
Ben Lomond - Northern Escarpment
 20-60 min
 Sun from mid-morning
 Alpine dolerite (varying from precise columns to blocky faces), from 50m to 200m
Acknowledgement
by Matt Perchard, Roger Parkyn & Andrew Bissett (after previous work by Robert McMahon), originally published in Craglets. Other topos and route descriptions by Dean Rollins and Andrew Geeves.
Introduction
The cliffs of Ben Lomond provide arguably the best climbing in Tasmania. Anyone interested in the finer points of jamming can perfect their skills here, with soaring, unblemished cracks of various widths rising side-by-side. But beware, one of the problems of climbing here is gear related - it is not uncommon that you will require at least four pieces of identical protection, so perfect are the cracks - some are known to require a rack of at least fifteen friends!
Being near Tasmania's main ski field, climbing is only possible during the summer months and warmer days of shoulder season. For those inclined, winter climbing would certainly provide new problems - don't forget the ice screws! At an elevation of at least 1300m, the crags are very high (by Australian standards). That said, crags face north, and so are warm considering their elevation. Even in summer, weather changes will occur very quickly - so don't forget your warm gear or be prepared to shiver. On warm summers afternoons though, this place is complete bliss.
There are few facilities in the park, so bring everything - lunch, clothes and water (for some crags). Don't forget either some tape for your hands or bandages - the choice is yours! The best map of the area is probably the Ben Lomond National Park Map and Notes, available from most camping stores, though it's hardly necessary. This guide is far from comprehensive, but contains enough of the good routes to get you started. For a comprehensive guide see "Memory of a Journey" by McMahon & Narkowicz.
Note: The cliffs of Ben Lomond have no bolts. This ethic has been fostered by the first ascentionists in an effort to retain a true traditional climbing area, where self-reliance and skills outside of just 'climbing' are bred, tested and indeed required. Please respect this ethic for future generations to come.
Access
Ben Lomond is located about 50km south-east of Launceston. It shouldn't take much more than an hour to be at some of the closer crags, though with walks of up to two hours some are more suitable as weekend epics. Watch out for wildlife in the wee-hours, as the National Park is crawling with it. Anyone stupid enough to climb in the Carr Villa area during winter should note that they do not need to pay the entrance fee; this is for access via Jacobs Ladder to the ski resort. During summer there is no entrance station.
To get there from Hobart, head north along the Midlands Highway, turning off R towards Evandale (just past Epping Forest, and 4km before Perth). In Evandale, turn L at the post office (Russell St) and stay on this road as it heads out of town and eventually turns to gravel (C413). Continue along the gravel road (take care - some corners are quite deceptive) until it joins another gravel road (Forest Rd) on a bend. Turn L sharply here and follow road to T intersection. Turn R onto the sealed Blessington Road (C401) and follow this until the Ben Lomond Rd turn off. Note: this is but one way of many, though it is perhaps the quickest.
From Launceston, follow the road out of town to St Leonards then take Blessington Rd (C401) and continue to the Ben Lomond Rd turn off.
Once on Ben Lomond Rd, head up the mountain (taking care for wildlife and the occasional fallen tree). To get to the Carr Villa scout hut car park, take the turn off on the R just after the entrance station. For most crags park at Carr Villa.
The crags are described left to right as you face them - eg East to West across the escarpment.
Crag Steward
Rock climbers please contact the Cliff Steward (benlomond@climbersclubtas.org.au) if you have any queries or concerns regarding social or environmental impacts of rock climbing at this crag. Do not email regarding general travel, seasonal advice, or lost property - this is not the Steward’s role. If you have important safety information to communicate (e.g. risks due to recent and large rock falls) please also consider updates on thesarvo forum, facebook group and/or online guidebooks as appropriate. Please copy in cct@climbersclubtas.org.au if you feel you have a high level concern which may imminently impact the crag or climbing community.
Non-climbers, other users, land managers: please also contact cct@climbersclubtas.org.au if you have important climbing related queries at this location.
GPS
Strickland Corner
This buttress is above Strickland Corner, the first hairpin bend on Jacobs Ladder.
Behind the parking area at this corner is a short gully between the buttress and a tower on it's L. Go up the gully a few metres and climb a 10m corner to gain a platform abutting the face. Get into the alcove above the platform and surmount a bit of an overhang. The remainder of the route is an easy 50m face bearing prolific holds.
M. Douglas, I. MacDonald, Apr 1980.
Tennant Buttress
Upper Tenant Buttress Gully
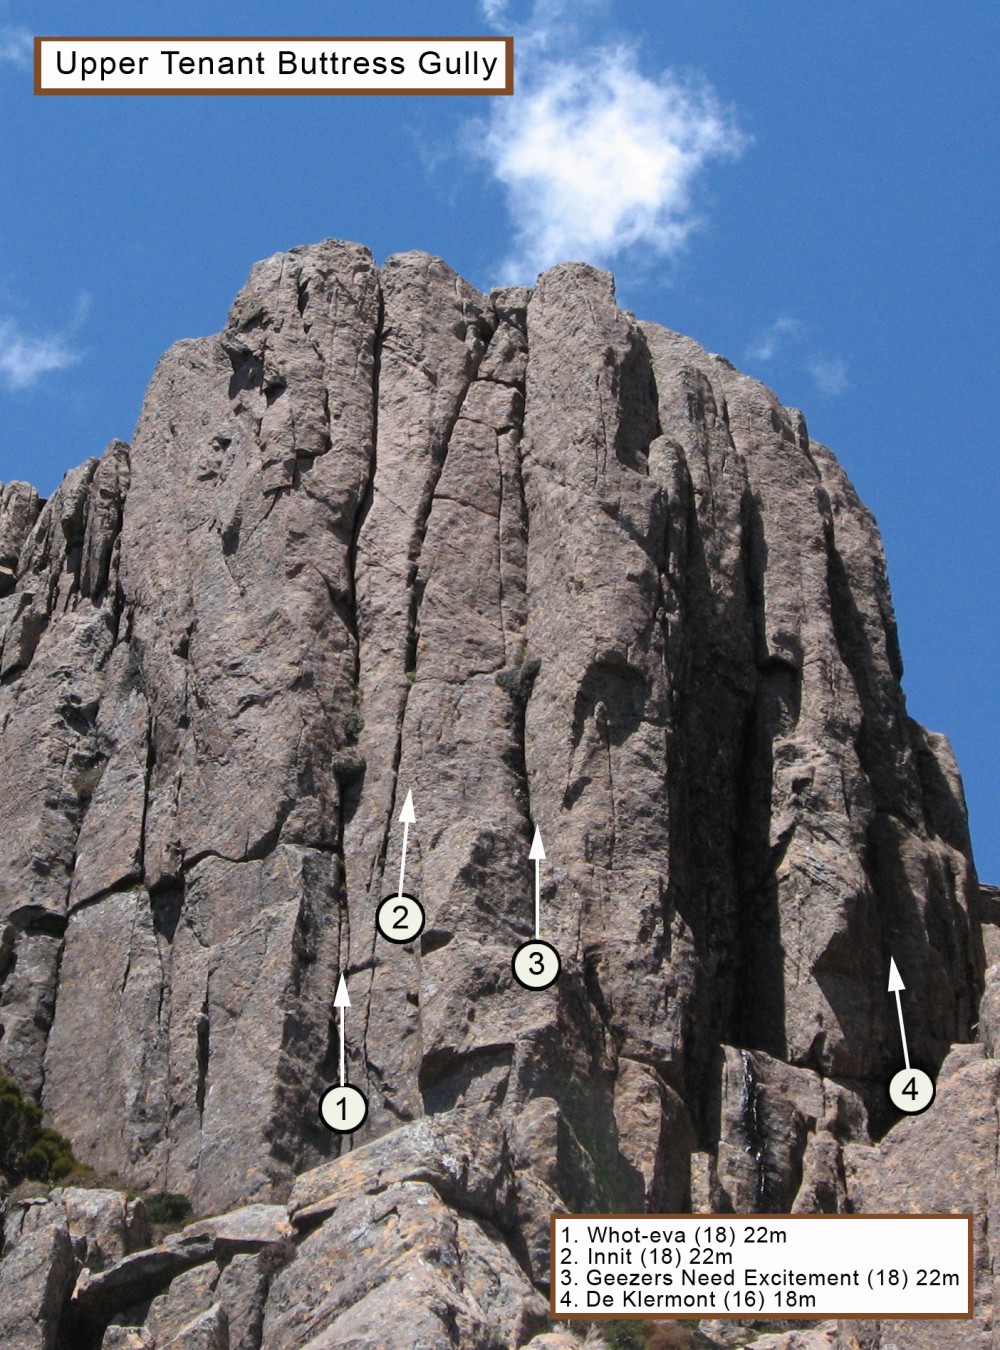
Approach: Park at the top of Jacobs Ladder. Walk in a westerly direction for approximately 30 minutes to reach a small cairned summit between Tenant Buttress and Snake Buttress. From here the cliff is visible down in the gully. All the routes were cleaned a little on lead but are still a bit lichenous on the bottom half. There are a few more lines to do that would need a good rap clean before climbing.
Good hand jamming that gets wider and more strenuous at the top.
Ben Veltkamp, Andrew Geeves, Dec 2008.
Tricky to start with, then easy jamming across the diagonal crack.
Ben Veltkamp, Andrew Geeves, Dec 2008.
Face climb past the dirty hand crack to a bush, then some off-widthing and jamming.
Ben Veltkamp, Andrew Geeves, Dec 2008.
Finger and hand crack with some good holds on the face.
Ben Veltkamp, Andrew Geeves, Dec 2008.
Snake Buttress
The next buttress L of the Pavilion. Access as for Pavilion, but keep walking a few hundred metres L towards the next buttress, then up scree to foot of crag. Descend by walking down scree back towards the Pavilion.
McMahon, Johnstone, 1974.
McMahon, Johnston, 1974
Ridge up buttress to L of Sweet Surrender.
Frew, Burnett, 1973
Harder RH start to VD Blues
McHugh, McMahon, 1972.
Frew, Burnett, 1974.
Bridging L-facing corner up the centre of the cliff. Scramble up to grassy ledge at base to begin. Thoughtful bridging up a mossy crack past some tricky bulges to a semi-hanging belay below clean wall on the R. Second pitch is easy, or else climb FKIADD (a much better idea).
McMahon, Maddison.
The intermittent crack system up the middle of the clean wall at the upper R of the crag. Climbed as a second pitch to Sweet Surrender. Awkward start and some tricky, technical moves.
Maddison, McMahon.
McMahon, Thomas, 1979.
McMahon, Smith, 1973.
McMahon, Thompson, 1978.
McMahon, Closs, 1978.
Up the front of the pinnacle around 100m R of Snake Buttress.
Maddison, McMahon, 1979.
Corner to the R of After the Rain.
McMahon, Ling, Narkowicz, 1982.
The Pavillion
The Pavillion can be seen from the Carr Villa scout hut. It is the large, foreboding looking buttress that sits on the lefthand side (as you look up from below) of the walking track from the summit The best way to get there is to follow this track until you are level with the base of The Pavillion. At this point you should see a faint track that veers off left across a scree slope towards the cliff. Keep skirting the bottom of the cliff until you can see a large ledge that runs along the base. This is best reached by bashing up the line of smashed scrub formed by some rockfall (you can't miss this, it looks like someone's been there with a brush cutter). Once on this terrace head to the left. The next climbs are found there.
Pavillion East Face
Duhih, McMahon, 1979
McMahon, Lockwood, 1978
McMahon, Lockwood, 1978
Lockwood, McMahon, 1978
Wall of Lords
The Wall of Lords is the left hand buttress buttress and wall of the cliff.
McMahon, Smith, 1976.
Smart, McMahon, 1979
The main ridge on the left side of the cliff.
McHugh, McMahon, 1972
Maddison, McMahon, 1978.
Morris, Roseberry, 1977.
McMahon, Frew, 1973.
Maddison, McMahon, 1978.
McMahon, Joyce, 1974.
McMahon, Joyce, Frew, 1974.
Maddison, McMahon, 1979.
Pavilion Main Face
Tillemma, McMahon, 1973.
McHugh, McMahon, 1973
Maddison, McMahon, 1976
McMahon, Schmidt, 1973.
McMahon, Duhig, 1978.
Maddison, McMahon, 1978.
McMahon, Frew, 1973.
Chalcuchima Buttress
Kennedy, McMahon, 1977.
Pollinger, Palme, 2007.
Lockwood, Thompson, Kennedy, 1978.
Jerry Jeff Walker Buttress
Jerry Jeff Walker is the most rightwards of the major buttresses.
McMahon, Marron, 1974.
Maddison, McMahon, 1978.
Closs, Lewis, 1973.
Lindorff, Roseberry, 1976.
McMahon, Thompson 1978.
Roxanne Wells, Grant Hyland, Mar 1993.
Lyle Closs, Ian Lewis, 1976.
Reece, Milne
McMahon, Maddison, 1976.
Fierce Archer Buttress
The smaller buttress up right of the Pavillion proper has two obvious straight up cracks.
The LH line.
Parsons, 1977.
Smart, Maddison, 1980.
The RH obvious crack. A great introduction to Ben Lomond cracks.
McMahon, Smith, 1973.
Face climb on next buttress right.
Maddison, 1980.
Local Loser
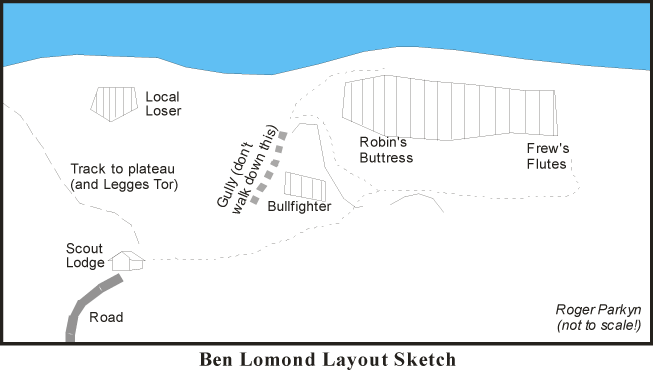
Directly above Carr Villa is a small but steep little cliff known as Local Loser. It is clearly visible above the Scout Hut, at the top of the scree slope, a short twenty-minutes walk away up the steep scree. The cliff is well worth the effort to get there and is also pleasantly sunny.
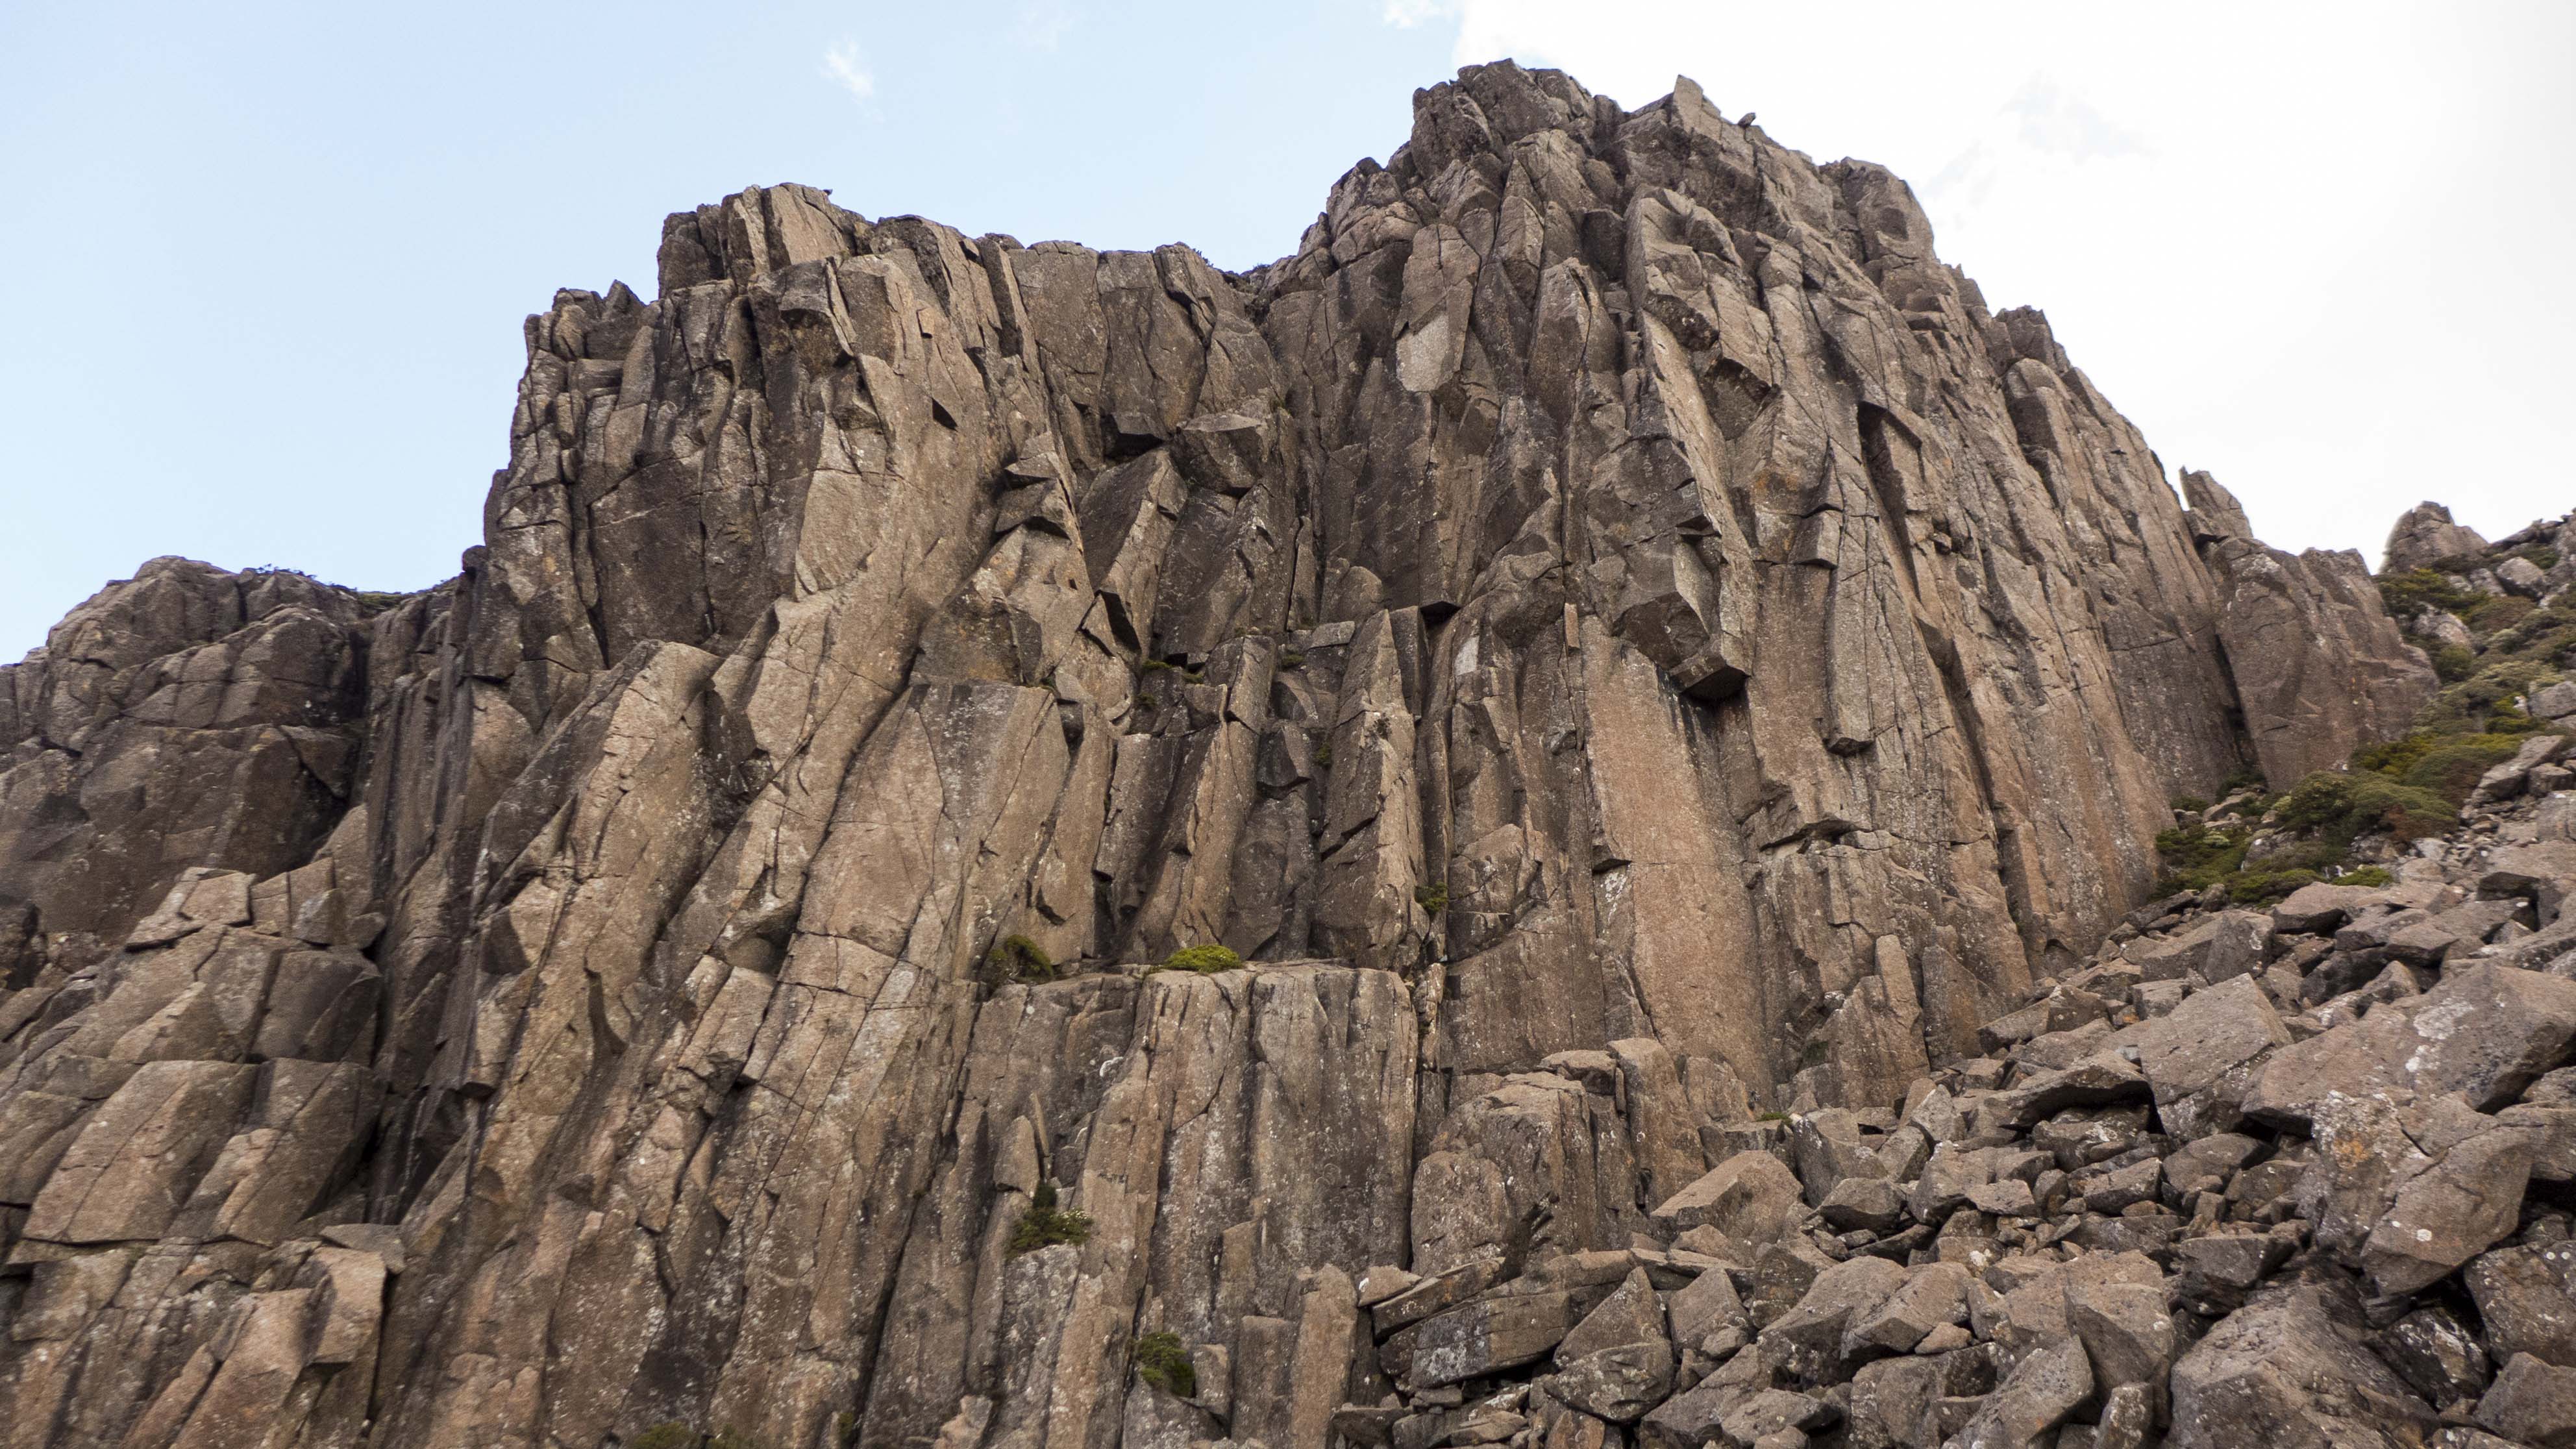
Local Loser
Follow the groove on the L of the cliff to the ledge below the 30° roof. Power up the L-leaning crack up through the roof and finish.
R.Thomson, R.McMahon, Jan 1978.
Climb the overhanging face, mostly on layaways and sloping pockets. Supposedly one of the most technical routes on the mountain.
J.Smart, Jul 1980.
The first route done on the cliff. Follow the flakes in the corner L of the overhangs. Move out L over dinner-plates under the roof, finishing up the corner leading out R.
R.McMahon, D.Burnett, Mar 1973.
On first ascent this was a pretty serious lead - new protection makes it better protected these days. Climb the obvious corner, with some difficult thin sections.
R.McMahon, 1973.
Climb the first few metres of HS then move left with a long reach on small holds to gain the arete. Climb this until you can step left into an open book corner. Follow the corner to the top, exiting at the head of the main recess in this portion of the cliff.
R. Eberhard, A. Eberhard, March 2024
The most prominent reference feature is the super-dihedral with a fused crack leading into a large roof. This is not (yet) a climb. Hidden Secrets starts about 5m L of this.
An amazing pitch, a must do. Climb up the corner system, over the bulge on jugs, then up until the wall blanks and you can see a big crimp. Move R to flake then climb up groove to another bulge, climb right to arete and up to ledge. From ledge continue up moving left then back right to summit.
Keith Milne, Colin Rees, 1983.
Up face R of the big blank corner, climbing seams. A serious proposition without the pre-placed gear used on the first ascent. Was the hardest climb on the mountain for a long time and subsequent ascensionists have suggested could be 27.
Adam Donoghue 2000.
Climbs a series of L-facing corners L of Local Winner. The FFA took five 8m screamers from the crux over two attempts before cracking it.
G. Narkowicz, Jul 1984.
The direct finish to Born Loser.
Gerry Narkowicz, John Fischer Jan 2010.
Climb the corner, then break out R onto the face - don't go up the next corner. The face has adequate (although spaced) protection and leads to a prominent undercling. Move slightly R again, then up to finish.
G.Narkowicz, R.McMahon, Jul 1983.
Begin in the cleft on the R of the cliff and strike out L up the face. Ordinary climbing with a poxy finish; definitely not "the classic of the cliff".
R.McMahon, R.Thomson, Jan 1978.
Climb straight up the cleft. Again, one of those climbs more reminiscent of caving than climbing; this is not what you come to the Ben for.
R.McMahon, E.Burnett, K.Smith, 1973.
Start behind the pinnacle of rock (which is not shown on the sketch topo). Bridge up until you can gain the thin finger crack, then follow the line to the top.
G.Narkowicz, Feb 1984.
Bullfighter Buttress
Left of Frew's Flutes is a columnar cliff of "immaculate precision" which is no more than 60m high, called Bullfighter Buttress. The climbs look much harder on sight than they are in fact.
McMahon, Narkowicz
Carson, Smart, 1979.
McMahon, Maddison 1979.
McMahon, Fraser, 1979
Morris, Maddison, Lockwood, 1979.
Climb the box corner on dirty rock, but with good protection, to a rest on the ledge on the left near Huevada. From here thrutch up the clean offwidth to the roof. No protection without a 5 & 6 cam. Sling the chockstone and layback over the roof. Finish up and left.
Ben Maddison & Robert McMahon Jan 1979
Thin corner to the R of the other routes.
Smart, Carson, 1979.
Maddison, McMahon, 1079.
Picador Buttress
When standing directly in front of Bullfighter Buttress, a short wall is visible down and just right of the main cliff. There are some short lines here. (Note: I'm pretty sure this is where Picador is, the only thing not matching the description is the length, but I can't find any other lines in the area that fit...)
A thin and technical boulder problem start leads to a hand crack at the top (past some greenery).
Nic Perndt, Dec 2008.
The short but appealing crack down and just R of the main Bullfighter Buttress cliff.
John Smart, Shane Carson, Mar 1979.
Isis Buttress
The slender buttress towards the bottom of the descent gully that faces the car park and receives early sun is Isis Buttress. There are two prominent corner crack lines, both of which are a good intro to the area if you want to test your jamming skills and are not yet up for one of the longer routes on the Flutes, or as a gentle finish to cap off the day. Approach from the L at a point in the gully level with the base of the routes. Descend by fixed tape/rope abseil at top of LOTMS.
The LH corner. Straight forward jamming up the corner, widening just before the ledge.
Shane Carson, John Smart, Mar 1979.
Ben Maddison/ Ingrid Crossland April 2015
The RH corner. Clamber R onto block to start. Jam and bridge the corner, moving L at the top to belay on same ledge as LOTMS. Probably the better of the two routes.
John Smart, Shane Carson, Mar 1979.
Osiris Buttress
This is the next chuck of rock uphill from Isis Buttress and on the same side of the descent gully (opposite Bullfighter Buttress). Approach by traversing in from high up in the descent gully. Descend by an easy walk off the back.
Up slab made by fallen pillar then take short hand crack on R to reach sloping ledge. Climb the crack splitting the face past a section that is not the most friendly of sizes.
Dean Rollins, Nic Perndt, Jan 2009.
As for LFRF to the sloping ledge, then take the dark crack in the corner.
Nic Perndt, Dean Rollins, Jan 2009.
Frew's Flutes
The crag of Frew's Flutes, in particular Robin's Buttress, provides the most consistently hard cliff on the mountain and the most regular columnar cliff in the state, perhaps Australia. Varying in height from 30m to 180m, it is close to a 1km long. The distinct face on the L is named Robin's Buttress after English climber Robin Thomson, who, fresh from Yosemite, pioneered many of the exhausting jam cracks in 1978.
The rock is wholly sympathetic in frictional texture but unrelentingly steep. Note that a high degree of fitness is required, even on the easiest routes.
See Robin's Buttress section for detailed access and descent info. The first section described are routes on the far LH end of the cliff in and near the descent gully for the main cliff.
Descent Gully Area
The following route is along the track heading back to Robin's Buttress. It is a prominent dihedral about 50m along from where the track branches off the main scree gully.
Start up the short hand crack on the L, then move R into the line along rail and climb the thin open-book corner. To descend, traverse R around block (stay roped up) and then downclimb easy gully.
Dean Rollins, Nic Perndt, Jan 2009.
Further along this descent track to Robin's Buttress, a short and rather unremarkable cliff band is visible on the R just before the saddle.
The crack towards the L end of the wall (with a scoop high on the L). Thin at the start, then widens towards the top.
Been done before? If not then: Tim Stubley, Dean Rollins, Dec 2008.
Down the final gully to the base of Robin's Buttress, the descent passes a mossy black wall on the R with a few brushed lines. This is shady side of the Descent Gully Pinnacle. There are also some short routes on the Heathcliff facing (west) side of the pinnacle. They are on the L when looking up at Robin's Buttress from the scree, the first route being at the far L of the lower wall. Descend by tape abseil or by scrambling down the NW corner (coming out just along from SSHS). Routes described L to R (counter-clockwise).
Short but surprisingly sustained stemming. Sufficient stonker stopper placements with some supplementary SLCDs constitute protection, placed from solid stances. Surpass slopey sidepulls and slippery smears to send successfully and summit. Stupendous.
Nic Perndt, Dean Rollins, Jan 2008.
At the R end of the wall is a little recess with 3 wide lines. Bridge and jam up the centre and RH one. There was a rigid friend stuck 5m up for a while, but it is now gone. Pink sling at top. This could actually be Split Surprises? (p. 62).
Unknown.
Now on to the black mossy wall that faces the main cliff. Routes are described L to R as you face the wall. Descent via a scramble and downclimb at the NW foot of the buttress.
Towards the L end of the wall is a clean, brushed line. The longest crack in the vicinity not broken by a ledge. Starts as thin hands and finishes with fists.
Pete Steane, Adrian Herington, Nov 1996.
The brushed finger crack towards the R of the wall. Follow the lack of moss.
Tony Dignan, Mark Moorhead, 1980.
Robin's Buttress
This buttress has the highest concentration of classics on the plateau; with a selection of long, sustained pitches of a variety of widths and styles.
Access: A cairned route heading west across the scree starts about 100m up the summit track, staying up high to avoid the bands of scrub. A quicker alternative is to first head along through the scrub and head up the scree to join up with the aforementioned cairned route. It is approximately 30 minutes of easy rock-hopping from Carr Villa to the buttress. When in the "scree saddle" under the big cliff, look up and you'll hopefully see the penis of rock (aka "the donga") at the base of the cliff proper. This is where Rajah and the like start and is a good landmark from which to identify the routes.
Follow the cairns up towards Robin's Buttress to a well-worn approach scramble up the scrubby cliffs below the donga. About halfway up to the base, the track forks; the L fork leads to the Rajah area (and routes further L), and the R fork leads to the Barbe di Vendetta area (and routes further R).
Descent: The routes on Robin's Buttress top out at a flat, rocky outcrop. At the carpark end a path is visible a few metres back from the cliff edge. Follow this and keep an eye out for more paths and cairns leading towards the head of the broad gully a few hundred metres away. Don't be tempted into straying L into the gully too early, or you may end up having to do some short (but easy) down climbing. The main descent track to the head of the gully is a very simple walk.
Once at the top of the gully, head down the scree following cairns. The main gully heads all the way down past Bullfighter Buttress, and meets up with the cairned route from the car to the Flutes. However, towards the top, another track branches off and heads L (as you walk down), up over the saddle, and down a rocky gully. The start of this track is cairned well, and it sticks quite close to the cliff line. If walking down, it is the quickest and easiest way back to the base of Robin's Buttress.
Alternatively, it is possible to rap off a number of the routes after the 'main' pitches by slinging chockstones and horns. This is a popular way to get off many route, as it avoid the lower quality rock towards to top of the cliff. However, despite the reputation of the top section of the cliff being a total pile of choss, a number of the more popular routes stay relatively solid to the end; for example, Defender, Rigaudon and Ramadan, and in fact offer quite good climbing in their own right. If you do rap off, don't trust any existing tat blindly, and don't count on your old tat being there next time you do a certain route.
Main abseil descent: Most people now rap the line of Ramadan. This requires two 38m raps and about ten meters of tat. (The tat obviously may or may not already be there.) The top is very loose and there are lots of golf-ball size rocks at the stance for the top rap. BE VERY CAREFULL if you use the rap, as it's directly above the Ramadan/Rajah belays.
There used to be a bolted rap station just right of Rajah but this was removed in 2007, in the interests of keeping Ben Lomond bolt free.
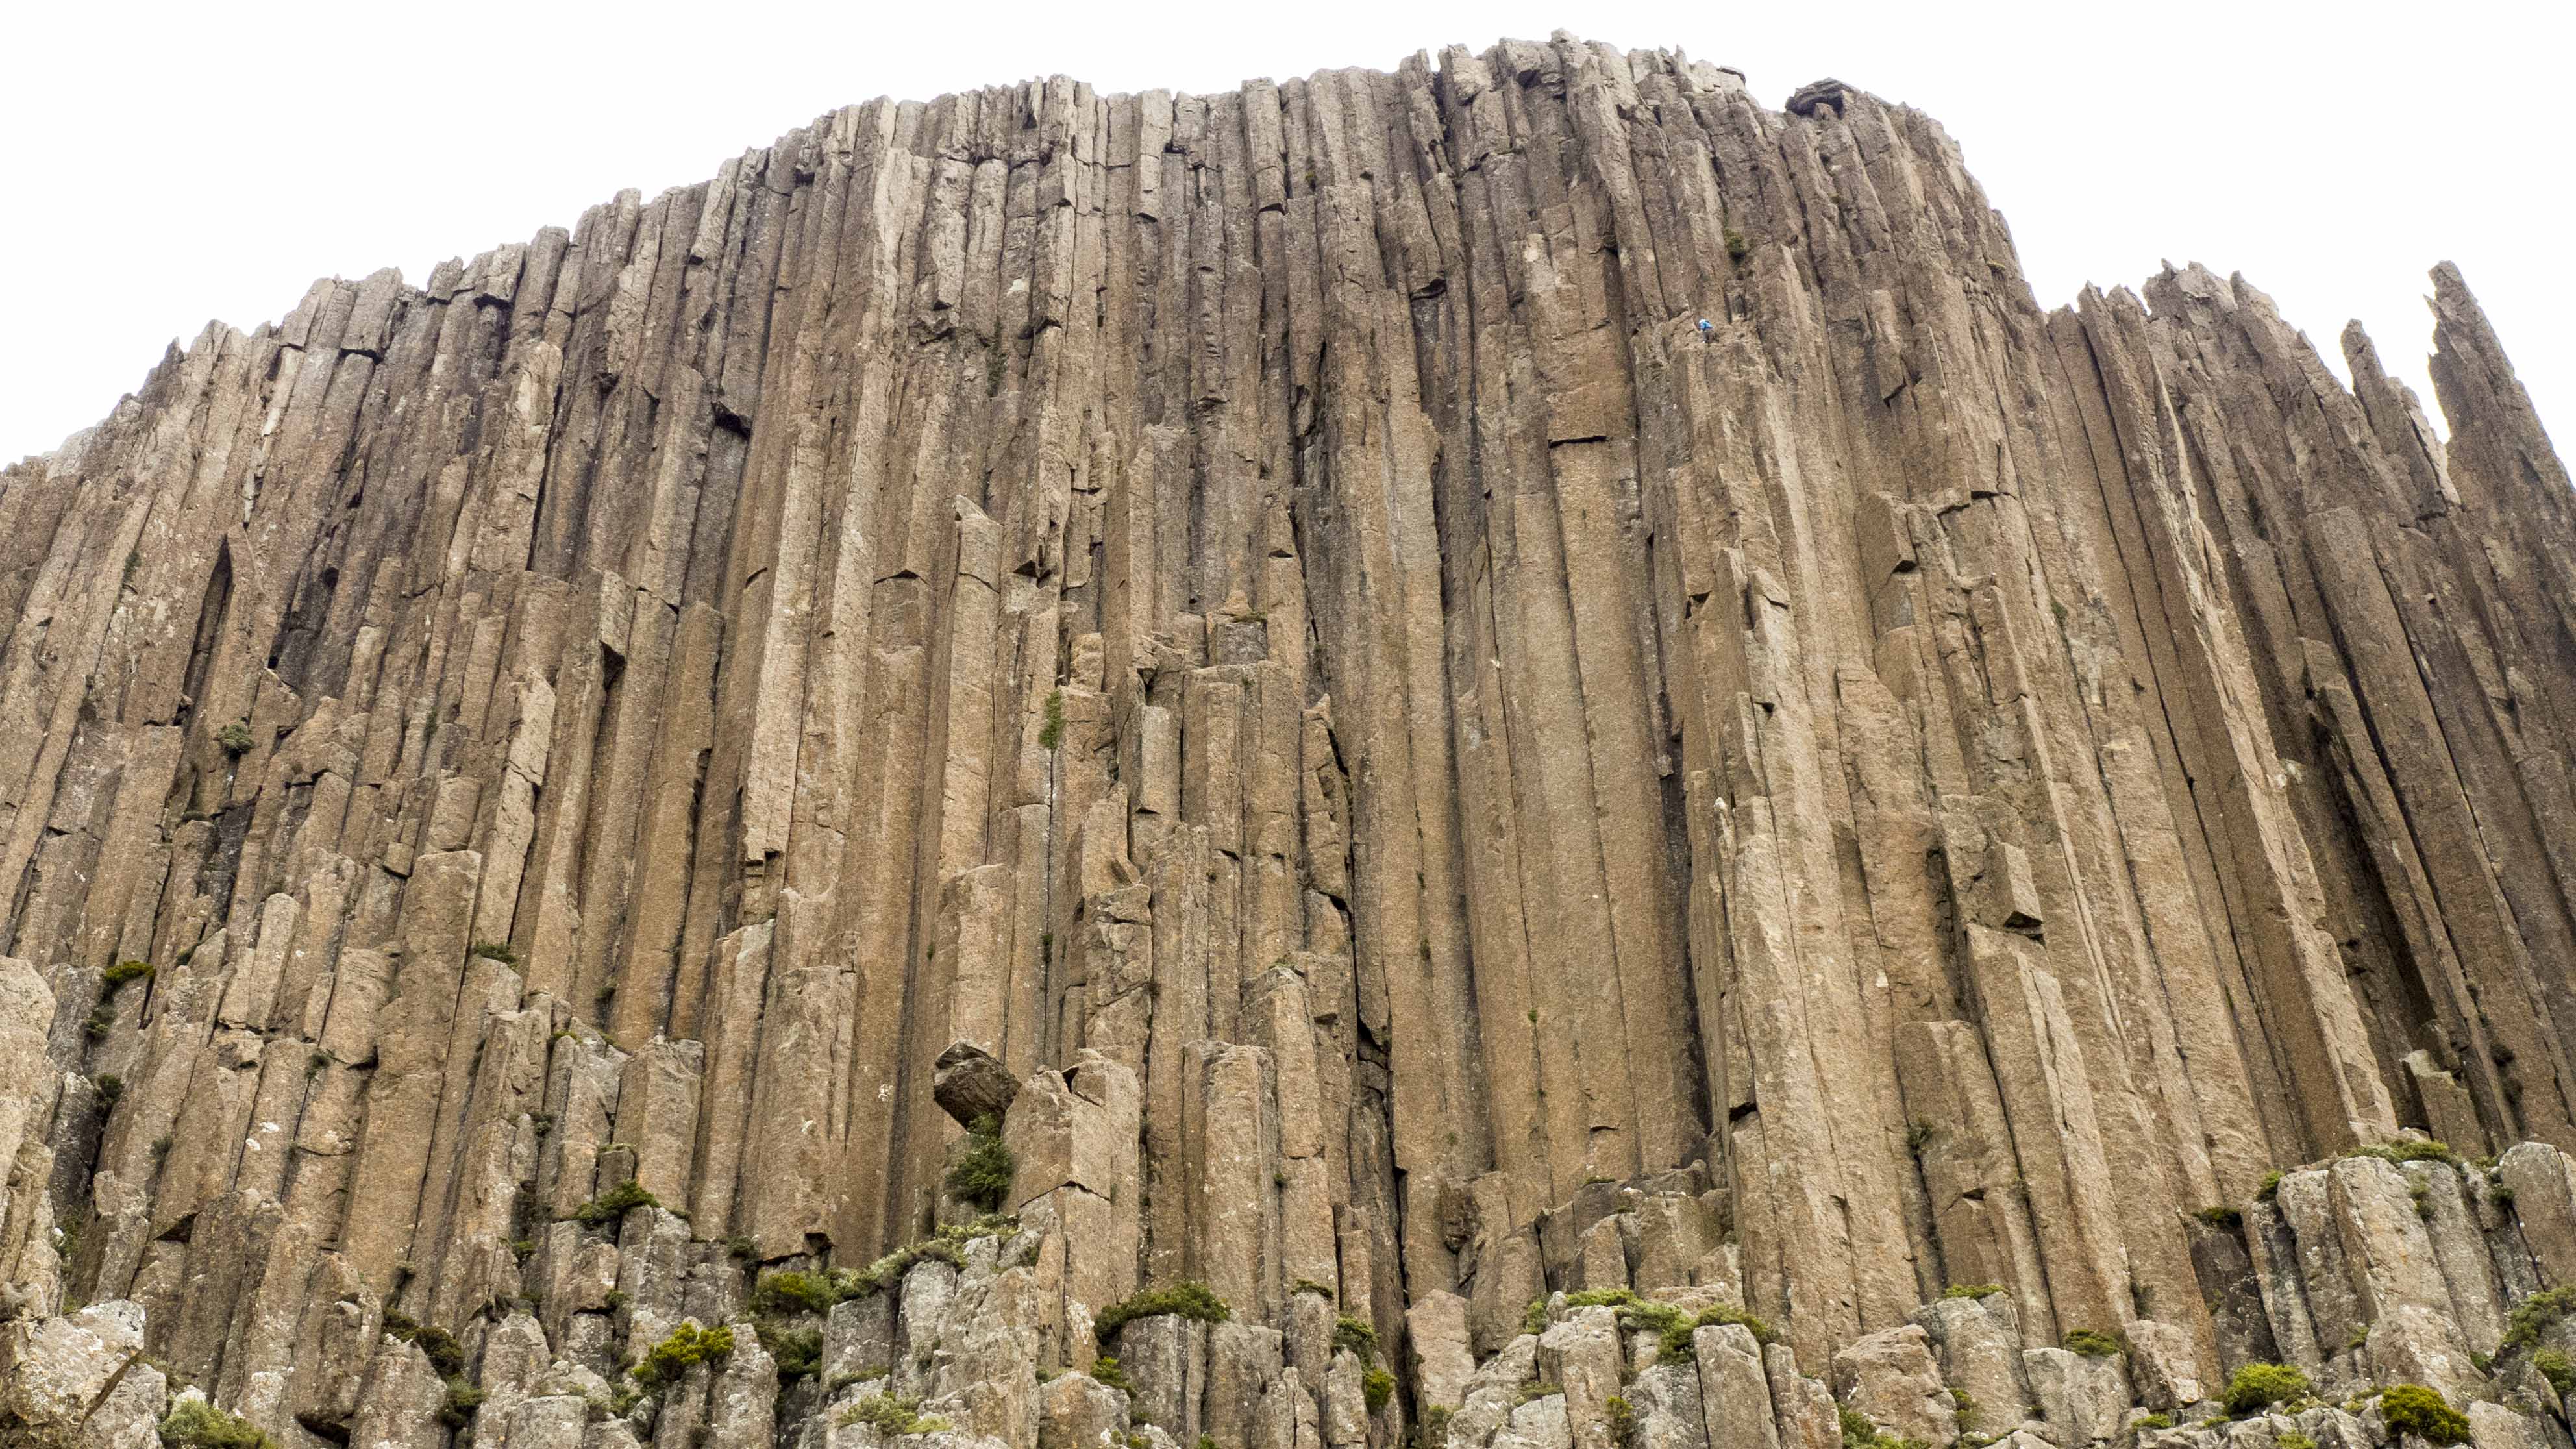
Robin's Buttress
- ★91.Captain Planet21
- 94.Necrophiliac22
- 95.Necromancer21
- ★★★96.Darkness Visible23
- ★★★97.Die Nadal22
- 98.Faith Defended21
- ★★★99.Defender of the Faith22
- ★★101.Rigaudon20
- ★★★102.Ramadan19
- ★103.Rajah Eliminate23
- ★★104.Rajah18
- ★★109.Dangerman Direct23
- ★★110.Dangerman21
- ★★★111.Master Blaster24
- ★★★112.Aquilla21
- ★★113.Barbe Di Vendetta18
- ★★115.Doug and Squib’s Route26
- ★116.Climbers Variant24
- ★★121.Rondeau19
A route on the left, diminutive edge of the buttress. Some face climbing and a flaring, thrutching chimney. (Alright, I said they were all classics; this is the exception that proves the rule, so read on. - Ed).
R.McMahon, H.Smith, 1977.
Andrew Geeves, Ben Veltkamp (alt.) Feb 2010.
Located just L of Rissorgimento.
R.McMahon, J.Smart, Jul 1980.
Rissorgimento
Located L of the main difficulties of the cliff.
R.McMahon, M.Broadbent, J.Fantini, Jul 1980.
For the far L of the buttress (up to and including Die Nadel) climb a short approach pitch (15) to the slopey ledge system.
The line L of the original first pitch to Necromancer. Step in from hand crack on the L, then climb the sustained hand and finger crack, finishing at the top of the square cut pillar.
Nic Perndt, Dean Rollins, Jan 2009.
G.Narkowicz, G.Hyland, Feb 1984.
D.Ng, D.Vincent, Mar 1990.
The test-piece thin hands crack. Located up the wall 5m L of Defender of the Faith, a good bollard exists here to rap if you bring tat (take 2m). Bridge and finger jam the groove for 10m to a ledge on the left. Rest. Rest again. Rest yet again. Follow the crack and go for it. Either finish up pitch 3 of Defender or rap-off tat. Take lots of #1 and #2 (BD) cams.
T.Dignan, M.Moorhead, 1980.
For Defender to Rajah area, continue up the track to the base of your chosen route. A short scramble is required to reach the base of Rajah.
An alternate and far superior 1st pitch to Defender of the Faith, if a bit necky. Up the face left of the offwidth.
Doug Fife. December 2012
S.Parsons, R.Staszewski, P.Bigg, Jan 1981.
Climb the thin direct start to Defender of the Faith. Protection from RPs at the bottom to 0.3 C4s up higher.
R.Wells, P.Steane, Feb 1994.
R.McMahon, R.Thomson, C.Larque, Jan 1978.
R.Thomson, R.McMahon, Jan 1978.
Fantastic, but a bit contrived, as it's possible to stem into Ramadan. A variant start to Rajah, ascending the technical finger-crack R of Ramadan. Originally climbed with two rests, but later led free.
Robert Staszewski, Karen Sippel, Jan 1981.
Lockwood, I.Thomas, Mar 1978.
At the 45m mark, cross the face of the column (exposed) into Rigaudon and finish up that climb.
I.Thomas, B.Maddison.
Starts 1m R of Rajah. The first crux pitch of 23m bridges and laybacks the thin crack to a ledge. The second of 45m ascends over blocks, then the short curving crack (R of the nasty chimney/offwidth) to a ledge. Continue up the wide crack to a stance above the block roof. And the final third pitch of 20m bridges up the twin cracks to the top.
M.Colyvan, N.Smith, Feb 1983.
Climbs straight up the widish crack behind where the abseil used to go. Start not far R from Rajah and climb up to the rusty piton. Head on up, finishing up the off-width.
Maddison, McMahon, Apr 1980.
Unknown.
R.McMahon, D.Stephenson.
For climb in the Barbe di Vendetta area, take the R fork of the access scramble about halfway up from the scree, head R and cross the head of a gully, then scramble up to the ledge at the base of the routes. This is about 60m R of the previous area.
J. Fischer, G. Narkowicz, Dec 2010.
P.Bigg, S.Parsons, R.Staszewski, Jan 1981.
R.Staszewski, S.Parsons, P.Bigg, Jan 1981.
J.Fantini, M.Ling, 1983.
Between the corner of Aquilla and the hand crack of Barbe Di Vendetta is a thin crack, which may have been aided before. Nevertheless, it has seen a determined effort at being freed, and would make for a phenomenal hard and well-protected route. However, the proximity of the L wall of Aquilla makes the route quite contrived at the crux.
K. Rosebery, P. Morris, B. Kennedy, 1977.
On the second pitch, go out R onto the face of the column, instead of continuing up the crack.
K. Lockwood, R. McMahon, I. Thomas.
For routes R of BdV, approach as for BdV and continue along the scrubby terrace just below the cliff for about 20m. A short approach pitch will be needed for some of these routes, but routes in the Rondeau area can be accessed by scrambling around the bushy corner at the far end of the ledge.
Doug McConnell and Squib 2009
P.Bigg, S.Parsons, R.Staszewski, (alt), Dec 1980.
Start around the corner from Barbe Di Vendetta. Jam up the crack into the off-width; jam up the offwidth into the chimney; jam up the chimney to the face... up this to a ledge, then return to offwidth dis-technique to the roof. Hokey-pokey right, up the chimney, jam crack. Hokey-pokey right, up the wide crack and on to the top. Follow that?
S.Parsons, N.Smith, Dec 1980.
Again details are sketchy. Pitches of 18, 18, 23. and 14.
P.Bigg, R.Staszewski, S.Parsons, Dec 1980.
A sustained hand crack corner system. Pitches of 17, 20, 14. Nice climbing on pitch one leads to the belay ledge left of the corner-system. The next pitch doesn't climb so well as there is a scary semi-detached spike and the lichen is thick. Rapping off the top of one would be a good option.
P.Bigg, S.Parsons, R.Staszewski, summer Aug 1987.
Thin seam up the wall between Terrorful and Rondeau.
Matheson, Elliot, 2000.
To access Rondeau, King of Kings and Social Lepers, as well as JWAT and climbs on The Last of The Independents: Take the normal approach to BdV, then continue scrambling around through pretty easy terrain and down a short chimney. Then, staying high when possible, continue around and up until in front of a couple 3 meter cracks below Rondeau ledge. It seems further scrambling is impossible, however it is quite safe and easy to continue around a couple metres then pull on through some short trees. Access to these routes in this manner is easily done in 15 minutes from BdV on your first visit.
Descent from the belay ledge shared by Terrorful, Tango, Rondeau, Kingdom of Heaven is a 43 m rap from slung bollards. With a 60 m rope, a second rap can be made from slung chockstones in first belay of Grim Reaper (behind/underneath the fallen collumn on the bushy ledge).
C.Larque, I.Thomson, B.Kennedy, Jan 1978.
Tucked around the corner from Rondeau are two long, imposing lines.
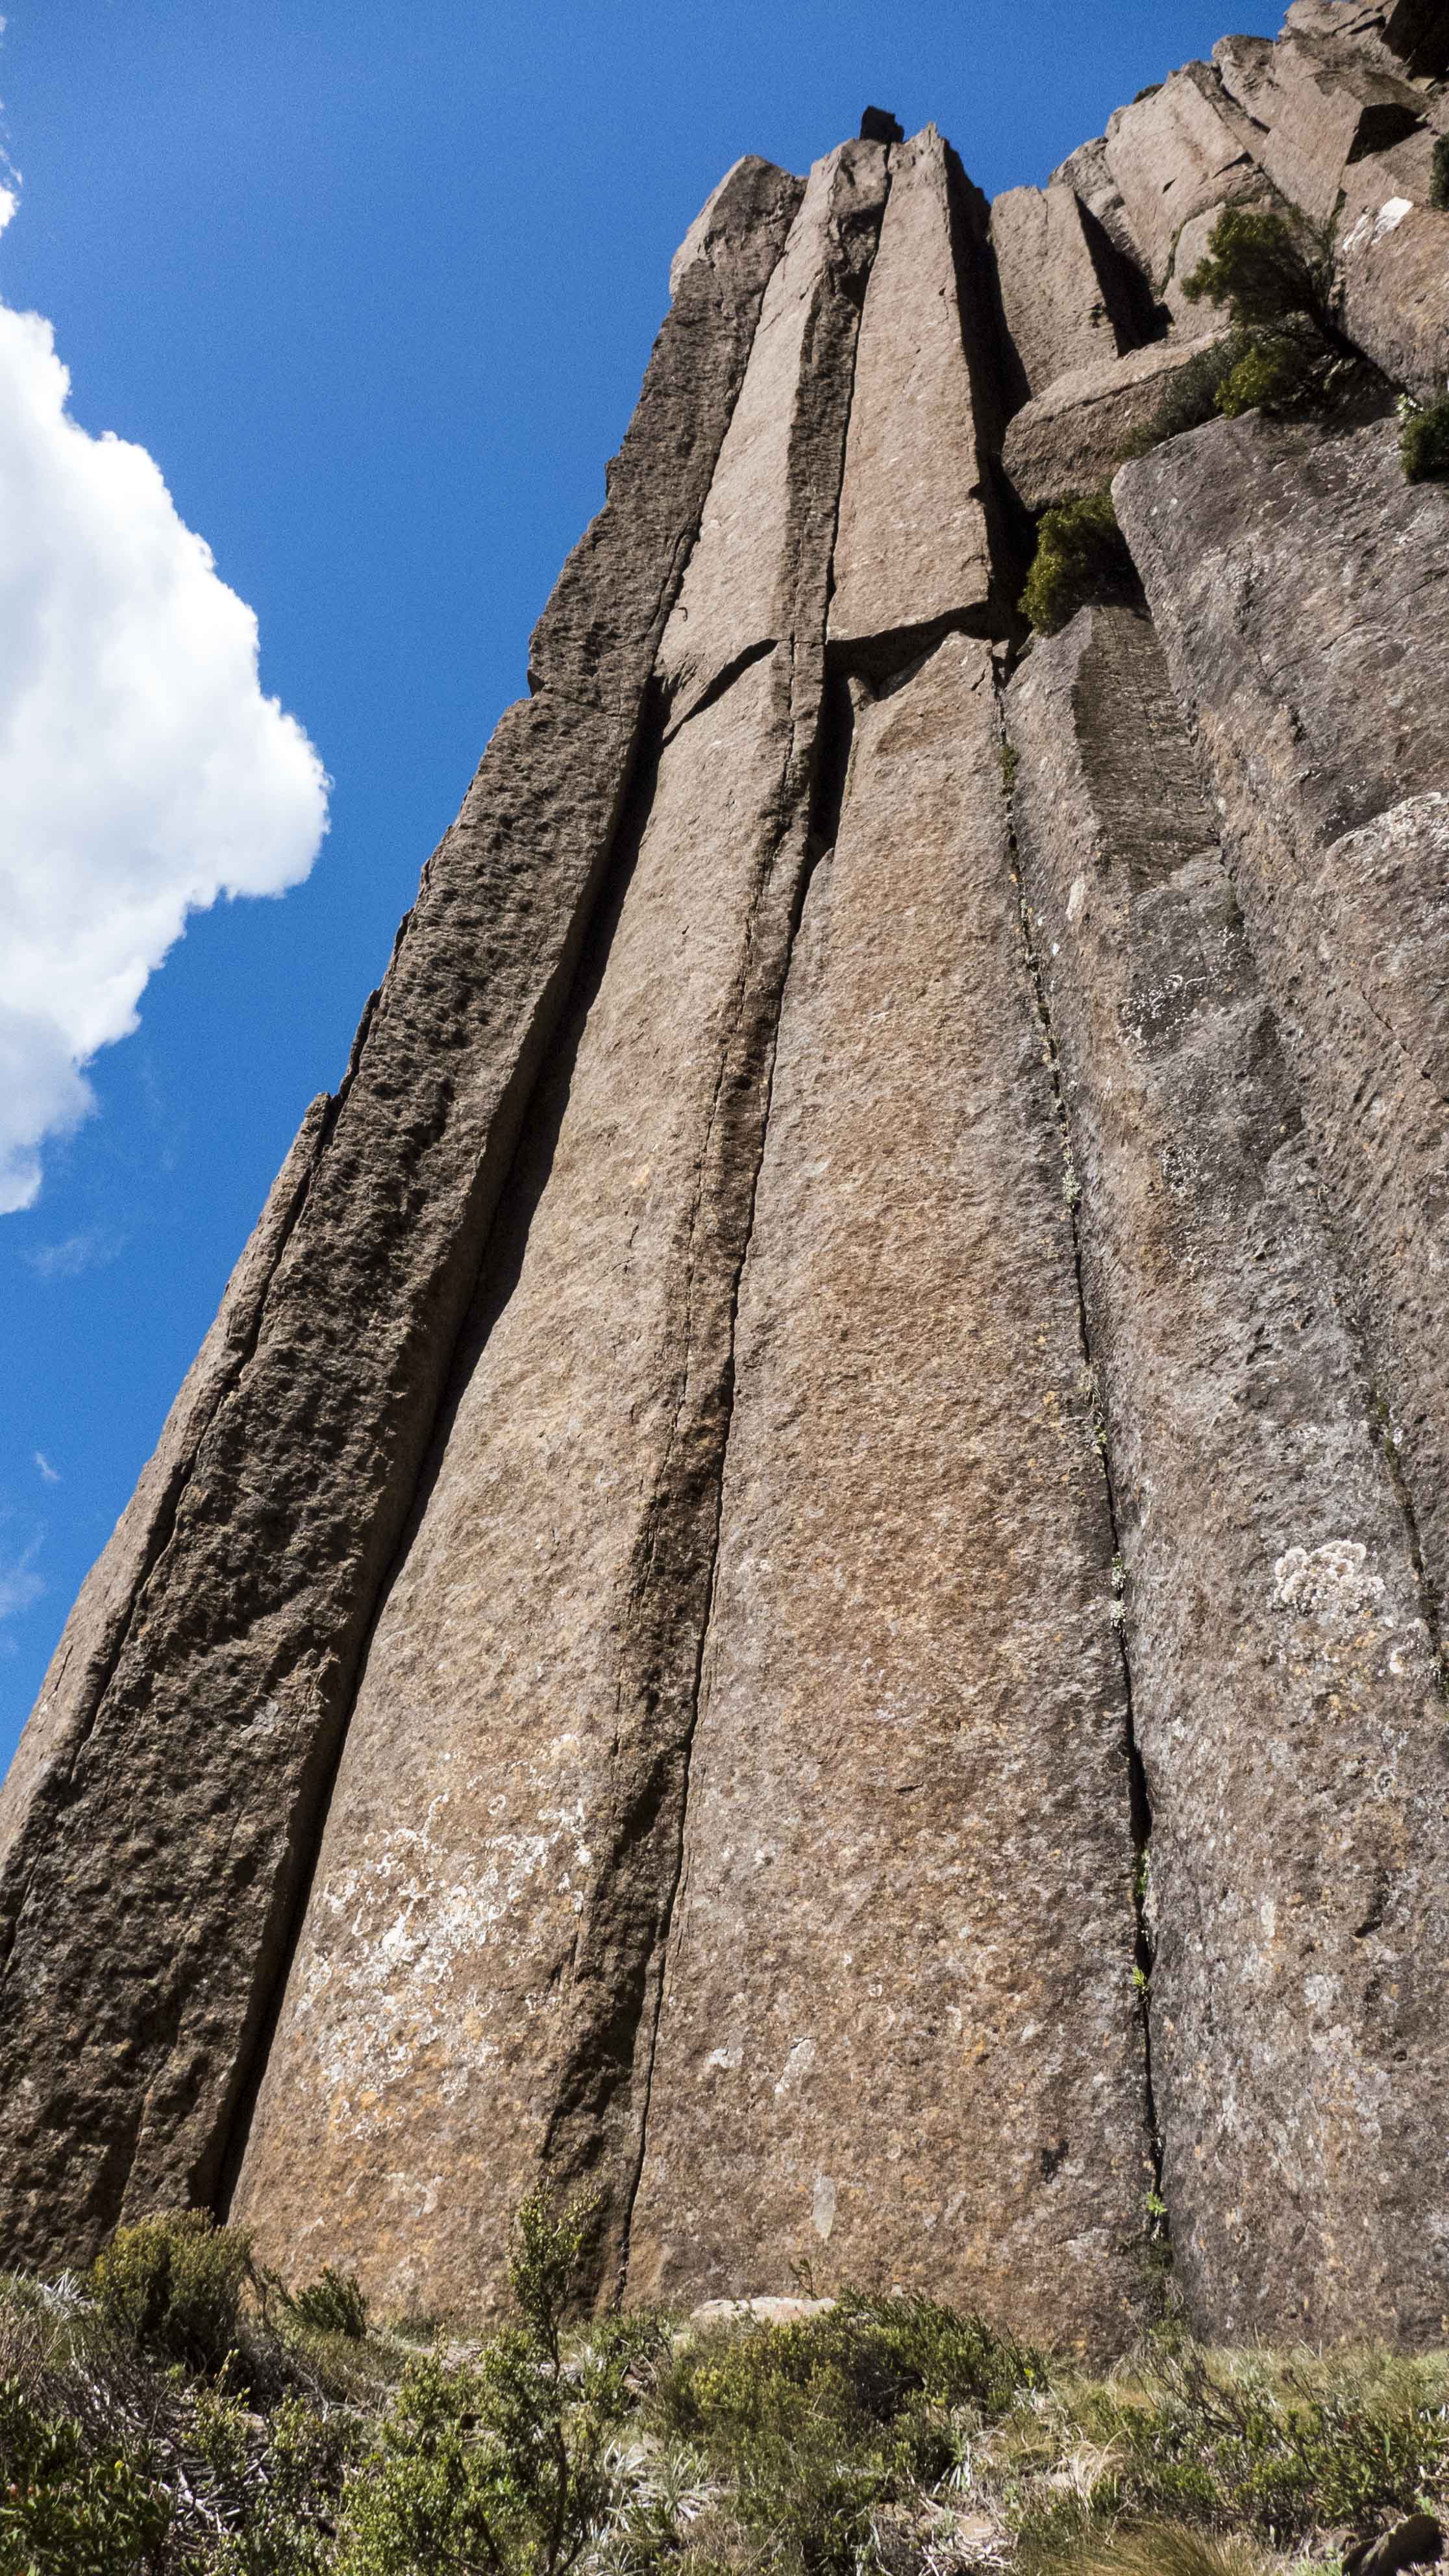
Gerry Narkowicz & Nick Hancock, Feb 2005.
A.Collins, G.Narkowicz, R.McMahon, Jan 1985.
Last of the Independents Ridge
This is the steep ridge-line with a few prominent pinnacles just R of Rondeau, which separates the two dominant buttresses of Robins Buttress and Frew's Flutes. The first routes are on the left side of the ridge.
Gerry Narkowicz and Doug Fife (alt) Nov 2010.
R.McMahon, G.Narkowicz, Jan 1985.
Climbs the monolithic pinnacle on the Last of the Independents Ridge. From a belay in the notch on the south side of the pinnacle, climb out right above the void to a stance and welcome gear on the arete. Step right and climb the face with more welcome gear on a suspect block, to the cool summit. Originally accessed via Suddenly Last Summer, but it probably makes more sense via Ass Gas or Grass.
Kim Ladiges & Nick Hancock Jan 2019
Short but oh so sweet. Approach as for Jesus Was a Terrorist. The line left and up of JWAT, at the base of the pillar on the Last of the Independants Ridge directly across from King of Heavan. This is the line mislabled in Memory of a Journey as Ass, Grass or Gas 18. Nice try Bob! Tips layback (00 Friends) opens up to a joint or two (0 Friends) until you get a yellow alien at the top. This climb required no cleaning and does not seep. The next pitch is Anna's 17, then if you're psyched keep going to the top!
Crazy John, G. Narkowicz, Dec 2010.
The beaut finger to thin hands corner crack left of Ass, Grass, etc. Destined to be an Immortal. Take a double rack of friends 0-2.5 with plenty of wire placements to make up for less cams. A little bit Defender of the Faith, a little bit Holiday in Cambodia. The face holds should stay on if you're not too fat! Climb this right facing corner bridging on face holds until a thin hands crux gets you to a jug/no hands rest. One more tricky move gets you to an easier crack system and the rap station.
J. Fischer, G. Phillips, 13 Feb 2009
Ass, Gas, or Grass; Nobody Rides For Free
The righthand of the parallel lines up the start of the ridge.
R. McMahon, H. Mohler, P. Cullen.
The obvious alternative finish to the ridge.
P. Cullen, H. Mohler.
The lefthand direct start to the ridge.
R. McMahon, H. Mohler.
Start on the west side of the ridge, then take a fairly direct line.
McMahon, Smith, Dec 1980.
There are a couple of routes on the west face of the ridge.
The first line along from the ridge is pretty fused. Start at the next on along, jamming your heart out.
R.McMahon, B.Cameron, Feb 1985.
Climb the next crack right from Francesca, with jams and layaways.
M.Ling, B.Cameron, R.McMahon.
A couple of lines up the gully from Luciana. A twin crack system in a box corner, the right hand crack eventually becoming offwidth. Superb bridging to half height with hand size gear in the RH crack for 10m then switch gear to LH crack (wires and micro cams). From small ledge at half height, jam thin LH crack until able to stem across to lip of offwidth roof (crux). Run it out up the offwidth for 5m to the top.
Gerry Narkowicz and Andrew Martin Jan 2013.
Next line right is a superb thin spearing crack. Strenuous jamming in that awkward size between fingers and hands.
Gerry Narkowicz and Andrew Martin, Jan 2013.
Because of the snow, what we were forced to have the day before! Its a fun root. 30m rap in from the top of the west side of the Last of the Independant Ridge. Its the line closest to the pinnacles that doesn't suck. I think the 'line' (which looks like crap) closest to the pinnacles is possibly the finish to the route LOTIR as vaguely described in Memory of a Journey. Survival Sex is good hands to killer layback up a wide crack - take a 4 camolot or 5 Friend. Then bomber gear on slightly suspect feet. Surprise face move crux with more face moves around the flaring finger crack. The rap in detracts, but is worth doing.
Crazy John, G. Narkowicz, Dec 2010.
Solidarity Wall
The cliff is then broken by a distinct gully separating the main part of Frews Flutes from the Last of the Independents Ridge. Tucked high up, and perhaps best approached by abseil, is Solidarity Wall.
Next line left of Solidarity. Start up the easy corner, which becomes harder with layback/bridging. Finish up the face.
A.Collins, R.McMahon, G.Narkowicz, Jan 1985.
Start 10m right of the gully, just right of the cleft at half-height. Climb the chimney past some boulders, then follow the jam crack and three distinct corner systems straight up.
M.Ling, G.Narkowicz, R.McMahon, Nov 1984.
Start 6m right of Solidarity and 6m higher. A great looking line. Start up the crack on the left, with finger locks, and thin jams, continuing up the protruding edge. After the ledge, climb the precarious flake before finishing as for the last corner of Solidarity.
G.Narkowicz, M.Ling, R.McMahon, Nov 1984.
Start just right of Zanskar. Bridge up the recessed column (with a crack on the right), before moving into the chimney (crux) and following this. Jam up to shocking rock and even worse pro.
G.Narkowicz, M.Ling, R.McMahon, Nov 1984.
Start just right of Gdansk, on the ledge. Climb the face and the hard finger crack. Again as the rock goes off so does the pro, until the off-width roof and the final crack to the summit.
G.Narkowicz, R.McMahon, Dec 1984.
Start down lower than the previous lines and to the right. 1. 35m 17. Follow the easy crack past a ledge and the wide crack. 2. 30m 16. Follow the easy crack and groove.
R.McMahon, G.Narkowicz, Jan 1985.
Narkowicz, McMahon, 1985
Frew's Flutes (Main Face)
A further 200m right of Robin's Buttress are the cliff's of Frews Flutes. They provide amongst the best climbs on the entire mountain - very steep, very sustained and very, very mind-blowing! They are a bit harder to find though, unless you have a personal guide. Access from the top is the go - fix a rope from the top.
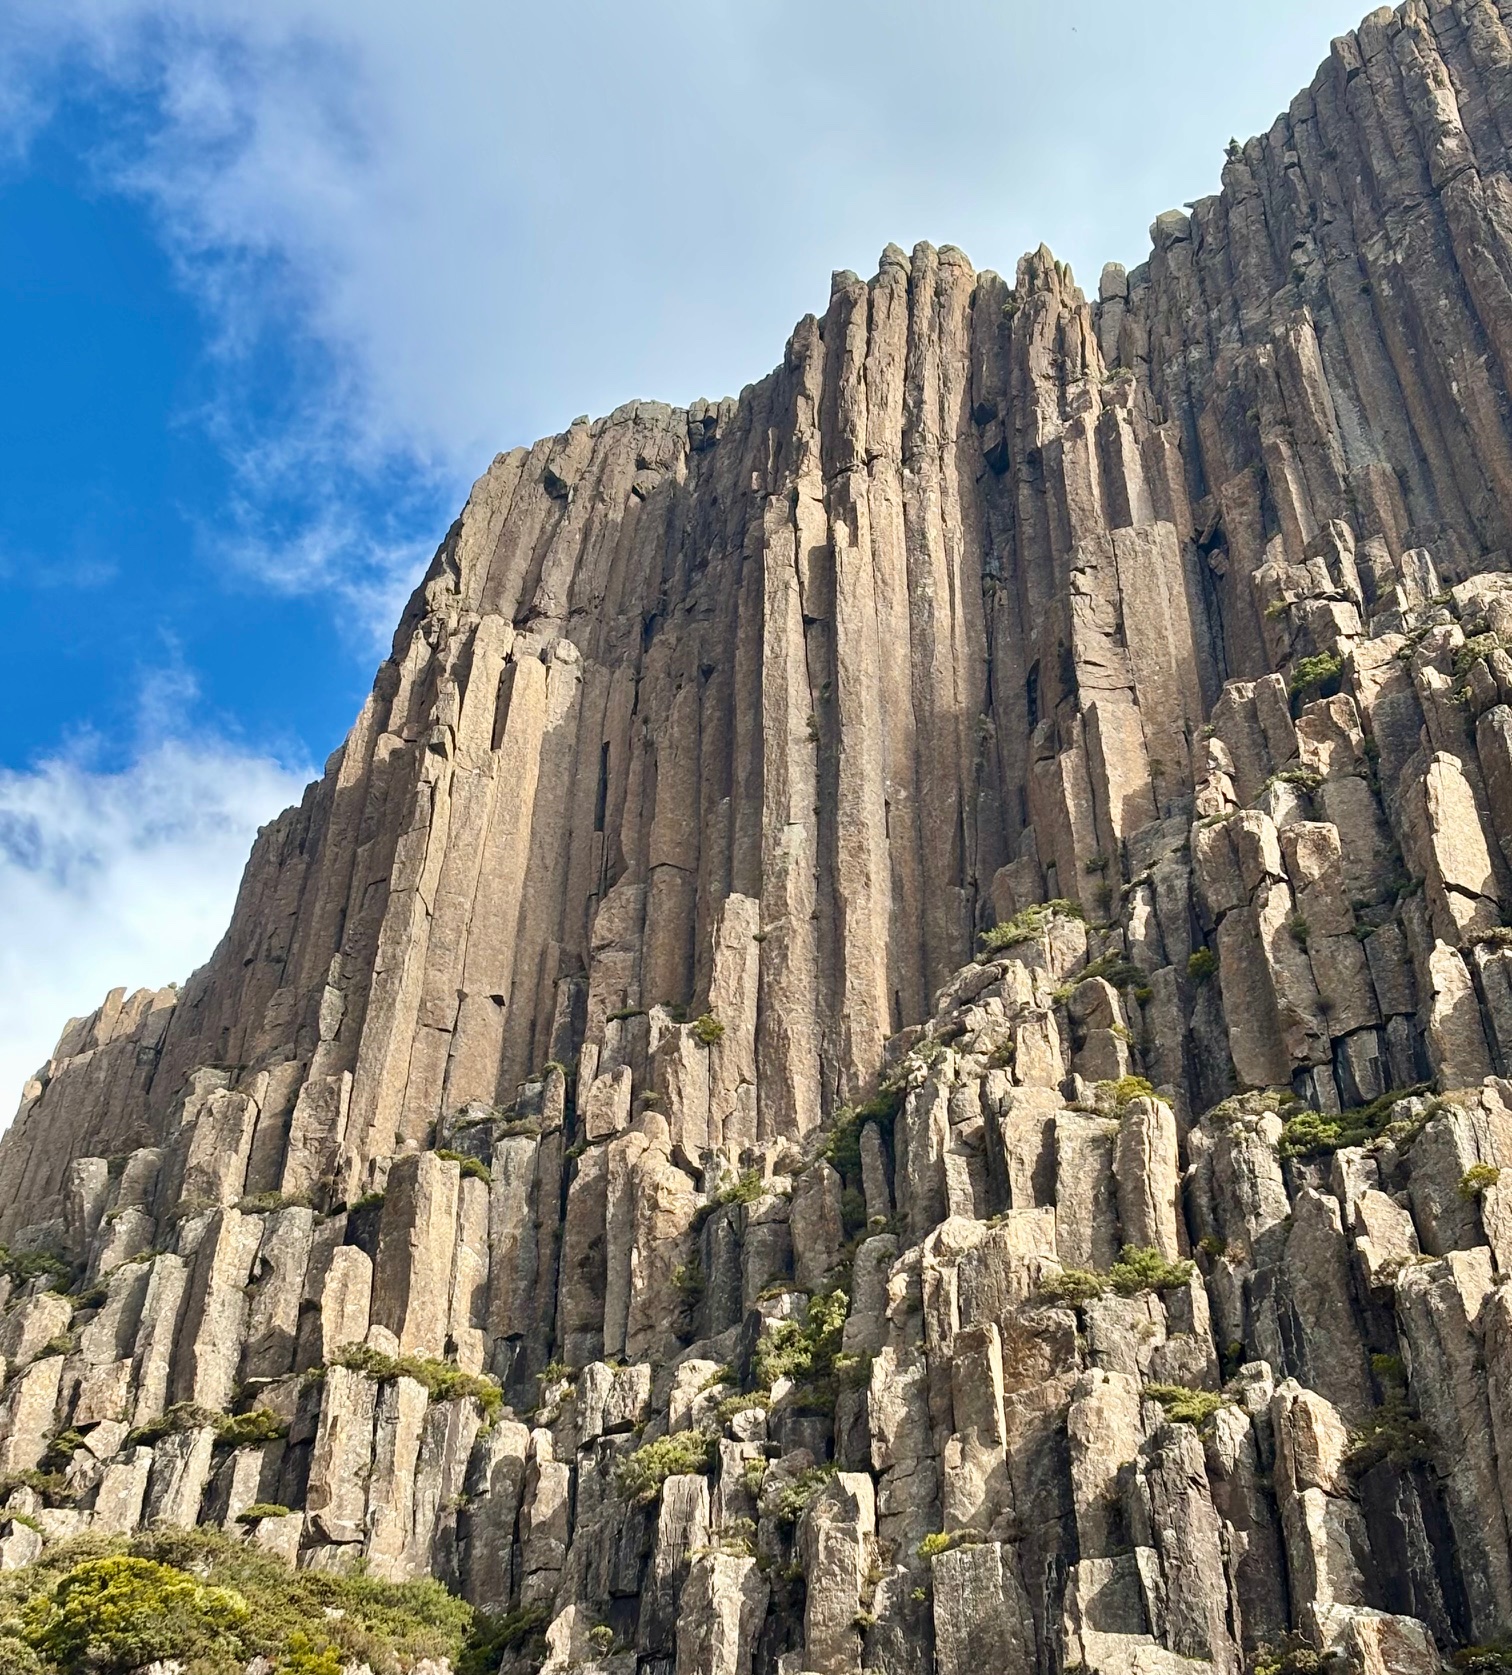
Frews Main Face
Begins up a short offwidth left of the west facing buttress. The first pitch is predominantly bridging. The second is the crux, which is quite hard and with few positive holds. The third crux pitch is as for 35mm Dream.
B. Maddison, R. McMahon, 1977.
At the far L of the wall. Climb up until forced L onto the nose. Continue on up.
A great pitch. Instead of moving L on the first pitch, go straight up through the small roof. The crack thins to finger locks and bridging, with the crux up high. Good pro.
G.Narkowicz, M.Tierney, Jan 1985.
Start at the jam crack between 35mm Dream and Powerdive. The grade blandly camouflages the 100m desperate fight against gravity.
B.Maddison, J.Smart, Jul 1980.
The seminal hand & fist crack (stock up on #3s and #4s!). On the far L of the main wall, climb the third crack R which faces west and is R of triangular roof a few metres off the ground. The second pitch of face climbing solves a problem that was pending for years, completing Late For Sky begun many years previously. Access from below is hideous - dense scrub and awkward dodgey "scrambling" up blocky terrain.
B. Maddison, P. Mills, P. Morris, Jan 1979.
Gerry Narkowicz, Jan 2011.
Next line R of 35mm Dream.
Stevens, McMahon, Thomas, 1980.
Thin east facing corner R of 35mm Dream. A bit of a classic. Climb directly up the thin jam crack to belay ledge below the big corner.
B.Maddison, E.Lees, 1981. Direct start Narkowicz and Lidman Dec 2009.
Gerry Narkowicz, Alex Wilson, 29 Dec 2000
Pitch 1: Adam Donoghue 6 Dec 2012, Pitch 2: Adam Donoghue, Claire Donoghue Feb 2009.
The well protected thin bridging corner 2 lines R of El Shaddai. Belay at about 50m height, then step left into a crack for a second pitch to the top.
Ingvar Lidman Jan 2010 (with pre-placed gear)
R.McMahon, M.Ling.
Crack up the face to the R of This is the End. Shares first pitch with Michel De Notre Dame Direct, then steps down and across R.
Maddison, McMahon, Smith, 1981.
R.McMahon, G.Narkowicz, Sep 1984.
2nd crack R of Michel De Notre Dame Direct is a splitter hand crack.
Gerry Narkowicz, Andrew Geeves, 2008.
Now a fair way to the R.
Rock-A-Day Johnny Face
To the R of Conchubar is a great looking amphitheatre high up the main wall with a series of spearing cracks (and some fused and less than vertical toward the bottom).
Access to the start of most of these is by scrambling/climbing up the easy gully at the base. Or access via the top.
Descent from these routes is best by walking down the shallow gully with Heathcliff on your left (about 300m from where you top out in the Heathcliff direction) - this is very easy and much quicker than the standard descent gully. You should come down directly in front of the main cliff (Apprentice Buttress) of The Rocks. Descent from Cuchulain ledge is possible via abseil from tat (50m into gully & another 50m to ground).
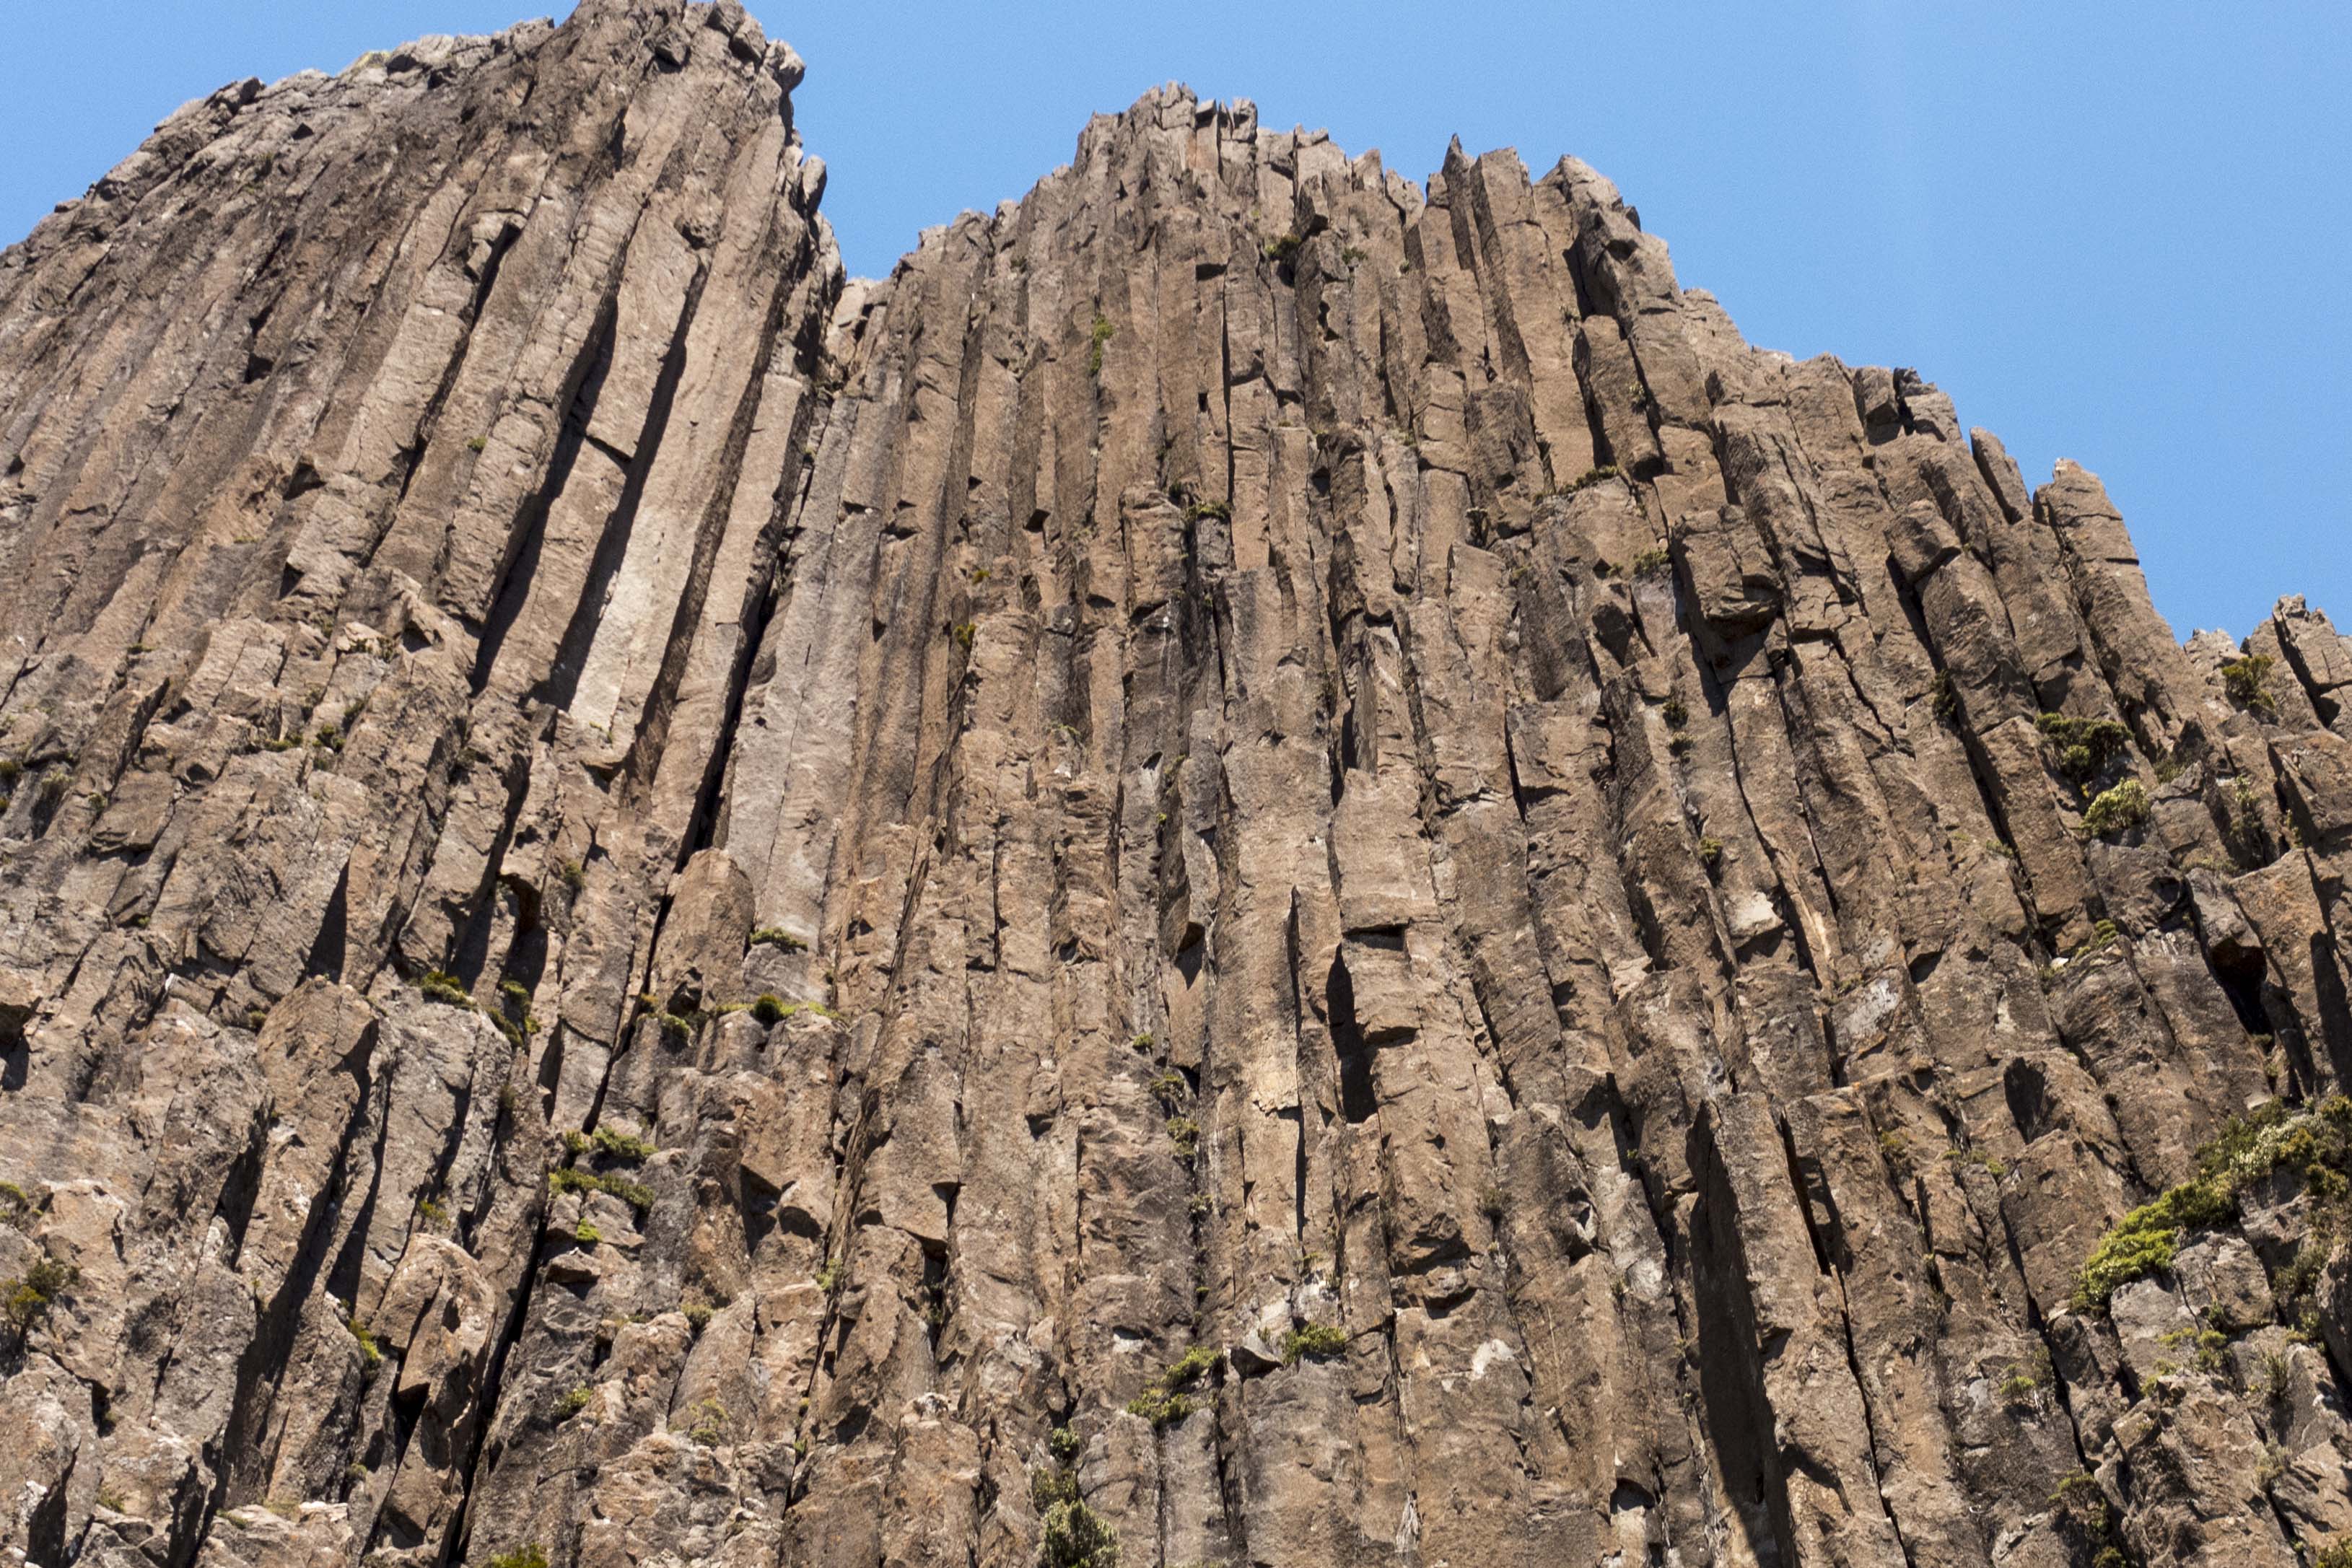
Rock-A-Day Johnny Face
Left of Cuchulain and Stylistic is another East facing corner with a prominent crack. Pitches one and two are as for Cuchulain up the gully. The third is the crux of desperate finger-locks which later eases to hand-jams. The fourth pitch continues up the crack until tottering shards force a retreat. Nevertheless, the climb is regarded as complete.
Lockwood, I.Thomas, Mar 1978.
K.Carrigan, S.Parsons, Apr 1982.
R.McMahon, K.Lockwood, I.Thomas.
Face climbing with good gear, a rarity on the Ben.
Access via Cuchulain pitch 1 and 2 or it might be possible to rap in from the top.
From the Cuchulain ledge reach right and place a cam then climb the face left of the arete to a suspect but good flake. Continue to right arete then up following the gear and good holds between right arete face and left arete.
Single set of Cams to #3 (doubles of 0.4 and 0.5) and wires.
Ben Maddison, Squib. 16/01/2009
R. McMahon, P. Mills, Maddison, I.Thomas, Jan 1979.
The obvious finish to the climb.
S.Parsons, P.Bigg, Dec 1978.
Climb the "hideous" west-facing offwidth past a specially made tube (there used to be two, but one has fallen out or otherwise vanished). Starts as a hand and then fist crack, but quickly gets into the swing of things.
J.Fantini, 1980's.
The thin crack straight up the face 2 lines right of Pipeline. Access either by abseil from the top of the ridge (80m rap), or climb the gully up left of Laendler to the base of the route. Gear is good and plentiful, but fiddly to place. For a second pitch, continue up line of least resistance.
Ingvar Lidman Feb 2011.
A solid effort was put in by Gerry N. cleaning this pitch. Starts as for Ballbreaker but continues directly up the corner rather than bridging right at about ten metres into the finger crack. A much welcome rest is found at half Height before the final bridging section. Excellent small to medium wires and camalots up to #2 can be found the entire way up the pitch. Lower off bollard with tat at the top of the pitch or continue up Ballbreaker.
Simon Bischoff Jan 2023
Gerry Narkowicz Feb 2012.
R.Thomson, B.Kennedy, Jan 1978.
Dean Rollins, Jake Bresnehan (alt.), 18 Nov 2008.
Garry Phillips, Jake Bresnehan (team ascent), 26 Nov 2009.
Ascends the ridge on the right of the cliff (ie. the skyline as seen from the car park); a great adventure and considered somewhat of a classic, though why is anyone's guess; huge and varied, with an atmospheric middle section and a fine crux last pitch bridging and jamming up twin cracks. Apart from the last pitch and a short grade 17 section on the second pitch, the climb is fairly 'cruisy'. The first route on the Flutes.
R.McMahon, R.Frew, Jan 1974.
Moustache Tower
The tower a few hundred metres R of Frew's Flutes. This is the square-topped pinnacle visible from the carpark, just past the Rock-A-Day Johnny ridgeline.
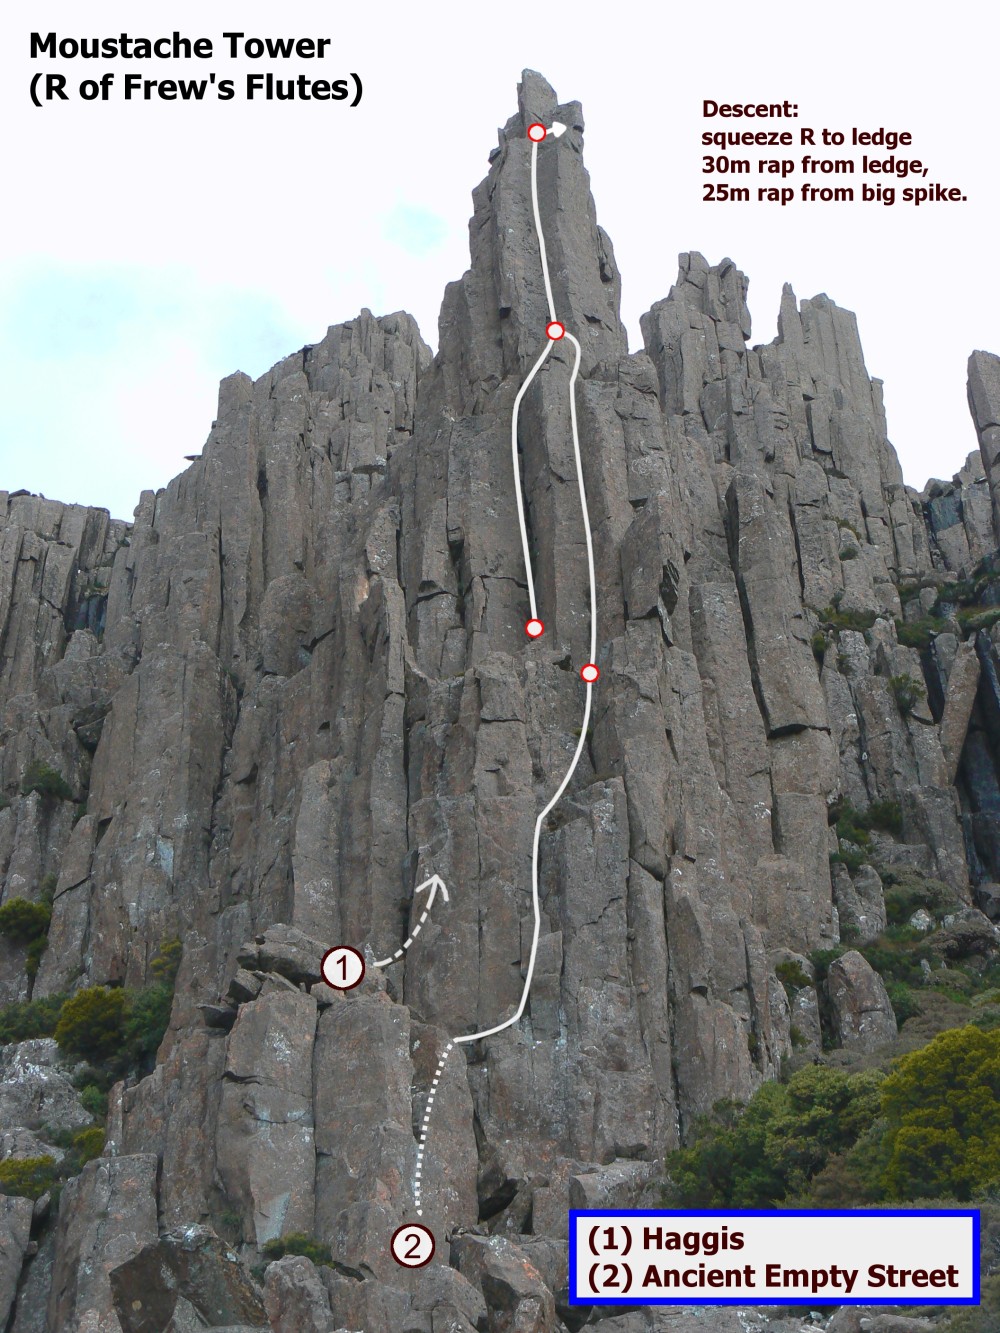
Originally graded 17.
Jake Bresnehan, Dean Rollins (alt.), 19 Nov 2008.
Heathcliff
Heathcliff is the large irregular cliff about 20 minutes further west across the scree from Frews Flutes. There are 19 routes described in the 2008 McMahon & Narkowicz guide.
McMahon, Smith, 1977.
Maddison, McMahon, 2/79
Parsons, McMahon, 3/78
McMahon, Morris, Maddison, 2/79
Schmidt, McMahon, 1/73
McMahon, Maddison
McMahon, Frew, 10/73
McMahon, Burnett, 3/73
McMahon, Smith, 9/73
McMahon, Carson, Smart, 1979.
The next climbs, across as far as Lost Dreams are best accessed from the left, along scrubby ledges.
McMahon, Quiqley, 1973.
Maddison, Jacques, 1979.
Starts at a flat area above about 8m of scrambling (from the access scramble). Climb the tessellated wall left of the big chimney; climbs directly through the steep area at about 20m to belay on the slab above. Gear is a bit spaced at the bottom but is OK and improves higher up. Great rock and a different style of climbing to that typical of The Ben. A second pitch is required to get off: traverse right for about 15m to the col with the chock-stone swathed in ugly tat (and thence rap to the starting point).
Neale Smith, Robert McMahon, Mick Ling 1/80.
From the same starting ledge as Tupelo climb the steep wall right of the chimney. The ground is steep, making it pumpy to place gear, but the jugs just keep coming; great fun. Climb left of the projecting roof at about 25m (i.e. maintain a direct line) to belay at the top of the buttress. Scramble left to the same tat and rap as for Tupelo.
Ben Maddison, Robert McMahon, 17/2/79.
McMahon, Burnett, 1973.
Schmidt, McMahon, 1973.
McMahon, Smith, 1980.
McMahon, Smith, 1980.
McMahon, Smith, 1980.