
Lowdina
 25 min steep uphill
 Morning & midday sun
 Dolerite
Acknowledgement
Originally published in Craglets by Evan Peacock. Guide update and crag revival undertaken by Christoph Speer, Hamish Jackson and Martin Brown, with help from friends and the CCT.
Introduction
IMPORTANT - ACCESS REQUIREMENTS UPDATED MAY 2026 - NEXT BBQ MAY 2027 TO BE CONFIRMED
Only a short drive from Hobart, Lowdina is an excellent winter trad crag in the South. The rock quality is very good, and the crag provides a wide-selection of interesting routes, each with their own unique flavour. Though the cliff only makes minor first impressions, its hidden gems will become gleamingly obvious as you explore it. Summer climbing here is unpleasant, as it's usually too hot and the grass seeds through these months are very annoying. Routes are listed in the guide from climbers left to right.
History
In the beginning..
Michael McHugh first noticed the cliff from the Trans Tasman passenger train window traveling between Devonport and Hobart. Not long after, McHugh with Peter Jackson visited the cliff and in 1968 with Bob McMahon, John Moore and Mendelt Tillema put up the first routes. Jackson also published the first guide in the early 1970s with about 30 routes containing his signature sketches. The original guide can be viewed at Libraries Tasmania - Archives History Room in Hobart.
Rock-stars, run-outs and burn-outs..
Between the late eighties and early nineties, new route activity at Lowdina was intense. Most of the harder routes done during this period were by Evan Peacock, Garn Cooper and Al Adams. Martin Stone published a new guide in the mid-eighties but it soon became outdated. Evan Peacock and Colin Reed published a third guide in 1992 that formed the basis of the crag info later published in Craglets. In the mid-nineties interest in Lowdina waned for various reasons including the need to complete an indemnity form prior to visitation. During the 00s and 10s sporadic visitation meant a significant number of routes retreated under a liberal coating of Lowdina’s infamous lichen.
The future..
Lowdina’s relative obscurity was set to change. During winter 2021, the crag sparked the interest of Christoph Speer, Hamish Jackson and Martin Brown, signifying the start of a modern revival. Recognising the value of the cliff for winter trad-climbing, work began on serious route cleaning, installation of lower-offs and replacement of the old carrot bolts, giving the crag a much needed face-lift. The guide has also been re-written, with the addition of topos to assist in route navigation, as well as revised route descriptions and some upgrades. During this period there has been significant new route activity spearheaded by Speer, Jackson, Brown and Broome.
Access
IMPORTANT – LOWDINA ACCESS REQUIREMENTS (Updated May 2026)
Next Annual BBQ: May 2027 to be confirmed
Lowdina is on private land. Continued access depends on climbers respecting the landowners and following these requirements. N and R Bevan kindly allow access provided the following process is followed:
1. Attend the Annual Lowdina BBQ
- The annual BBQ is held at the start of the climbing season and acts as a meet-and-greet with the landowners.
- Details are shared a few weeks beforehand.
- Attending the BBQ places you on the approved climber list.
2. Request access before every visit
- Text the Bevans at least one day before your trip (text preferred - 0418 604 286 or 6260 4286)
- Include: Who is coming, Vehicle registration/details, Expected arrival time. Wait to be given the OK from the landowner.
- If you did not attend the BBQ and are not on the approved list, permission will not be granted.
- New climbers are welcome to attend with approved climbers who have requested access.
4. Biosecurity requirements
- Clean and disinfect your shoes before arriving. This is essential for farm biosecurity.
5. Sign in every visit
- Complete the indemnity form / visitor register at the stile before entering the property.
- This is required every time you visit.
- Ensure you are BACK AT YOUR CAR BEFORE DARK. This is very important.
Please respect the property, the landowners, and the access arrangements — ongoing access depends on it.
Access to the cliff is located from the end of Lowdina Road in Campania (about 4.2km North of the town centre). A convenient parking area is located at the end of the road just after the old house at the railway-line turning circle.
Walk to the LHS of the old house above the railway-line to locate a wooden stile. Sign-in, then cross the fence here and start walking towards the cliff between the fence-lines. Close any gates behind you and don't damage the fences when crossing them, it REALLY pisses people off. Head-up over a short hill, cross the field passing some stacked boulders and look for some orange tape on a fence at the base of the hill - this is where the track up the hill begins. Follow the rough track up the steep hill to arrive at the Bismark Buttress. Make your way along the base of the cliff-line to move between buttresses.
Camping
There is basic camping at Colebrook Park near the Craigbourne dam (10 mins NW of Lowdina), and Campania Flour Mill Campground 10 mins SE of Lowdina.
Please DO NOT camp on the Lowdina property itself.
Crag Steward
Rock climbers please contact the Cliff Steward (lowdina@climbersclubtas.org.au) if you have any queries or concerns regarding social or environmental impacts of rock climbing at this crag. Do not email regarding general travel, seasonal advice, or lost property - this is not the Steward’s role. If you have important safety information to communicate (e.g. risks due to recent and large rock falls) please also consider updates on thesarvo forum, facebook group and/or online guidebooks as appropriate. Please copy in cct@climbersclubtas.org.au if you feel you have a high level concern which may imminently impact the crag or climbing community.
Non-climbers, other users, land managers: please also contact cct@climbersclubtas.org.au if you have important climbing related queries at this location.
Gear and Grades
A single rack of wires and a double rack of cams from BD #0.3 to #3 will suffice for most climbs. RPs and micro-cams (#0 to #0.2) are essential for many of the face climbs here (a double-rack is ideal). A 60m single-rope is the go, although double ropes (or single folded over) may keep you safer on a couple of bolder routes (e.g. Little Squeaky Feet). A stick clip is very useful, as many first bolts are high-up on the mixed routes.
Try any of the following recommended routes if time is short and you want the best - general consensus is that grading at Lowdina is stiff and old-school.
- A ~ symbol indicates the need for RPs / micro-cams.
- A + symbol means very approachable and well protected.
<12 - Papillon+, Tormentil+, Greenknowe
13 - The Ants Pants+, Casuarina Crack+, Sweetie
14 - Things to Do While Waiting for the Apocalypse, Strawberries+
15 - Canary, Bismark+
16 - Chocolate+, Ulysses, Hood
17 - Hooter~, Subvert the Dominant Paradigm, Virag, Snoober~, Ferio+, Ungar+, Chook Fever+, Psoriasis
18 - The Danger Hog Shuffle, Wolftone+, Anzac Day, Felix+, Daytime Delinquents, Mother Earth+, Mick Goes to Moonah~, Time Warp~, Electric Exercise Bike~, Boys in Bikinis
19 - Yoda~, Something Scurrilous+, Don't Jolt That Bolt~
20 - Liars and Losers~, Illegal Move, Gecko~, Authoritarian Ultranationalism+
21 - Brittle Little Mothers~, Balbatross, Rogering the Rock+, Bulging Biceps~, Maggot on a Brick+, Caged+, Ukiyo-e+, Scaredy Cat~
22 - Drury Line, Acerb, Plasticine Thylacine, Punks and Lepers~, Picnic in the Front Room~, Ashlars Edge+
23 - Albatross, Lumbar Cruncher+, Little Squeaky Feet~
24 - Lumber Cruncher Direct+, Bonsai+, Radical Centrist+
25 - Onklunk
26 - Wailing Wall+
The gate keepers for technical, thin-gear face climbs:
1. Hooter (17)
2. Mick Goes to Moonah (18)
3. Yoda (19)
4. Liars and Losers (20)
5. Brittle Little Mothers (21)
6. Punks and Lepers (22)
7. Little Squeaky Feet (23)
Bolts
Most of the old carrot bolts have now been removed and replaced with stainless steel fixed hangars or glue-ins. There are still a couple floating about yet to be replaced (noted in the descriptions). Any remaining carrots and mild steel FH's should be treated with much caution, they are likely 30+ years old now. Some old pitons are also still in-situ (mostly in good condition) - back these up where possible. As always, you should inspect all fixed gear before use - you are in charge of your safety.
Ethics
Much time, effort and money has gone into rejuvenating this crag for winter trad-climbing options close to Hobart. Please respect the land-owners wishes regarding access, remember that you are on private land and act accordingly. Please top-rope anchors through your own gear to avoid premature wear.
The ethic at this crag is traditional. It is expected that natural protection should be used where-ever possible. Some routes here will test your ability to place small gear and climb with confidence above it. Whilst mixed routes are common, the crag is not suited to fully bolted routes, as the style of slab climbing on the routes here is quite unique, in that the RP placements are unusually good for dolerite, providing ample protection for competent leaders. The intention is that this crag is left as a place where traditional climbers can learn and improve their ability to place micro-gear.
To improve the climbing experience, some climbs have had their old bolts re-positioned, and in certain circumstances bolts have been added with permission of the FA following wider consultation.
Environment
Peregrine Falcon's almost certainly nest around the cliff and have done so for many years, although the location of their current nest site in 2020-2022 era is unclear, with occasional sightings of birds only (not distress signals). In 2022 sightings have been reported in the far northern reaches of the crag. Previous nesting sites reportedly include one behind Bismark Buttress and one atop Virag Buttress. Please be on the look out and report sightings to the CCT peregrine stewards. If you start hearing a lot of squawking and/or start getting swooped, please climb elsewhere on the cliff to avoid disturbing the birds during their nesting season (usually between July - December).
Detailed raptor information: http://www.thesarvo.com/confluence/display/cctpublic/Raptor+Nesting
Please stick to the marked track as much as possible - even when it's wet and muddy. Track braiding can become a real problem and work is undertaken regularly to minimise our impact. Please help to keep existing tracks free of sticks and debris and please avoid creating new ones.
GPS
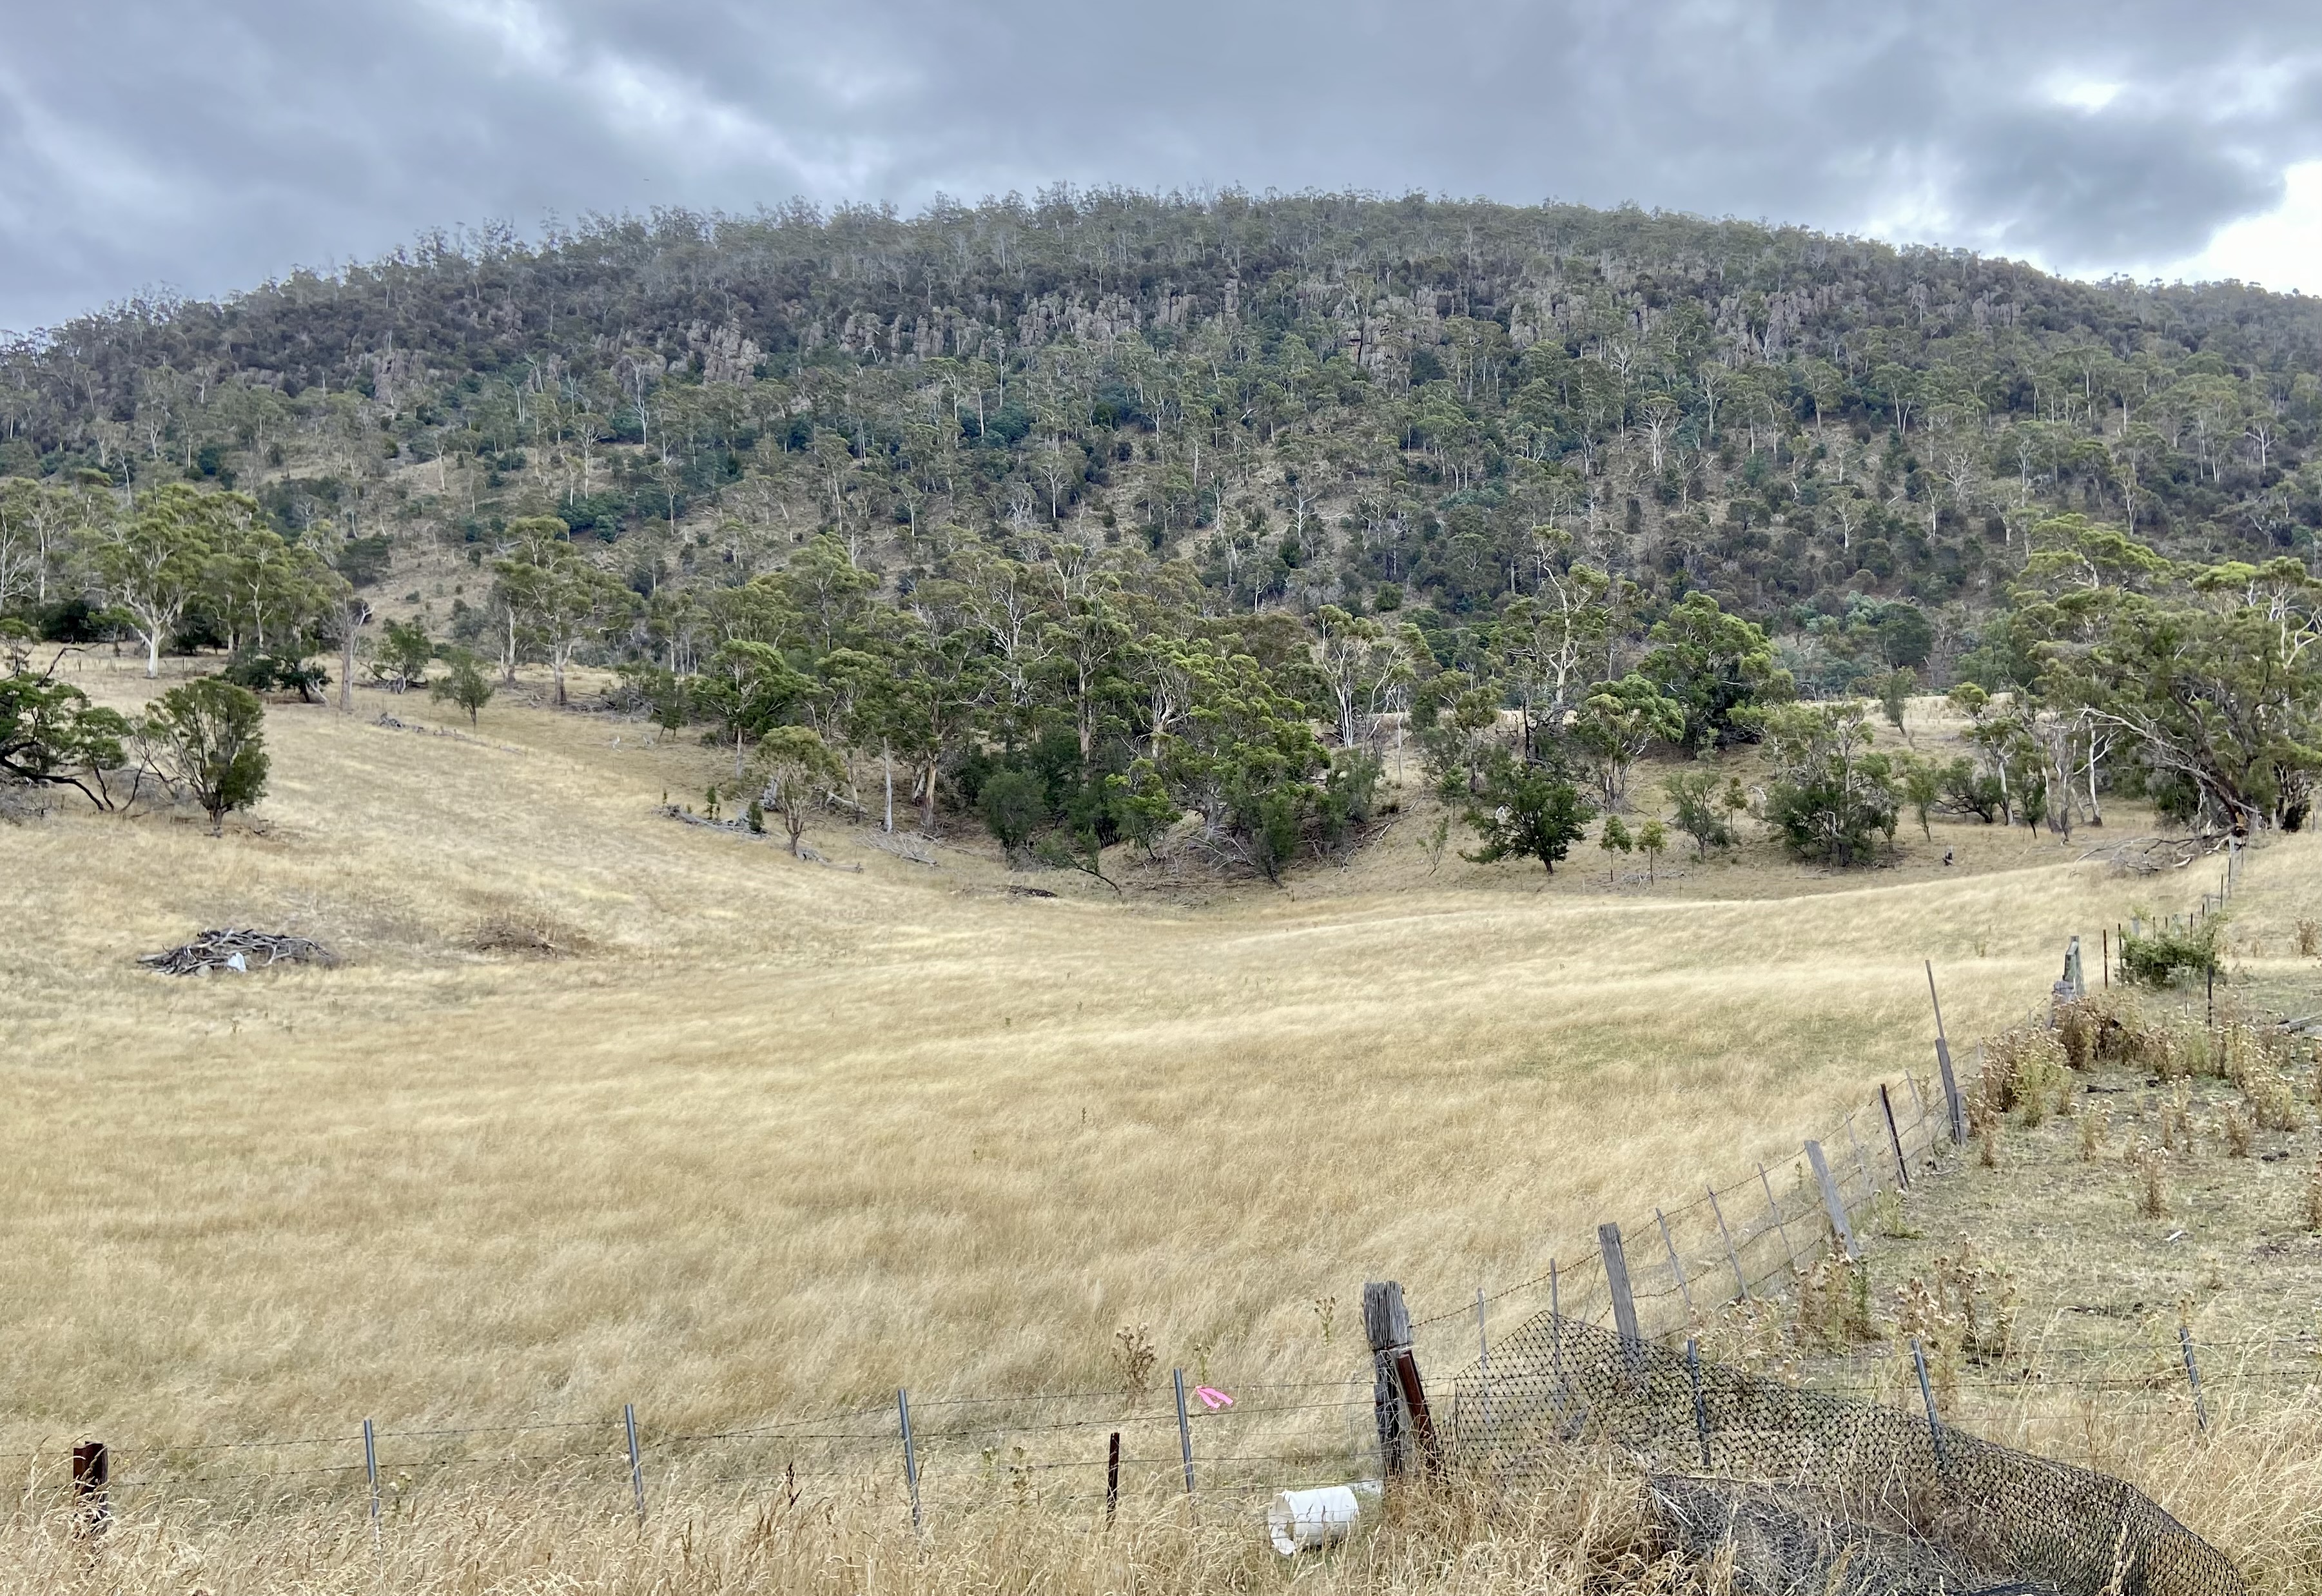
Scharnhorst Buttress
Rarely visited, Scharnhorst Buttress is at the far left hand end of the crag immediately before the the hillside turns to the south and into a gully. Beyond the gully the cliff-line peters out. Approaching from the right, the buttress is about 80m left of a narrow scree slope.
Scharnhorst is the furthest left hand climb on the crag. The route climbs a groove, that continues up a contoured crack through a small roof. It roughly finishes up the nose of the buttress. Avoid the loose slabs on the left near the top.
Karl Prinz, Kevin Kiernan, Mary McWhirther, Feb 1975.
Start in the alcove 6m right of Scharnhorst, off the top of the pillar. Step across and up to the ledge below the flake. Go up the right hand crack, then move left and up past the right hand edge of the flake, finishing up the crack. RPs and microcams useful.
Al Adams, Evan Peacock, Tim Olding, Aug 1988.
Start 8m right of Scharnhorst on the ledge below the brushed slab. Step up for the slope above, continue up to the next sloping ledge, then up the flake to the top. RPs and microcams useful.
Al Adams, Evan Peacock, Aug 1988.
Extremely bold face climbing with a technical finish. Start immediately left of The Spastic Acrobat on the left hand side of the arête. Climb to the horizontal at 3m (and place gear!) then launch for the bolt (hoping your belayer jumps downhill if you fall off clipping). Finish through the small roof on the left. RPs and microcams useful.
Evan Peacock, Steve Ford, Nov 1991.
About 20m right of Scharnhorst; or 50m left and 30m downhill from Punks and Lepers. Look for a smooth, grey face split by a horizontal break near the top. Start just right of the obvious crack, and go straight up the face on RPs to a small ledge. Continue up on small holds and layaways (more RPs) to the horizontal, then crank through to the finger crack (lichenous) and the top.
Al Adams, Evan Peacock, Aug 1988.
An isolated pinnacle lies between Vulpecula and Scharnhorst buttresses. Climb the crack that forms a sweeping s-curve up the right hand side of the buttress.
Mary McWhirther, Kevin Kiernan, Karl Prinz, Feb 1975.
Vulpecula / Punks and Lepers Buttress
Some heady test-pieces and a nice hand crack. The following buttresses are located about 20m left of the narrow scree slope. There is a lower-off on the Punks and Lepers buttress.
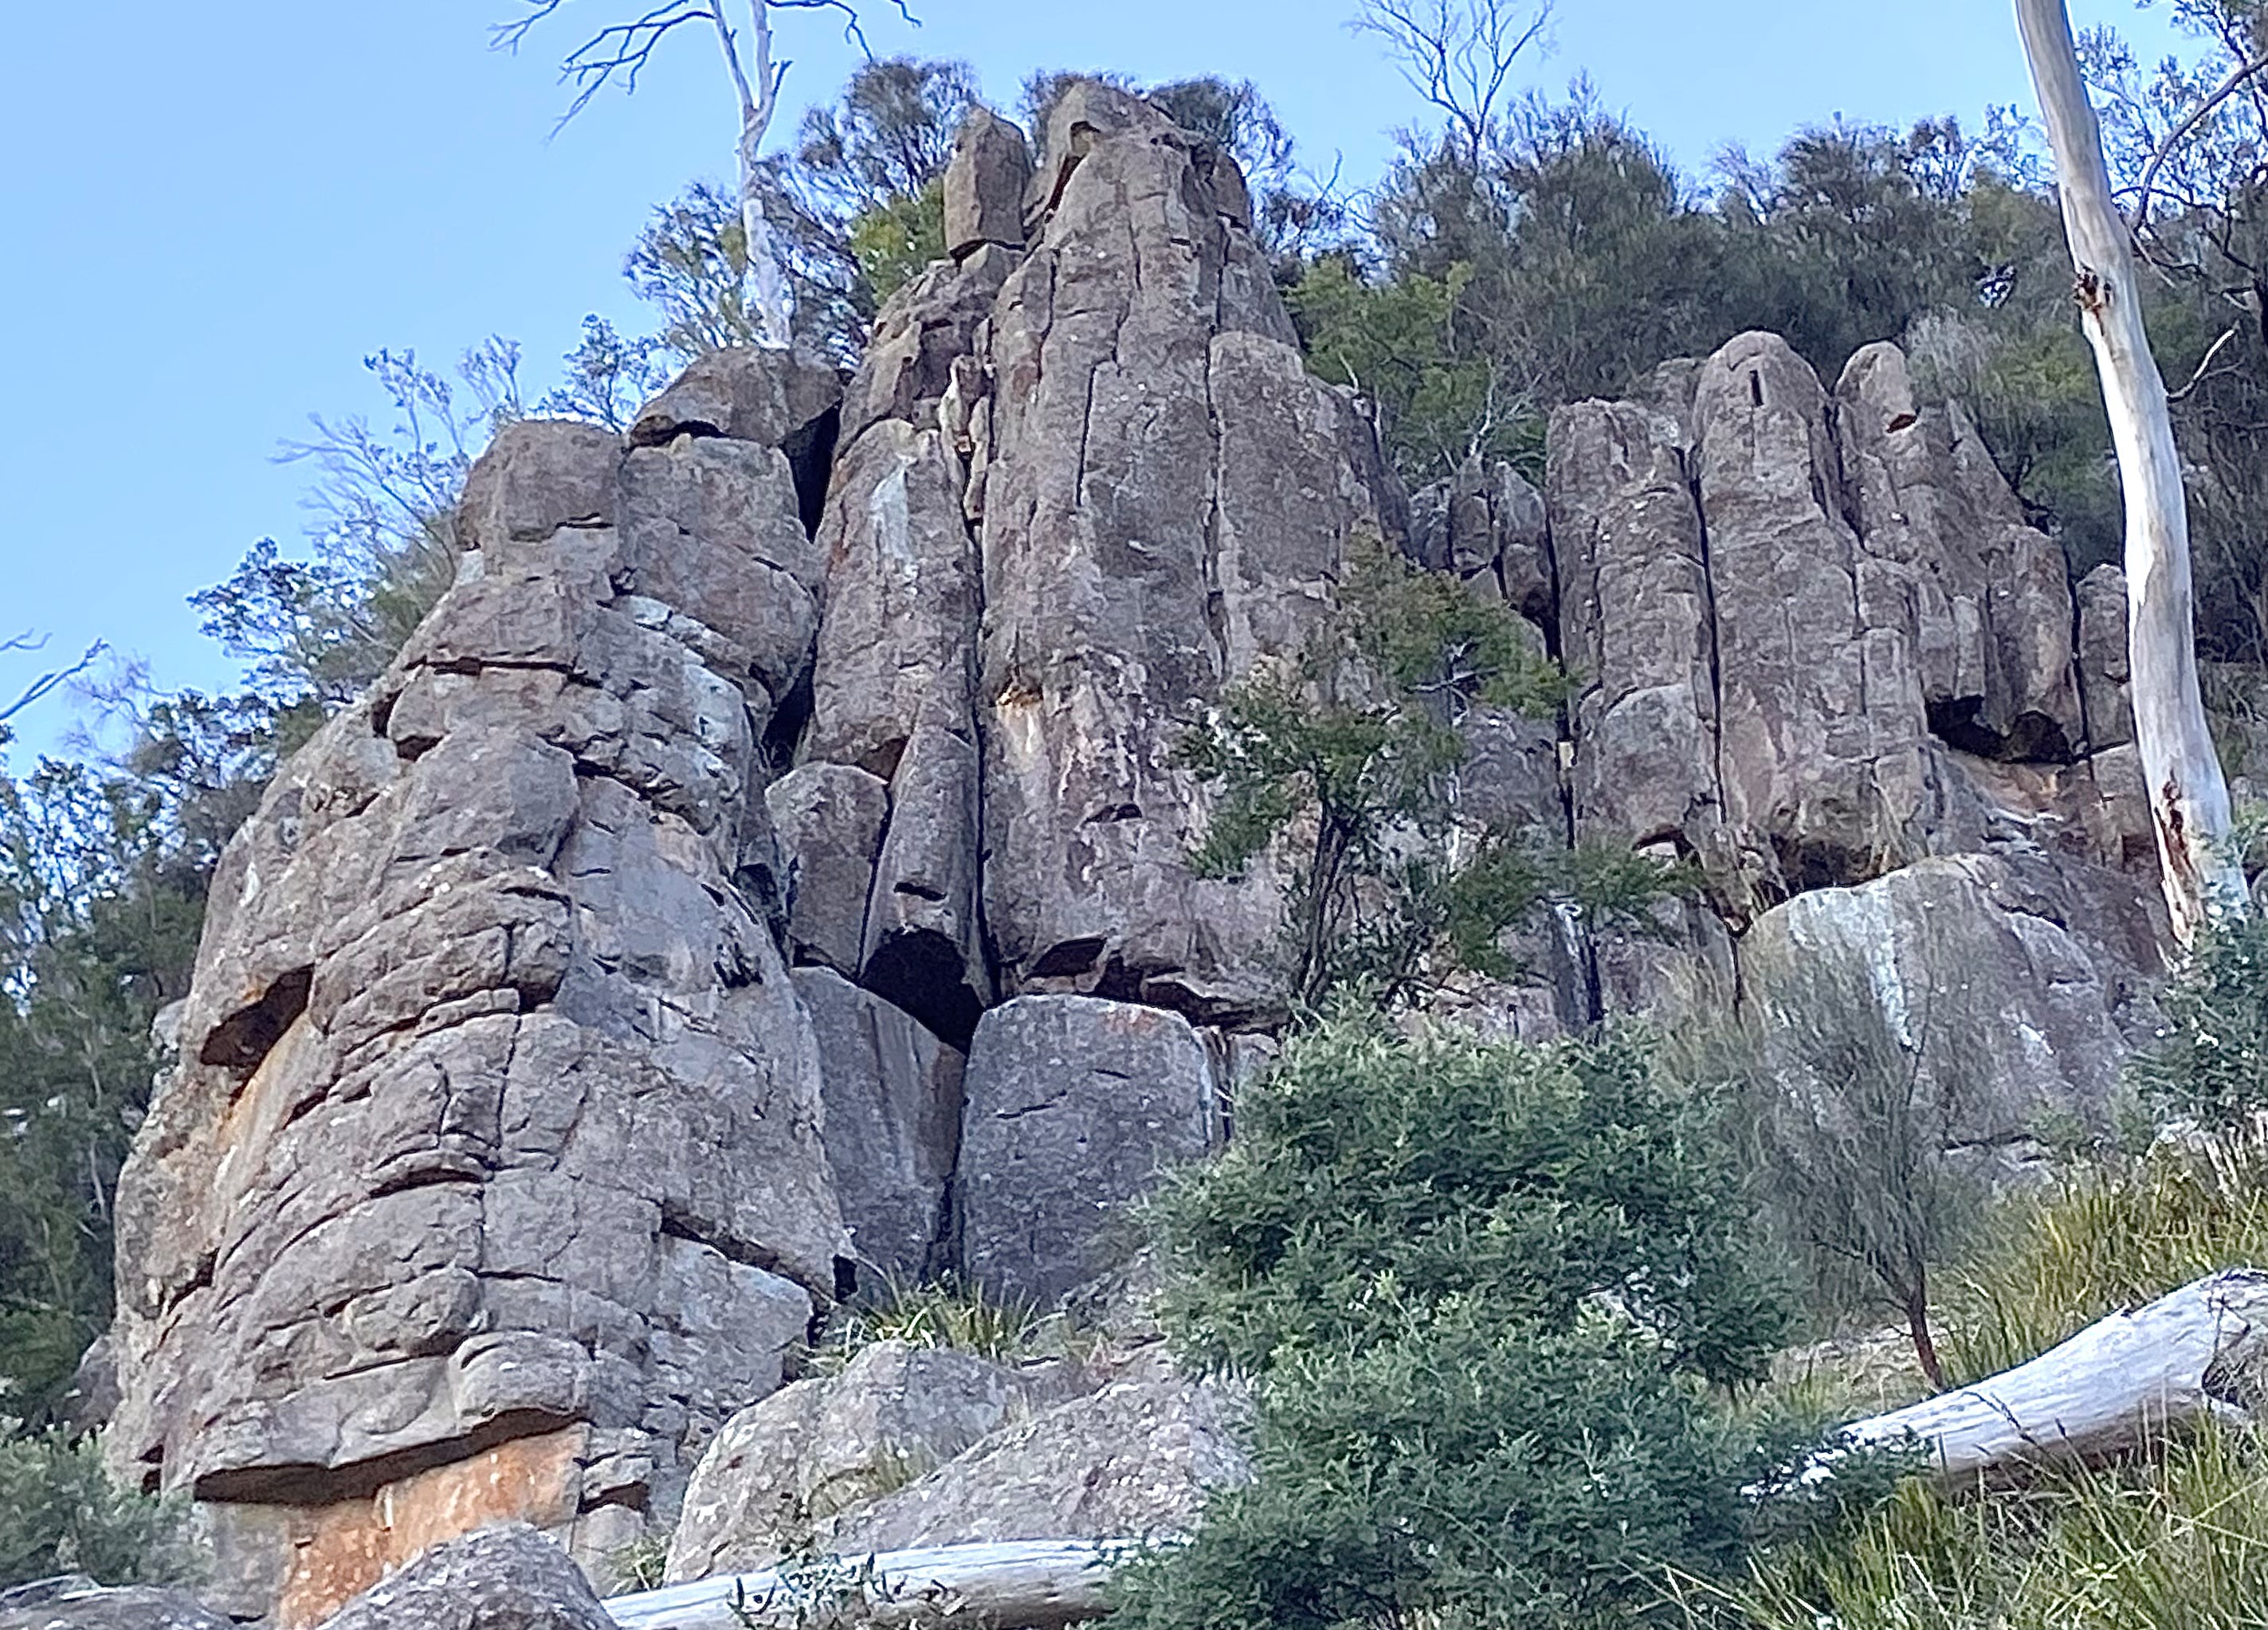
Vulpecula / Punks and Lepers Buttress
On the South side of the Vulpecula Buttress is a nice looking crack-line starting from a large flake and ending in a headwall. Climb the crack, through the headwall (crux) and up to the top. Scramble off the back.
Jeroen Jansen, Lawrence Wonhas, August 2022
Takes the off-width crack just to the right of FLSC.
Lawrence Wonhas, Jeroen Jansen, August 2022
Starts below the big roof, taking the line to the right of this, up the wall on the right (careful of loose flakes) and then leftwards to the top (belay as for FLSC).
Jeroen Jansen, Lawrence Wonhas, August 2022
From the base of the buttress, climb the nose past loose flakes to a broad ledge. Scramble on up the blocky ledges, then finish up the obvious slab on the left hand side.
Kevin Kiernan, Karl Prinz, Mary McWhirther,Feb 1975.
A short masochistic variant to Psoriasis. Take the off-width crack about 3 m left of the start of Psoriasis, trending right into the hand crack when this ends. Move right after this finishes and continue up Psoriasis to the DBB. Take a big cam.
Henry Garratt, Nov 2021
The crack-line left of Punks and Lepers provides the easiest worthwhile route to the top of the buttress. Climb the short groove to a small ledge, then jam steeply through the bottomless crack to a stance below some keyed-in blocks. Avoid these by trending right onto the exposed face and follow the crack system above to lower-off as for P&L.
Christoph Speer, Mark Passier, Henry Garratt, Nov 2021
Not for the inexperienced. In fact this is not the route for people of a nervous disposition, the accident-prone, the unlucky, the uninsured, those who are easily disheartened or those with loved ones. It is however, one of the more outstanding and challenging examples of the classic Lowdina face climbing style. Climb to the break, then up the face past the cracks to the top. RP placements appear 3.5m above the horizontal break, one set of RPs #2-5 are essential, with doubles of size 2 and 3 serving well. With nesting of RPs at the crux, and an attentive belayer while the nest of RPs goes in, the climb can be on-sighted fairly 'safely' (despite appearances).
Al Adams, Evan Peacock, Nov 1988.
The crack-line right of Punks and Lepers is a fine companion-route that will also have you questioning your life choices. Climb easily up the lower crack to the top of the pedestal; then climb up the thin continuation crack. Finish up the short corner above to the lower-off on P & L. Small cams and RPs provide adequate protection at the crux - brass offsets are handy but not essential.
Martin Brown, Hamish Jackson, Aug 2021
Take the hand crack past the block (it's in there) and follow it past a tricky move to a bollard belay. Walk-off down rocky gully behind the route.
Fraser L-R, Sammi Dos, Nov 2021
Start-up the hand-crack to the block, traverse right and then follow the thin crack and face with all the confidence of RPs and microcams, to a bollard belay out left at the top.
Sammi Dos, Fraser L-R , Nov 2021
To the right of and uphill from Nerve Block. Up slab from tiny gully then moving left to gain crack. Better than it looks...
Presumed to be Dave James and Tim Whelan. June 2021
Anzac Day Buttress
Worth visiting for Anzac Day alone. The Anzac Day Buttresses are the two distinct buttresses located just before you hit the rock-scree slope if approaching from the right. There is a lower-off at the top of Anzac Day.
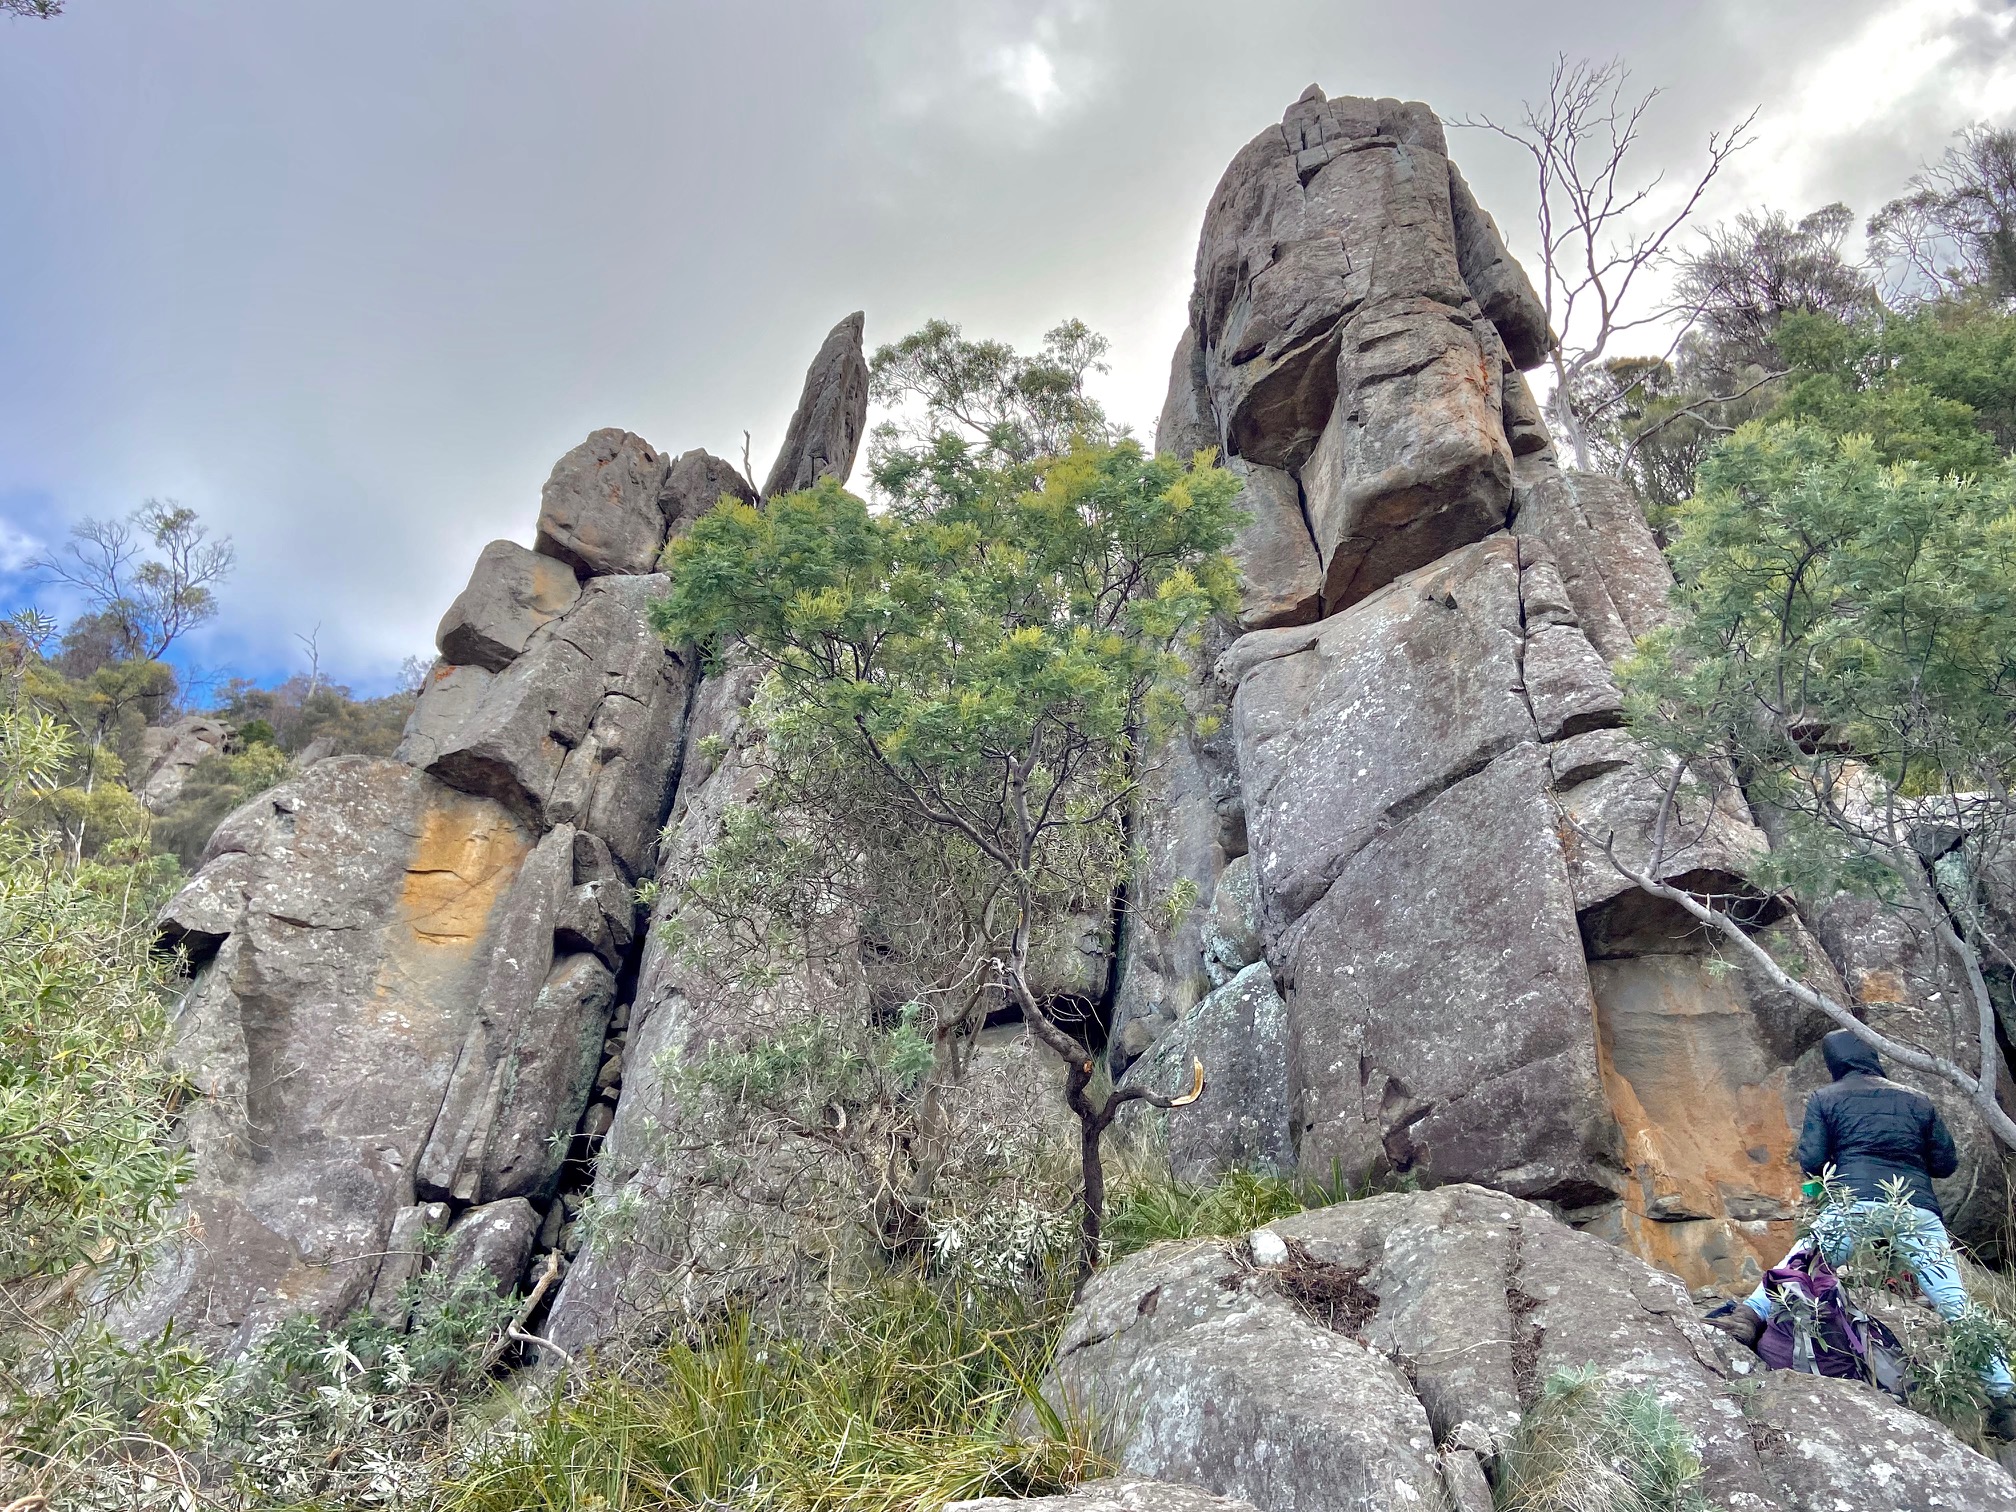
This route climbs the wall which forms the left hand side of the Ape chimney. Gain the corner-groove just off the ground and climb up it, passing right of the small roof. Cross left into the groove and climb this until able to move right into the crack and to the top.
Dave Humphries, John Buttery, Jul 1984.
Located 7m left of Anzac Day on a small buttress topped by a prominent 4m flake. Climb the narrow flaring chimney immediately to its left.
Chris Viney, Brendan Moore, Apr 1972.
Climb the gaping, cheese-grater off-width left of Tongerlongeter Day. Big gear is useful but not necessary.
Jeroen Jansen, Vanessa Tonet, Aug 2022
A serious undertaking. Named after an Indigenous war hero in the Frontier Wars. As for Anzac day to the second roof, then go left through this to navigate loose blocks above, finishing up the wall to lower-off.
Jeroen Jansen, Jai Friend, August 2022
Dave Humphries, John Buttery, Jul 1984 (original). Christoph Speer, Mark Passier, Rachel Chong, July 2022 (variant start).
We are all striving to be one, aren't we? Start below the roof 2m right of Anzac Day and climb the arête and crack above to a large ledge. Move left to regain the arête, then up the right hand side of the wall to the top and DBB. Careful of loose rock.
Jeremy Rackham, Anna Hasan, Apr 1992.
Mick Goes to Moonah, Boys in Bikinis & Casuarina Crack Area
A range of nice routes. The next set of climbs are located in a small amphitheatre above the Anzac Day Buttress to climbers right. Head up the short gully from the track, just before you get to the Anzac Day Buttresses. There are lower-offs on each buttress for easy descent.
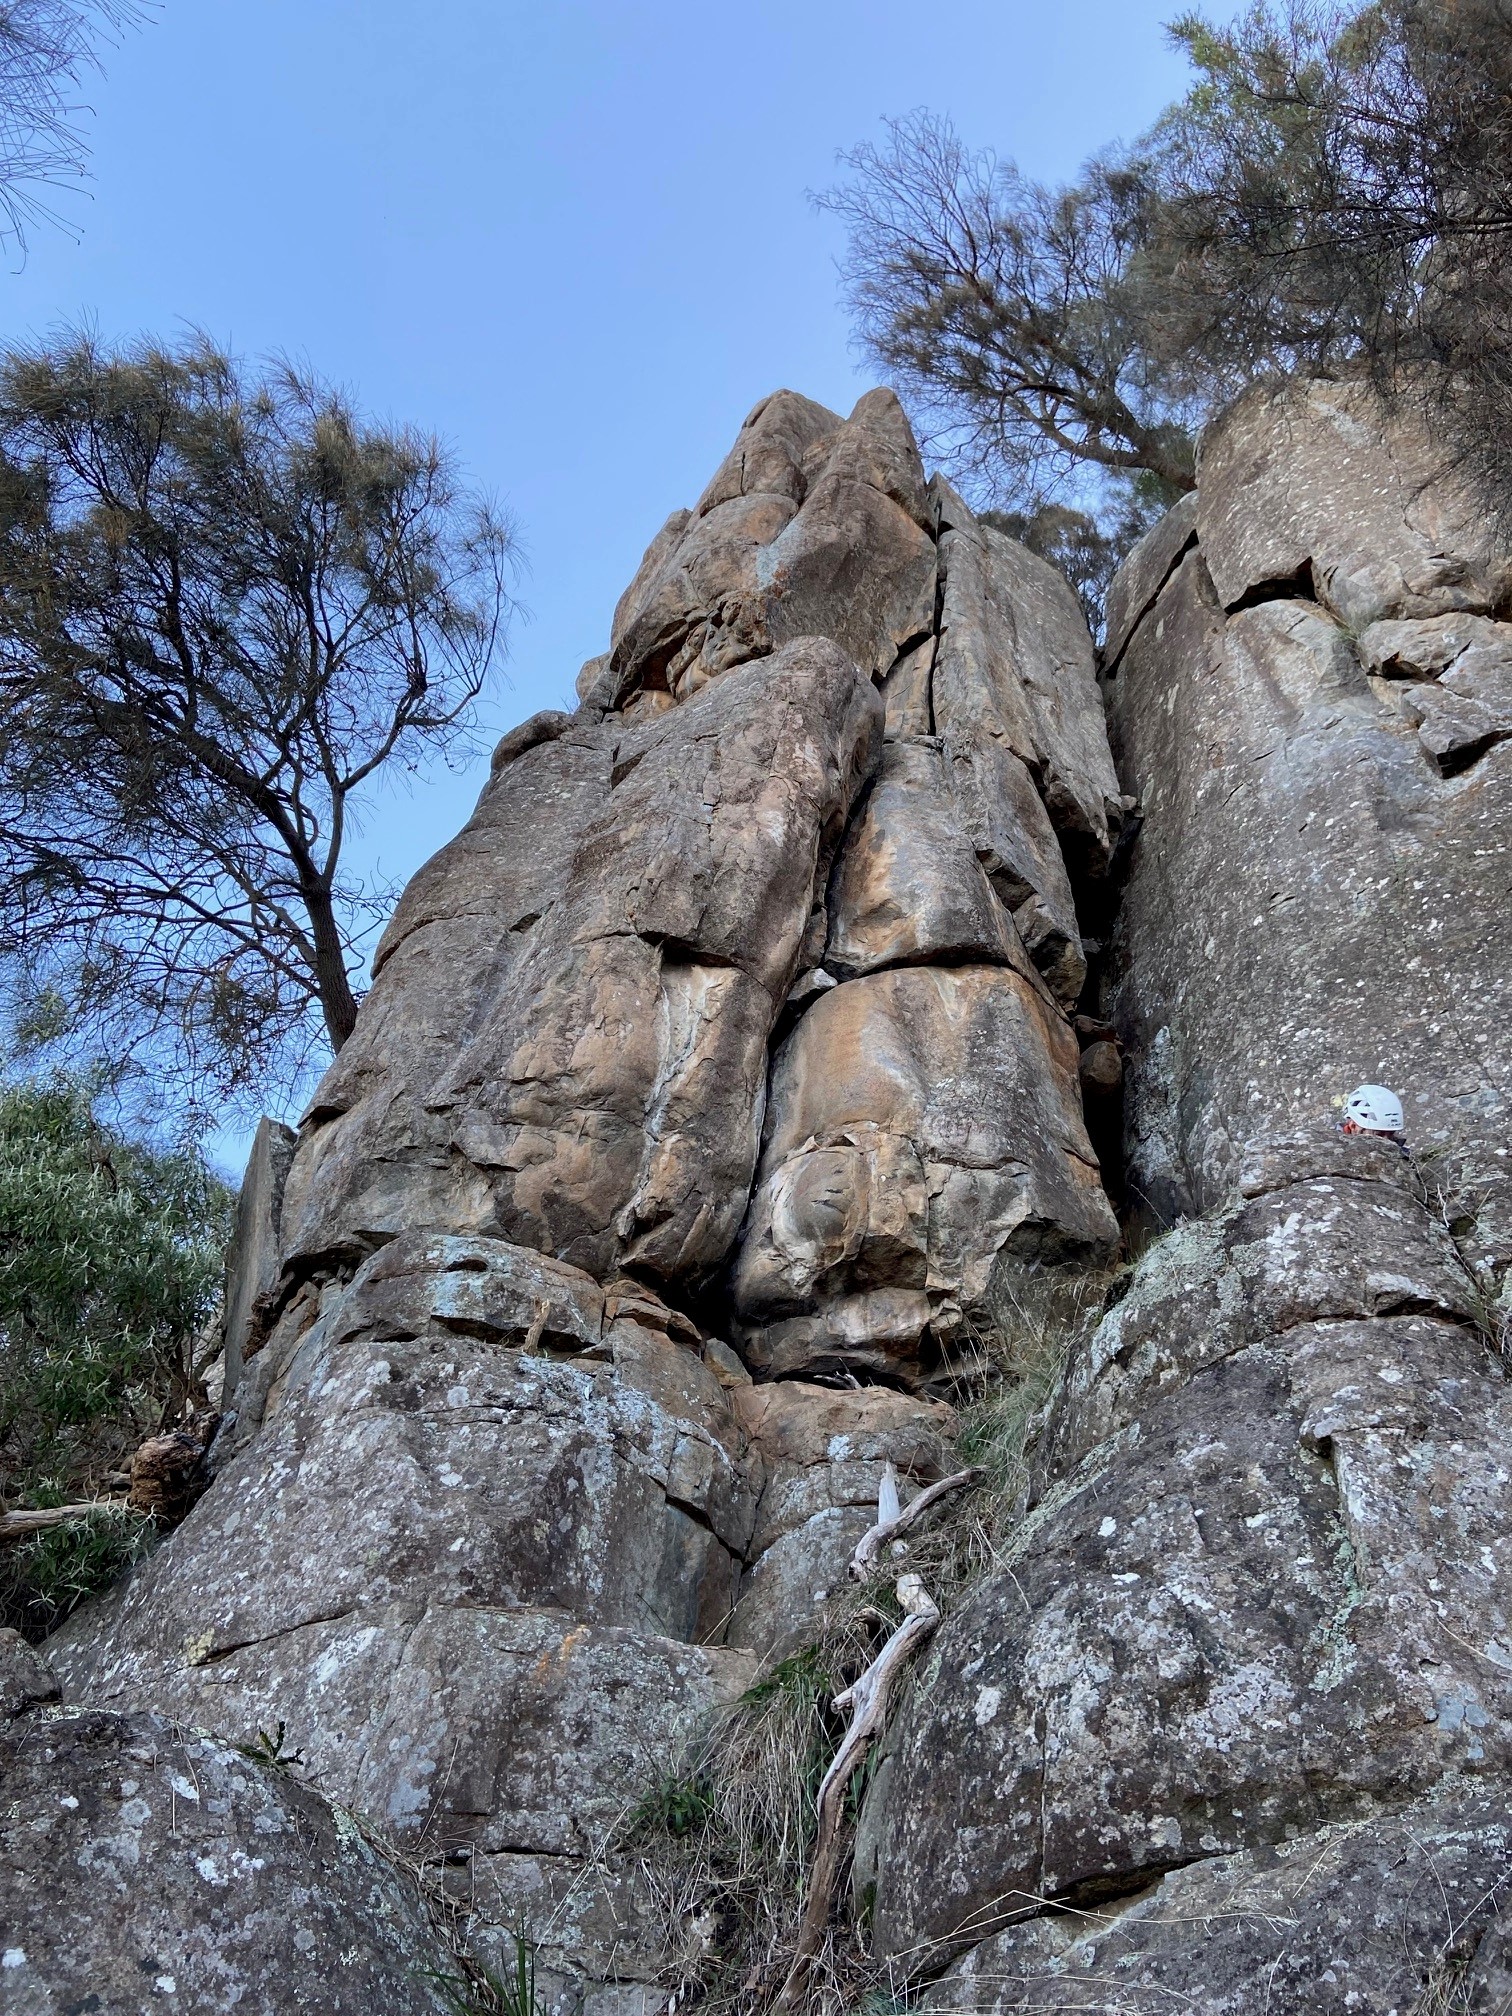
Mick Goes to Moonah Buttress
An engaging lead up the groove and seams on the nose of the buttress. RPs, small wires and micro-cams provide plenty of good protection despite the initial appearances. Lower-off.
Dave Humphries, John Buttery, Jul 1984.
Follows the well-protected clean crack-line. Leaders thrashing about through the various bulges provides an amusing spectacle for onlookers. Jam thoughtfully to surmount the initial bulge, then continue up the line to battle the fist crack to a ledge. Traverse left and up around the arete to the lower-off.
Dave Humphries, John Buttery, Jul 1984.
Worth a sneaky look. Starts 3m right of Chook Fever at the slab. Up the face into the crack-line, finishing up the wide crack. Trad belay and walk-off.
Al Adams, Garn Cooper, Nic Deka, May 1986.
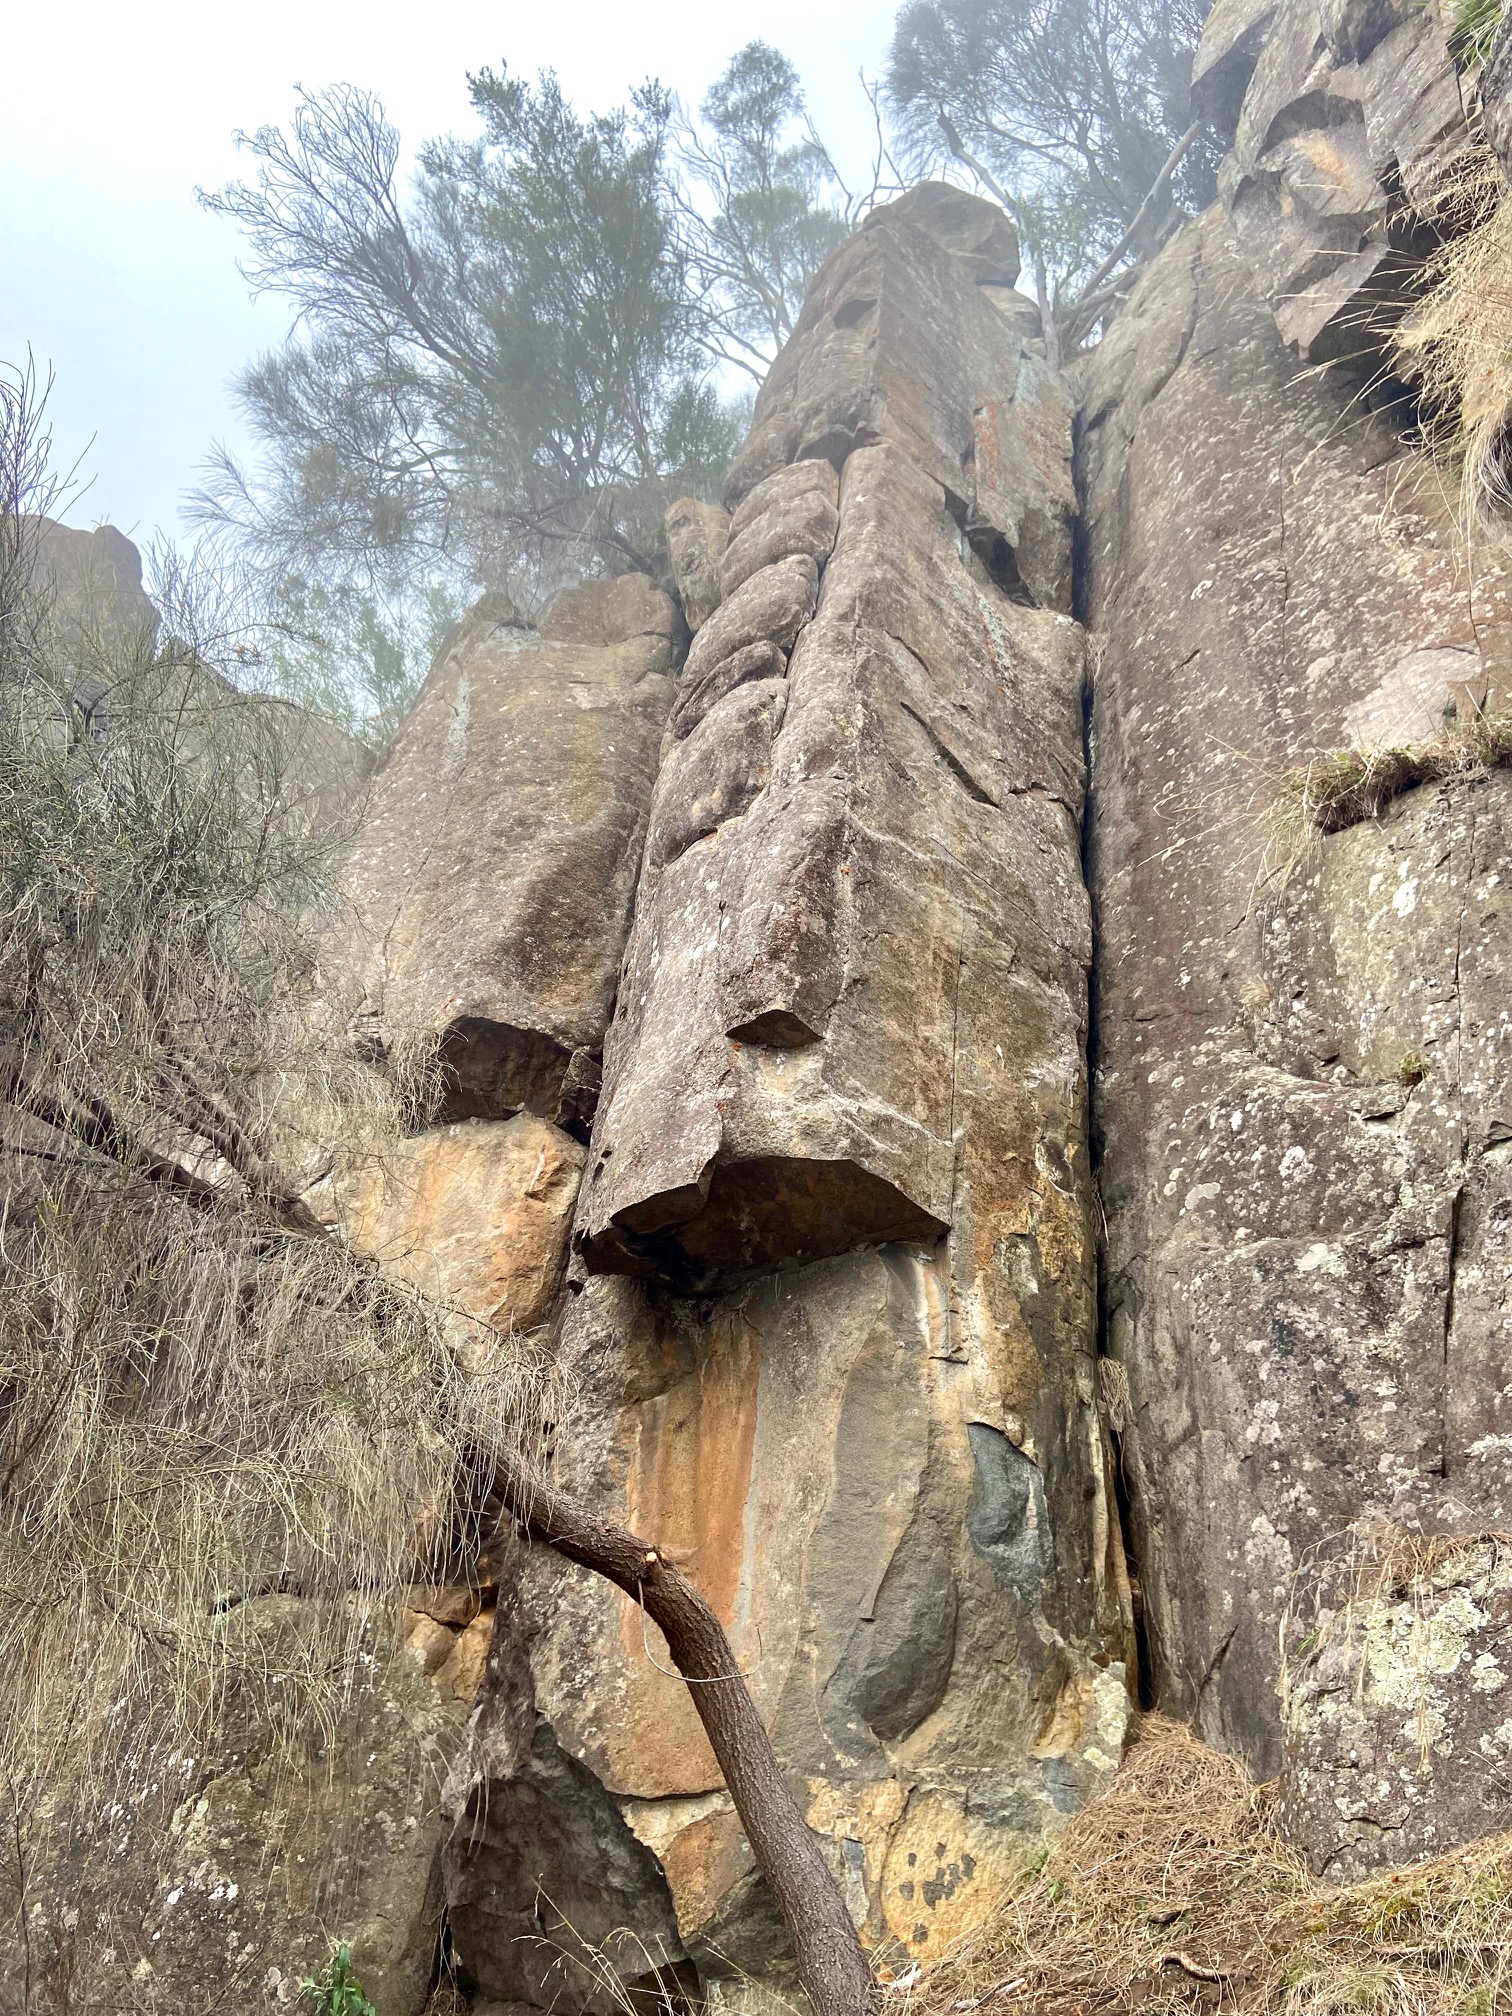
Boys in Bikinis Buttress
Start in the corner left of the roof and bridge your way up until you can layback the flakes and clip the bolt. Move right with difficulty to enter the crack-line on the face of the buttress (crux), then continue up the nose of the buttress with a character-building finish. Lower-off.
Al Adams, Evan Peacock, Jun 1988. Fixed pin replaced with bolt in 2022 with FA's permission.
The face between Boys in Bikinis and Jot Jot Splat. Climb up past an ancient FH and several wires (crack needs a brush) to the lower-off. Somewhat contrived trying to stay out of Jot Jot Splat.
Evan Peacock, Steve Ford, May 1992.
Not bad. The corner crack which widens from hands through to off-width at the top. Jam and bridge your way to the top. Lower-off.
Evan Peacock, May 1990.
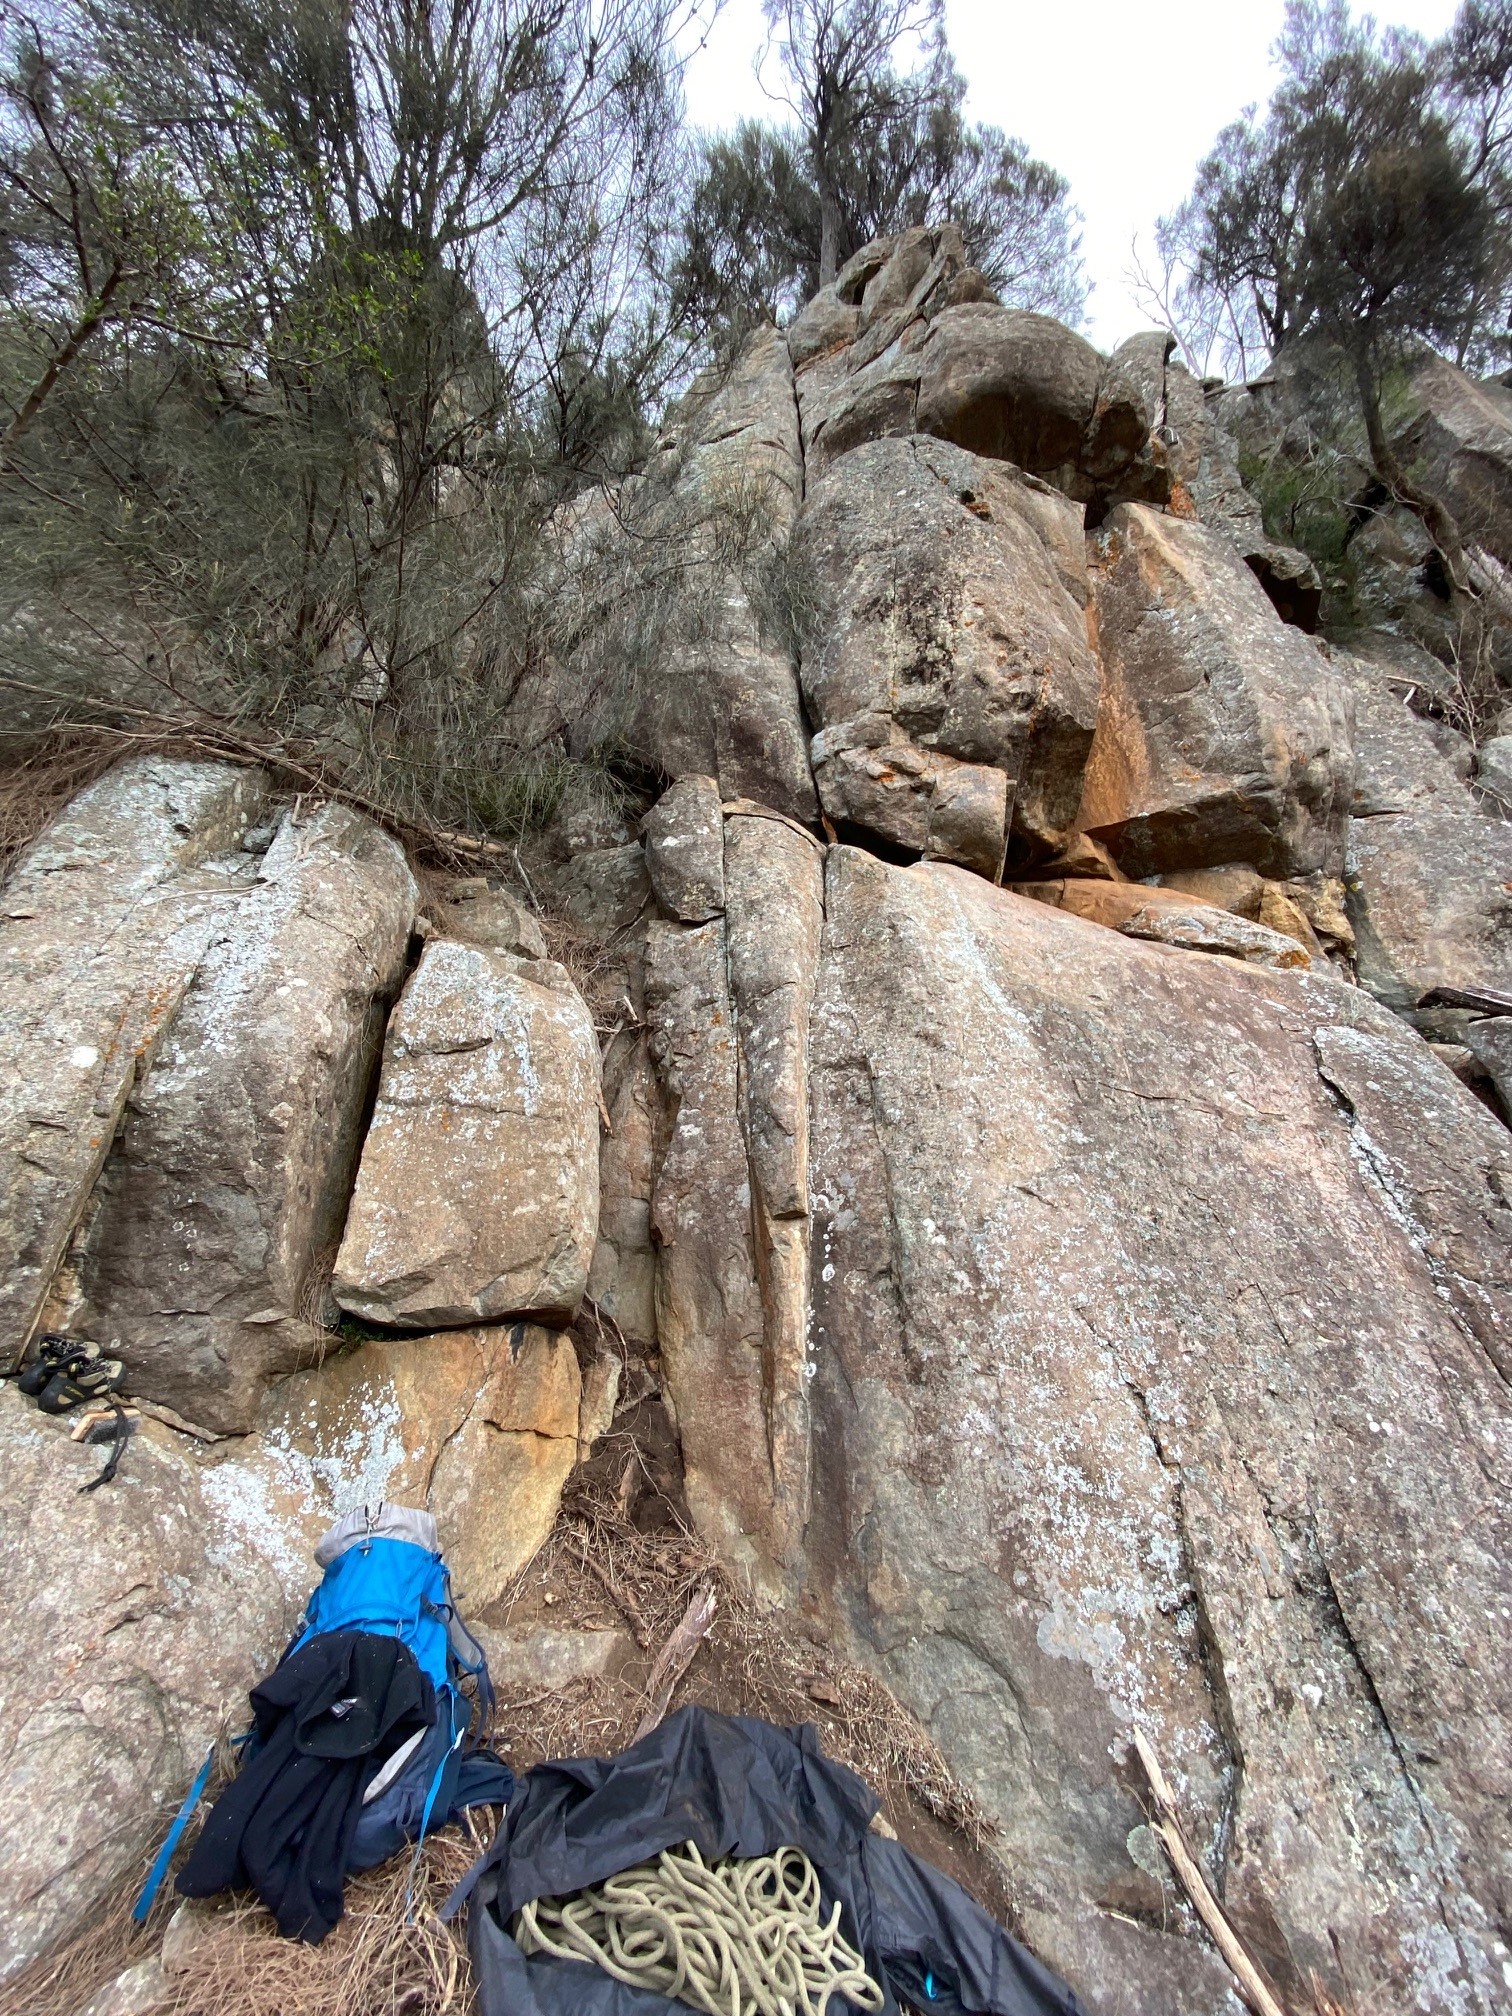
Casuarina Crack
Located between Jot Jot Splat and the top of the Tormentil Buttress on the same contour, is an obvious hand crack to the right of a large She-oak tree. Follow the well-protected crack and rap-off trees at top (take a sling). Alternatively, you can walk down the 'pleasure gully' to the left.
Christoph Speer, Martin Brown, July 2021
Climb the slab directly into the dihedral. Turn the roof and continue up the arete. Trend leftwards following detached blocks to a RP seam. Ascend this up to the tree.
T. Fulton, D. Morley. Nov 2023
Something to do while waiting for your turn on Casuarina Crack. Climb the gully to the right of the face. Step left and up into the steep corner (RP's helpful here). Up to the rooflet and then squirm to the left using your belly where you can (make sure you extend your pro before traversing!). Up Casuarina Crack to finish.
T. Fulton, P. Higgins, D. Morley, B. Fulton. Aug 2022
Finn Buttress
Finn is located on a separate buttress of its own about 25m left of Tormentil Buttress. The buttress has a series of blocky towers as prominent features.
From the block at the base of buttress, follow the weakness straight up the nose which steepens at the top. About as loose as it looks!
Robert McMahon, Peter Jackson, Chris Viney, 1969.
Tormentil Buttress
A couple of good routes, Tormentil is well worth doing if you're climbing at easier grades. Tormentil Buttress is located in a small amphitheatre downhill and just past the Delinquents area. There are lower-offs at the top of Tormentil and Tim's Excuses. From above Tormentil you can take a short track to climbers left to get to Casuarina Crack and the base of Mick goes to Moonah Buttress.
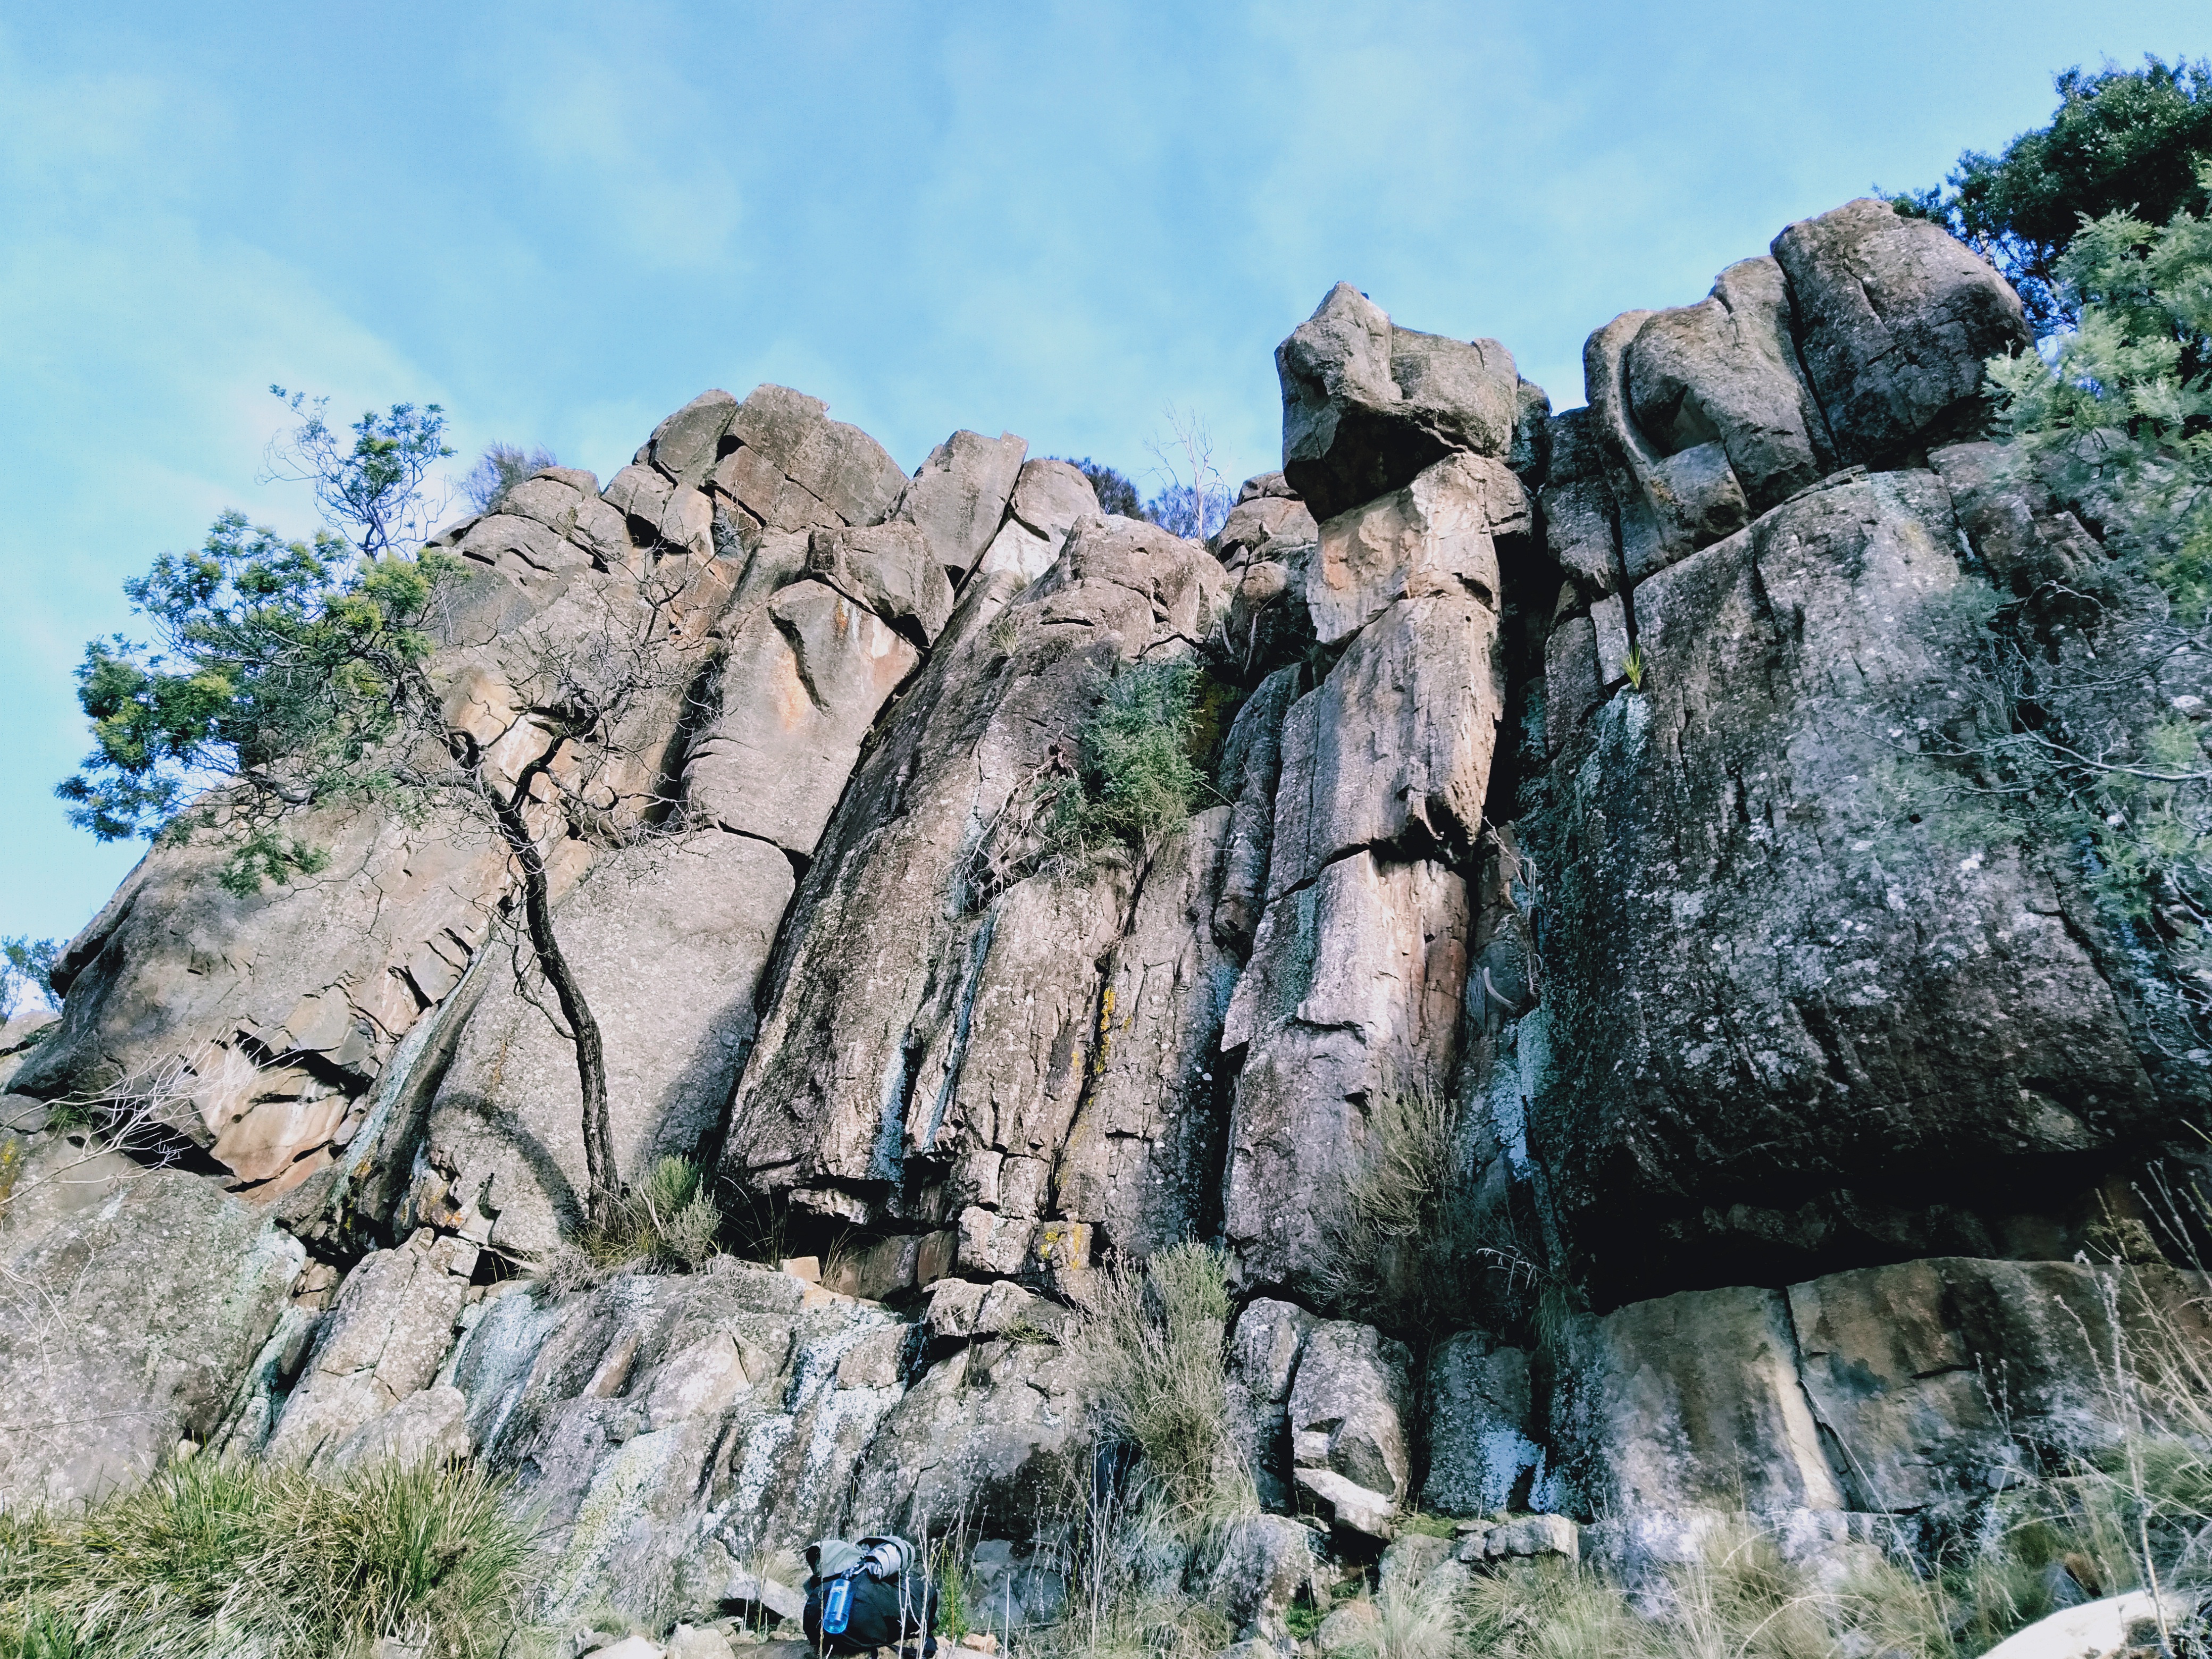
Tormentil Buttress
Go left around the base of the buttress and uphill to where an obvious ledge leads back right towards the nose. Follow the ledge then climb the crack to the ledge above Cromlech. Finish up the broken crack above, or via the nose on the left. Take double ropes or fold your single in half.
Peter Jackson, Lyle Closs, May 1971.
Takes the thin line just left of the chimney (Cromlech). Surmount the lego at the base and follow the thin, well-protected crack to the top and lower-off. The crux moves are a little contrived and start above a ledge (though they can be appropriately protected).
Evan Peacock, Colin Reed, Sep 1991.
The chimney a few metres to the left of Tormentil. Climb the chimney which is loose at first and awkward in spots (sounds delightful).
Robert McMahon, Peter Jackson, Chris Viney, 1969.
Quite good - one of the original routes here. Climb the smooth curving right-facing corner crack, located just to the right of the base of the buttress. Despite looks you don't need off-width gear.
Peter Jackson, Robert McMahon, Chris Viney, 1969.
Climb the face 1m right of Tormentil. The key runner placement requires some thought but is bomber.
Evan Peacock, Colin Reed, Sep 1991.
Start about 15m right of Humber on a slab, just past a roof-capped mini-buttress. Climb the left hand of the two lines, finishing up the hand crack.
Evan Peacock, Colin Reed, Sep 1991.
Seldom climbed. Takes the line just right of Garage Sale up the face.
Colin Reed, Evan Peacock, Sep 1991.
Delinquents Area
A nice area with a range of absorbing routes. Find this area by spotting two very prominent, large buttresses located just uphill as you come past the Oisin buttress from the right. Lower-offs are on each buttress for descent.
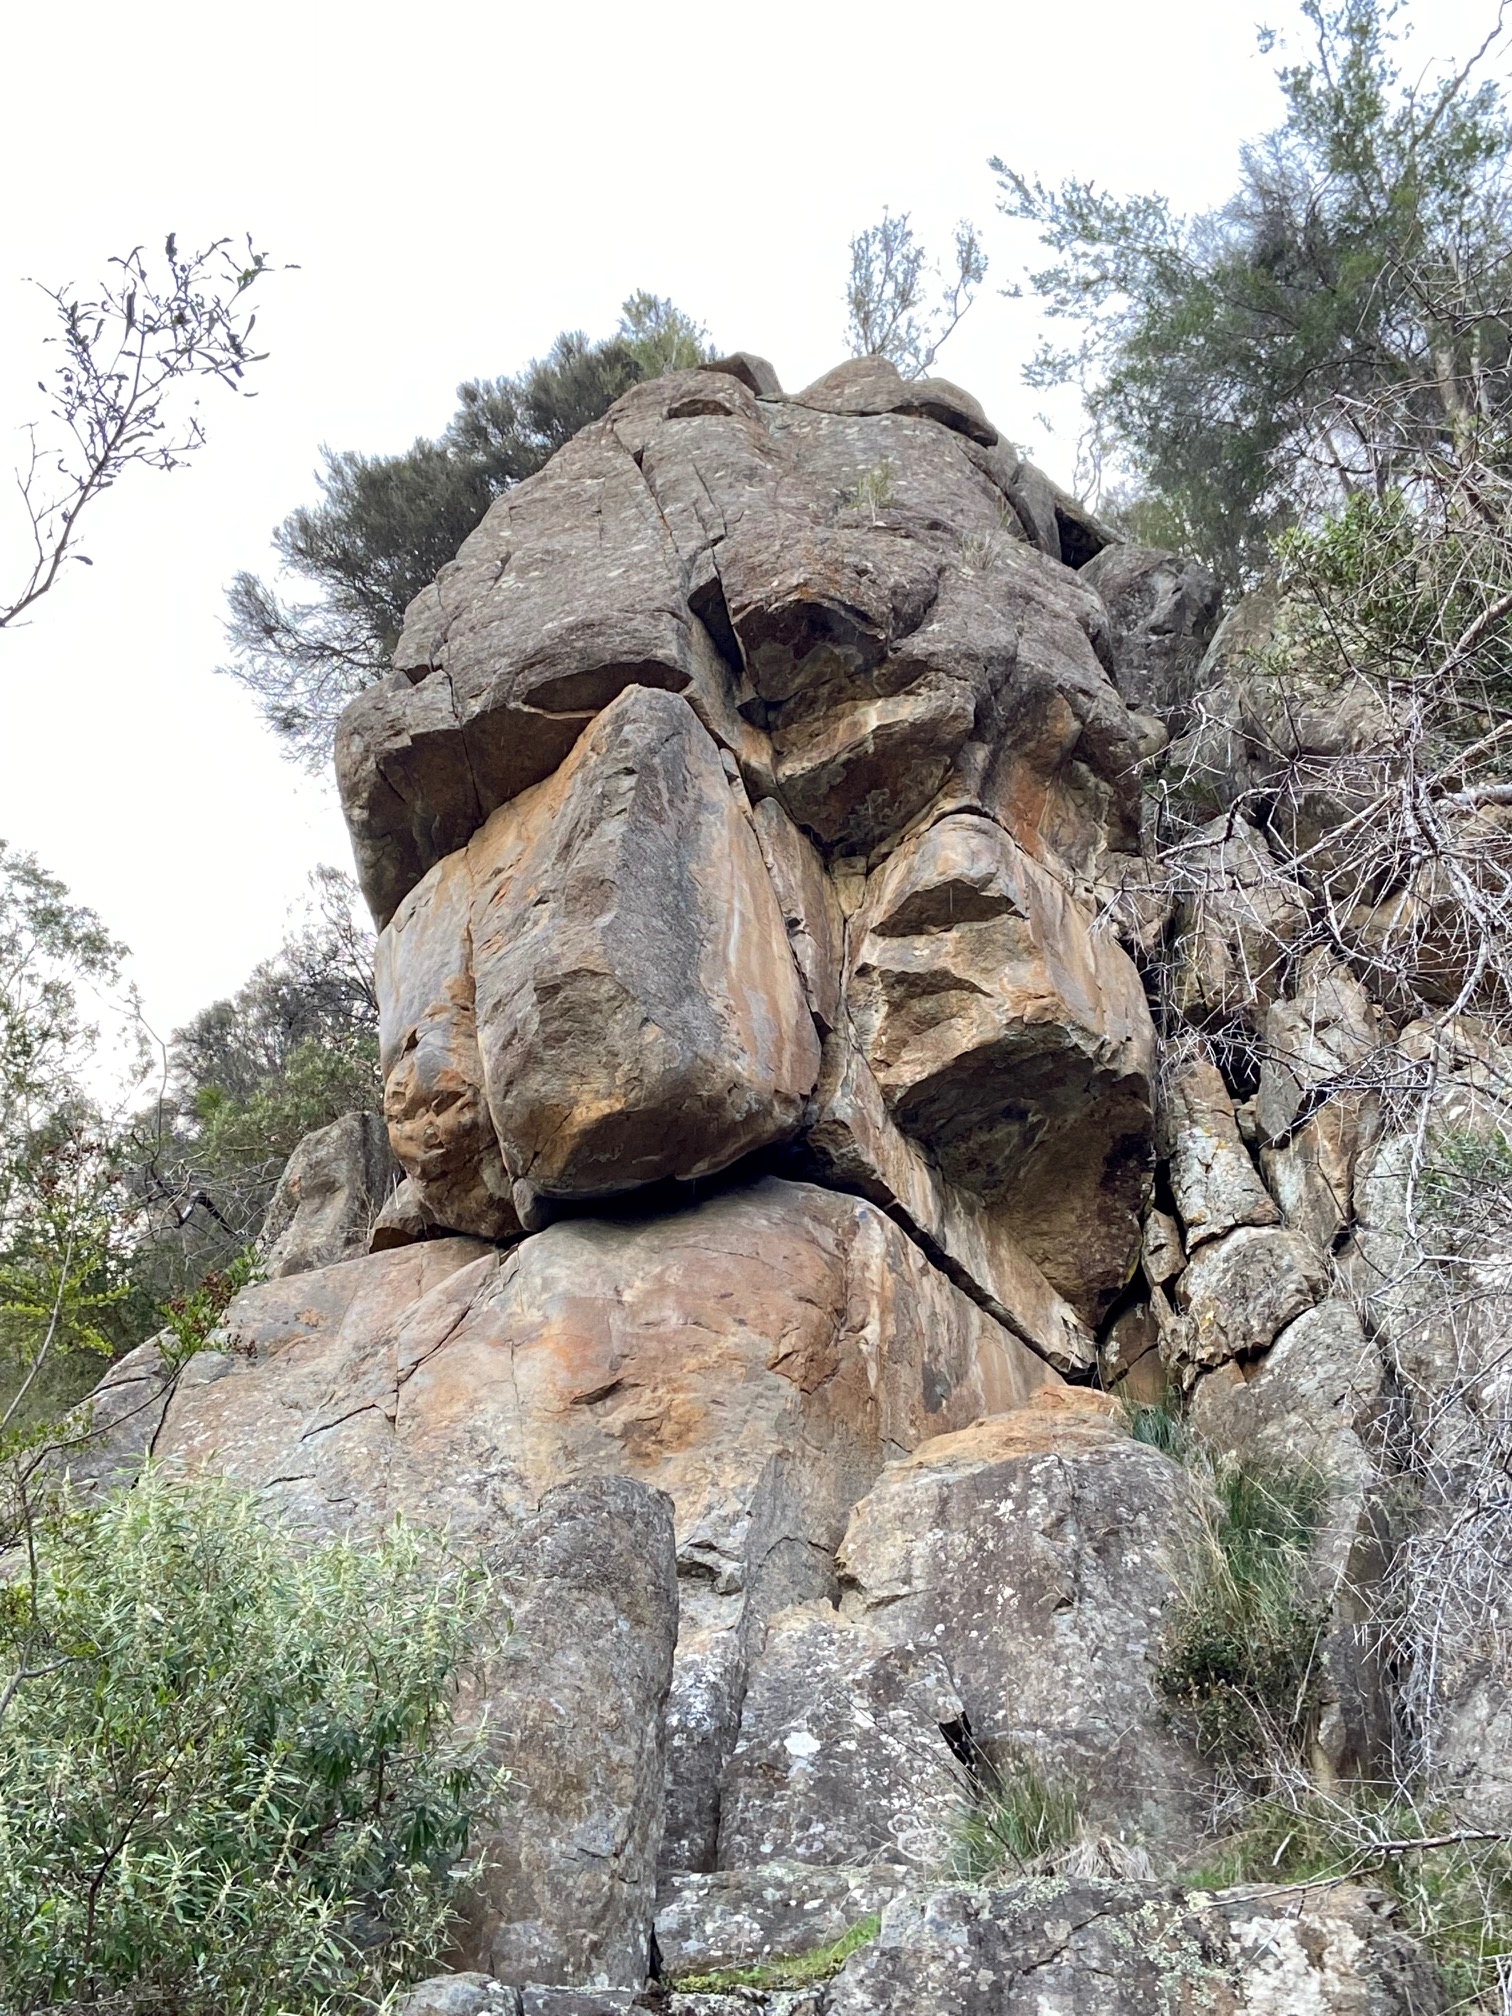
Delinquents Buttress
Good moves the whole way. The short slab about 30m left and up from Daytime Delinquents, behind the distinctive Naughty Bottom Burp Buttress. Starting from the left arete, climb the slab trending right and up past two bolts, finishing up the layaways on the right past some good wires and finger sized cams. Stick-clip the first bolt.
Garn Cooper, Richard Bottomley, Lucas Bottomley, Anna Hasan, May 1991. Re-bolted 2023
The small separate buttress about 15m left of the Delinquents Buttress has a clean face line and chockstone filled chimney on the R at a sag bush. Climb up to the ledge on the LH side and a #2RP, then continue back R to the horizontal break. Climb up the sloping ledge and a knifeblade runner, then up to the top, trying not to rain loose blocks onto your belayer.
Evan Peacock, Colin Reed, Roger Parkyn, Jun 1990.
The result of some rather vigorous cleaning techniques... Start left of Daytime Delinquents at the base of a slab. Climb the slab to a stance at the orange wall. Perplexing moves past the bolt, then crank left through the roof to a large ledge before finishing up the face right of the arete to the lower-off.
Roger Parkyn, Al Adams, Evan Peacock, Jun 1990. Re-bolted 2023
Absorbing climbing through the roof. Follow the corner system to the roof being mindful of the hollow sounding flake, then break-out left to a stance at the arete. Up past the roof trending right, and into a straightforward crack to a lower-off.
Al Adams, Garn Cooper, Pete Steane, Dec 1984.
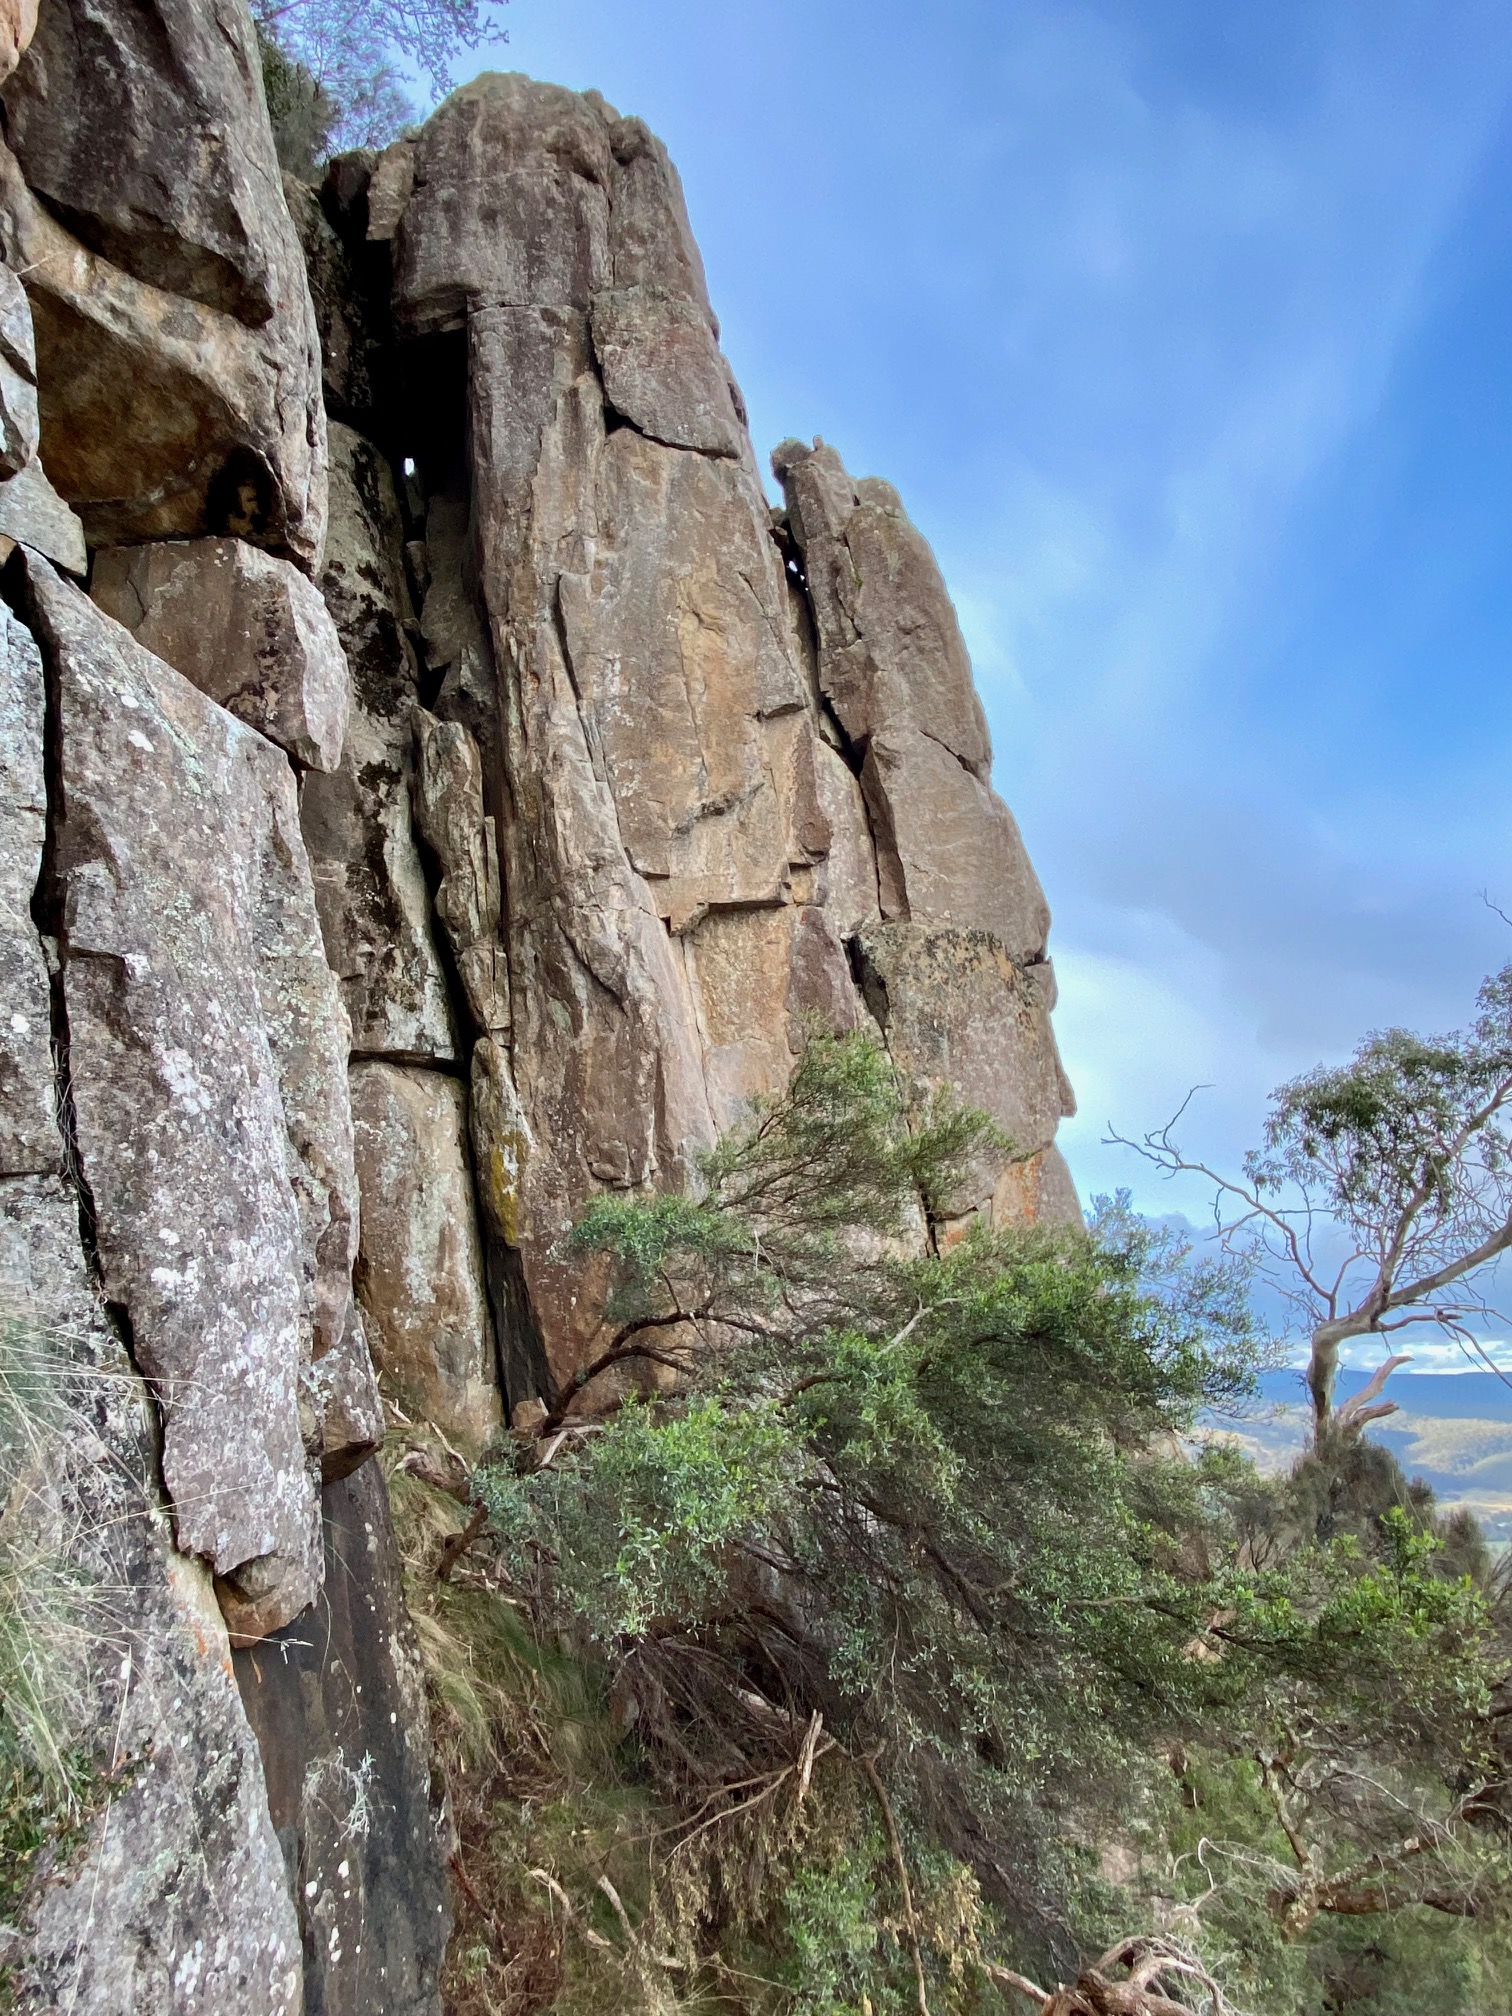
Squeaky Feet Wall
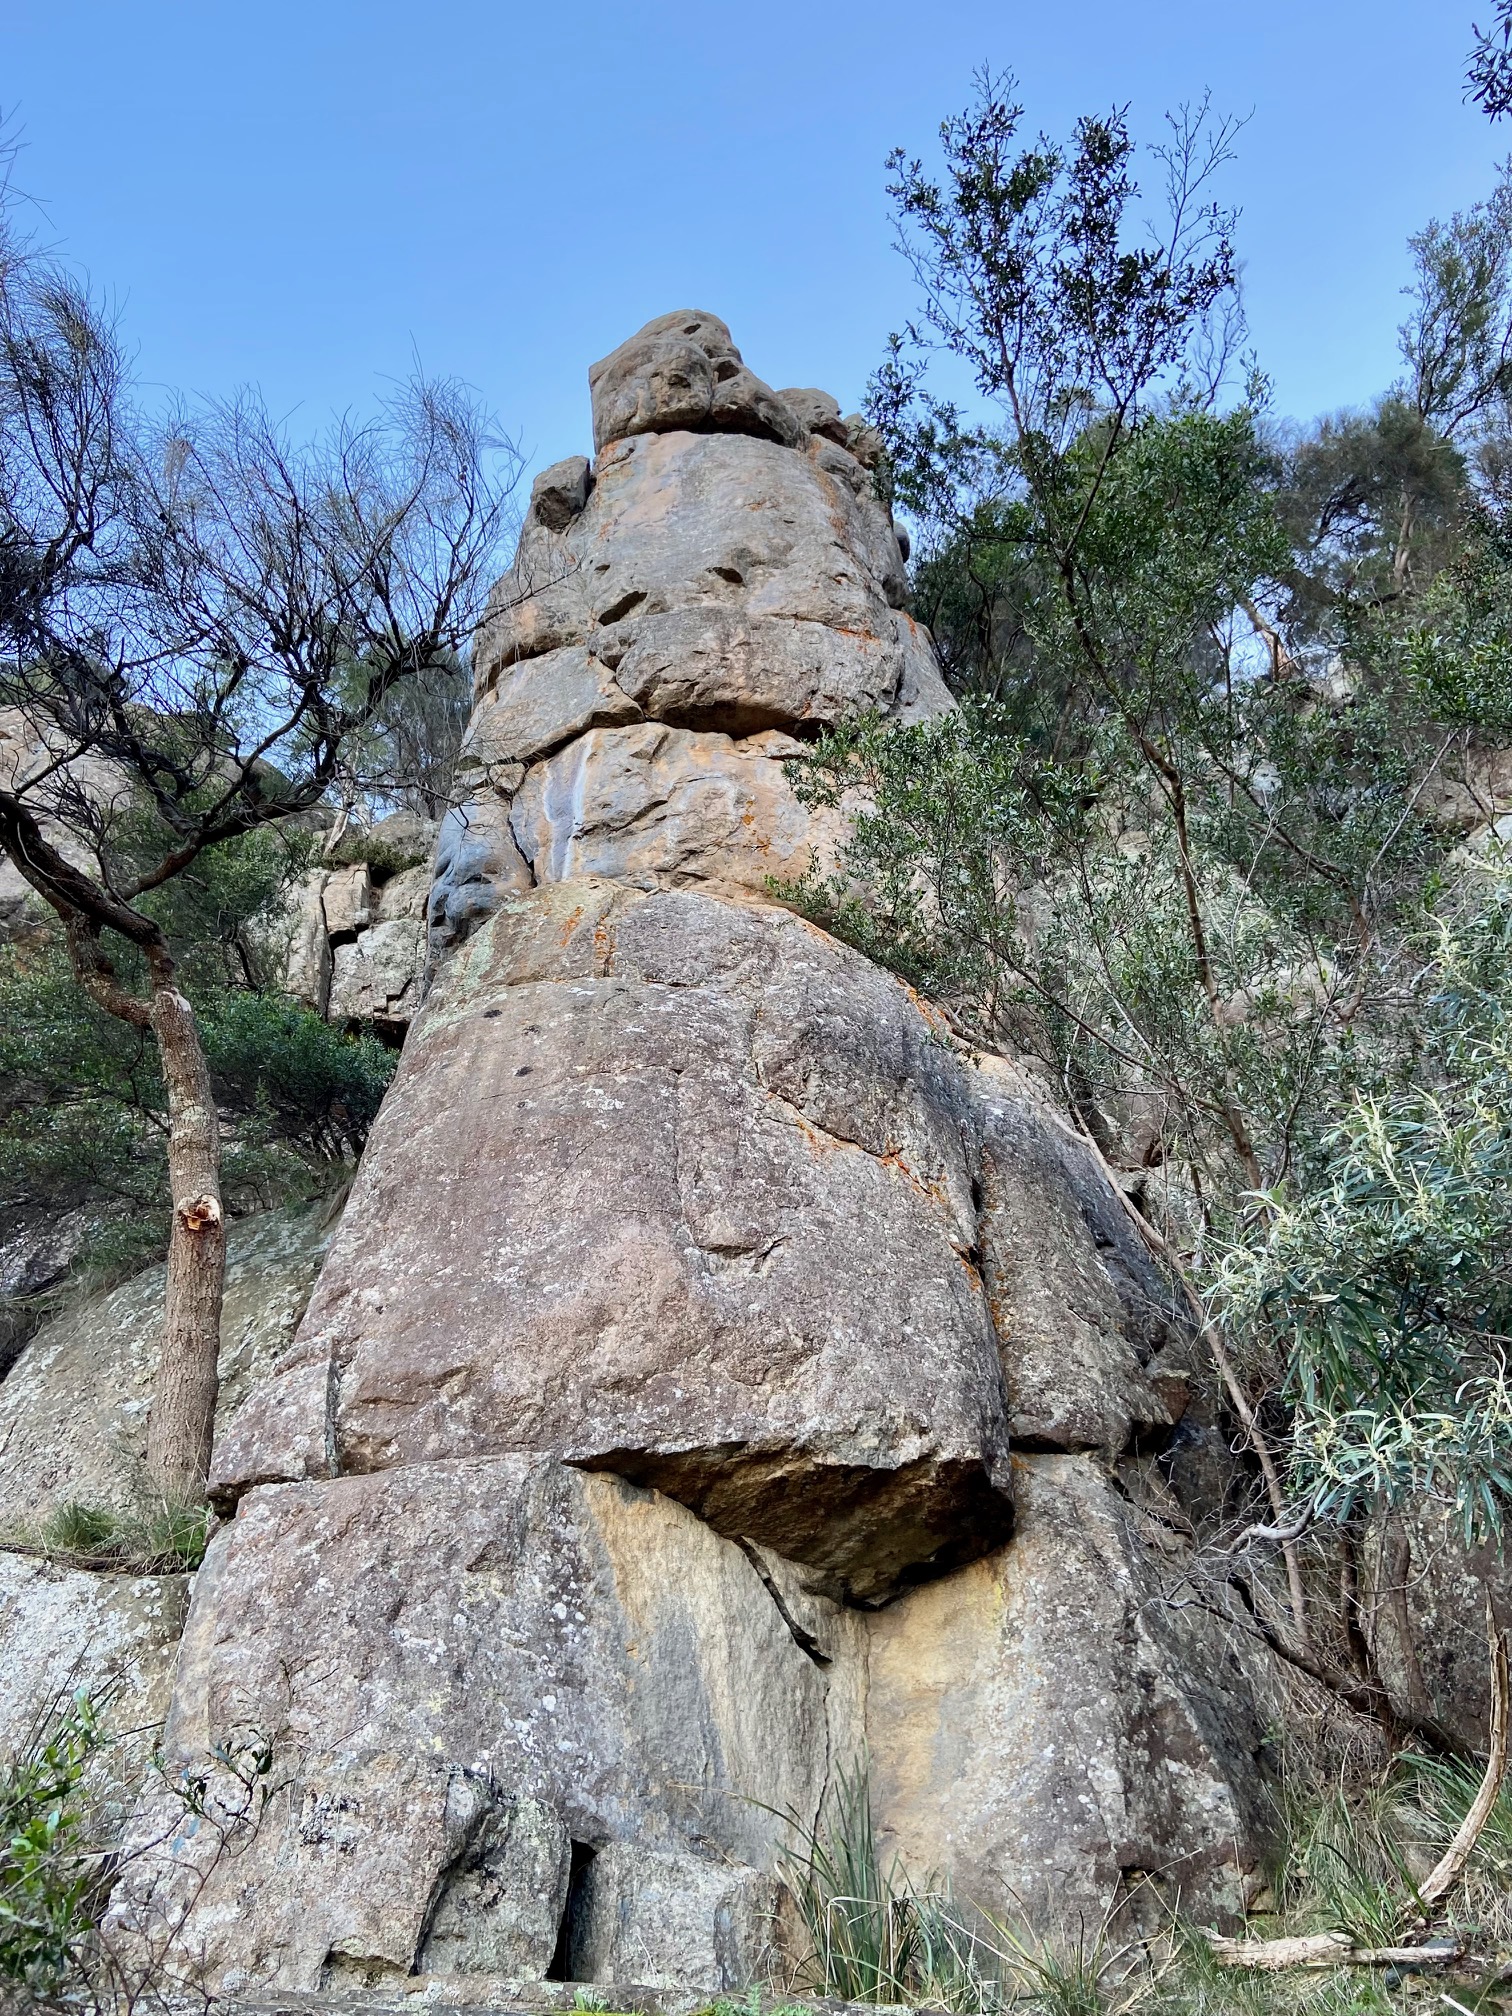
Something Scurrilous Buttress
This is one of the more serious leads at Lowdina and is rarely repeated. Follow the thin seam up the overhanging wall, past the infamous #1 Camalot placement and a couple more 'interesting' pieces to a lower-off. RPs are essential and small offsets cams are useful. A good line that is marred by a step left into the gully/crack that is all too tempting during the desperate crux section at half height.
Evan Peacock, Steve Ford, Al Adams, Colin Reed, Dec 1991.
A diverse outing. Follow the crack system up the face to a delicate stance below a bolt. Pass this into the hand-crack above (crux), then hand traverse out right around the magic wedged block to an awkward mantle to gain the thin crack system above on the left. Follow this to the top and lower-off.
Al Adams, Garn Cooper, Jun 1990. Re-bolted 2022
This route isn't the only thing requiring cleaning. Start at the weakness 3m right of Something Scurrilous. Climb the line to the bulge and pull through it on layaways. Continue up the tight handcrack to where it veers right. Continue up using a layaway edge and move L out into the chimney. Step around the arete and clip the DBB to lower-off.
Al Adams, Evan Peacock, Roger Parkyn, Jun 1990.
Start on the downhill prow of the Catoblepas buttress, on a brushed slab. Climb easily up the slab to the roof, through this (RP runner) and continue easily.
Al Adams, Evan Peacock, Steve Ford, Colin Reed, Dec 1991.
About 10m L of Oisin is another large buttress. The line starts in a widish crack on the RH side of the buttress, then trends L onto the eastward facing side. Continue straight up with the crux at the top.
Garn Cooper, Al Adams, Simon Stubbs, Oct 1988.
Oisin and Alekhines Defence Buttress
The large buttress with an obvious wide crack (Oisin) running through the nose. The buttress can be accessed easily from where the orange-taped track splits off to the Ferio Buttress.
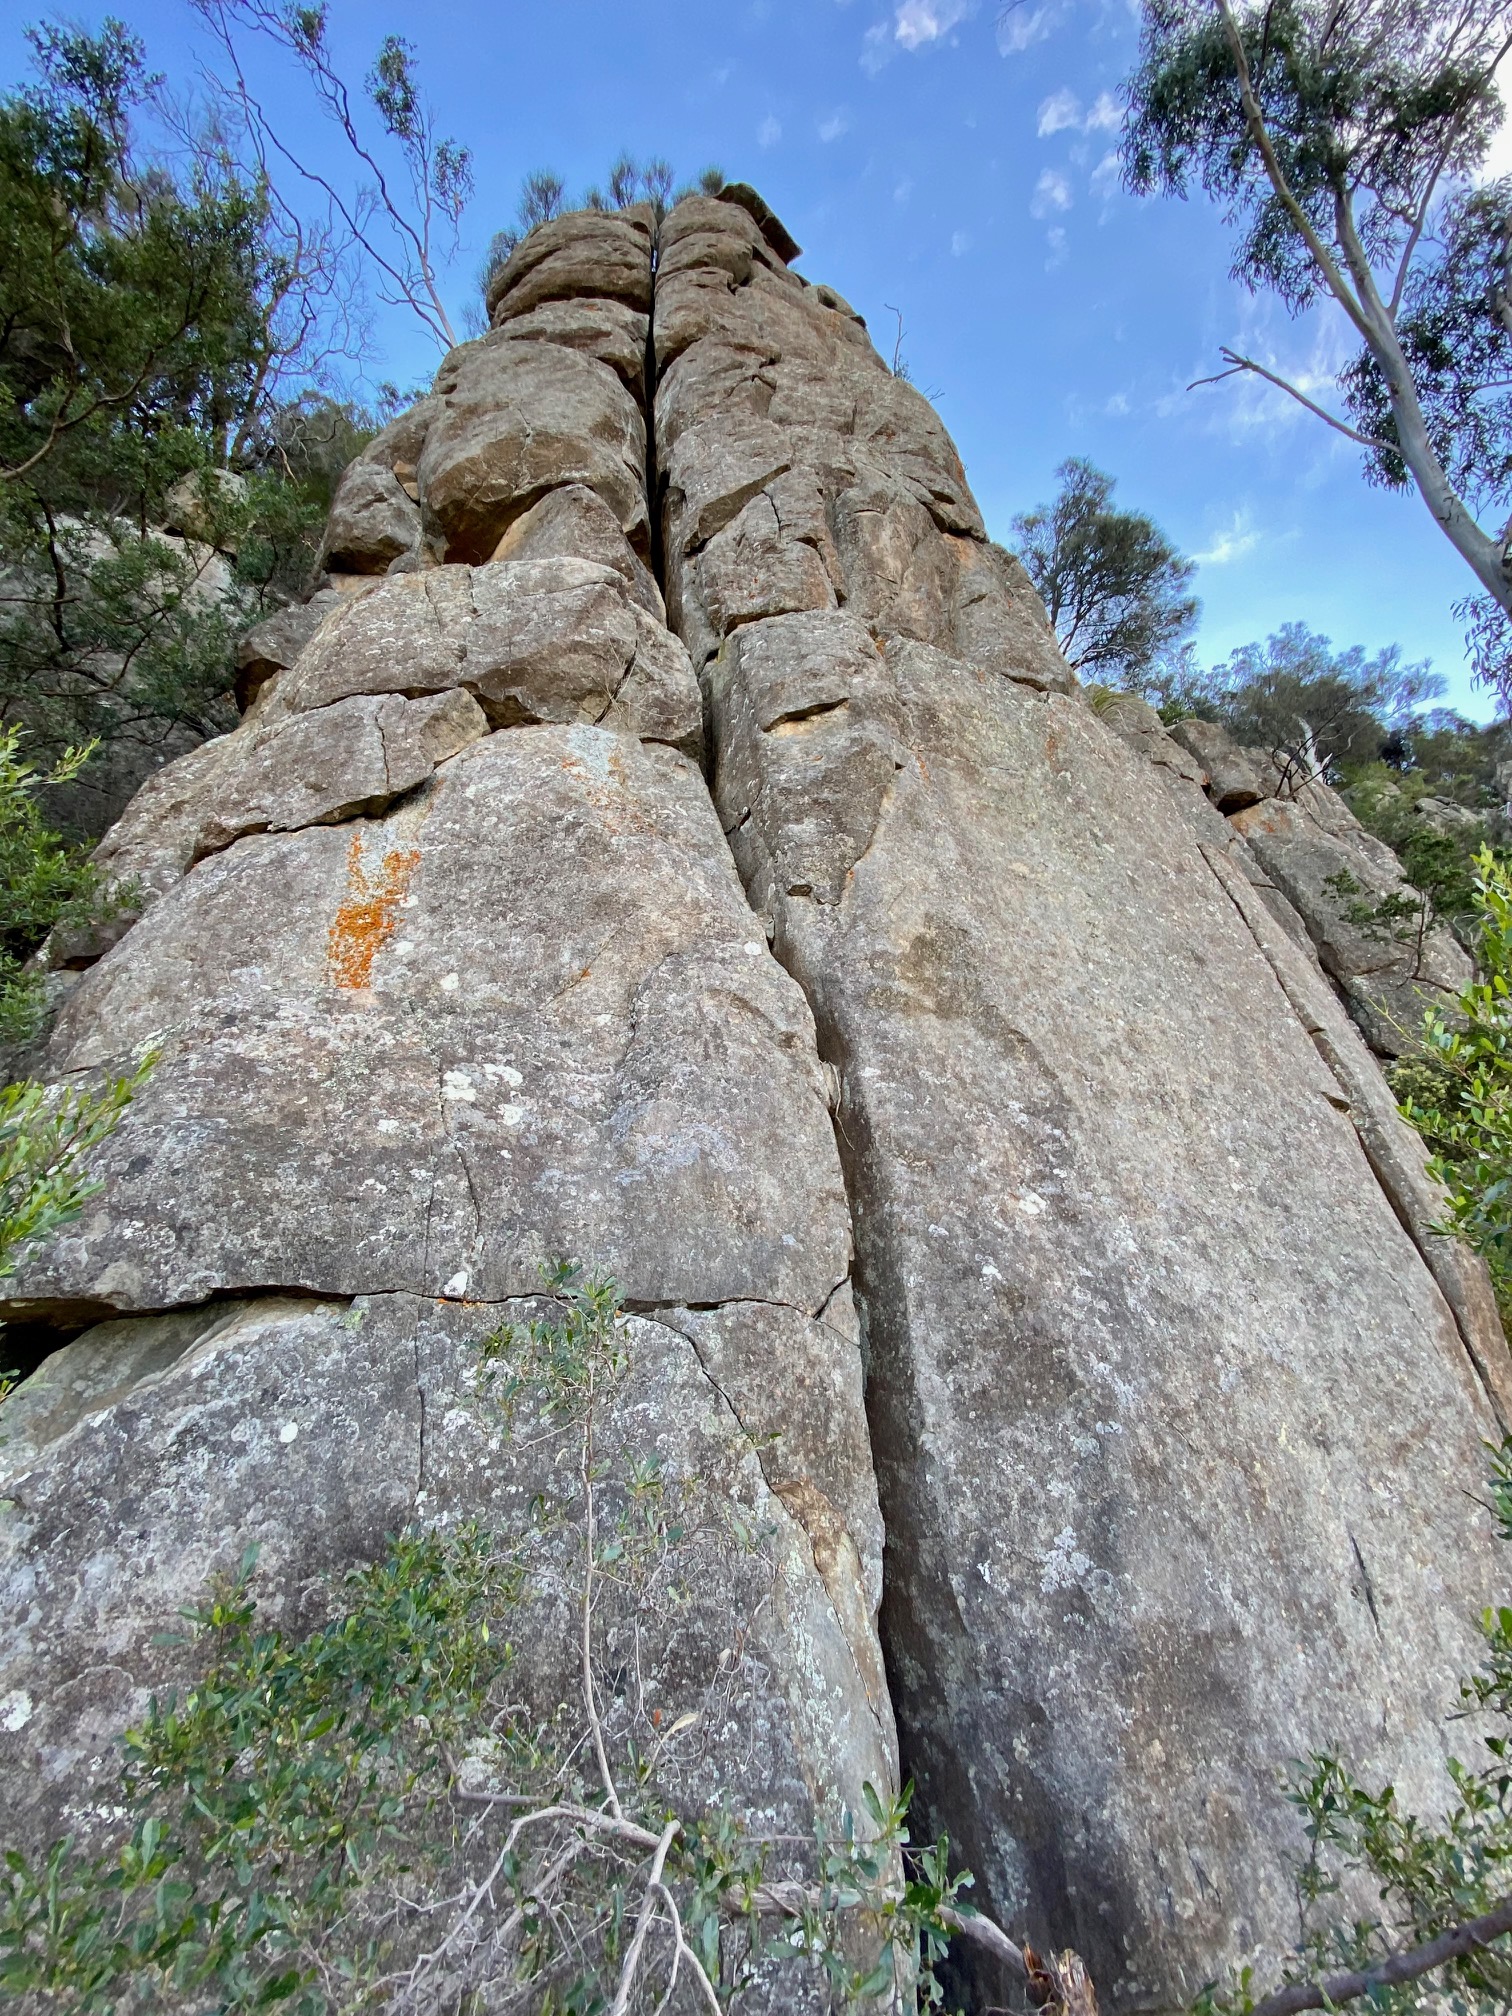
Oisin Buttress
The flakes on the right should be treated with care, as should the possum! Climbs the wide crack (#5 handy) on the big buttress, starting from the elevated rock platform which you gain from the Ferio area. Scramble off the back and rap-down using the Gecko / Alekhines Defence anchors.
Robert McMahon, Peter Jackson, Chris Viney, 1969.
A major disappointment once you have done the flake. Climb the crack up the LHS of a flake 3m R of Oisin (of dubious attachment). Either continue up the dirty gully above, or move L and climb the RH edge of the delicately stacked flakes just R of Oison.
Peter Jackson, Bob deCesare, Jan 1981.
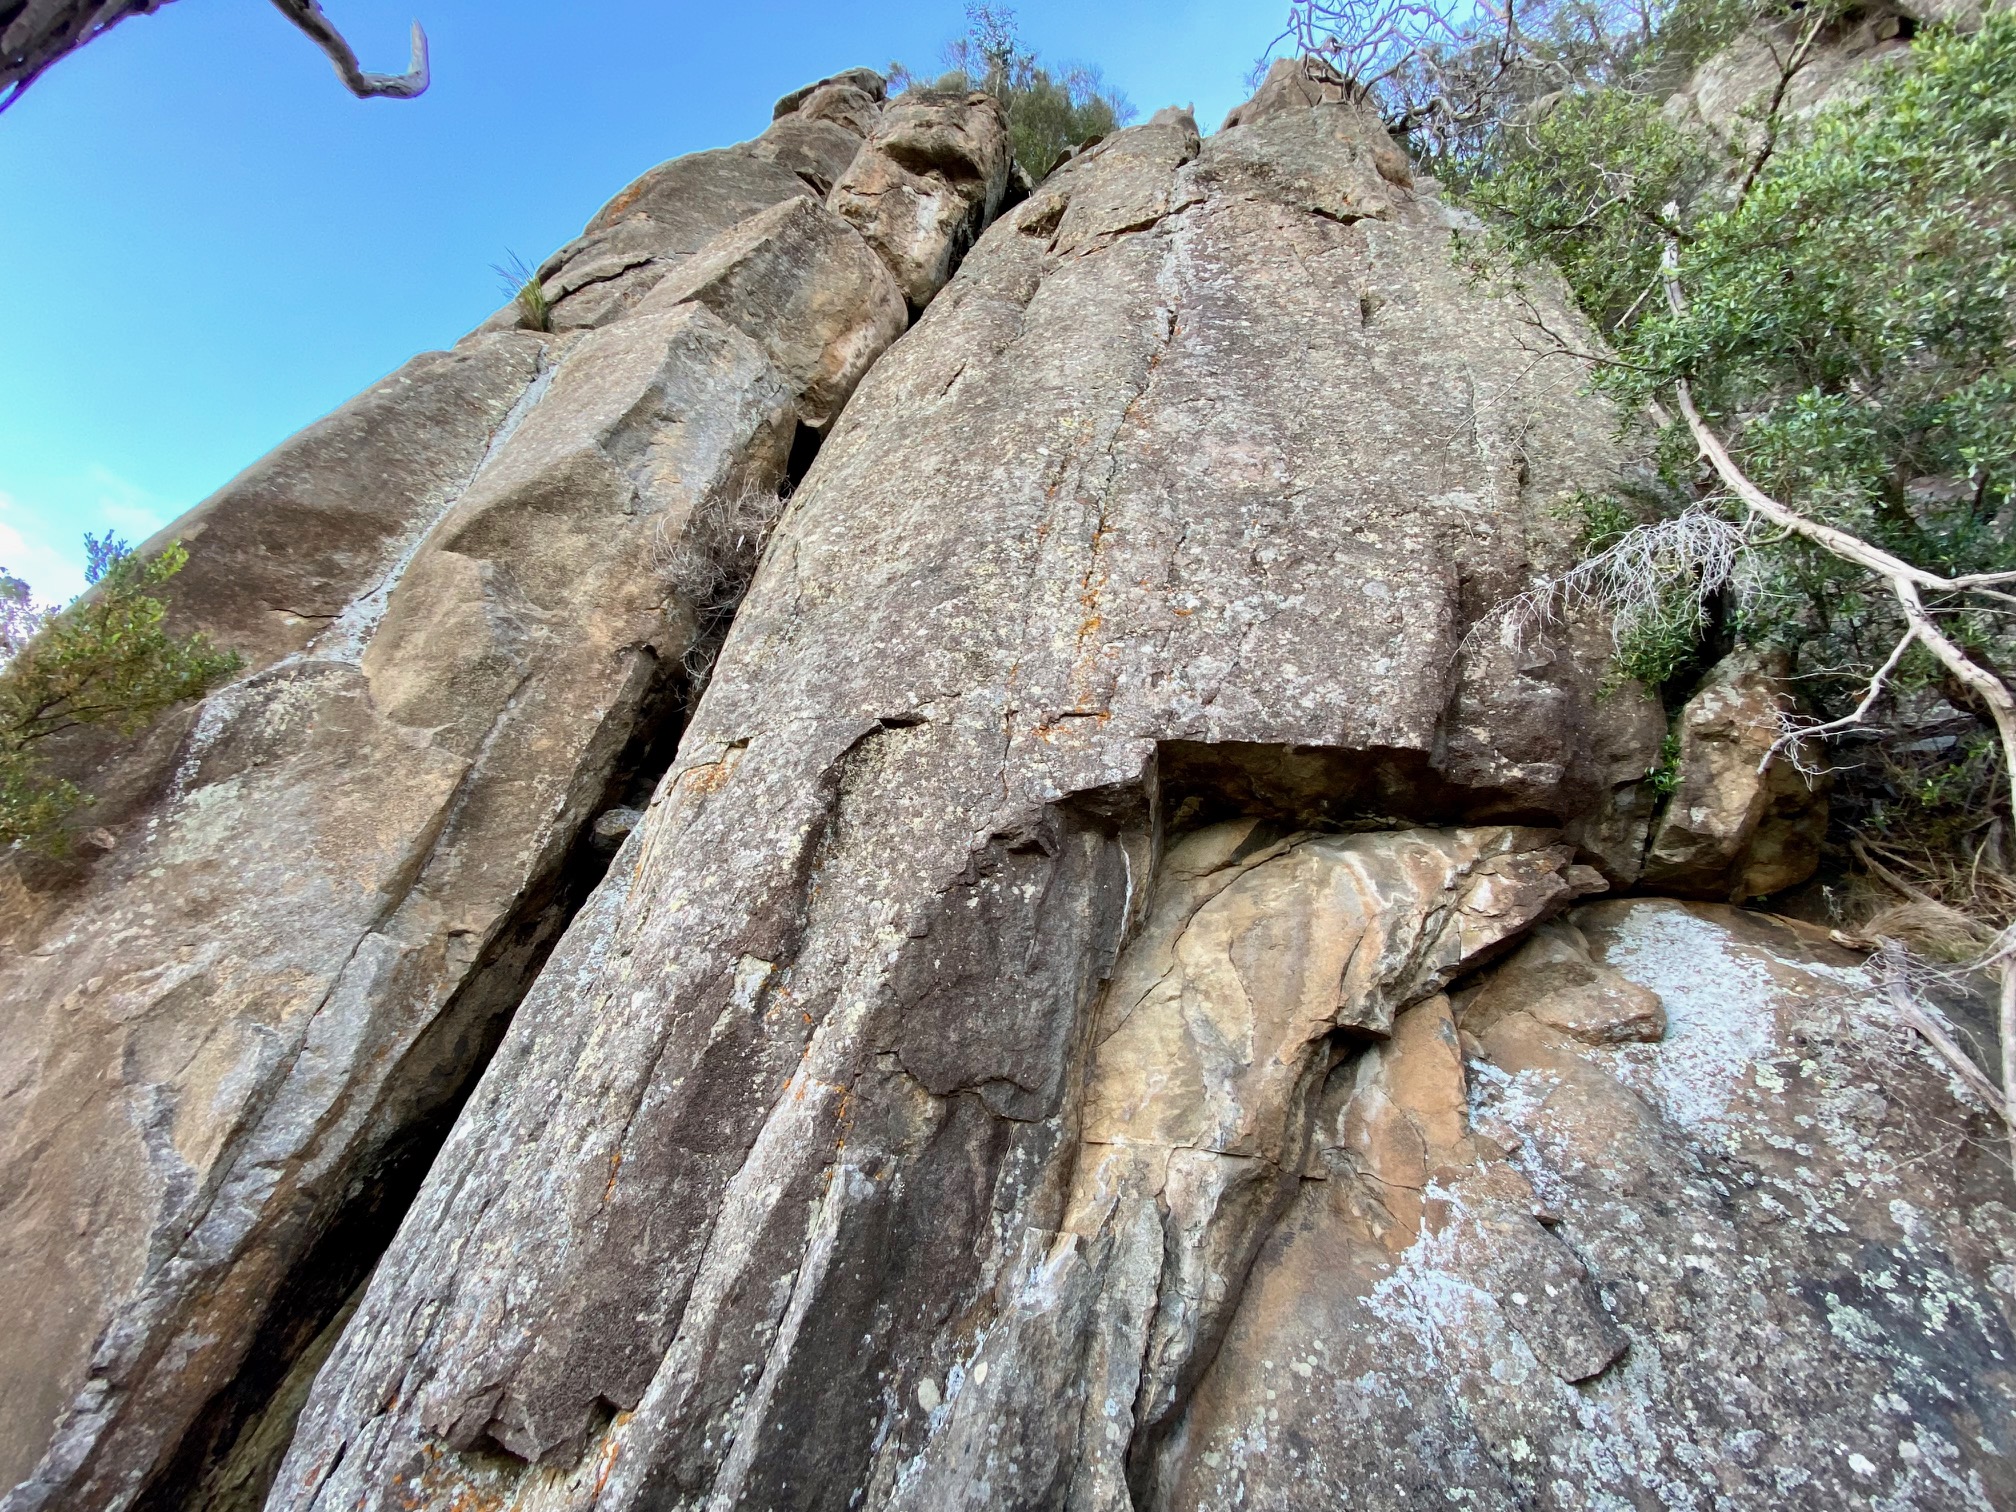
Alekhines Defence
The slightly overhanging problem just R of Mulliner's Code. Climb up into the small sentry box until the line joins the aforementioned then continue up that line.
Evan Peacock, Aug 1988.
The line just L of the Alekhine's Defence buttress. Climb the arête carefully on large holds to the horizontal break at 4m where runners appear. Continue up Mulliner's Code.
Evan Peacock, Sep 1989.
The direct start and finish to Alekhines Defence - and the pick of the two. Superb climbing. The bold start requires strong fingers and a good head - RPs and some lateral thinking is required to get through the first few metres, to where the excellent protection begins about 5m up. RPs, small wires and finger sized cams essential.
Adrian Herington, Doug Bruce, 1985.
Also a bold start. Start up the slab on the right hand side and climb through the overlap (Shallow RPs in seam on right). Continue up the face trending diagonally left to gain the crack where the good gear begins and follow this to finish. RPs, small wires and finger sized cams are the go.
The original finish went up the groove on the left, but the described route above is better.
Garn Cooper, Al Adams, Oct 1984.
Ferio Buttress
For this area, take the uphill track as you pass Directissimo Man instead of following the orange-taped track down the hill. Lower-offs have been installed for convenient descent from the routes. Some of the routes tend to have Casuarina leaves fall into them if they haven't been climbed in recently - please give them a quick clean if you're on-route!
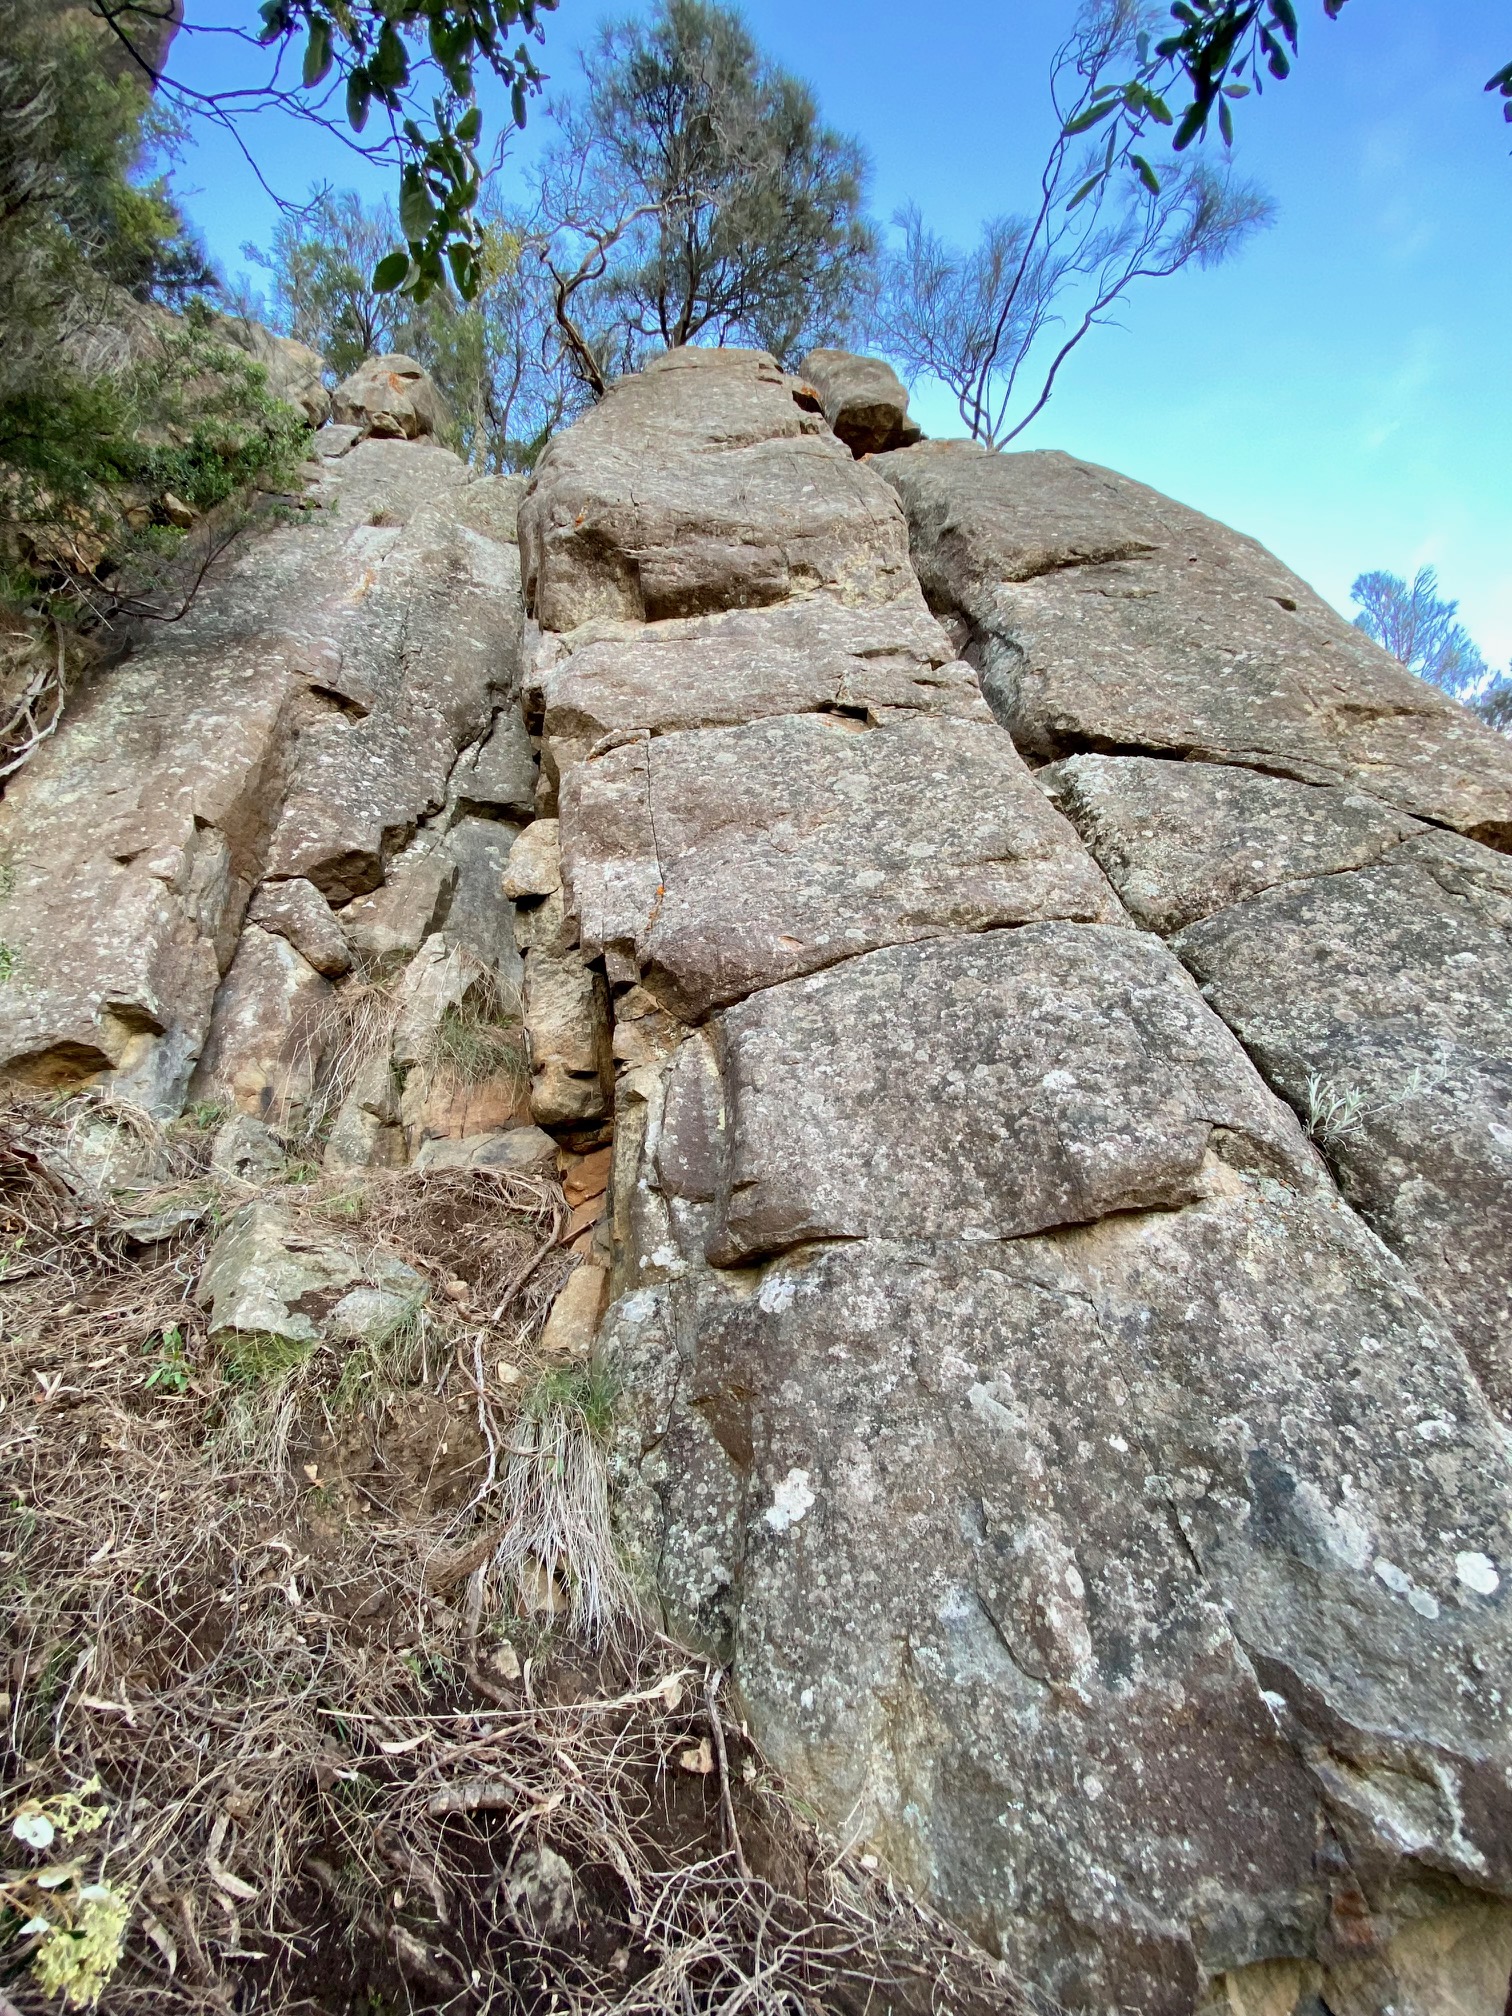
Ferio Buttress LHS
The undescribed, unnamed and unknown route up the overhanging wall to the left of Electric Exercise Bike.
Unkown project / FA (Not described in original EP guide)
Classy. Climb the groove/layaway to the left of the narrow chimney until you can trend left onto the slab. A couple of peculiar RPs protect the next moves until reaching a stance below the thin crack (good RPs and micro-cams available here). Climb this, with a hard move to obtain the jug which is often covered in she-oak needles. Saunter on up the easy crack above to the top and lower-off.
Al Adams, Garn Cooper, Oct 1984.
Continually entertaining climbing up the face and left arête. Head up the arete and through a bulge past two bolts to a stance. Arrange some snazzy RP placements and a 0-cam in the horizontal break then move up to the salvation of another bolt. Continue up the face/arête past some cam placements around the left of the arete to the lower-off. RPs and a single rack of cams from BD #0.2 - #0.5 essential.
Al Adams, Garn Cooper, Evan Peacock, Colin Reed, May 1990. Re-bolted (1st bolt added with FA permission) in 2022.
Want a bet? A contrived variant to the Ants Pants, but picks the best climbing. As for the Ants Pants, but trend left through a bulge (good wire) and follow the face before going back into the crack. Despite appearances, protection is very good.
Al Adams, Garn Cooper, Pete Steane, Aug 1985.
Recently cleaned and with the possum evicted, this is quite a pleasant lead for the grade. Follow the crack up the face of the buttress, stepping left at the top to clip the chains.
Bob Bull, John Moore, Apr 1971.
Add a grade if you're short. Carefully climb the RHS arete to the first bolt and head up past the small overlap to a stance at the second bolt. Continue straight-up the face with some choice moves (crux) to an obscure small wire behind the flake/jug. Either continue up the face on RP3's in the seam to the right or step left here and continue to the anchor.
Al Adams, Garn Cooper, Sep 1985. Re-bolted (1st bolt added with FA permission) in 2022.
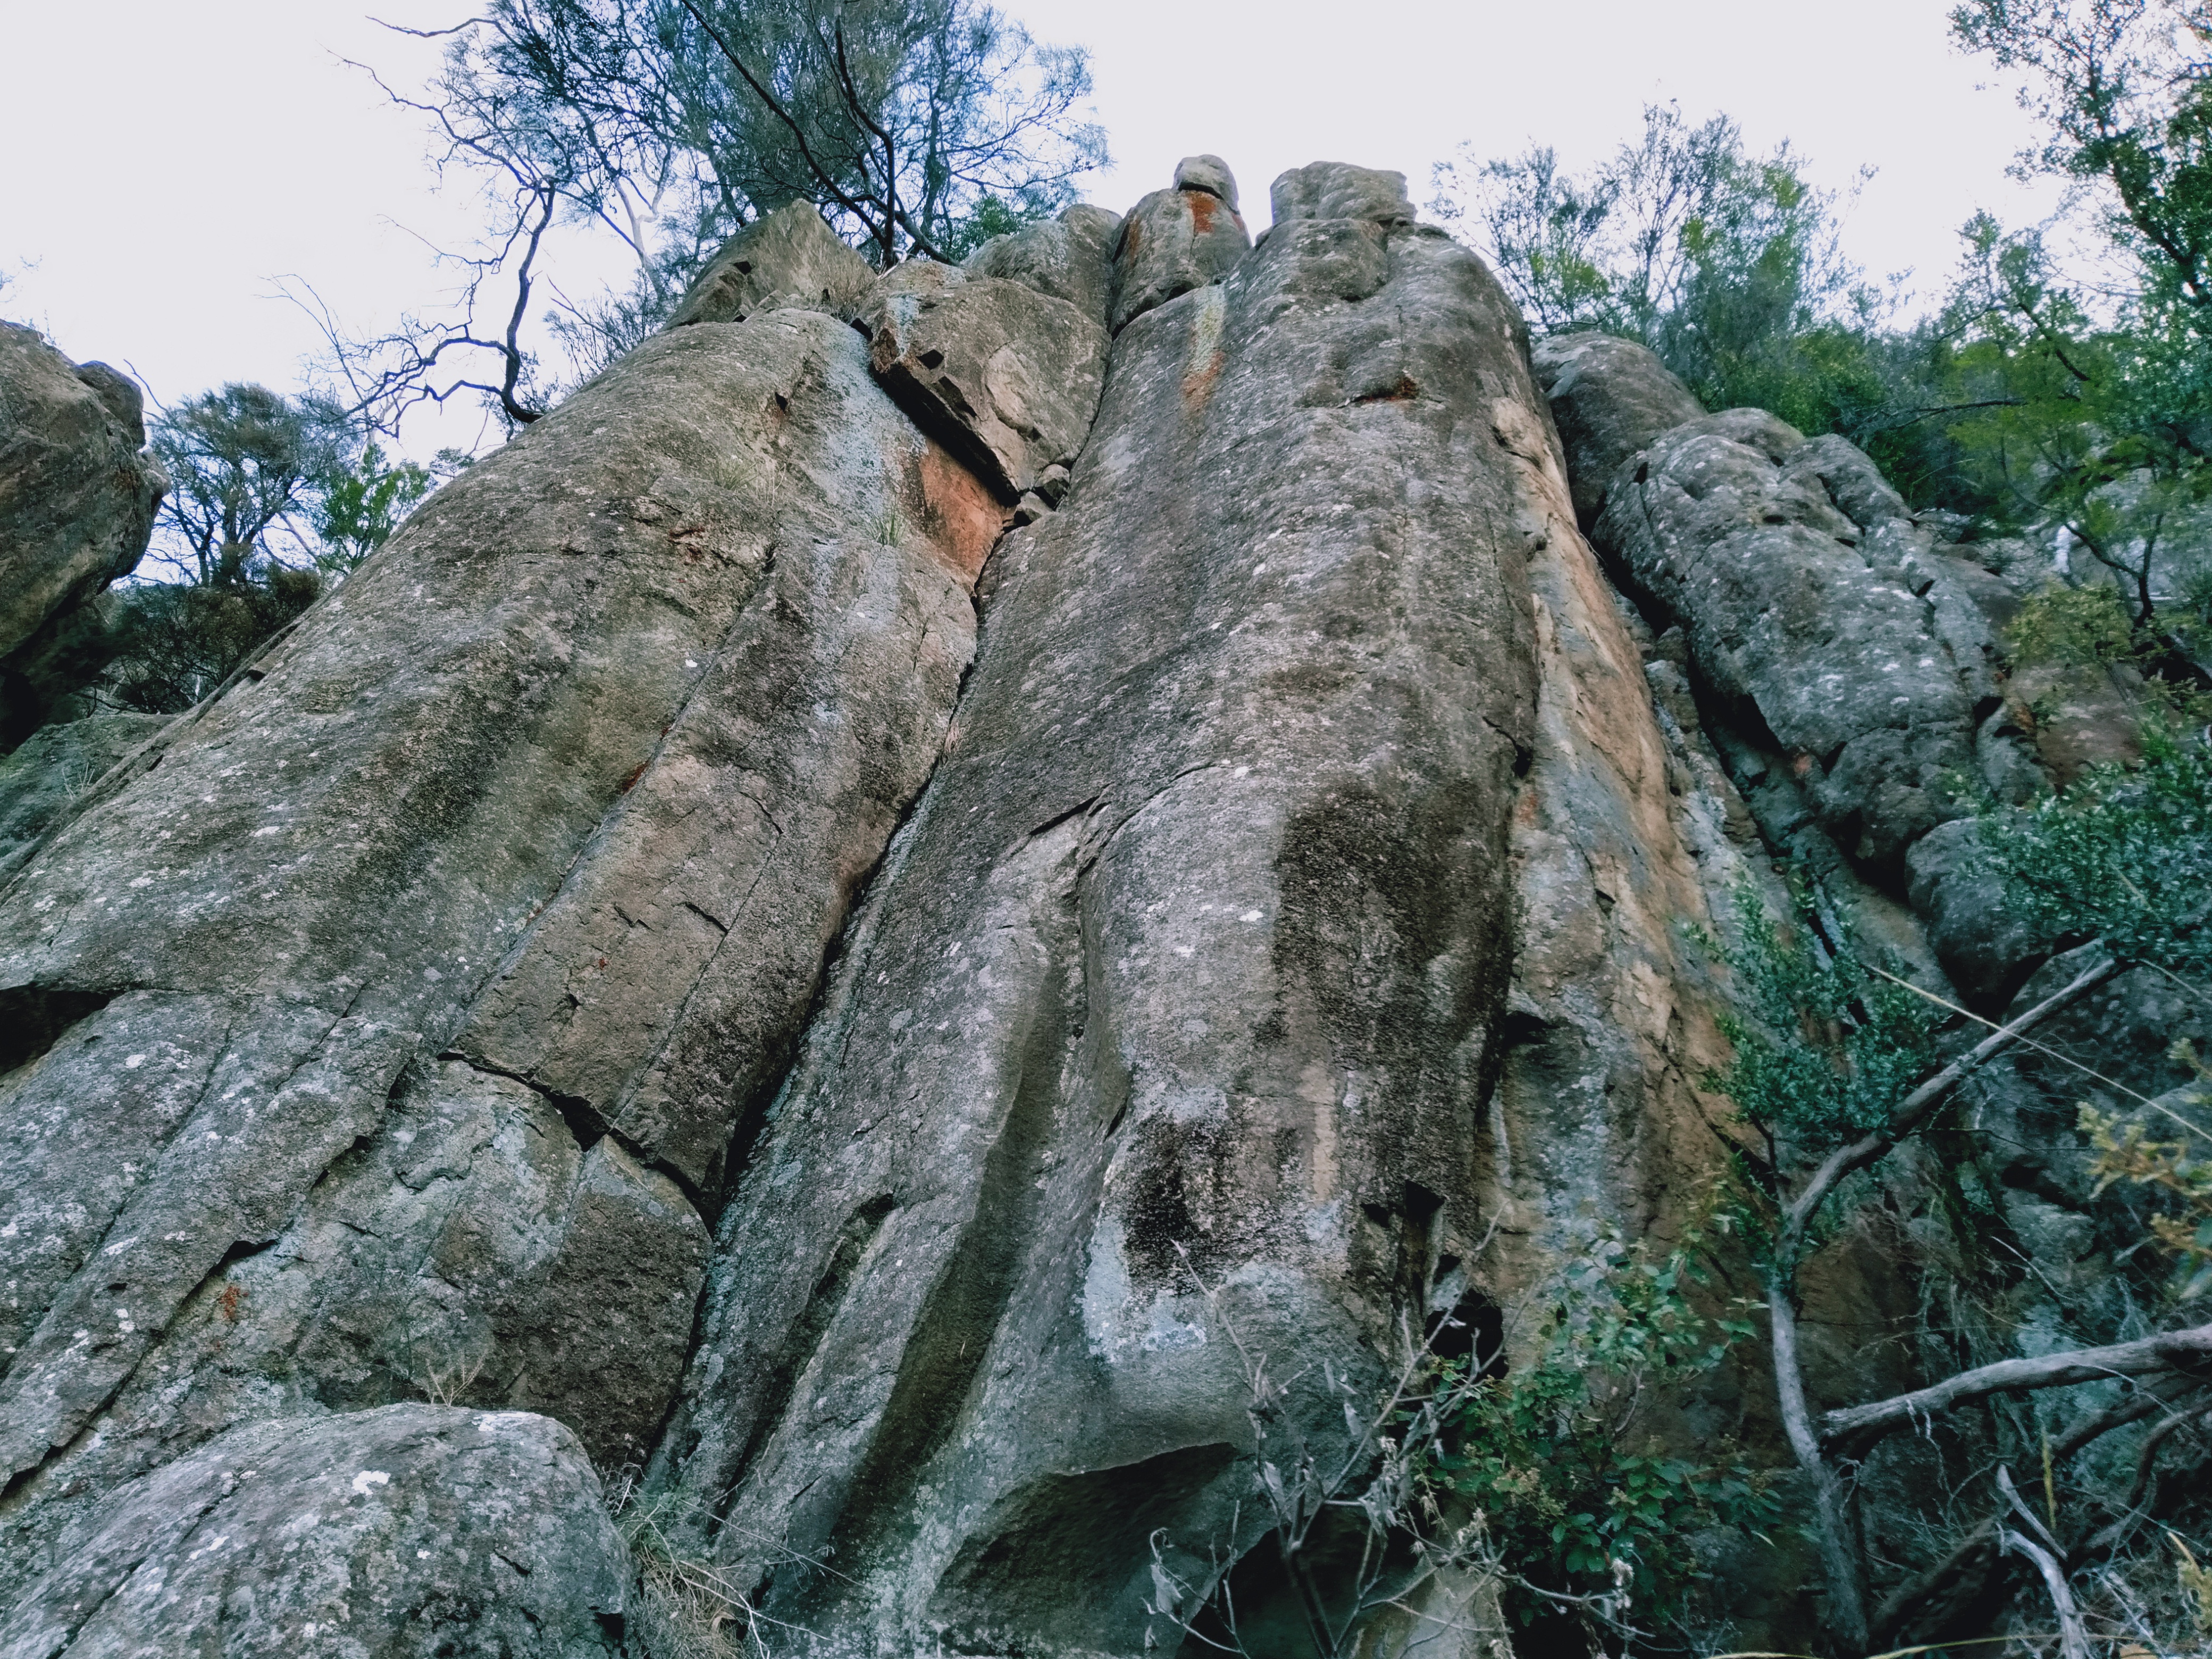
Ferio Buttress RHS
Classic moves. Starting at the base of the corner, layback and jam up the corner to the DBB lower-off.
Peter Jackson, Michael McHugh, Di Batten, Jan 1971.
Originally started through the groove until a key hold was pulled-off. Start up Ferio to the thin ledge on the right wall at 4m. Purchase some life insurance, then boldly head-out right and climb the arete. The first couple RP placements from the ledge are placed blind in the seam to the right - abseil inspection is recommended. RPs from #1 to #5 essential.
Al Adams, Evan Peacock, Jun 1988.
An unassuming route, but every move is gold. Follows the fused seam around the arete from Ferio. Layback the seam until it ends, then step left into Tall Dudes and finish up this - step left to lower-off as for Ferio. RPs from #1 to #5 and very small micro-cams are essential. Abseil inspection and double ropes (single folded in half) is recommended.
Evan Peacock, Colin Reed, Steve Ford, Steve Carter, Jan 1990.
Directissimo Man, Cryptic Clue and Mr Queasy Area
The next routes are located between the Ferio Buttress and the Zundapp Alcove in an amphitheatre of rock. The track runs straight past the base of Directissimo Man.
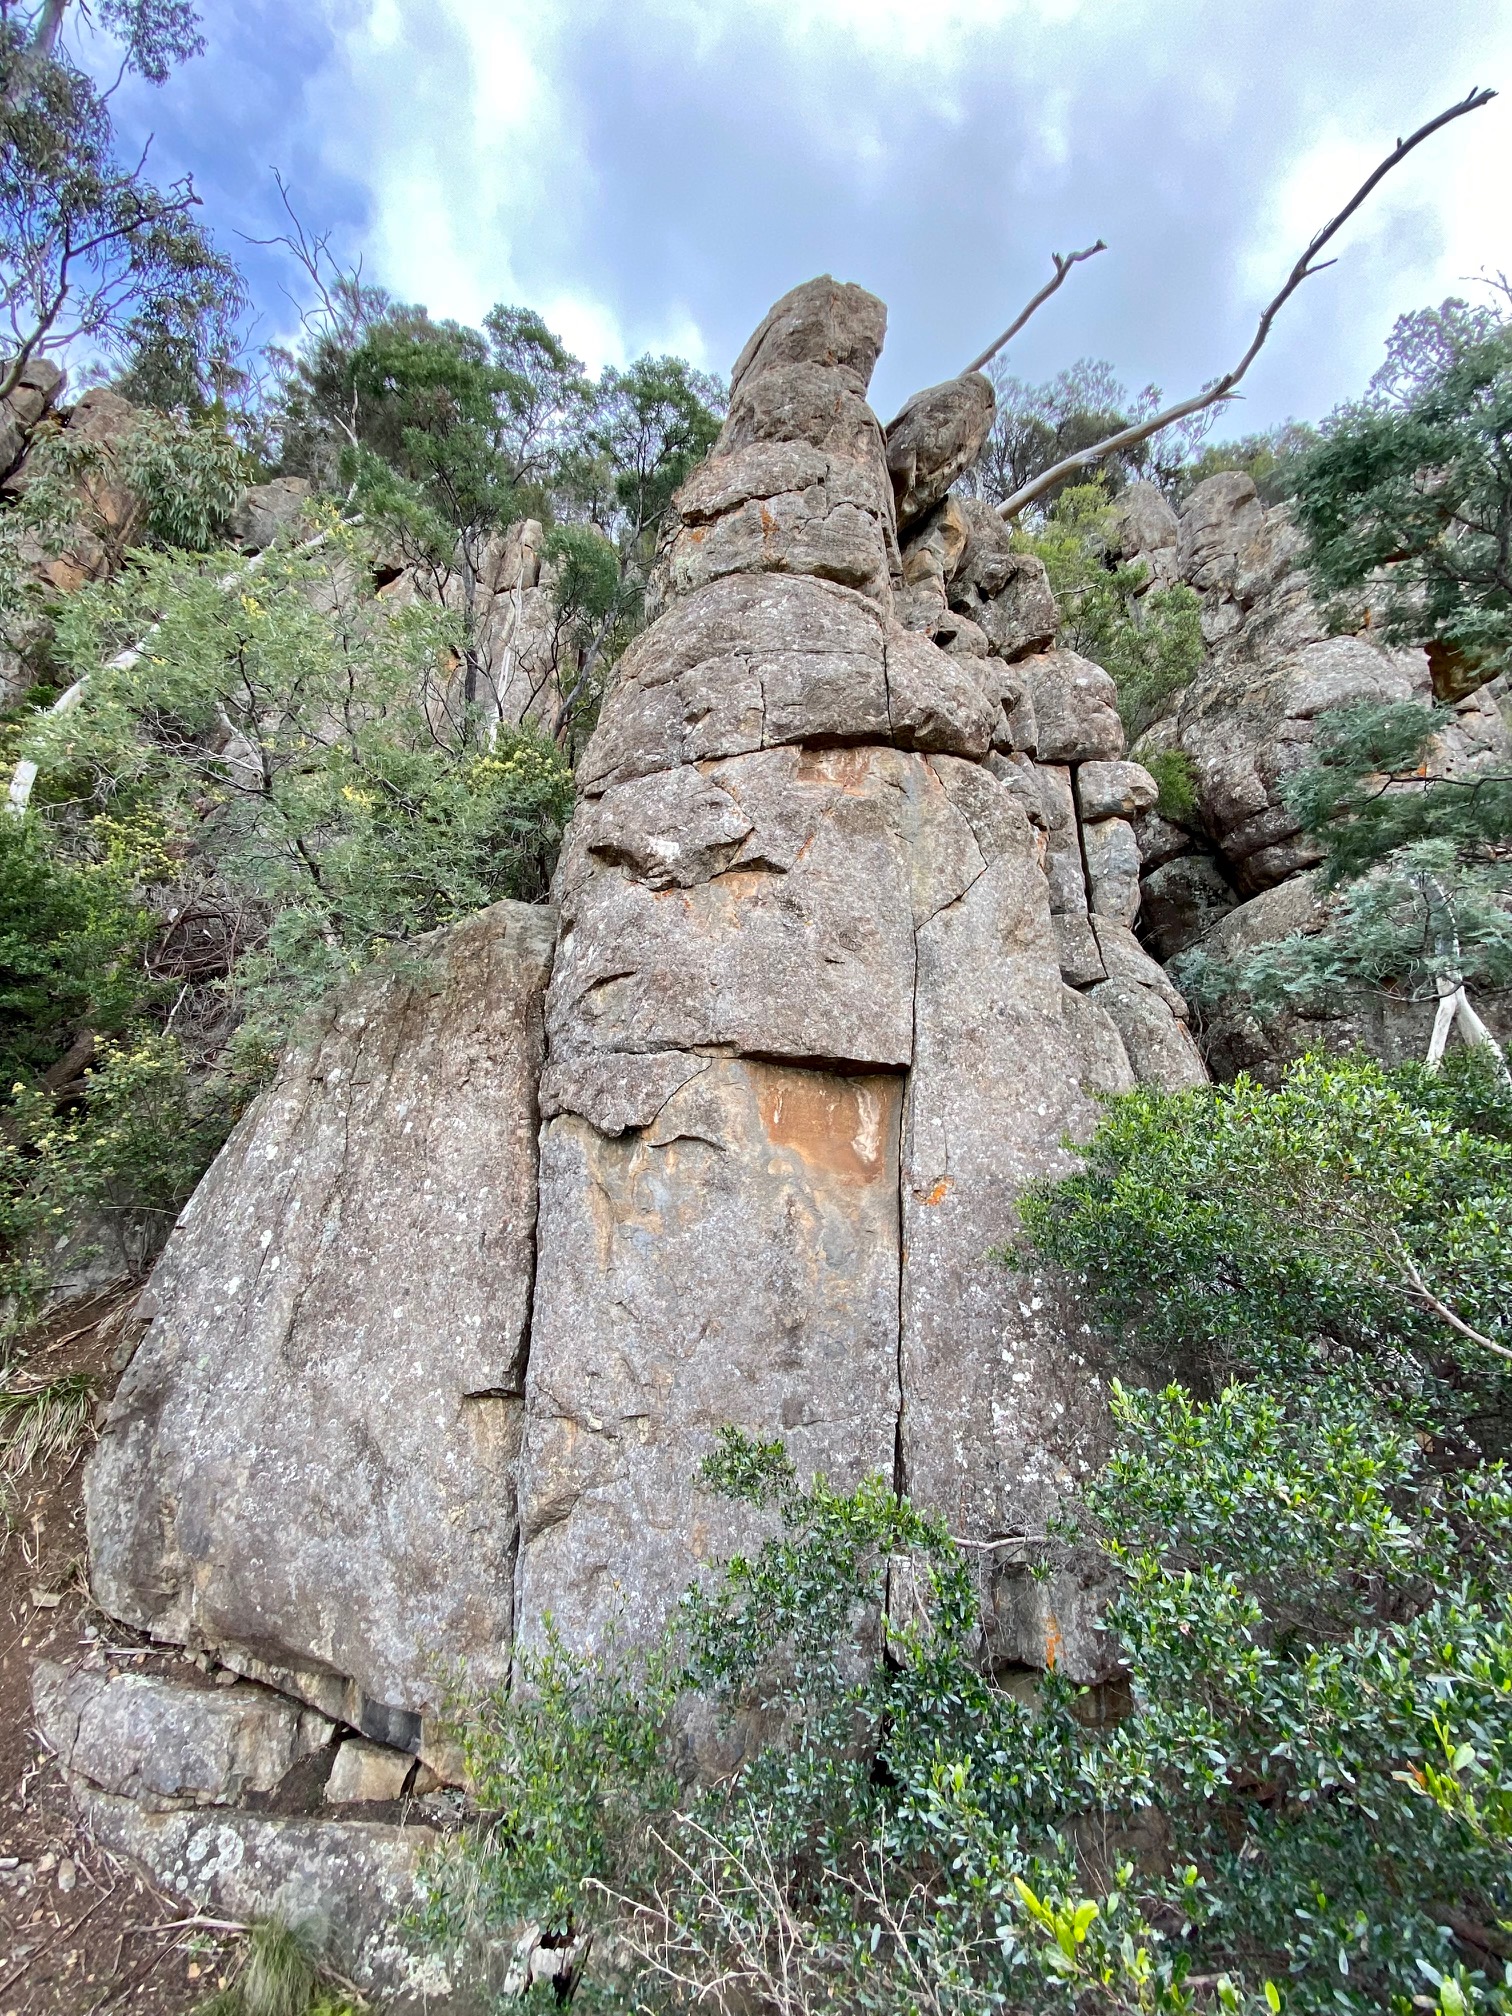
Directissimo Man Buttress
Climbs the nose of the buttress which you come across just before the Ferio Buttress. From the base of the flat rock platform, climb the obvious crack and face holds to the top. Walk-off.
Al Adams, Jul 1984.
Reading the guide to find the route optional. Climb the loose and mossy chimney to the right of the buttress. Delightful.
Bonnie MacAdam, Vanessa Tonet, May 2022
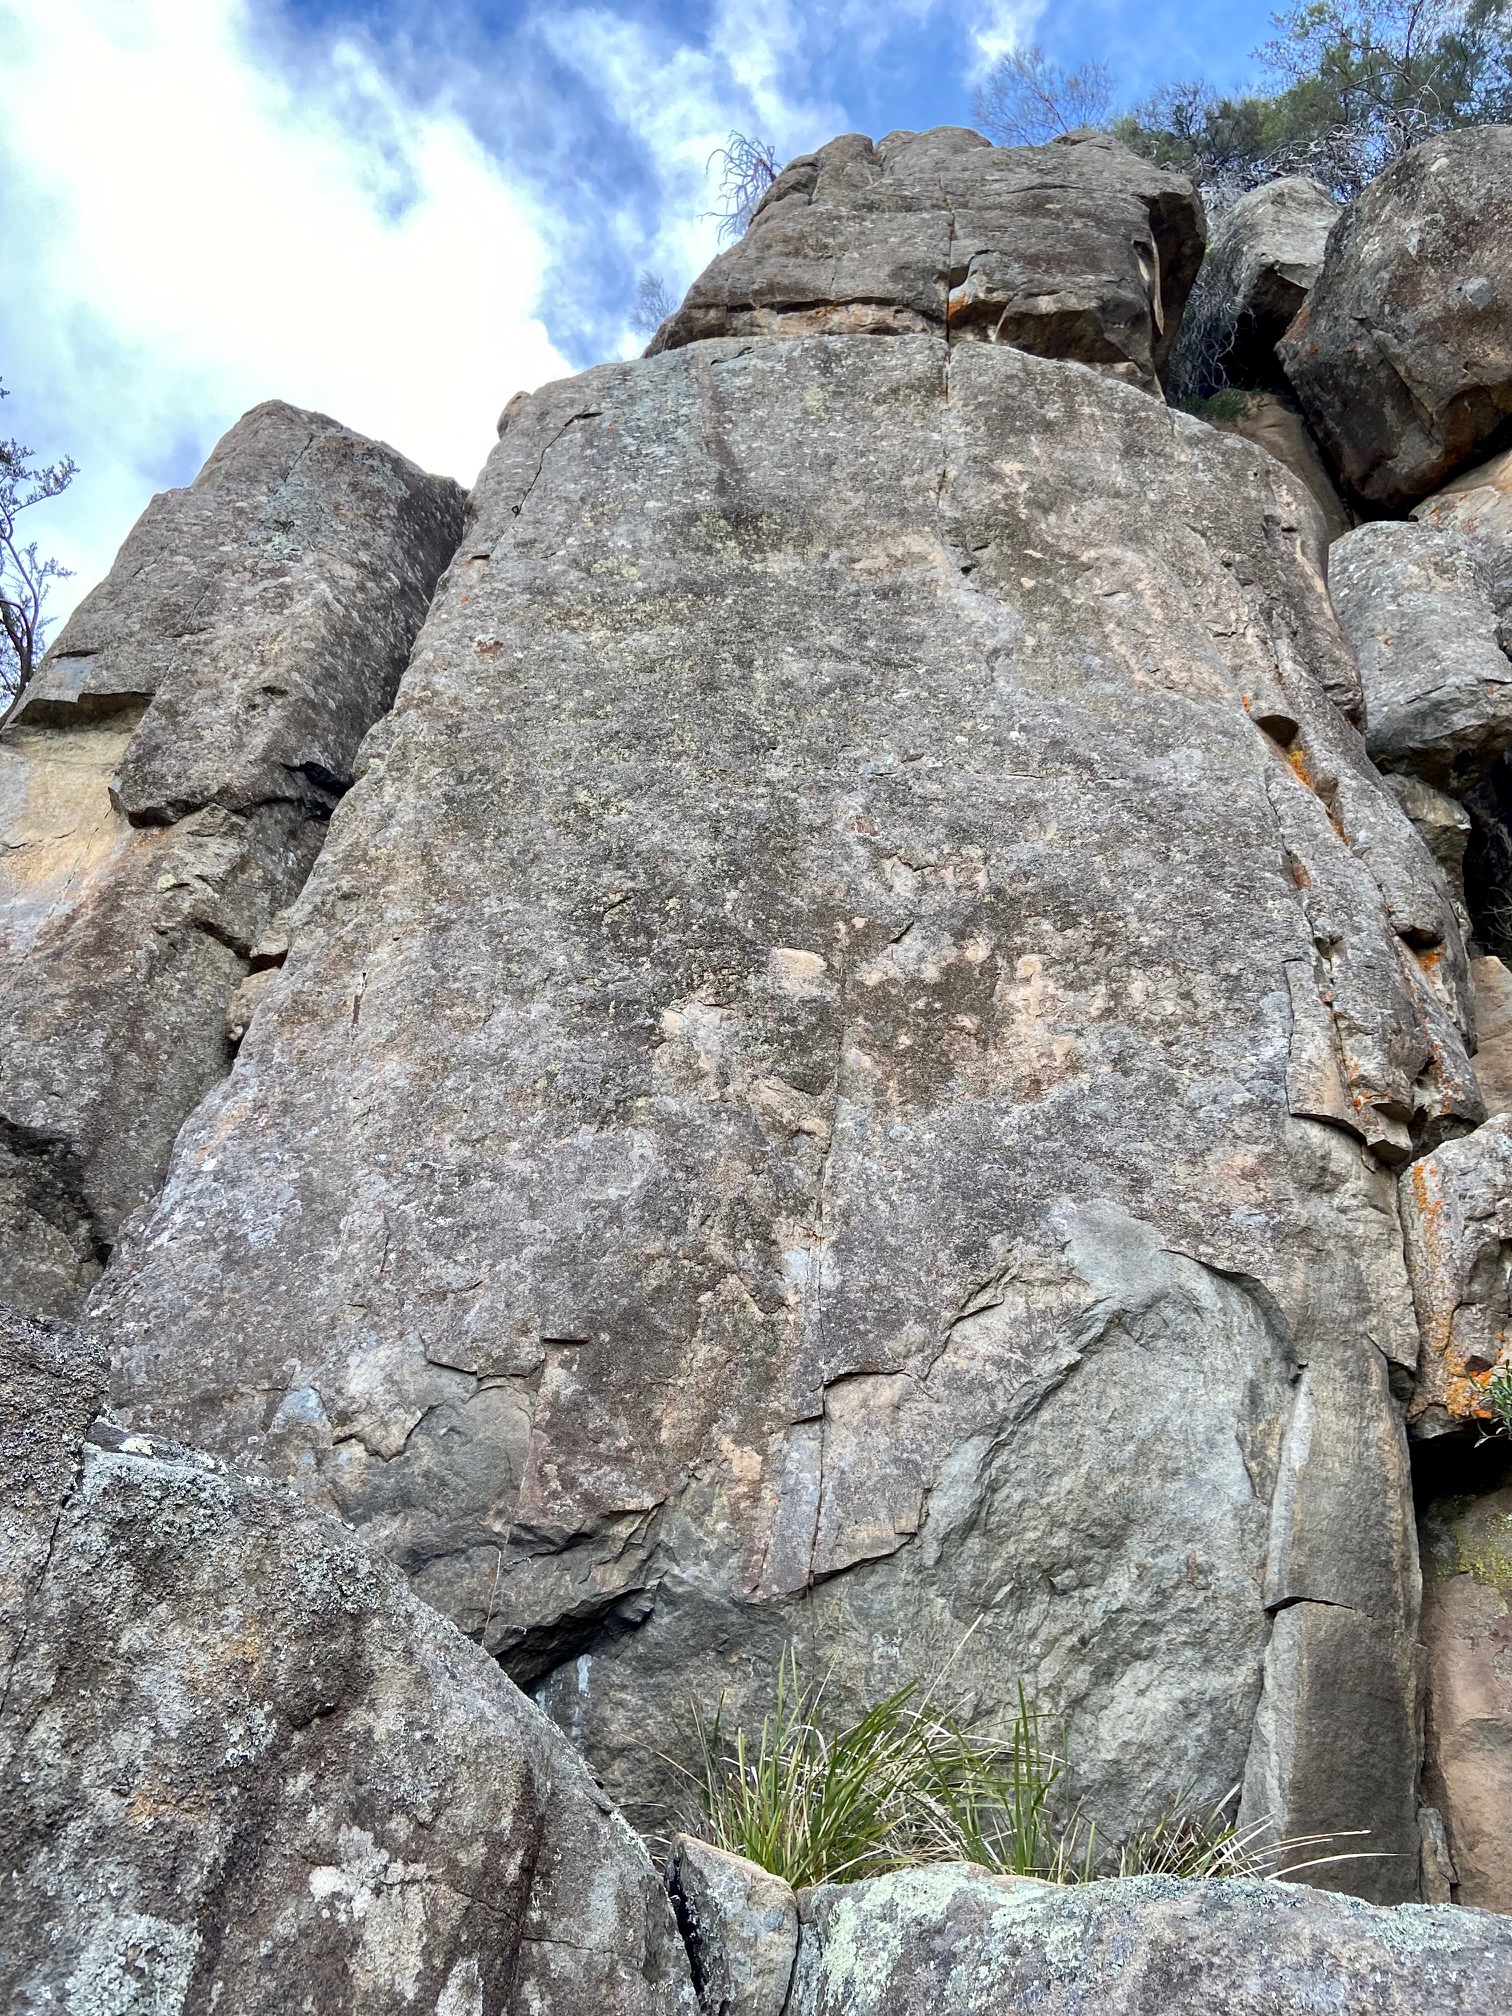
Cryptic Clue Buttress
The boulder problem immediately L of Cryptic Clue (past the chimney).
Colleen McCullough, Noel Ferrier, Jun 1990.
Another utterly contrived test piece. Uphill in the gully L of Mr Queasy is a blank looking wall broken by a horizontal at about 7m. Climb the face on the LH side of the wall using a bolt and a pin for protection (still there in Oct 2021) - but the LH arête is out of bounds! There are two loose blocks at the top, though they are keyed in.
Al Adams, Evan Peacock, Oct 1988.
The face to the right of Cryptic Clue. Start on the RH edge, on face moves. Mantle up onto some slopes, stand, place RPs, then follow the incipient crack to the horizontal break. Finish straight up on good face holds.
Evan Peacock, Al Adams, Oct 1988.
At the beginning of the notch is a prominent slab on the uphill side. Climb the slab to the ledge, then up the groove and through the bulge on the R.
Al Adams, Evan Peacock, Jul 1988.
Across the small gully right of Anagram is a brushed face with a thin crackline starting at half height. Climb the easy crack to a ledge and a #2RP aid move (or if you have a robotic arm climb it free via a desperately wide pinching layaway - awaiting a FFA). Clip the BR from a small edge, then continue up to a horizontal break and easy ground once the crack is attained.
Evan Peacock, Colin Reed, Jun 1990.
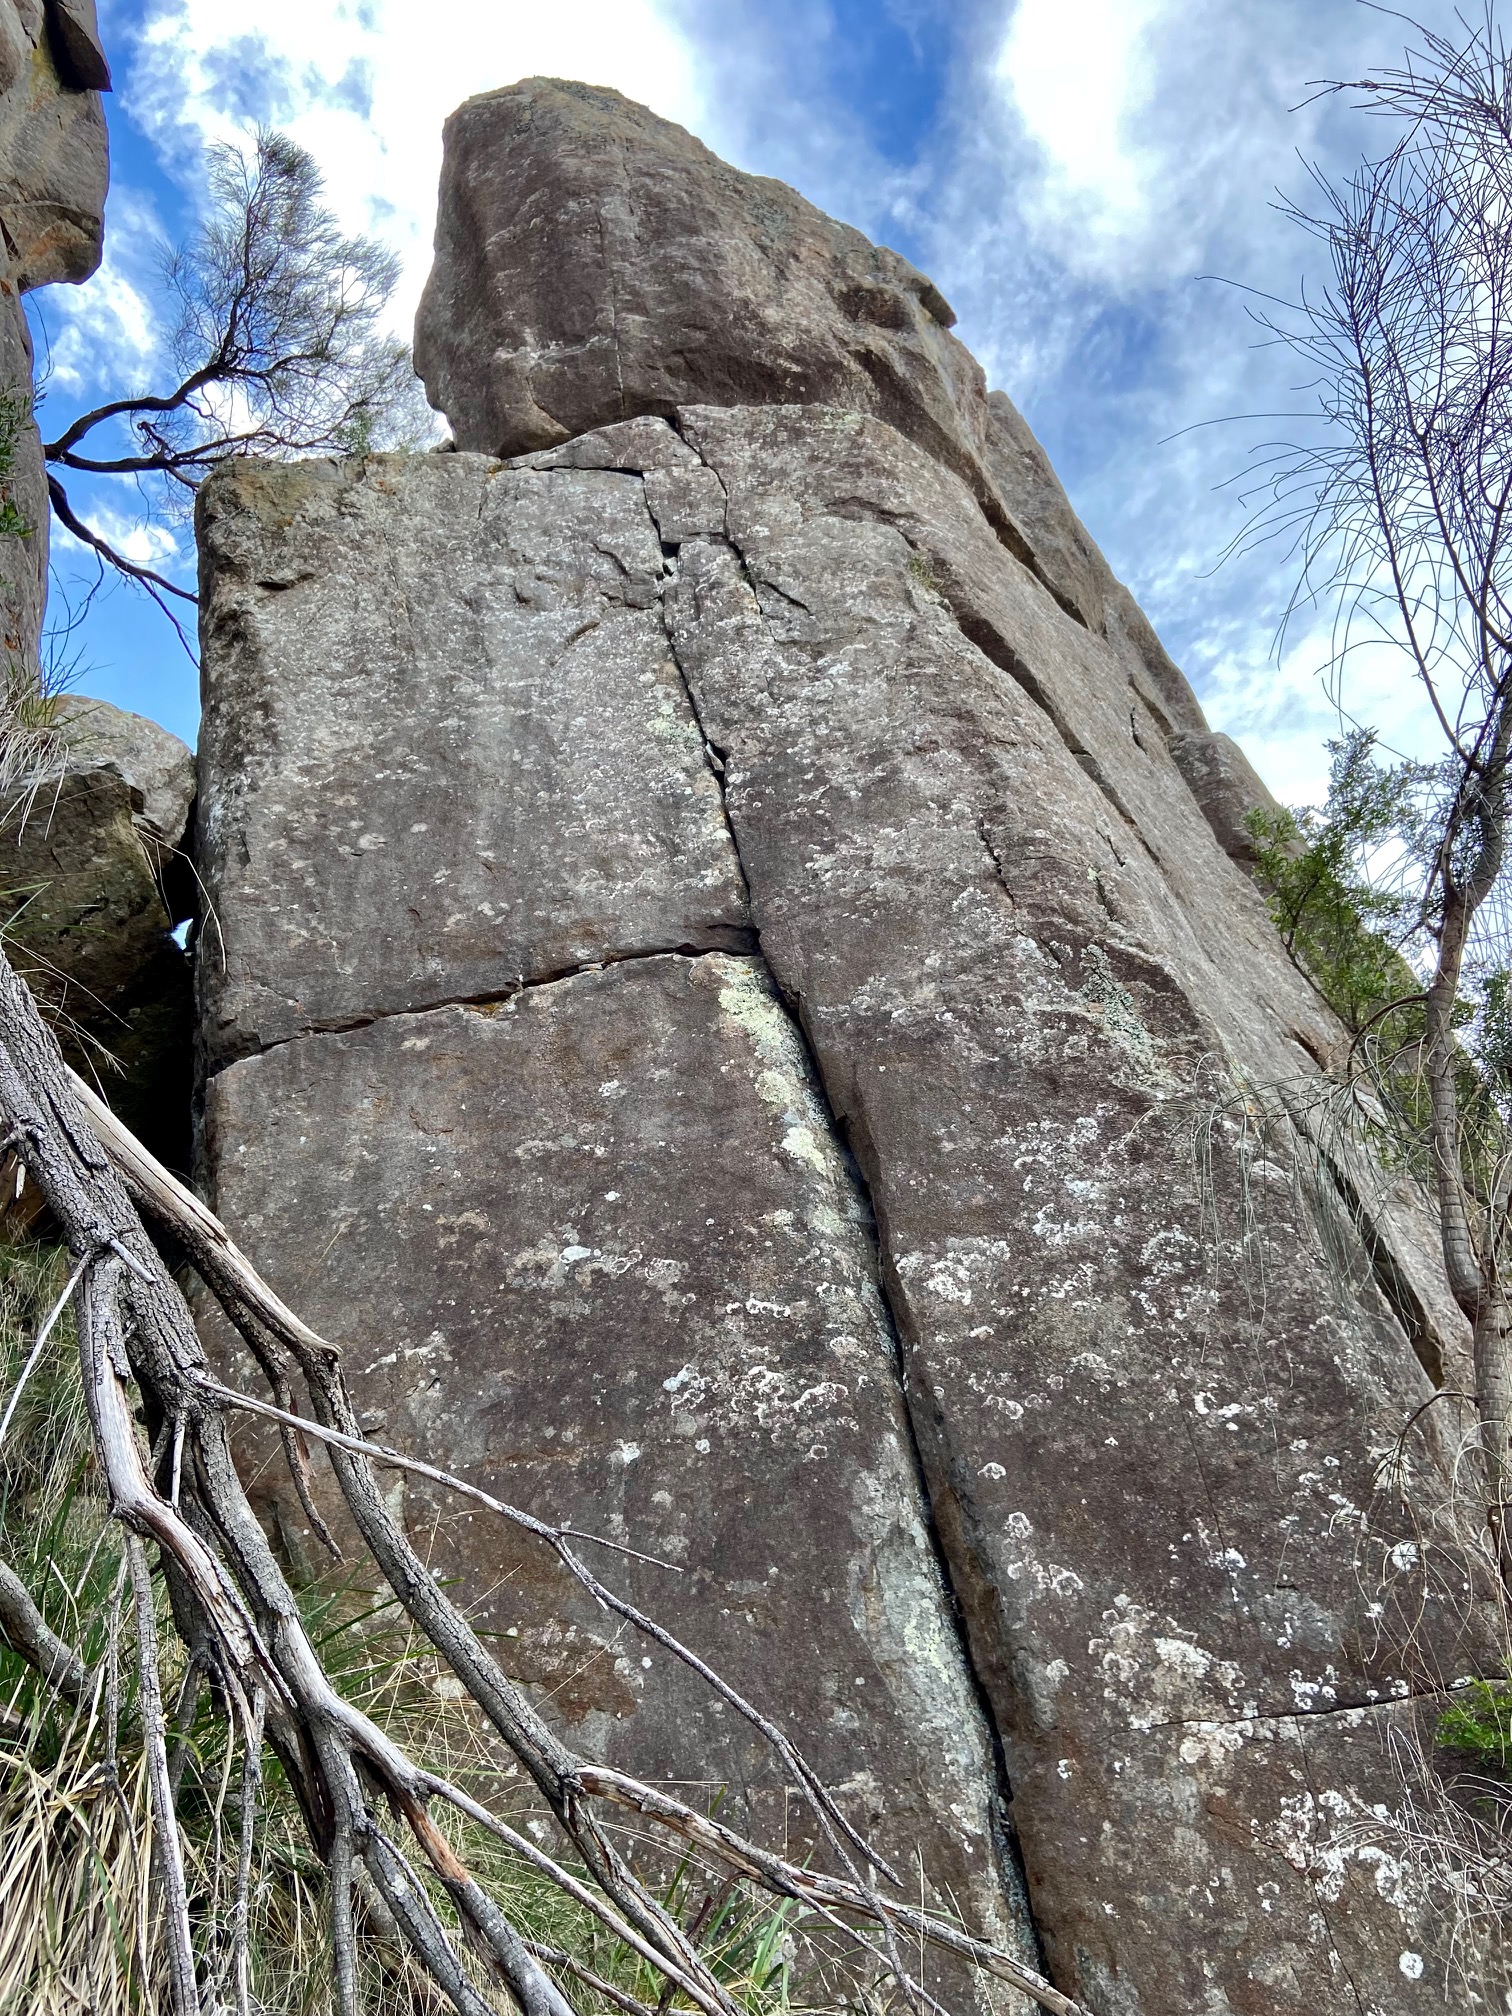
Left of Mr Queasy. Follow the corner/crack system to the ledge and tree.
Editors Note 2021: Needs a brush
Greg Aimer, Chrissy Freestone, 1991.
Go down the notch mentioned in Konked Out for 5m and on the L is a short handcrack. Belay at the eucalypt and climb the crack to the horizontal break. Surmount the bulge above for a slightly queasy experience, then reach through to a large ledge.
Al Adams, Evan Peacock, Simon Stubbs, Bruce Newman, Sep 1988.
The face to the right of Mr Queasy. Mantle onto the ledge then follow the easy crack until a wedged block. Continue up the finger crack (crux) to the horizontal and then up the bulge to the top
Jeroen Janson, Lawrence Wonhas, August 2022 (may have had an earlier ascent)
The big off-width right of 'Our People Are Nuts'. Start at the boulder beneath the base, through the gap, then up the off-width. Bring big cams (#5 and #6) for the upper section.
Jeroen Janson, Lawrence Wonhas, August 2022 (Dave James and Shirley Zeng were beaten to the FA by a week, but added the direct start underneath the boulder at the base)
Zundapp & Time Warp Buttress
The large amphitheatre of buttresses above the wattle grove host a range of routes. Located left of Bismark Buttress above the wattle forest. There is a lower-off above Jesus Trousers / Time Warp.
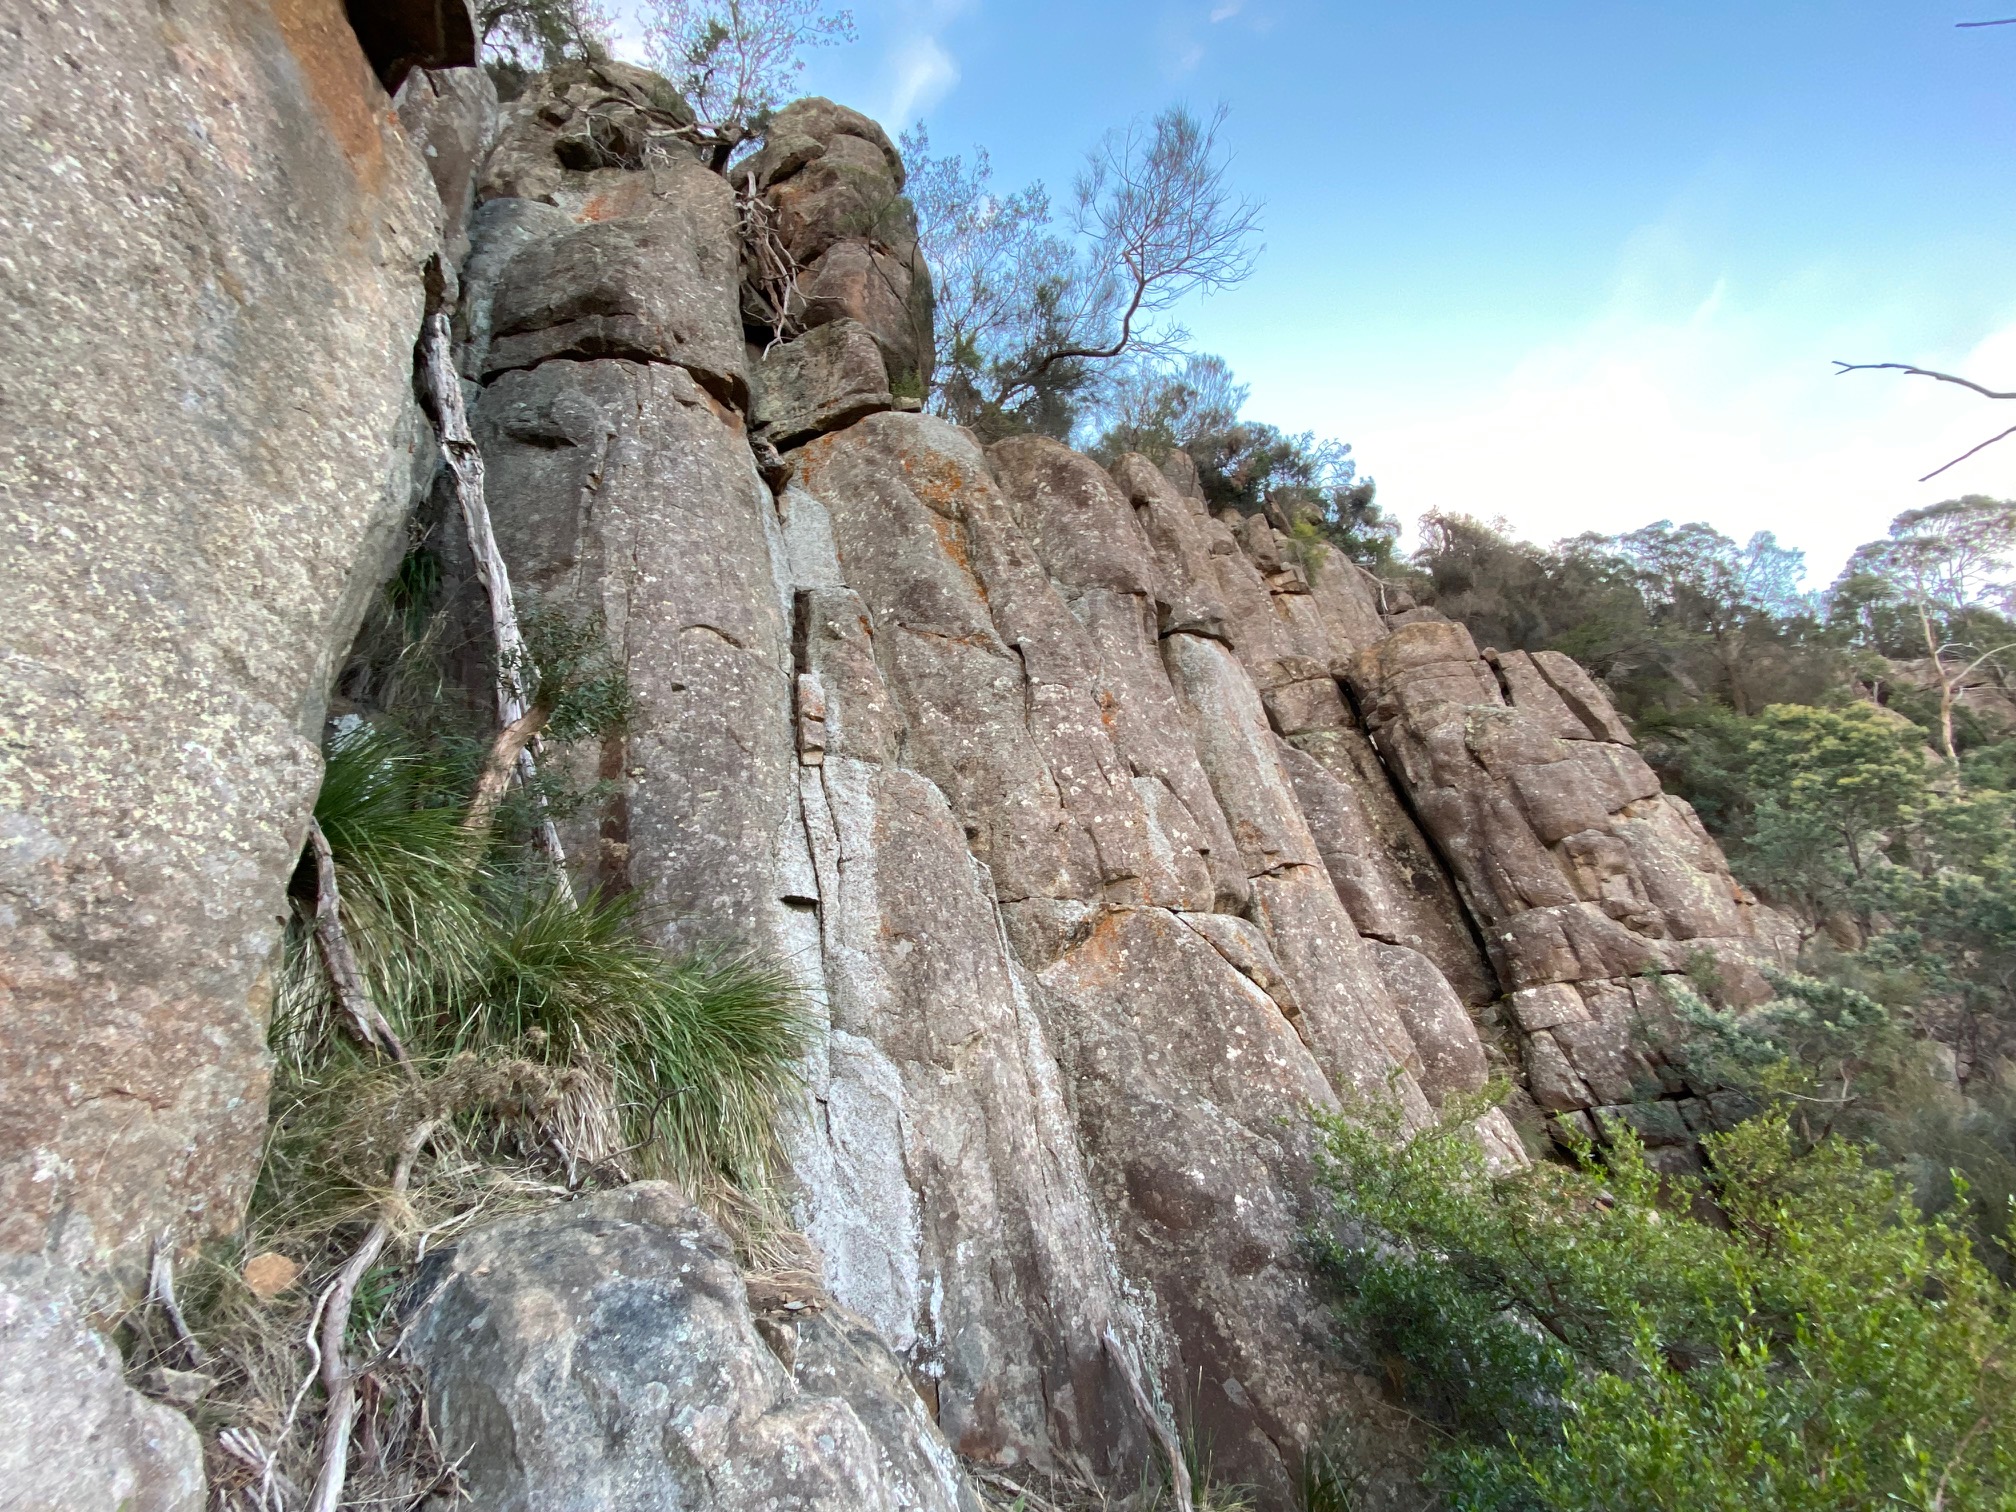
Up the brushed face with incipient cracks, then continue through the bulge (RPs) and the slab above. Finish up past a small roof / corner to the top of the buttress.
Evan Peacock, Al Adams, Jul 1988.
The lichenous finger crack about 5m R of Zundapp.
Evan Peacock, May 1990.
Finger crack 3m right of "Sunday Mockry". Head up until crack widens (Large cam handy). Either continue up to point where where it is possible to blindly step L into groove or enter groove from lowest point.
Liam Mangan-Smith, Neale Smith, July 2022
Climb the smooth orange crack through the bulges up the RH side of the buttress.
Peter Jackson, Mendelt Tillema, Feb 1971.
Found below Fat and Married on an isolated buttress, this route has caused quite a few new leaders to come unstuck on its tricky jams. The route takes the obvious crack up the center. Belay on top and walk-off to the right.
Russ Hinze, Terry Lewis, 1975 - 1998.
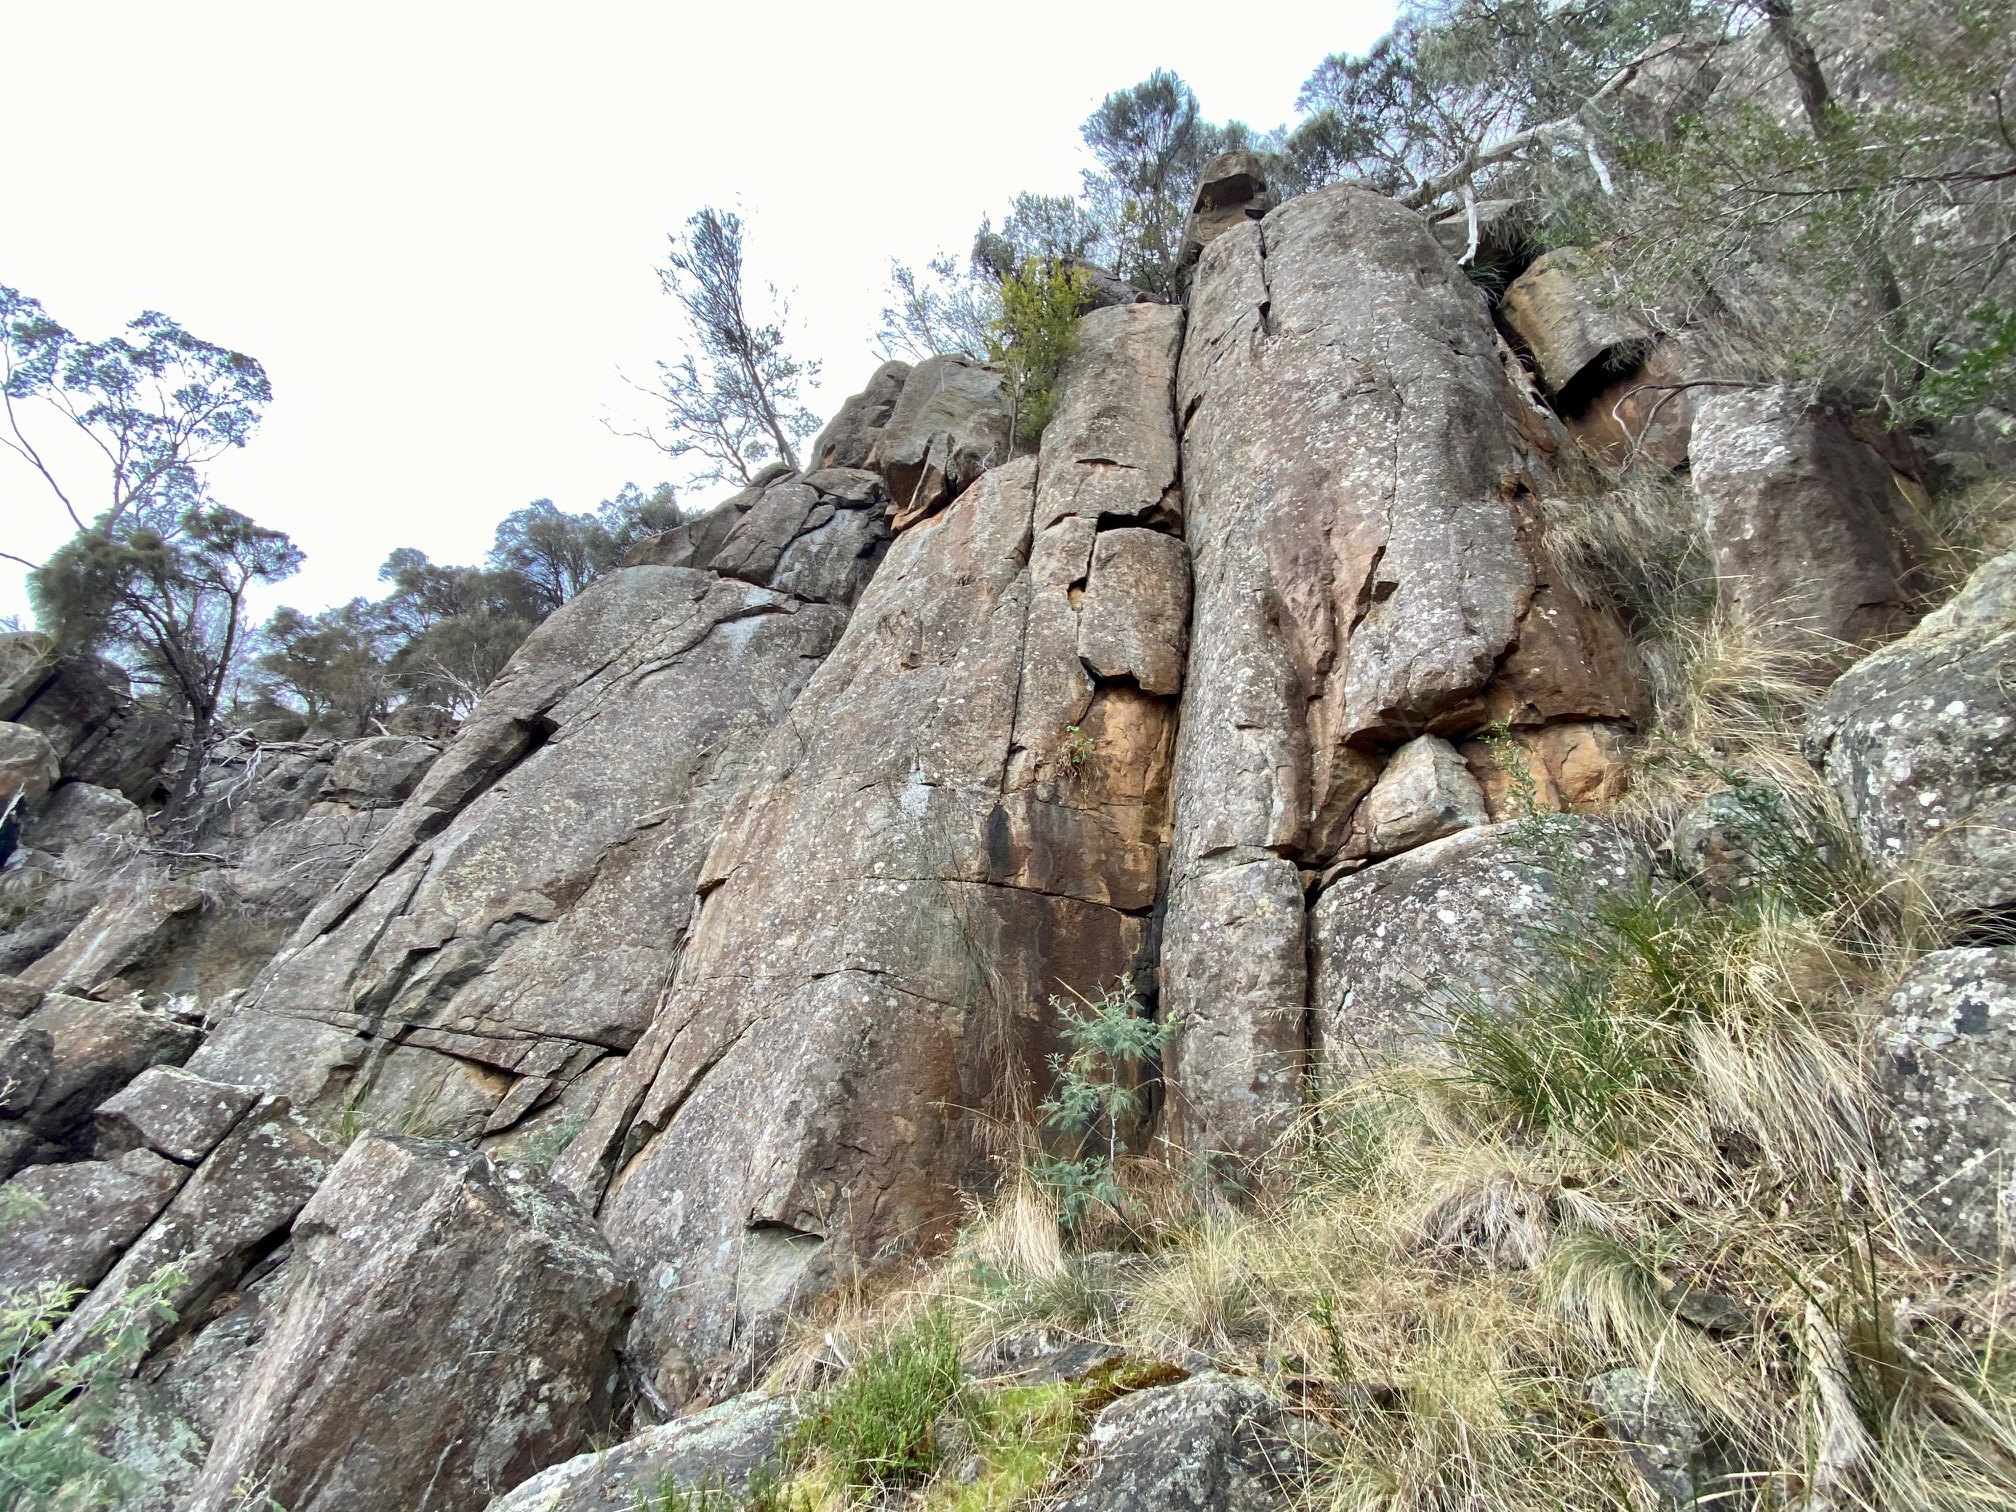
Time Warp Buttress
Climbs the small rounded buttress above No Corruption. Climb the arête using layaways on the RHS then cross left and continue up the face and seams to the top. Rap-off tree.
Evan Peacock, Tim Olding, Aug 1988.
Starts just right of the chimney. A couple of unprotected but easy moves lead to a crack and bomber RP protection. Continue straight up into the bushes.
Evan Peacock, Colin Reed, Tim Albion, Oct 1990.
Climbs the short crack to the left of the flake on Jesus Trousers. Bush-bash walk-off or rap-off tree.
Chris Dawson, Mary McWhirther, Sep 1974.
Nice jamming and bridging up the obvious corner-groove. Take care with the large flake. Step right to lower off.
Phil Steane, Pete Steane, Noel Ward, Doug Fife, Oct 1982.
Quintessential Lowdina face climbing. Start from the bottom of the buttress and trend right or step onto the face from the RHS of the arete in the gully. Follow the left-trending thin crack up the buttress using layaways, face-holds, and wishful thinking. RPs, small wires and micro-cams are the go. Lower-off.
Pete Steane, Doug Fife, Noel Ward, Oct 1982. Direct start: Nat Duhig, Mike Edwards, Nov 1986.
The Twilight Zone
Taking the track further uphill from the Spazattack Buttress will take you to the Twilight Zone. These are a series of short buttresses ending at a gully (Perchance to Dream Buttress). Further to the left from here is the Zundapp and Time Warp Buttress.
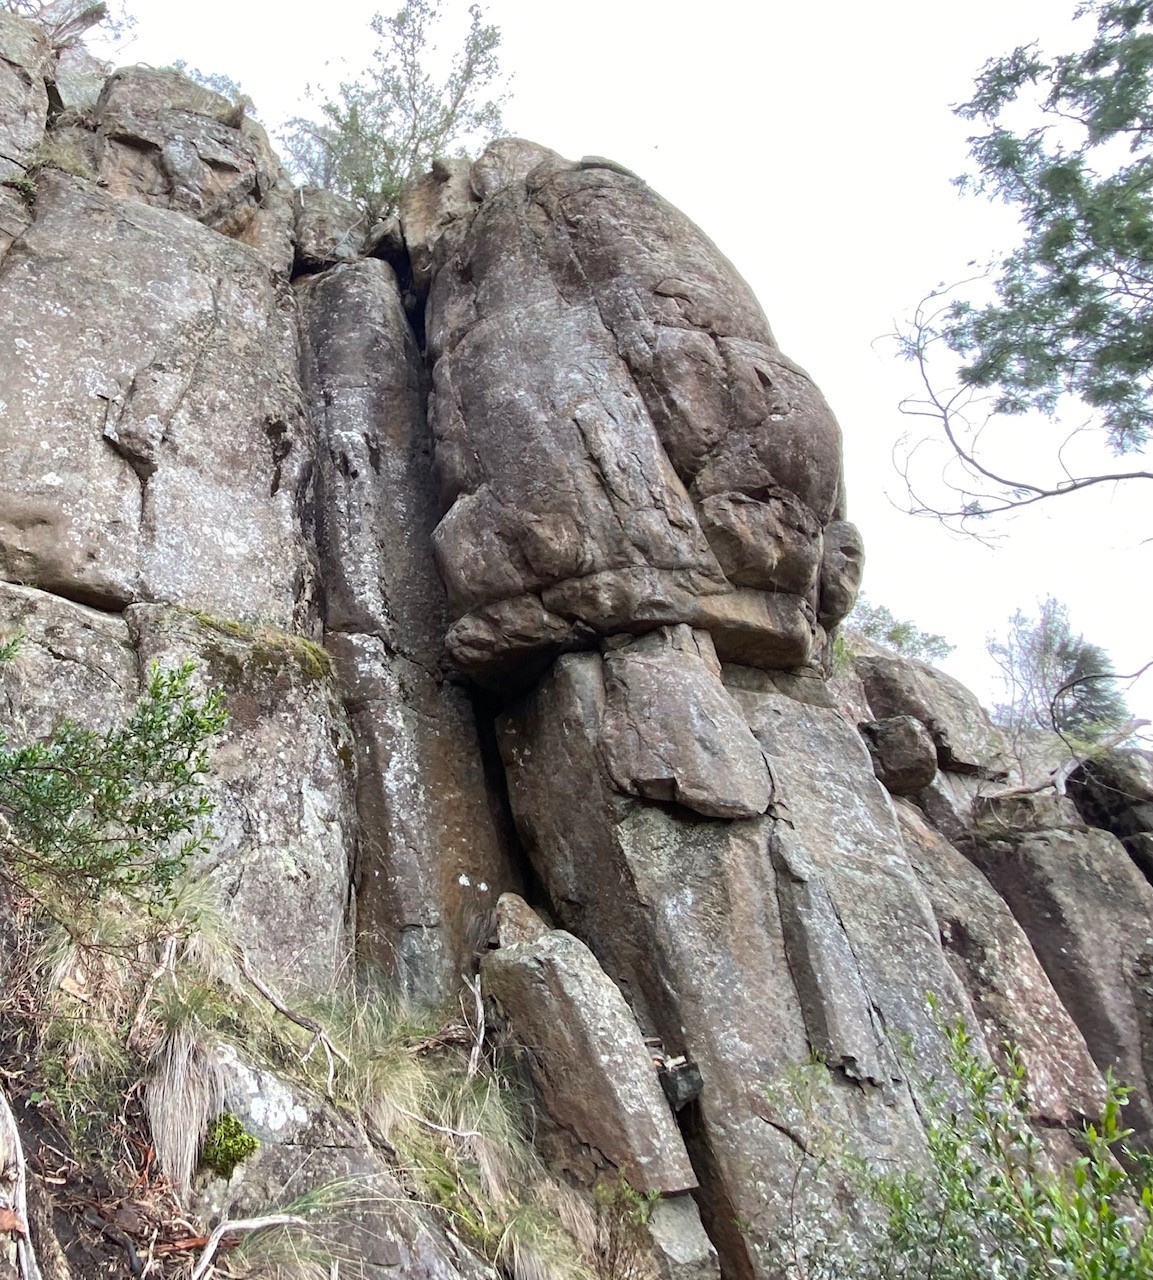
Perchance to Dream Buttress
Just left of Nightmare at 10,000 mm is a gaping off-width. Climb this to the top and tree belay. Take some BD sixes and some finger-sized cams.
Henry Garratt, Mark Passier, Christoph Speer, Nov 2021
Climb the obvious clean corner crack to the left of Perchance to Dream. Lower-off.
Christoph Speer, Henry Garratt, August 2021
Seldom done because of the location, but reportedly one of Garn's best FAs. Starts up an unlikely looking face and poised above is a block attached to a gently overhanging arête. Mount this as elegantly as possible and continue up the crack above. Walk-off to climbers left down the gully. A little dirty currently.
Garn Cooper, Al Adams, Pete Steane, Dec 1984.
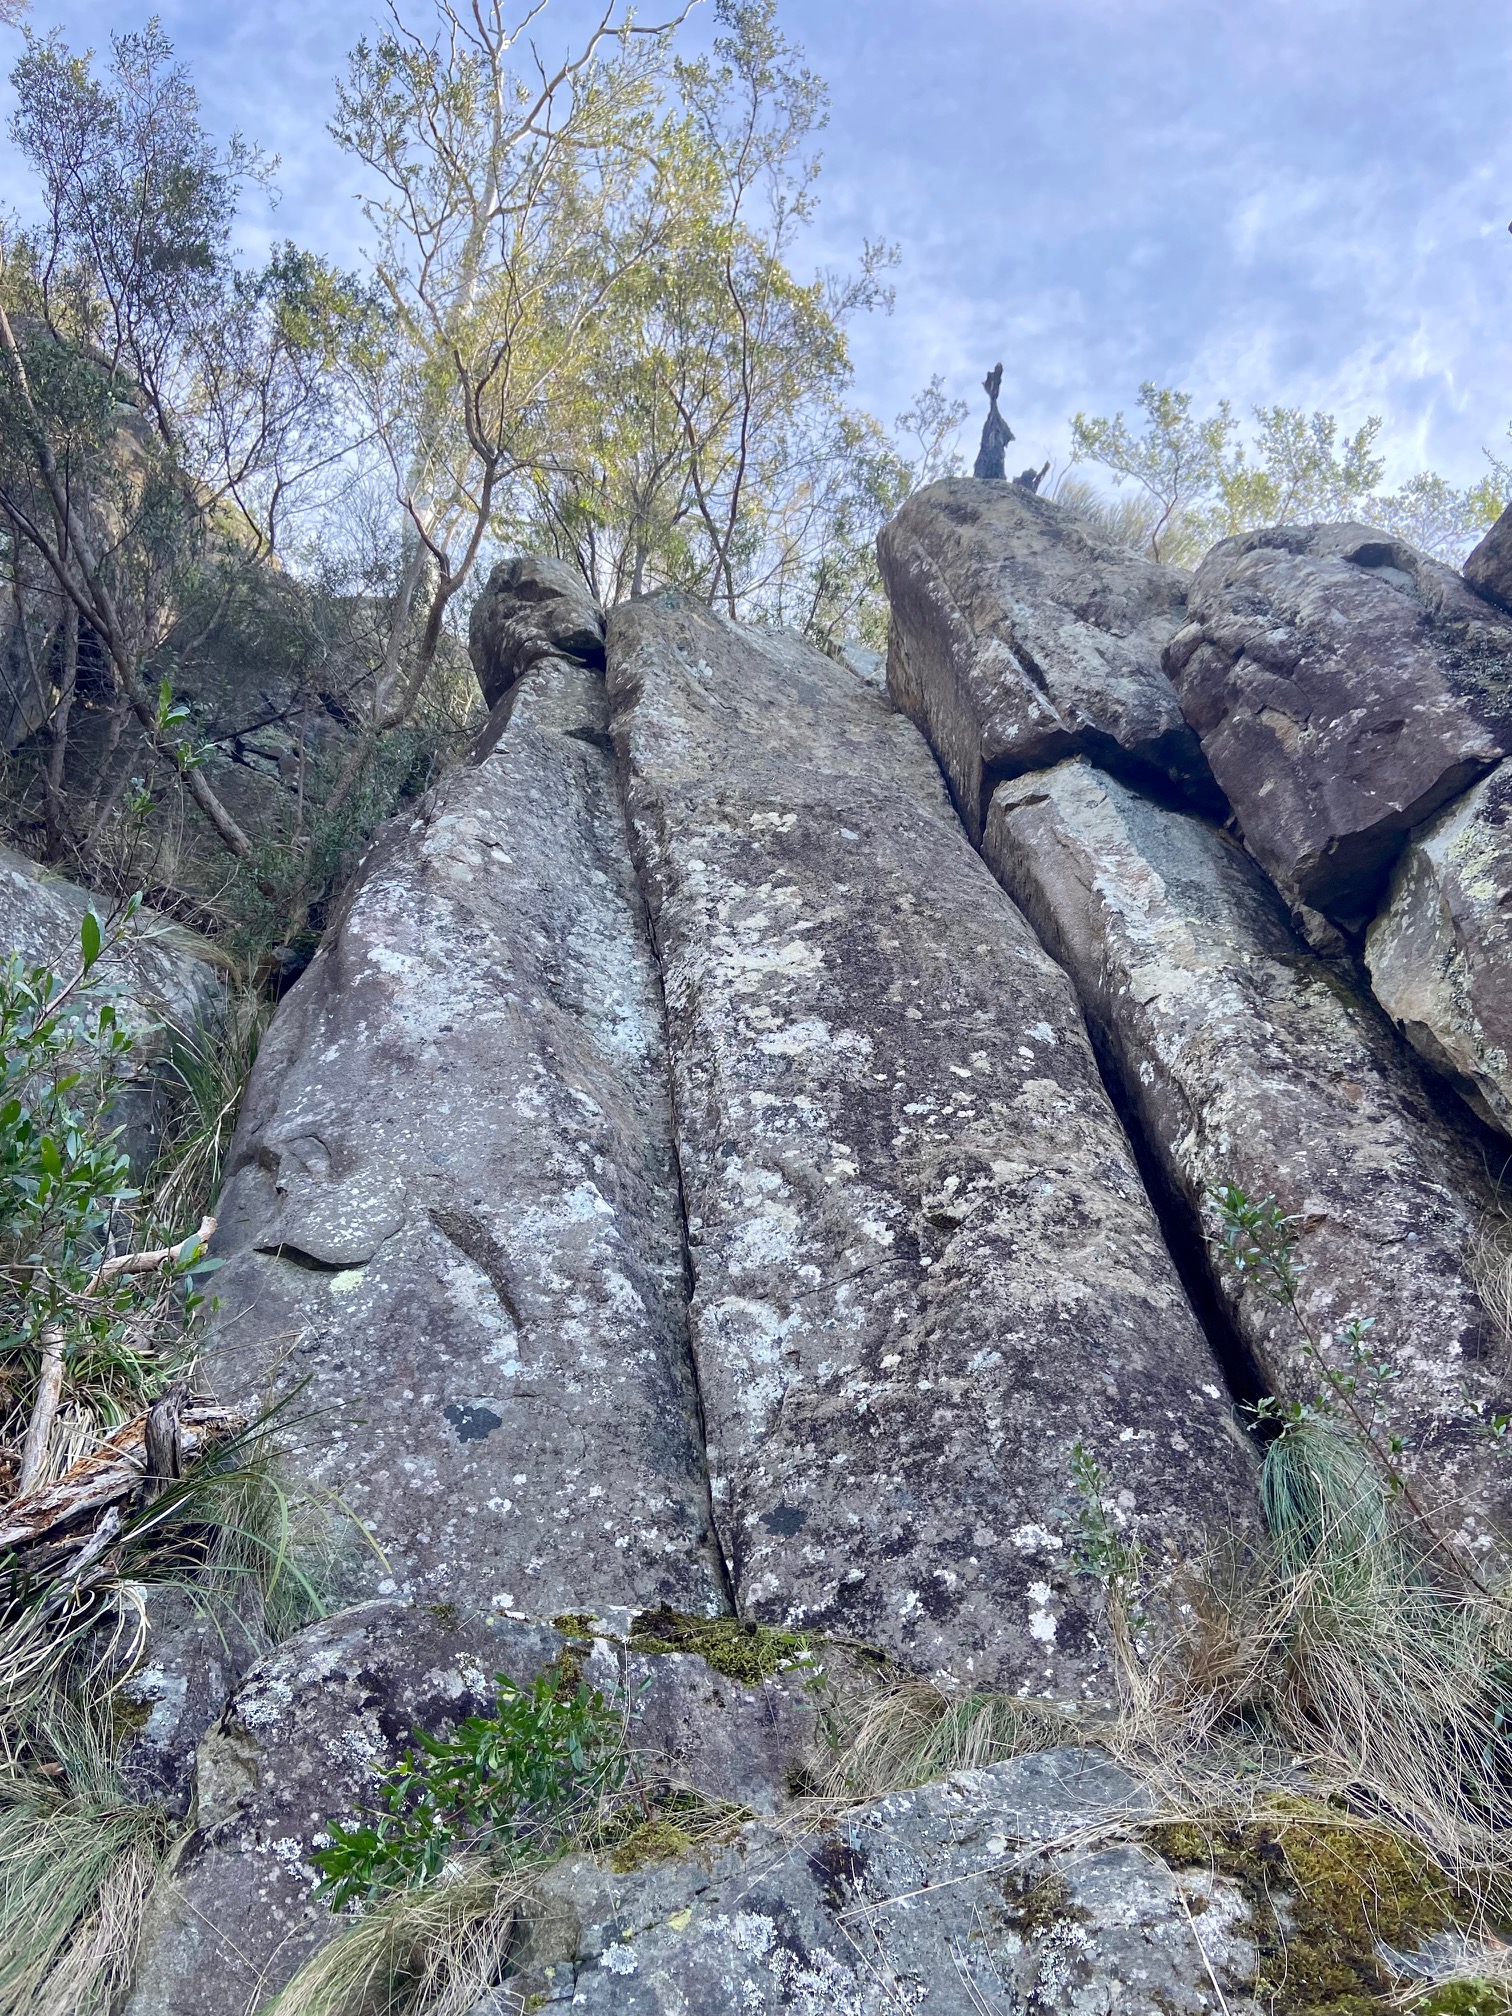
The Contortionist Buttress
The short, thin finger-crack in a groove. Weird but interesting moves. Step right to lower-off.
Christoph Speer, Jai Friend, August 2022
The short hand crack 2 m right of The Contortionist to DBB lower-off. Worth doing if you're already here - or just bored with life itself.
Christoph Speer, Jai Friend, August 2022
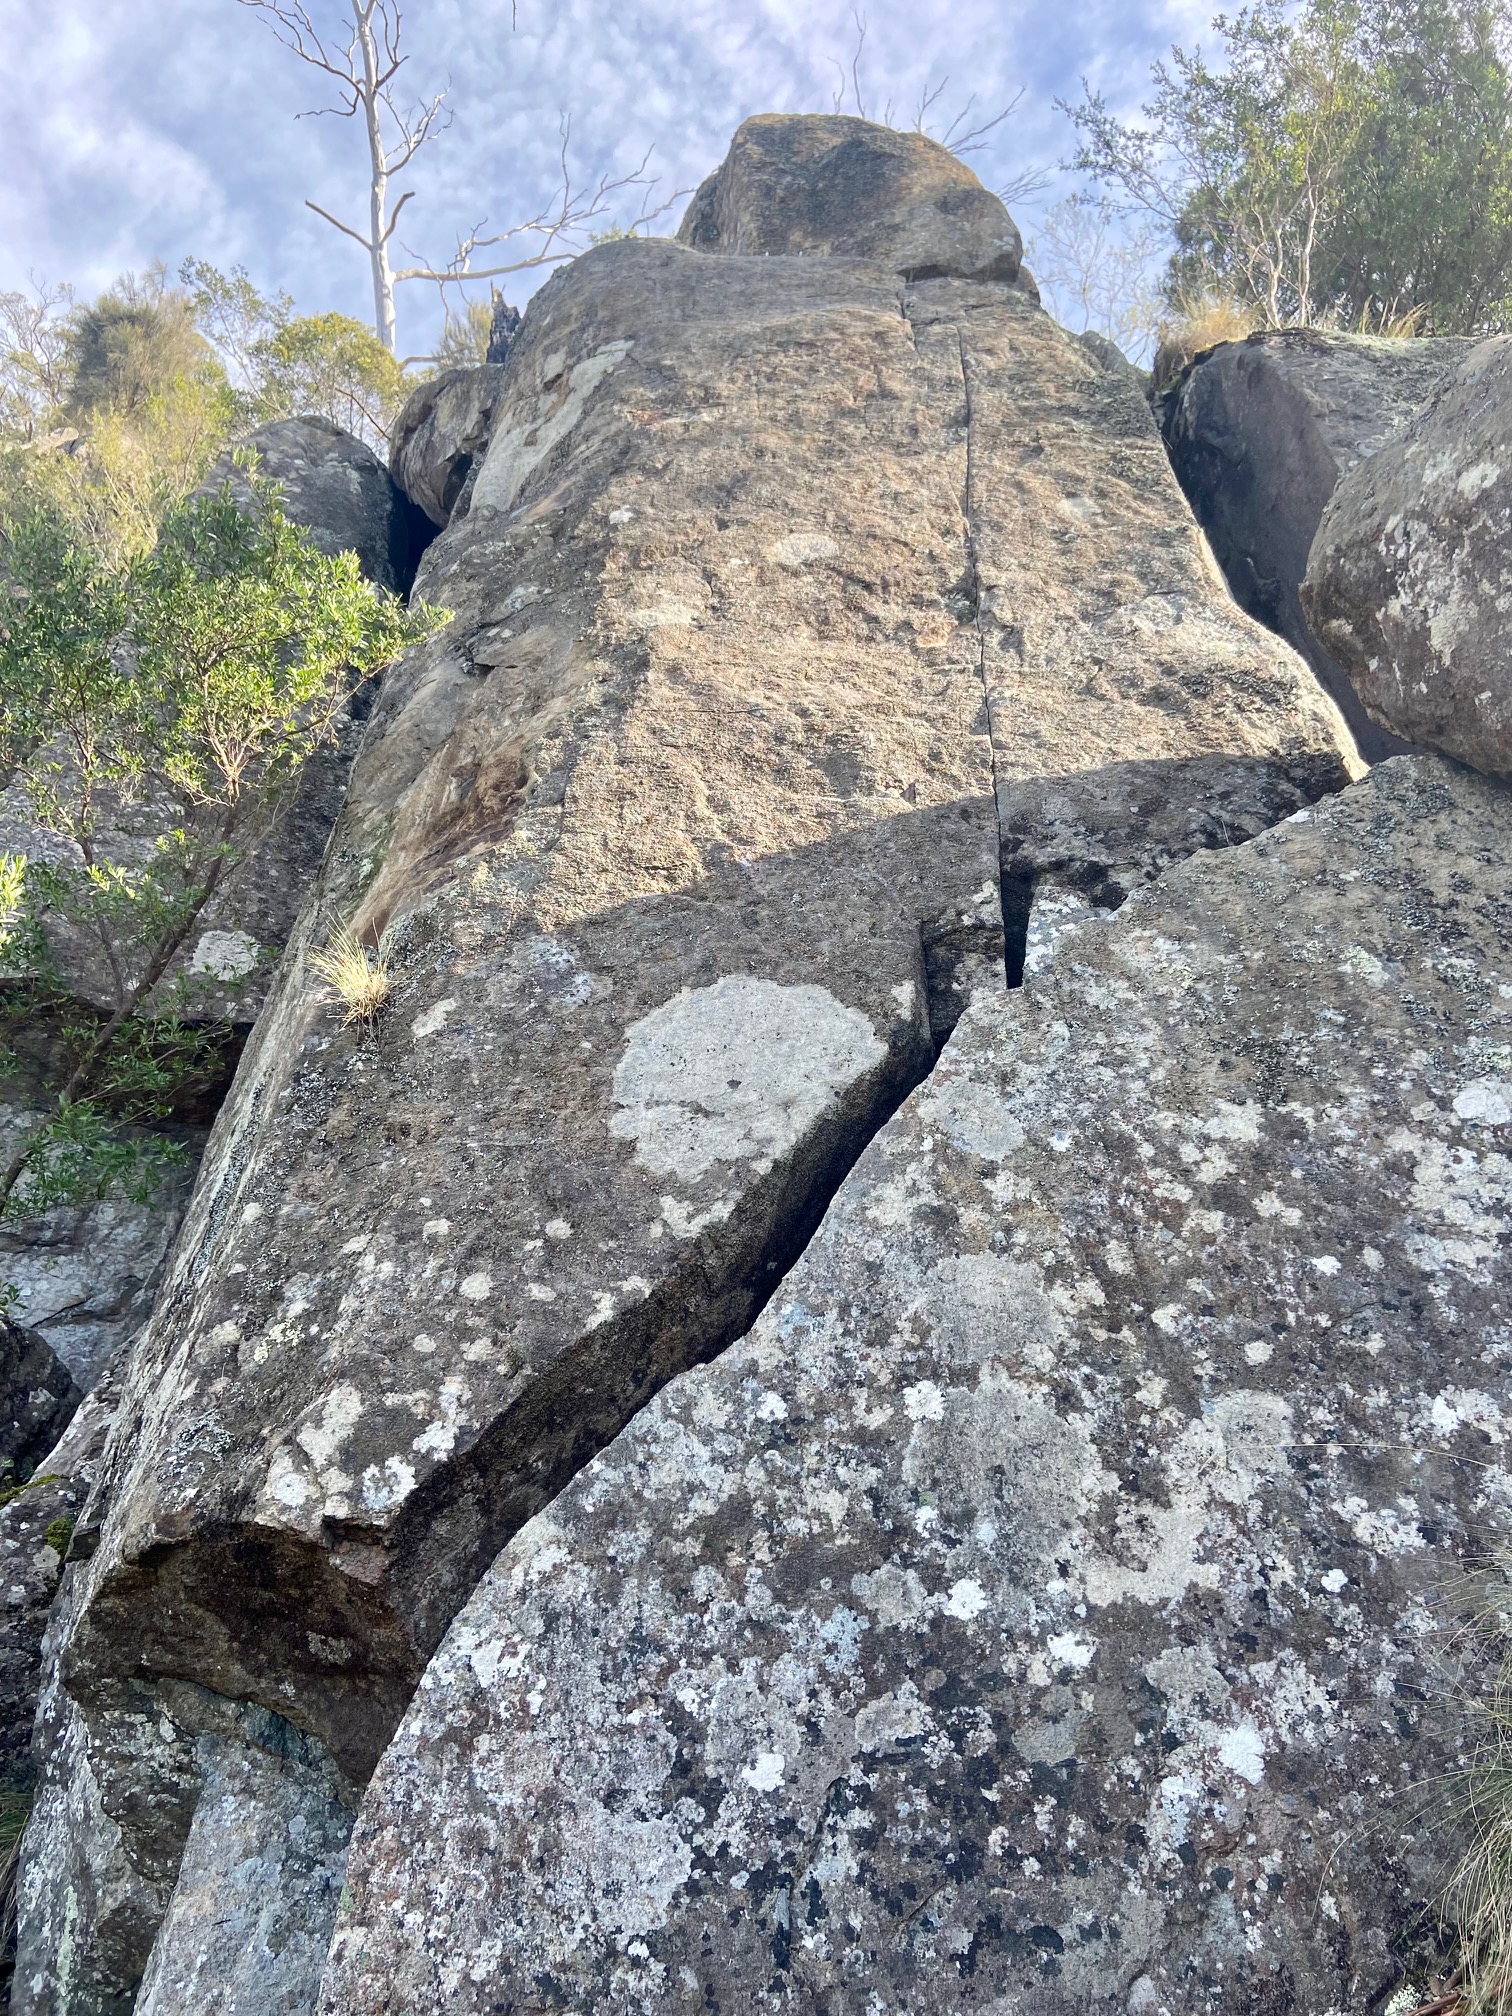
Dancing Shoes Buttress
The slab above Morning Sun, past a #4 cam, single bolt and RPs and micro-cams in the fused seam. Lower-off. A good introductory route to RP and micro-cam placements before tackling the more challenging routes here in this style.
Christoph Speer, Jai Friend, August 2022
Spazattack and Bismark Buttress (LHS)
Located immediately uphill and left of Bismark Buttress. There are a number of lower-offs above the climbs that can be used to descend.
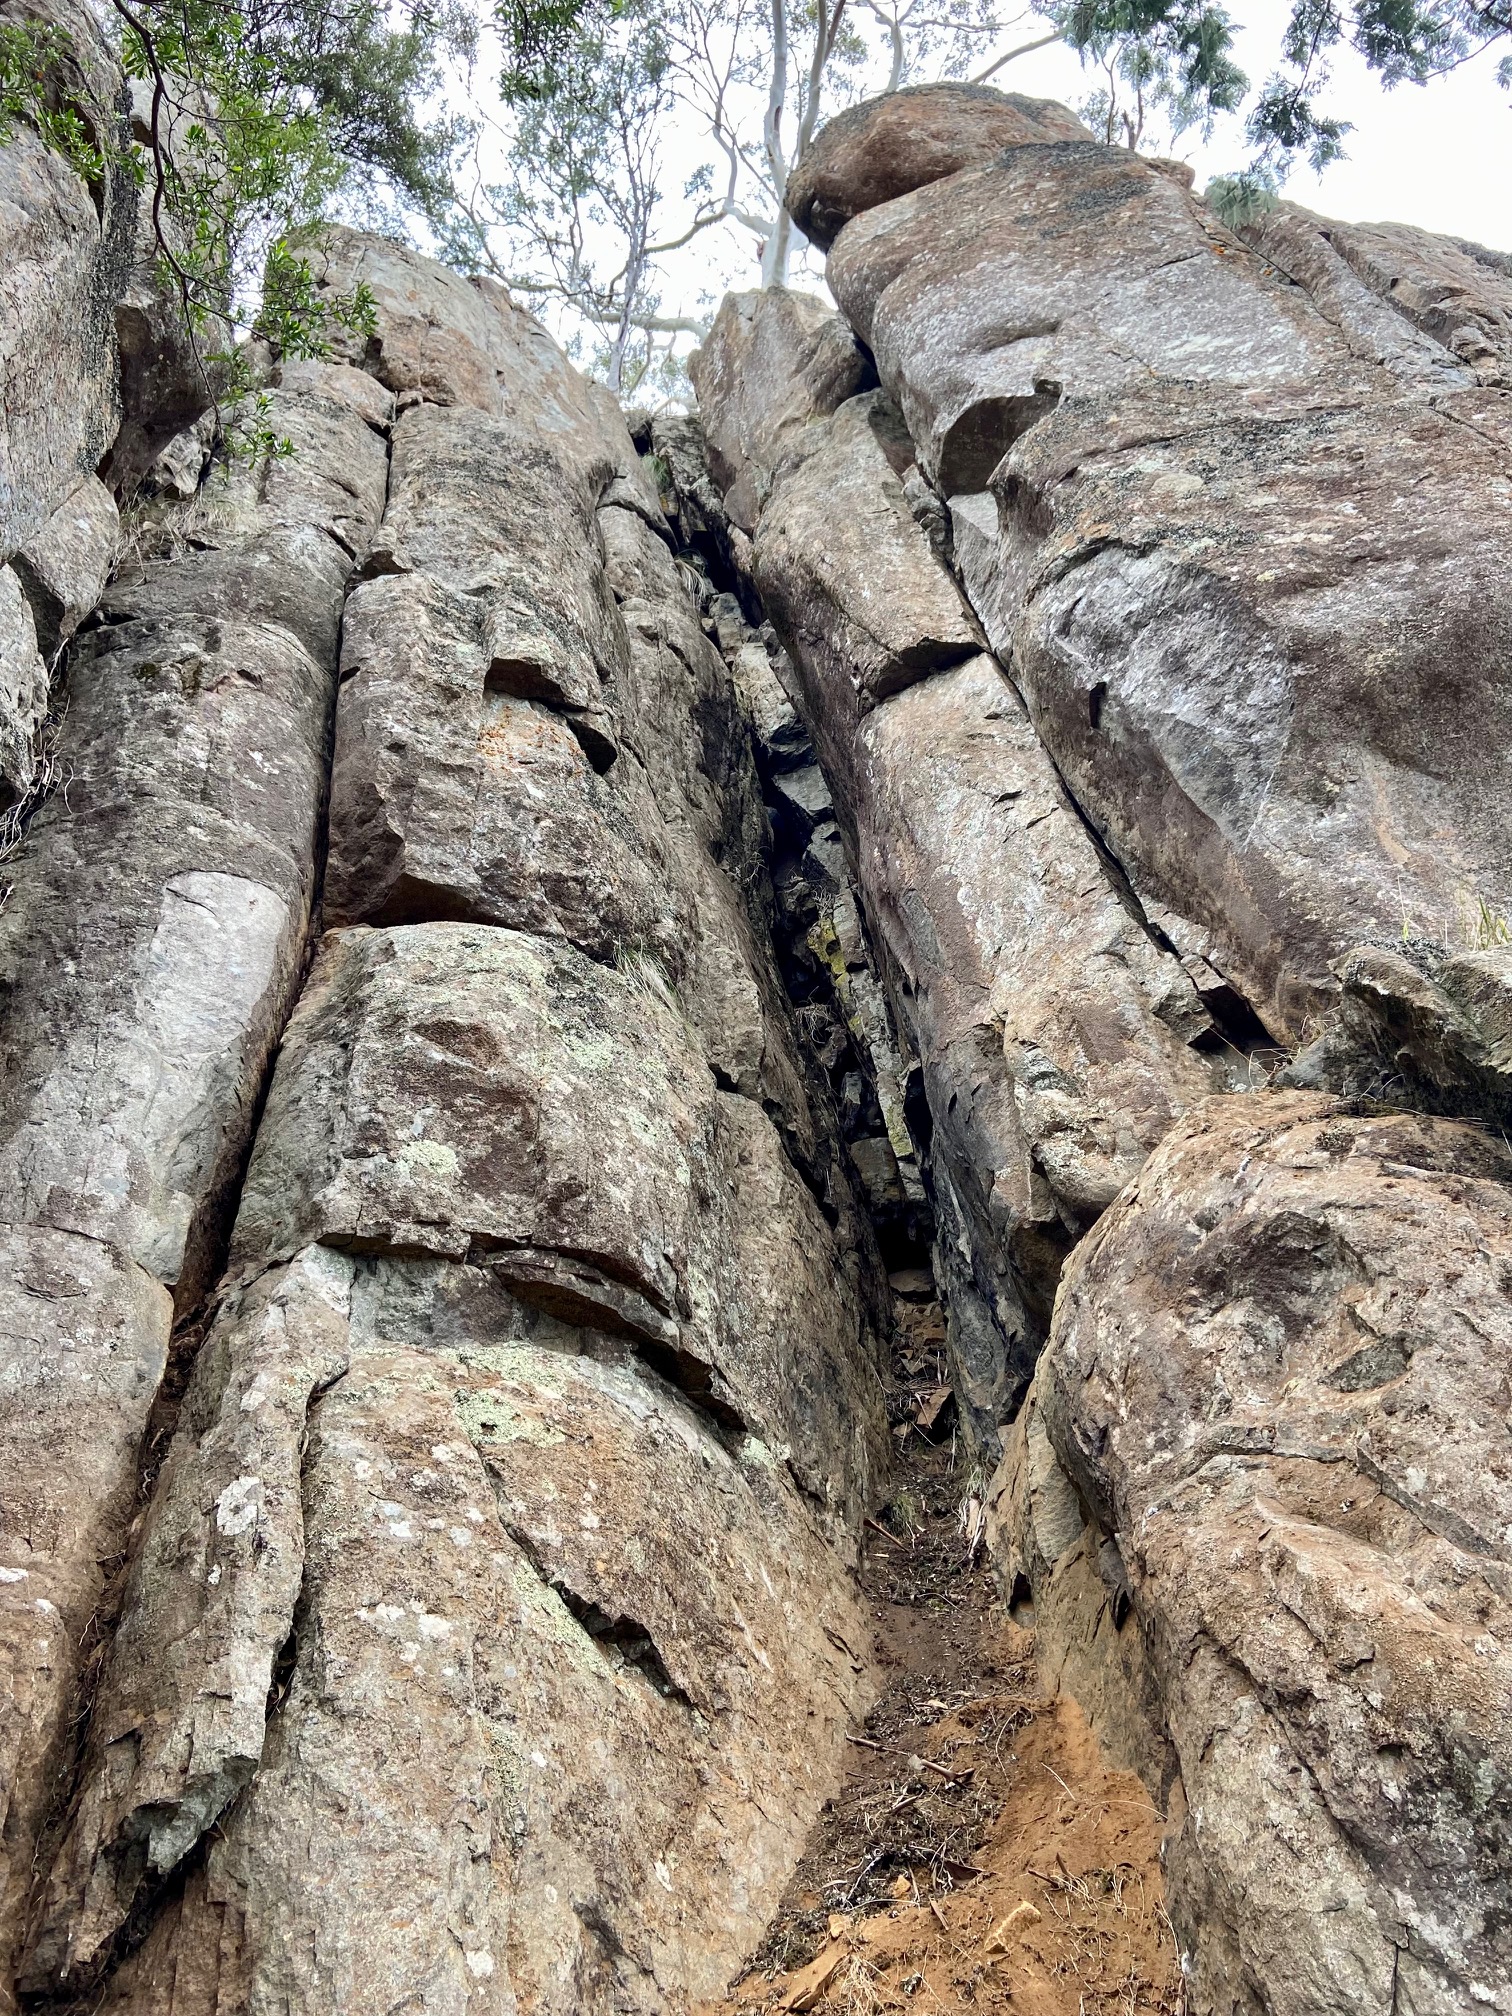
Spazattack Buttress LHS
The furthest line left. Follow the easy crack until you are forced to step right at the top below the thin finger crack. Thoughtful moves follow this to the top of the buttress (crux). Step right to lower-off. Very small cams and wires protect the crux.
Jeroen Jansen, Christoph Speer, July 2022
Consistent and well-protected (use a small wire for the start). Follow the crack-line, with the crux at the top.
Christoph Speer, Jeroen Jansen, July 2022
Tricky crack climbing. Follow the tricky left leaning hand-crack to the chockstones (keyed-in), mount these into the tomb and head to the top and lower-off. Take a BD #4 - no bigger gear needed.
Christoph Speer & Jeroen Jansen (team cleaning and sending effort), July 2022
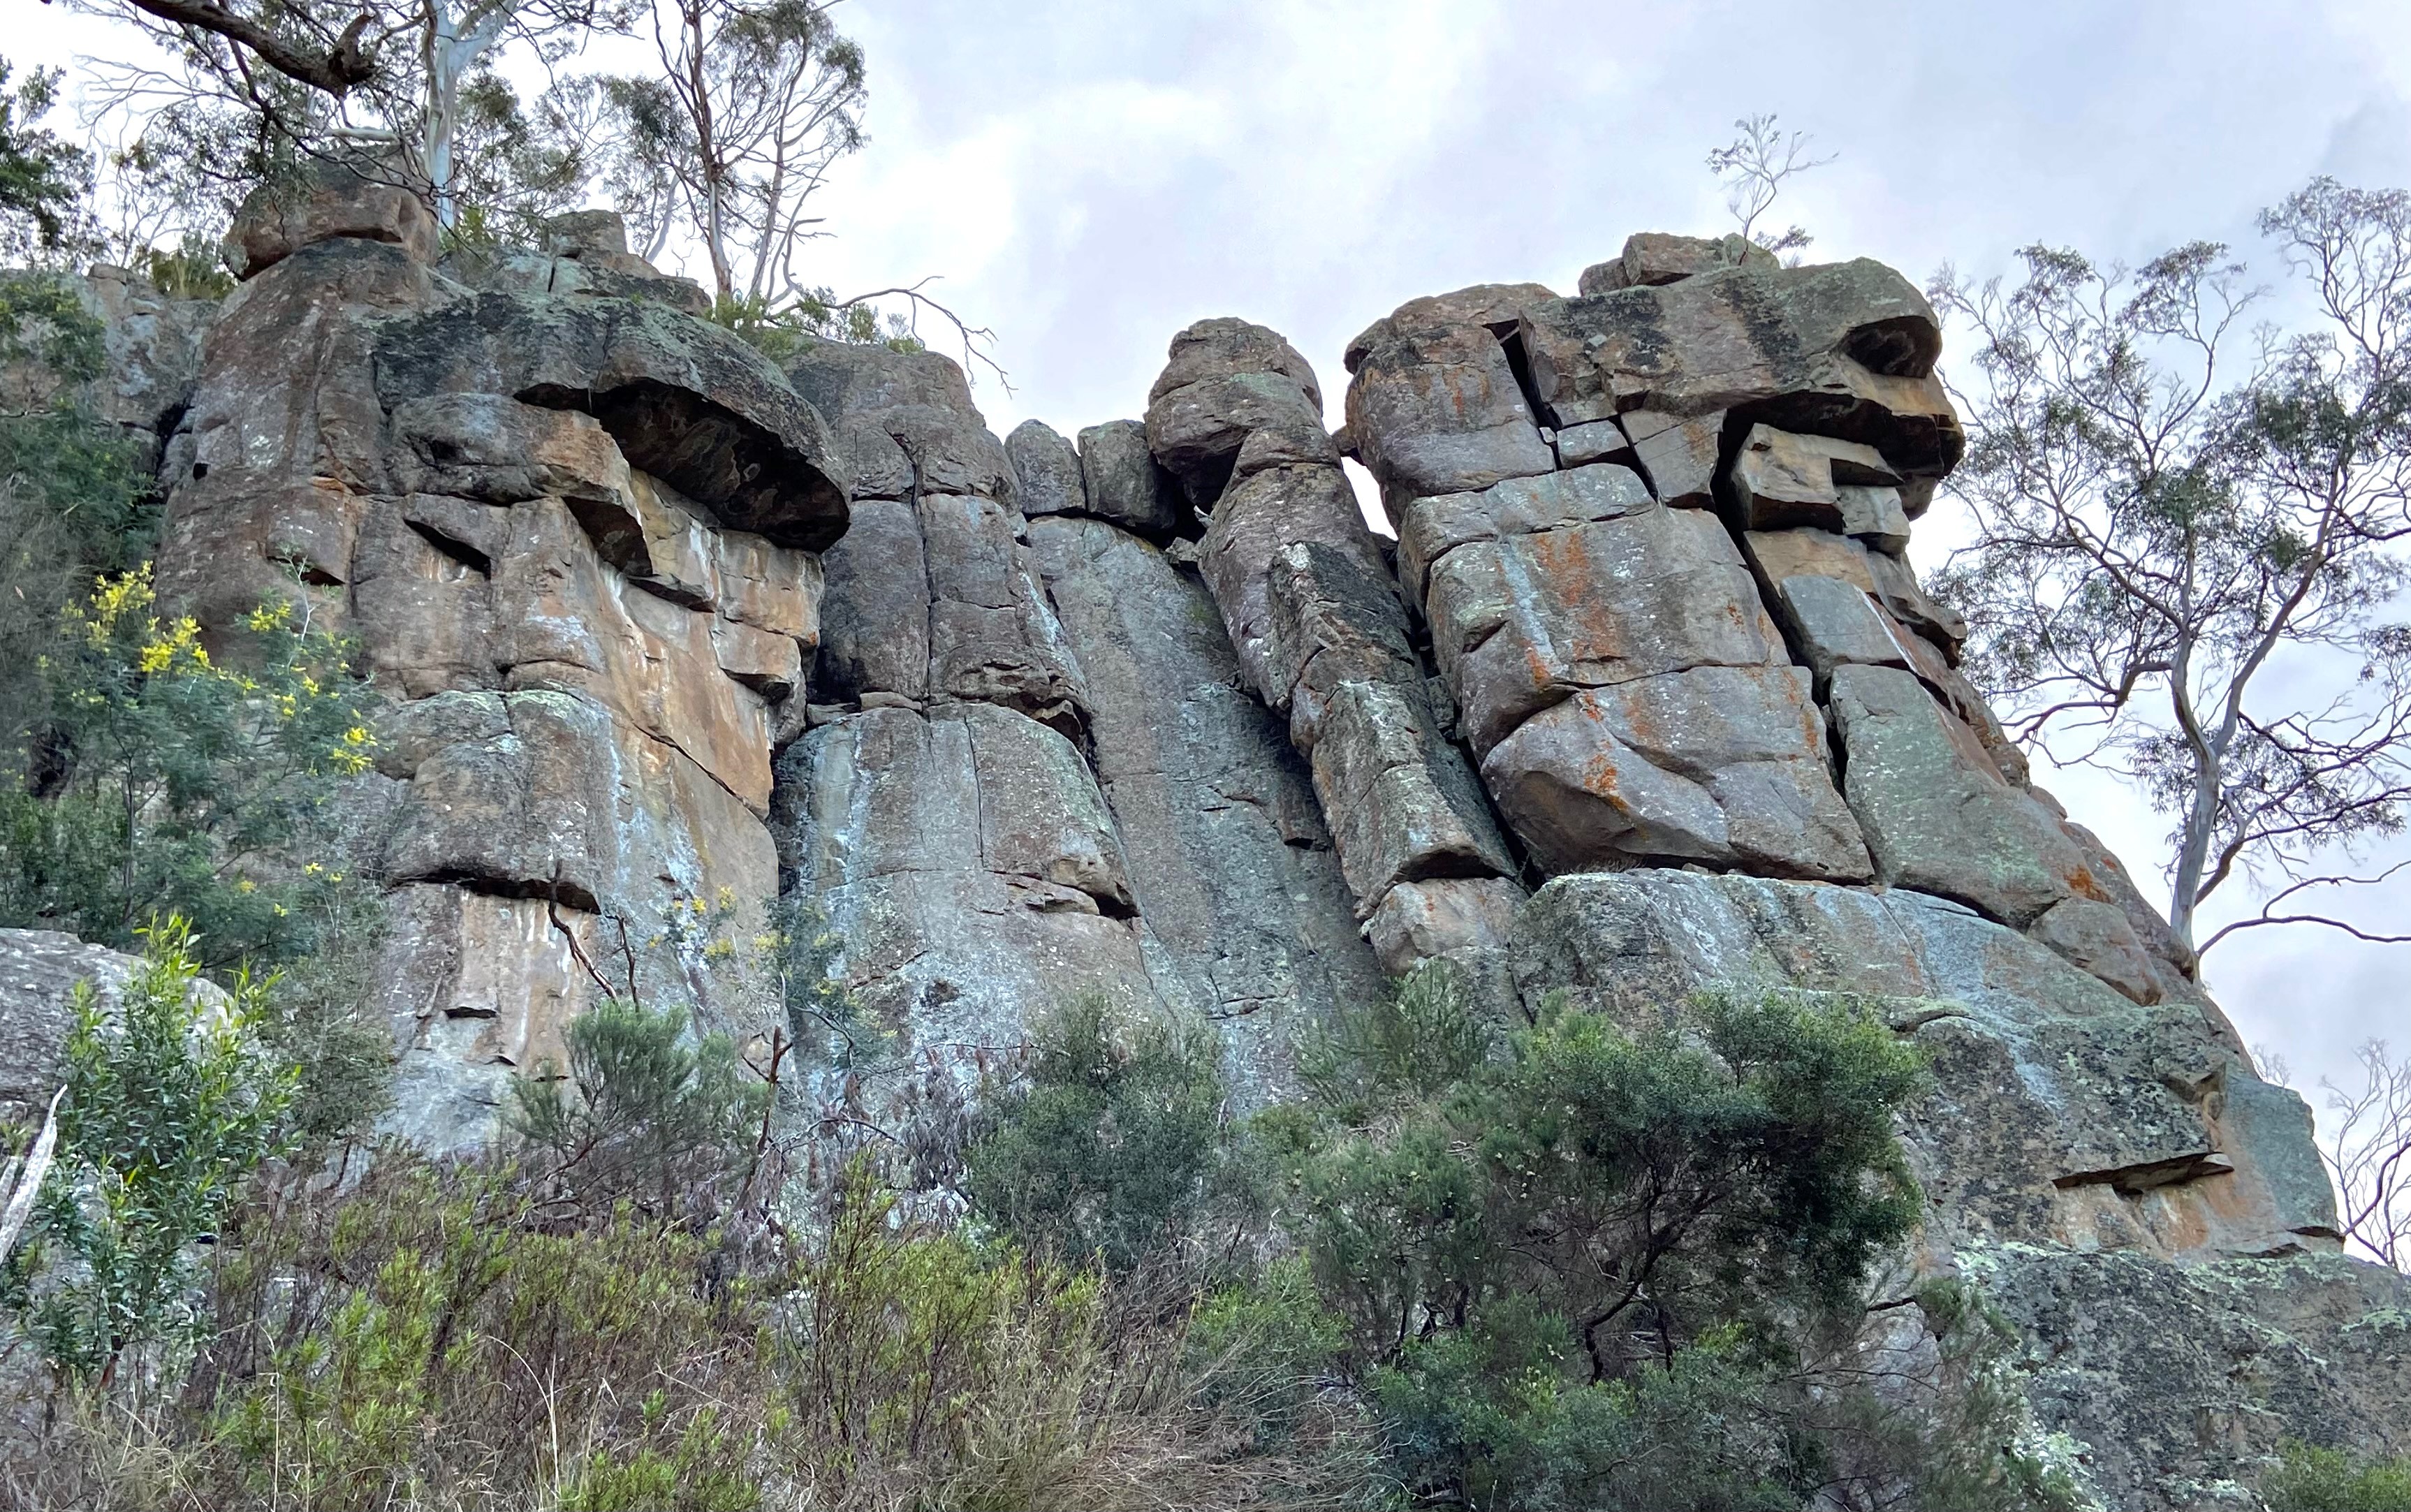
Spazattack and Bismark Buttress LHS
Good climbing with poor protection, requiring leaders to be confident at the grade. Start on the far LHS of the buttress and climb the face / flake, trending right to the horizontal break at 6m. Commit to the bulge and seam-line above the ledge, aiming for the horizontal break above for some small cams. Continue up the face and LHS arete above with RPs and micro-cams for protection to a lower-off.
Garn Cooper, Pete Steane, Oct 1984.
The direct start to Spazattack, which takes the difficult right trending thin crack/layback to meet the original route at the ledge. Bold moves above the bolt to reach the RP placement before the ledge.
Top Rope: Evan Peacock, Justin Kennedy, Oct 1985. FFA: Evan Peacock, Colin Reed, Jun 1990. Re-bolted in 2022.
Excellent technical climbing on great rock, this route was once a hefty and scary sandbag that was given the original grade of 20. The route is still challenging at 22, and is now well-protected with the addition of the first 4 bolts(!).
Climb the face to the horizontal break (finger sized cams) and a stance above. Tackle the boulder problem, trending right into a stance below the first roof. Clip the last bolt with a long draw and hand traverse left around the roof to access the groove crack above at a tenuous stance. Small wires and micro-cams lead through this to a lower-off.
Evan Peacock, Steve Ford, Feb 1992. Re-bolted / retro-bolted in 2022 with FA permission.
Good rock, but the upper bolted line ventures very close to R chimney. The overhanging arête 3m R of Drury Line. A desperate technical slab, followed by a strenuous journey up the arête around the roof. 4 FH's (some bolts rusted - inspect before clipping).
Evan Peacock, Sep 1992.
A grade test-piece that provides a few heart-in-mouth moments, well before you've even reached the crux.
Climb onto the face of the buttress from the RHS, arrange your gear, then follow the exciting rising traverse left across a thin flake into a stance below a piton (back it up). Continue straight-up the face and thin crack with the reassurance of micro-cams. Mantle easily and keep following the line, finishing up the short wall above to a lower-off.
Peter Jackson, Noel Ward, Doug Bruce, 1984.
Companion line to Hooter. Start as for Hooter, but continue up the arete instead of traversing out left. Weave between the thin crack on the right, and the crack left of the arete to find the gear placements. RP's or a large cam come in handy between the first and second rooflet.
Evan Peacock, Tim Albion, Colin Reed, 1992.
The straight wide crack just right of Grasshopper Island. Minimal jamming required.
John Moore, Peter Jackson, Aug 1970.
The lichenous slab / face in the alcove just right of Wetcheck. Nice moves, but the runners are all dubious (small wires).
Evan Peacock, Al Adams, Grant Rowbottom, Aug 1992.
Start immediately left of Hood on a ledge about 10m up. Gain the ledge from the left and climb to the horizontal break. Crux to the small ledge, then follow the #1 RP crack, before a mantle to easier ground. One carrot bolt (looks OK) and 1 FH (rusted - inspect before clipping).
Editors Note 2022: Route needs a clean before becoming approachable.
Evan Peacock, Steve Ford, Feb 1992.
Bismark Buttress (Centre)
The first part of the cliff you'll come to if you followed the pink-taped track. There's a suite of routes on this buttress and a lower-off at the top of Bismark. The initial 10m of easy (and lichenous) rock can be avoided by walking in to the base of the climbs via the RHS past Illegal Move (facing the cliff).
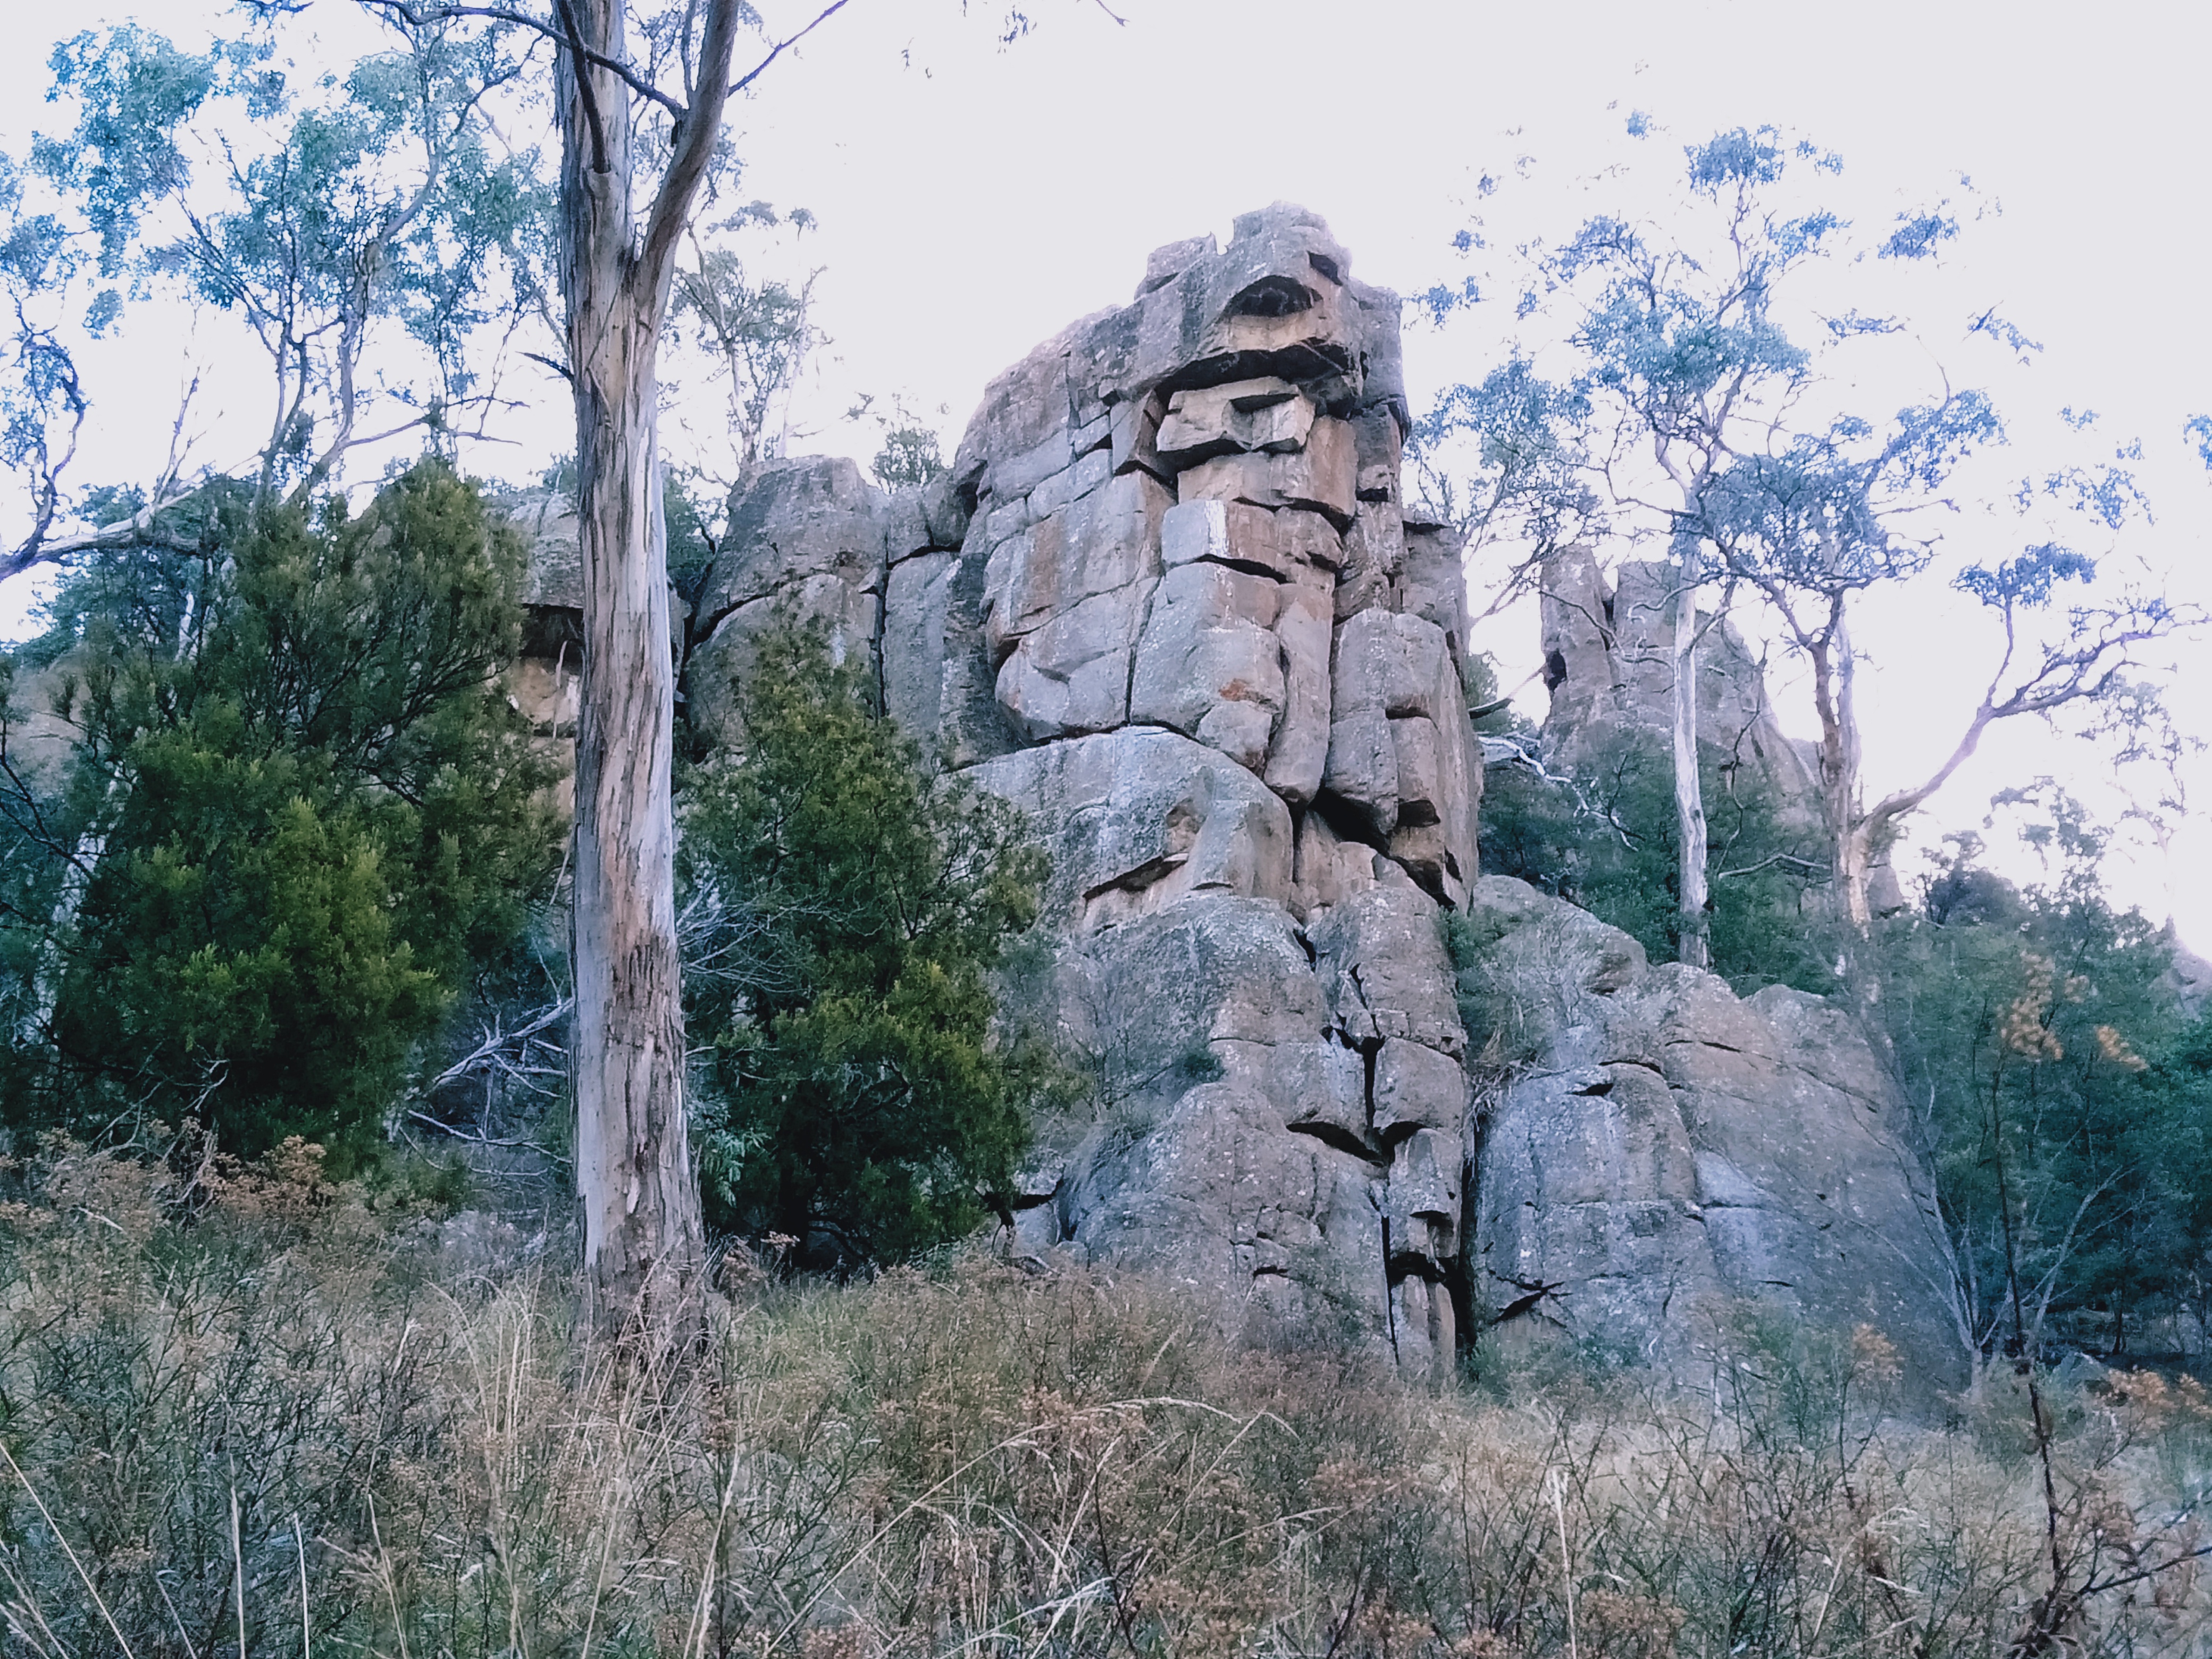
Bismark Buttress
The first route climbed at Lowdina. Add a star if you like old school adventures. Start as for Bismark for 2m, then hand jam left onto the nose following the horizontal line to the base of the wide crack. Go up the chimney / wide crack system until it ends at the massive roofs. Step out left here and follow the system up to belay on top. Walk-off down the back.
Michael McHugh, Robert McMahon, 1968.
Good exposed climbing. Start as for Hood to establish yourself in the crack-line just to the left of Bismark. Follow this straight-up until you reach the big roof, then make some cool moves out right using the massive flake to finish up the Bismark chimney to the lower-off.
Garn Cooper, Pete Steane, 1986.
The grunty looking wide crack in the prow of the Buttress is actually quite benevolent. Up the crack in the prow to the bulge and through it using small holds on the right. Continue past the small rooves and bridge the chimney to the top. DBB Lower-off.
Michael McHugh, Peter Jackson, 1968.
Bismark Buttress (RHS)
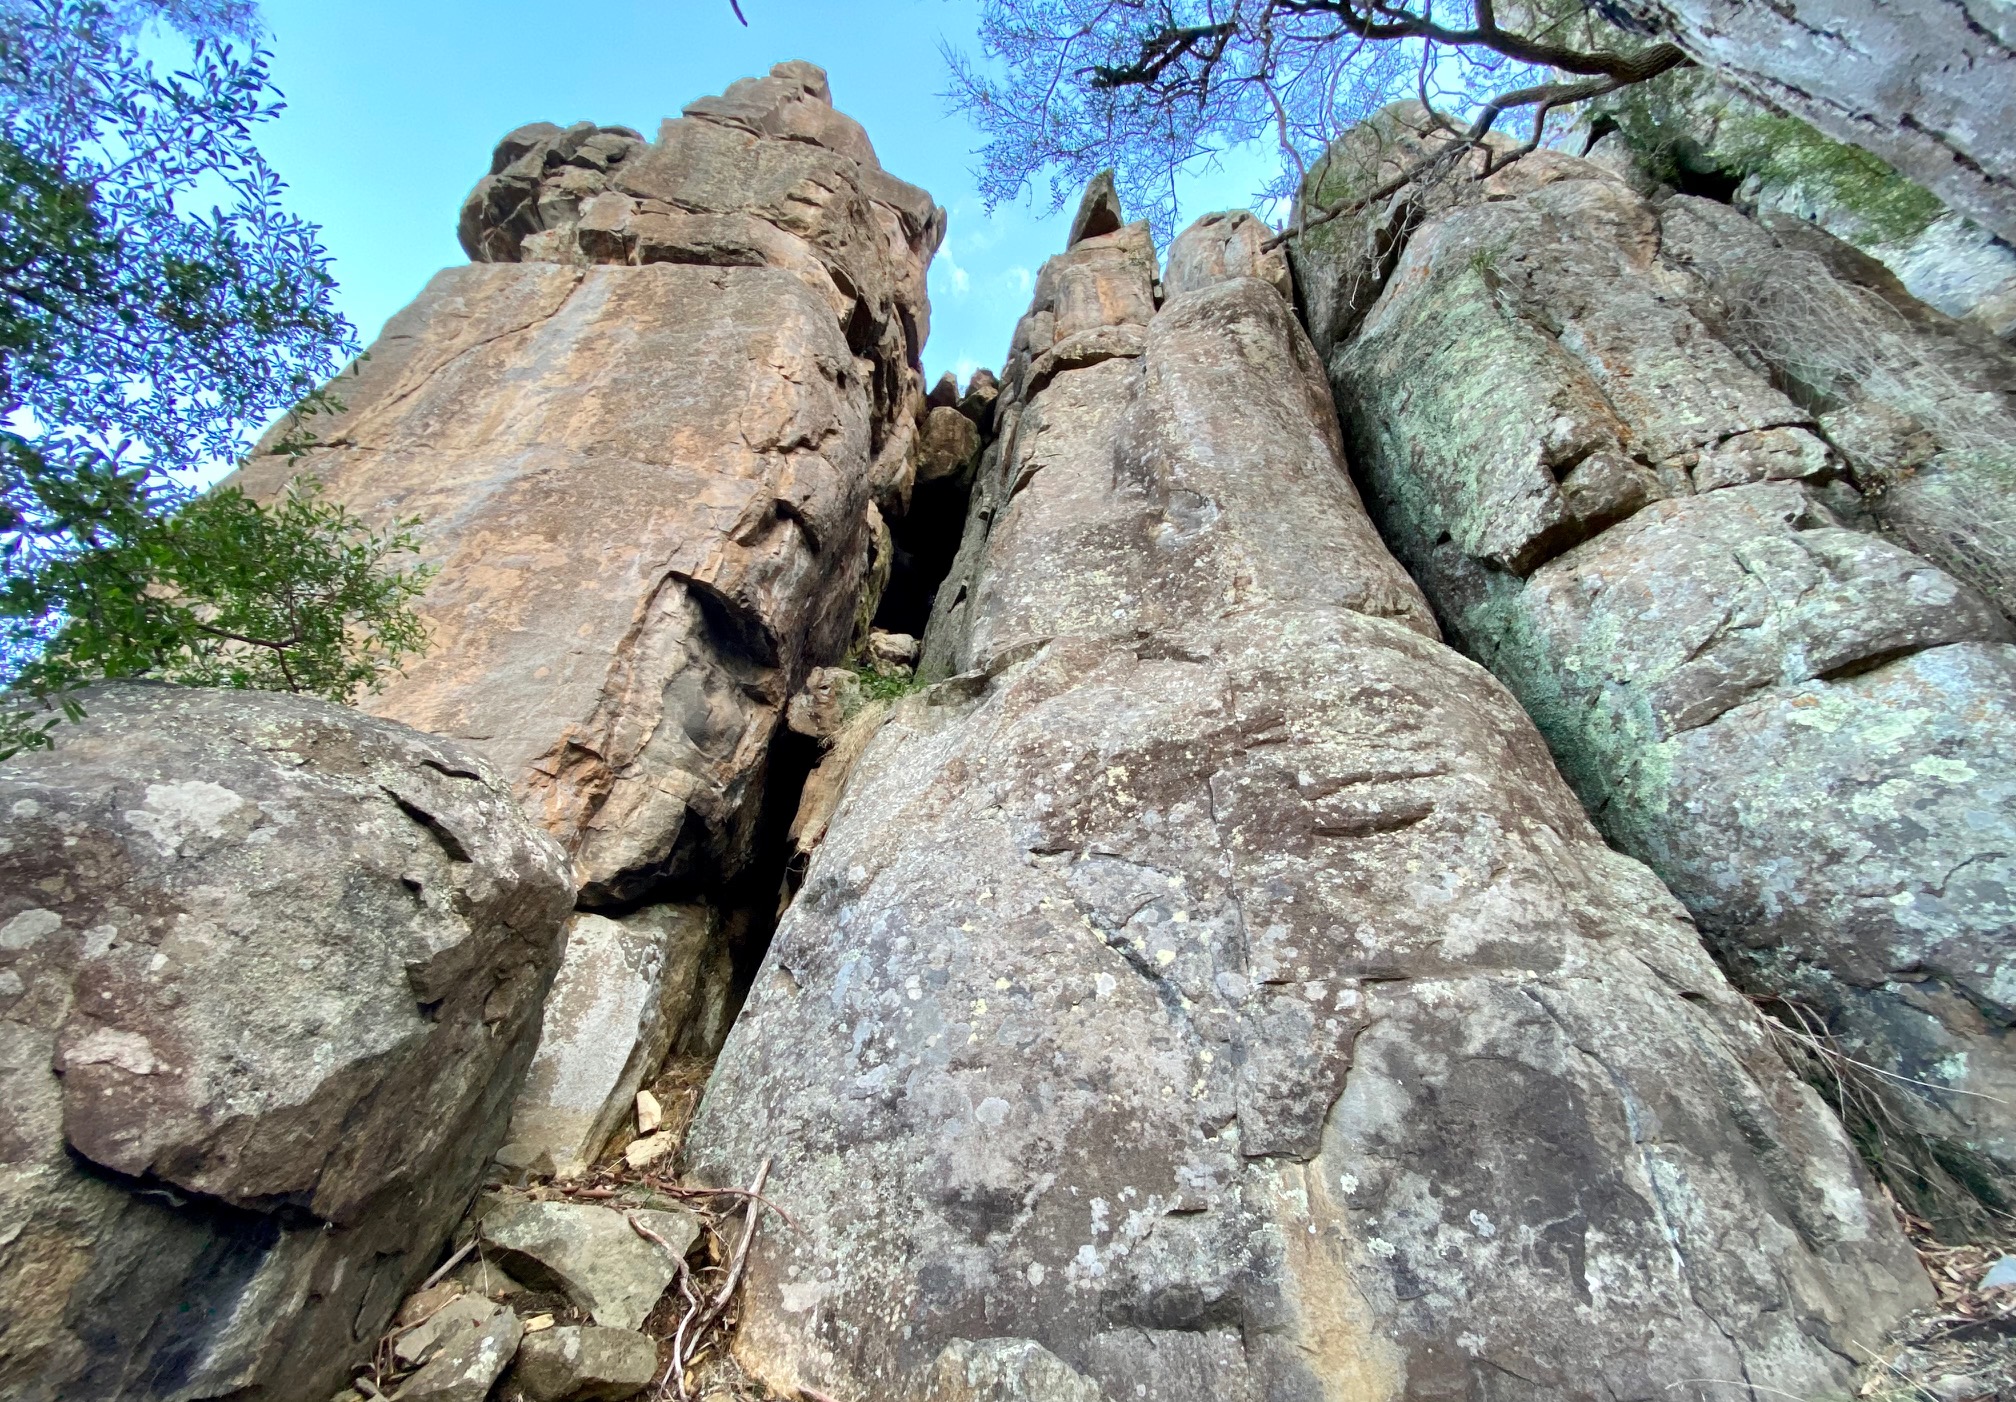
Bismark Buttress RHS
Nice but short-lived climbing on the LHS arete and face. Starting from the top of the boulder, difficulties past the 3 bolts to a ledge. Finish up the easy corner and chimney as for Bismark and lower-off. Take a single rack of cams (BD# 0.3 - 2) for gear above the bolts.
Evan Peacock, Steve Ford, Jun 1991. Re-bolted / Retro-bolted (with FA permission) in 2022.
Steep climbing with good gear. Into the gully, then step-out left and follow the arete and RH face past three bolts and a couple cams to ledge. Step right to steep gully face and up into short finger crack. Step back left around arete and mantle to anchor.
Take cams from #0.1 to #2 and don't clip the old FH.
Evan Peacock, Steve Ford, Grant Rowbottom, Aug 1992. Re-bolted / Retro-bolted (with FA permission) in 2023
A typical example of the Lowdina scene in the 90s and most likely a sandbag. Start up in the gully above Felix and follow the obvious crack (careful of loose rock at the top). Walk-off right.
Evan Peacock, May 1990.
Technical. Pre-clip the high bolt from the LHS before starting if you value your ankles. From the base of the buttress, boulder up the face to narrow ledge. Wizardry past the bolt leads to a short finger crack and easy finish. Trad belay (#0.5 - #1 cams) and simple walk-off to the right.
Take small wires and a single rack of cams from BD #0.3 - #2.
Garn Cooper, Al Adams, Sep 1985. Re-bolted in 2022
This climb has been forever changed since a huge section of the buttress has detached itself - the route is no longer the same as described below (Ed. - June 2025)
Once a nice climb on RP's, now covered in lichen. Climb the thin crack to a horizontal break - careful of the hanging block on the left. Easy walk-off to the right down the gully.
Evan Peacock, Grant Rowbottom, Steve Ford, Aug 1992.
Bonsai Buttress
Located up the gully left of the Virag Buttress and above Illegal Move, where a clean orange/gray face stands at the head of the gully. Lower-off at the top.
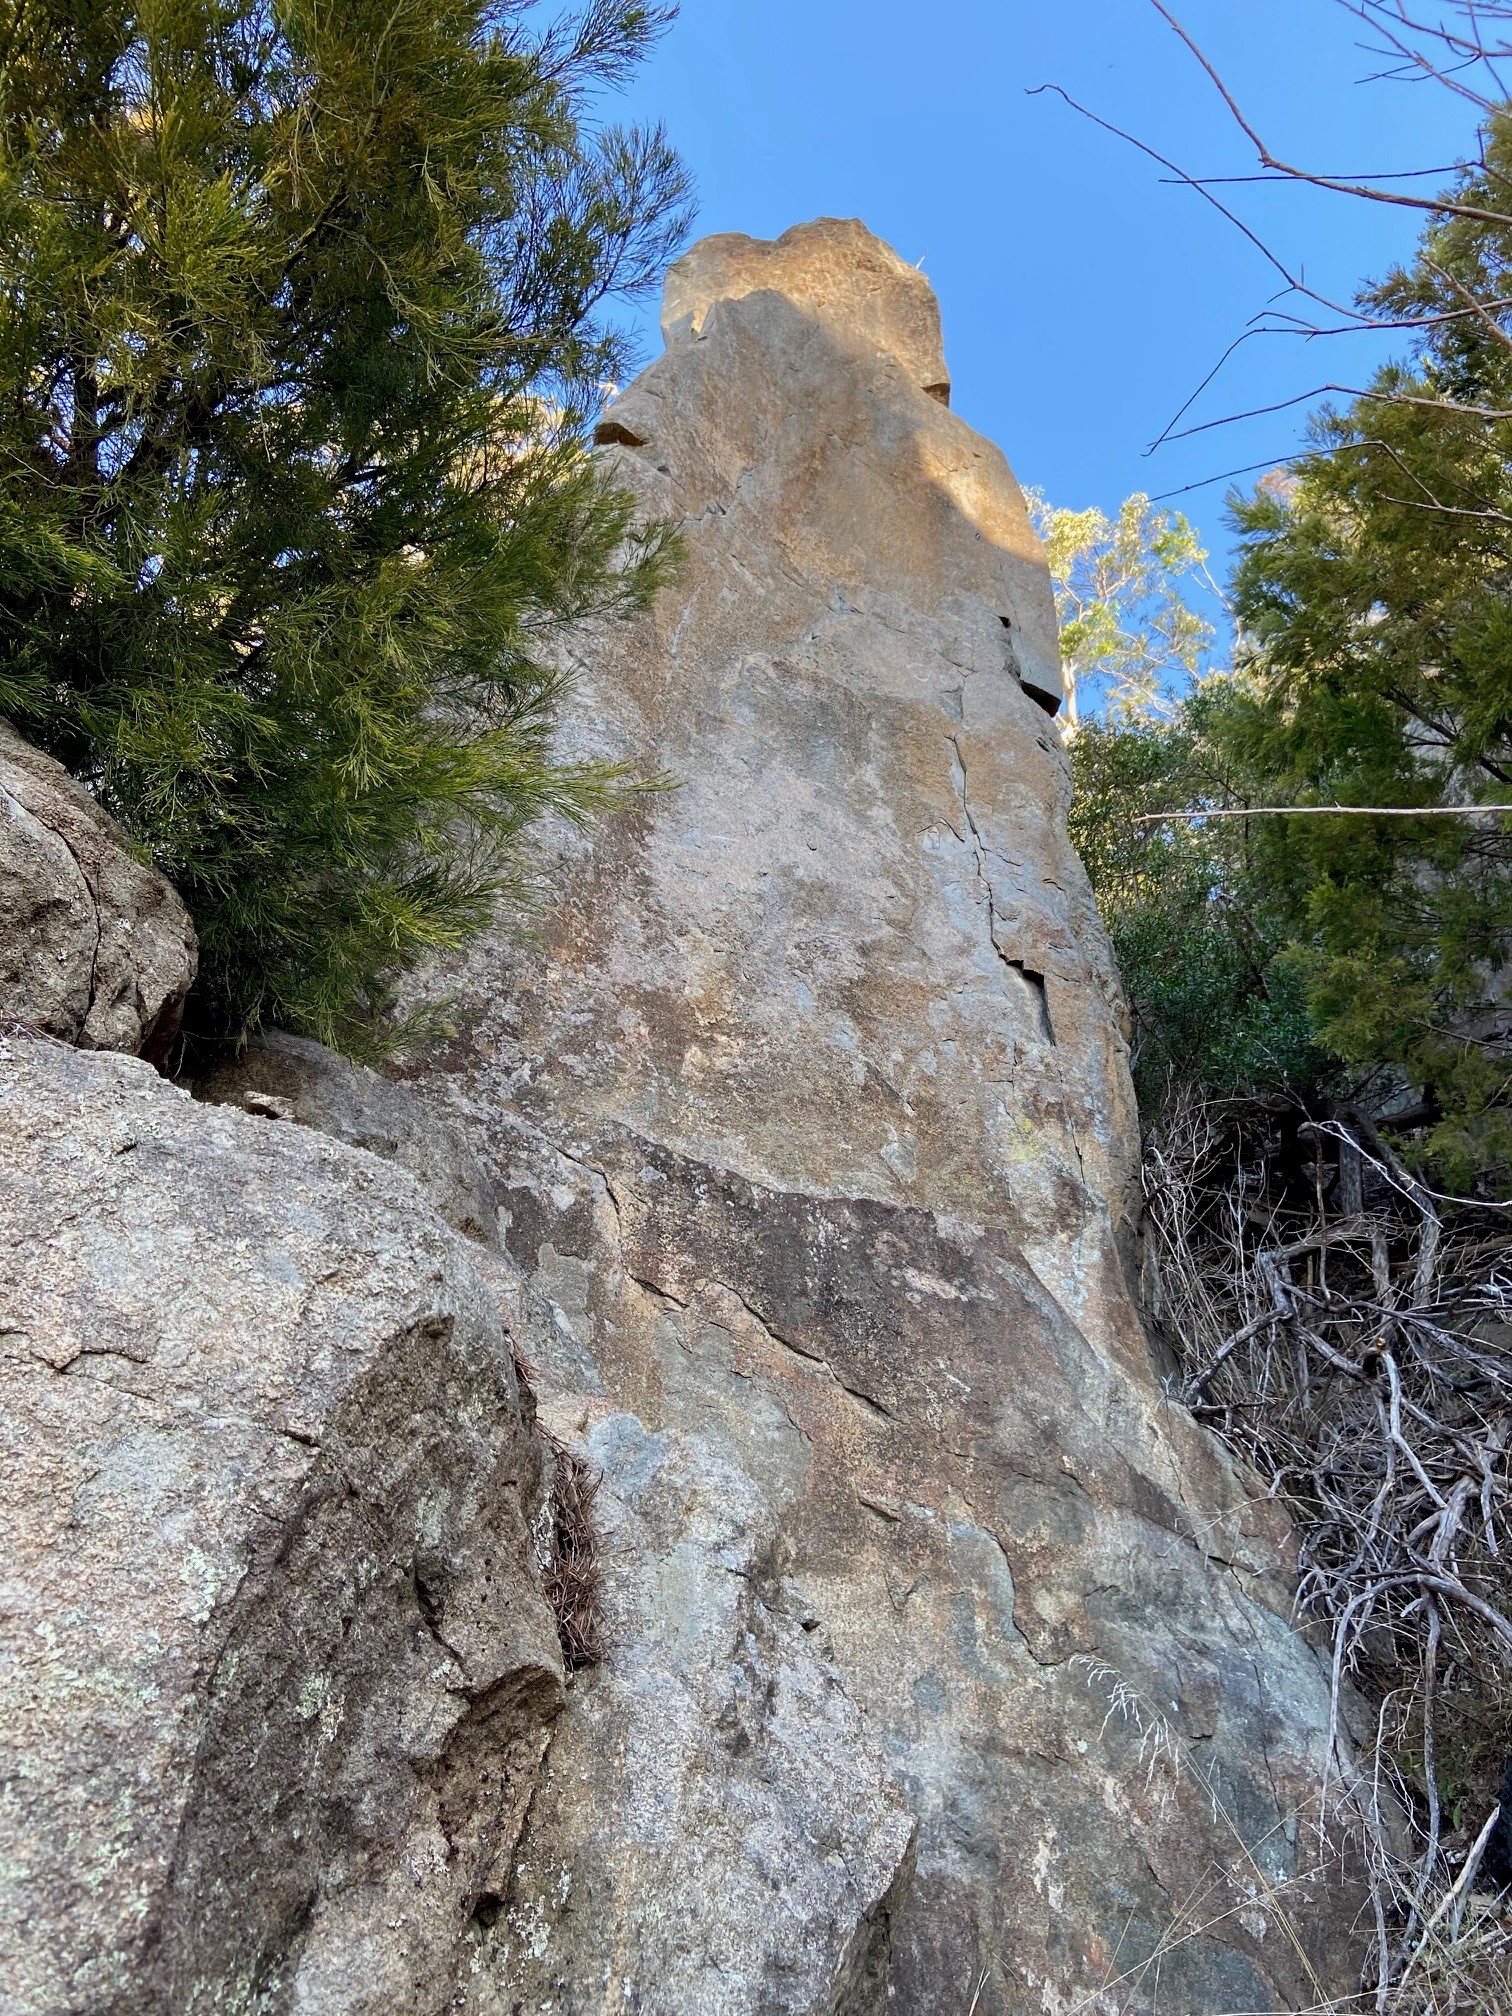
Bonsai Buttress
Start at bottom left of the Bonsai wall. Up the centre of the wall, using left arete as needed, then finish up left arete to the crux at the top.
H Jackson and M Brown July 2021
Originally a bold start, 2 additional bolts were added to save some ankles. From the bottom L of the face, climb up the line of face holds past a RP#3 to an unusual crux move on the upper arete (choose either a desperate dyno or cryptic static move). Lower-off. A variant start exists on the RHS of the arete - place a small cam in seam and move up to join the original line at the second bolt.
Marcel Jackson, Peter Jackson, Apr 1990 (2 additional bolts added with permission of FA in 2021).
Virag Buttress
A popular buttress. Located just uphill and to the right of Bismark. A lower-off is located at the top of Virag for descent from the climbs.
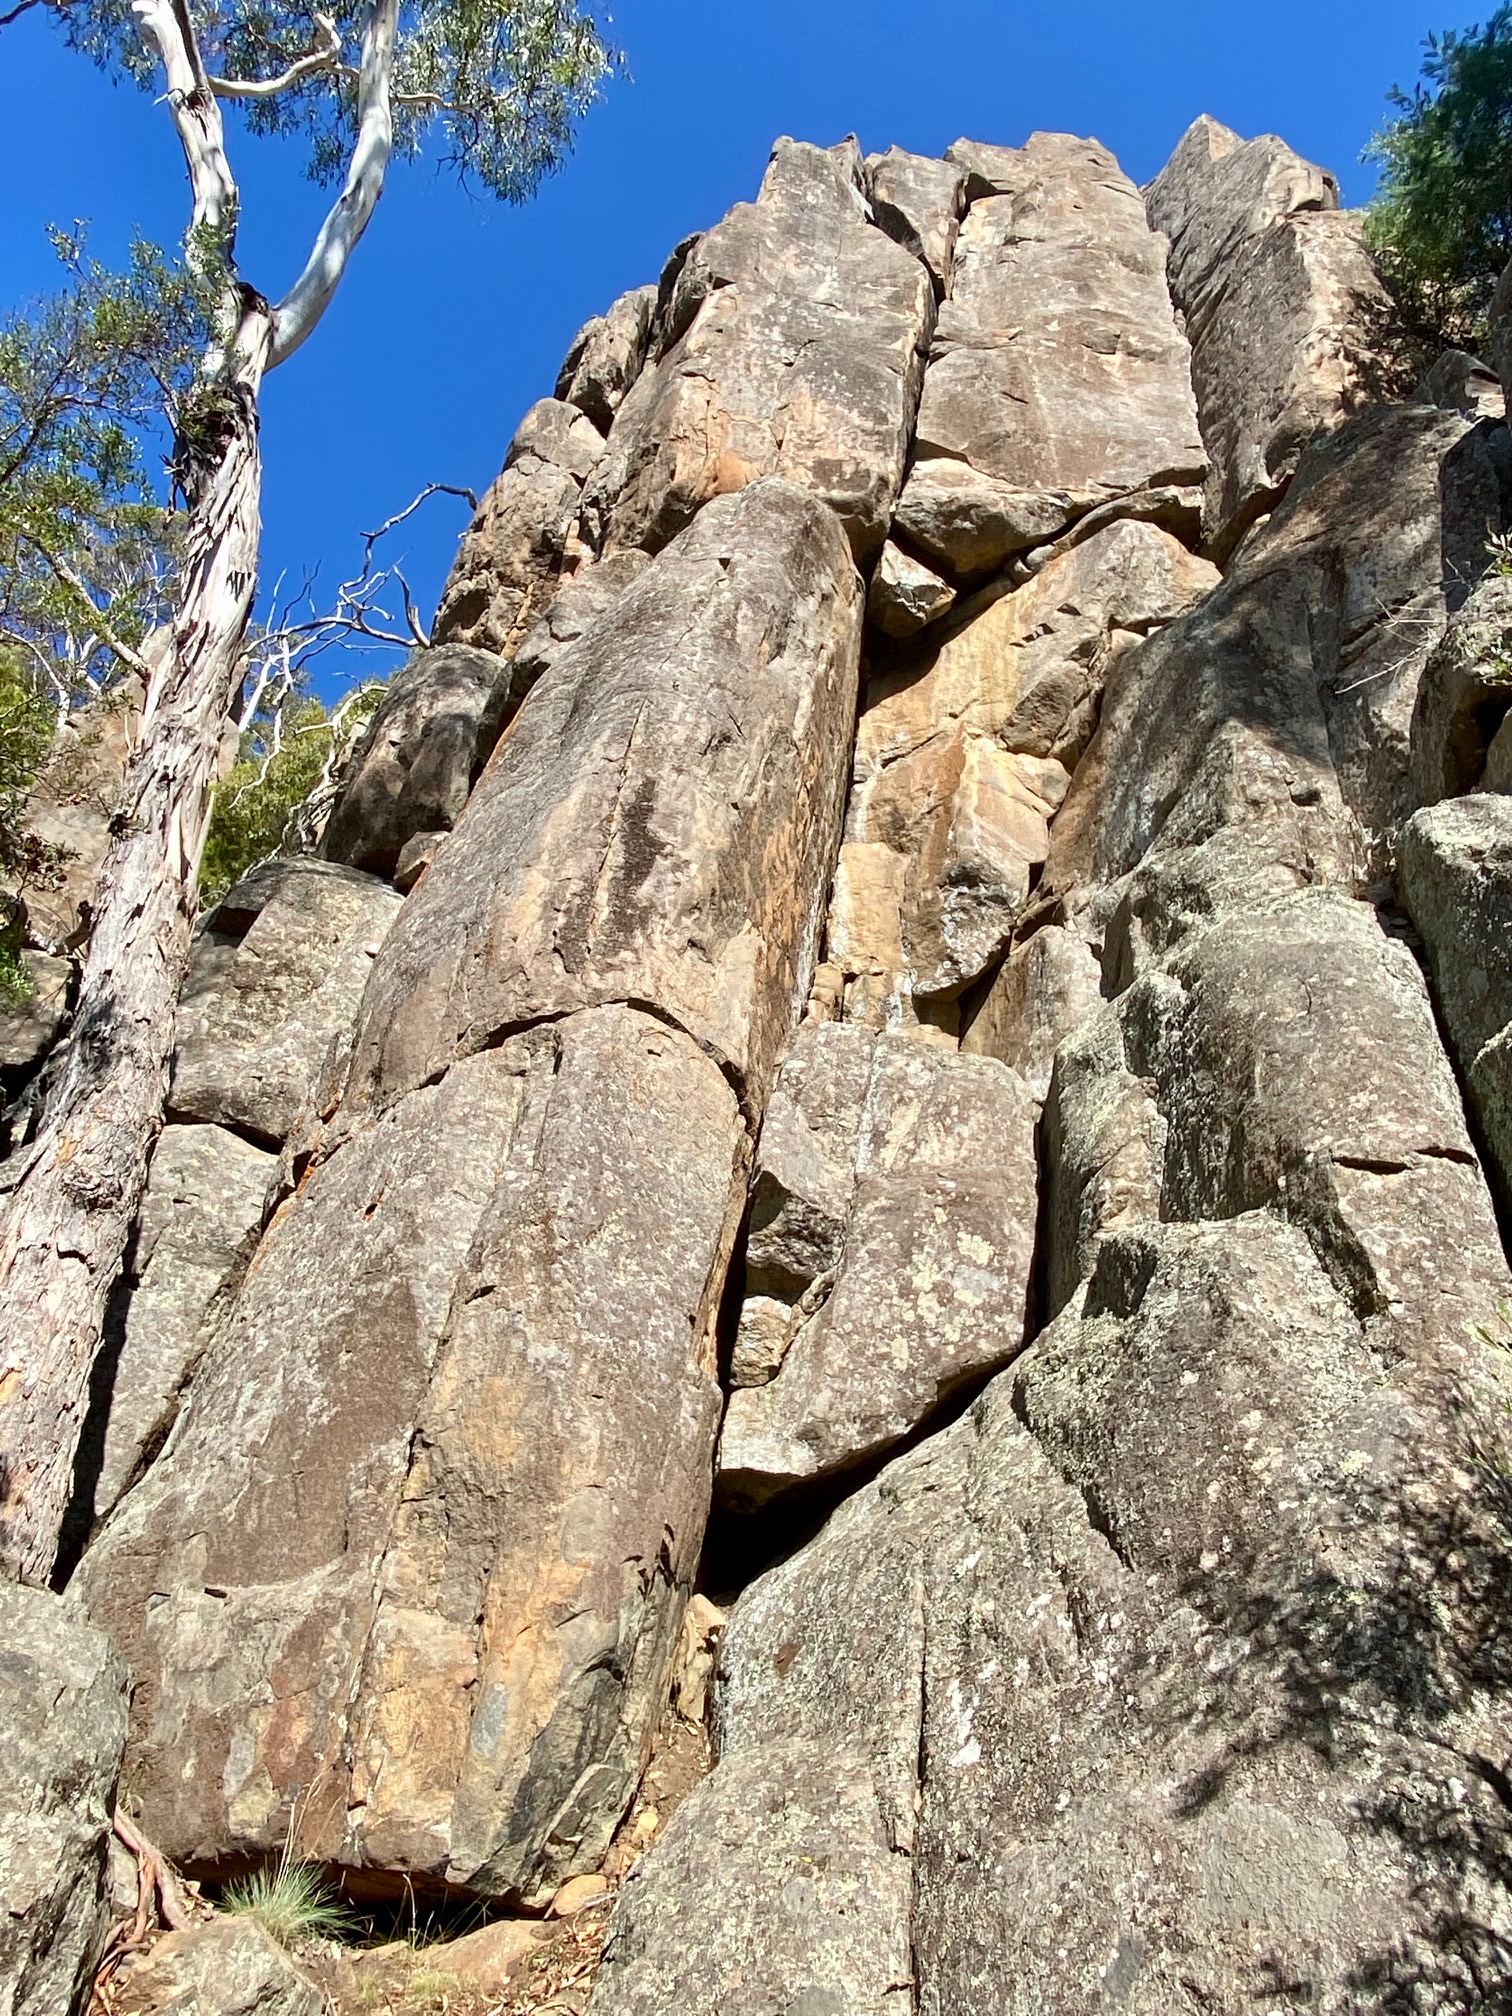
Named for the falcons who nested near here in the late 80's. Start immediately left around the corner from Ungar. Follow the thin fused crack (dust-off your RPs) through the series of ledges - face climb, mantle, face climb, mantle... finishing up the wide crack. Poor protection.
Evan Peacock, Al Adams, Oct 1988.
Tape-up. Jam the fist to hand size crack through a series of bulges, each one a little more difficult than the last. Climb the short wall off ledge at top and make your way to the DBB above Virag.
John Moore, Peter Jackson, Sep 1970.
A reachy climb and originally a bold lead with two carrot bolts and some RP placements that were unusually difficult to place on lead - the new bolts make this route more approachable.
Climb up the seam in the bulge to the first bolt (stick-clip), then continue up the arete using holds on the R wall (crux) to the horizontal break (#0.3 cam). Weave up the upper face past a small wire and 3 more bolts, before exiting R to the easy wide crack which is followed into Virag.
Small wires or RPs, and a few cams between #0.3 to #2 supplement the bolts.
Evan Peacock, Colin Reed, Steve Ford, May 1990. Re-bolted / Retro-bolted in 2021 (with FA permission).
An old-school Lowdina classic. Climb the initial corner past the wonky spike and bridge out through the roof. Haul yourself up into the wide crack (big cam useful) and up this to reach the salvation of a face hold on the left-hand edge. Follow the hand-crack and either finish left around the corner or go direct up the wall (better) to finish at the DBB lower-off.
Michael McHugh, Peter Jackson, Jan 1971.
Originally an aid-route, this thin layback corner still regularly spits-out aspiring leaders - fortunately the gear is bomber. Climb the right trending crack to a tricky exit into the corner. Up the difficult thin corner to a stance, then follow up the wide crack to the top. Either finish through the chimney at the top or climb the wall to the anchor direct. Lower-off.
Robert McMahon, Peter Jackson, Nov 1969.
From Wolfetone, move along to the second small buttress just R. Climb straight up the front of the buttress on flakes to the ledge on the R edge. Clip the fixed peg, then move back L onto the face of the summit block and up to finish.
Noel Ward, Peter Jackson, Jul 1984.
The very steep face route on the back of Wolfetone. Start L of Baby Animals and climb up past 2 FH (stick clip the first). Good fun! No lower-off. Best to continue up the Wolftone chimney and belay at the Virag anchor.
Evan Peacock, Grant Rowbottom, Sep 1992.
The Gully
The Gully uphill and to the right of Virag Buttress.
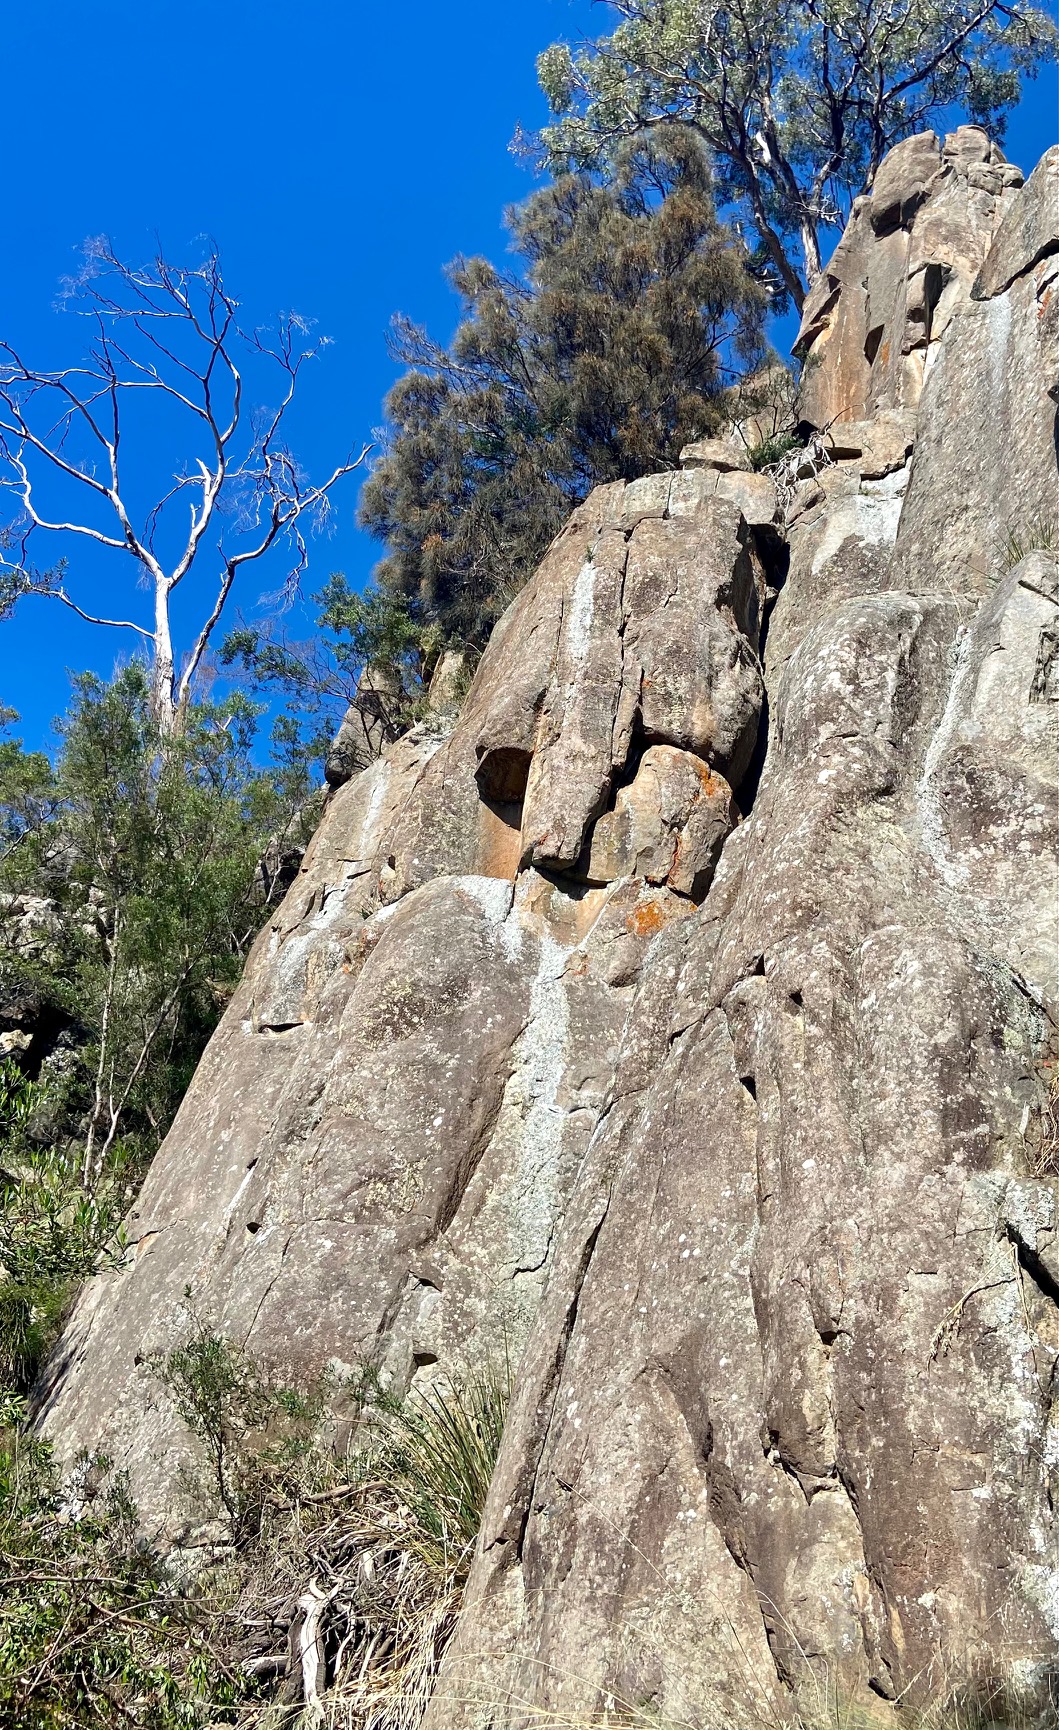
Fruitless Buttress
From Fruitless contour around L for about 20m to some largish boulders and a small face cleaned by rockfall. Climb the crack (small wires), with an interesting crux for short runts.
Lucas Bottomley, Richard Bottomley, Anna Hasan, Apr 1991.
Climb the face of the buttress for 6 m to the ledge below the small roof, move L around it, then back R to the crack and the top. A little mossy at present but still approachable.
Garn Cooper, Pete Steane, Sep 1984.
Climbs the short orange corner crack at the top of Fruitless. Good for those learning to jam.
Garn Cooper, Pete Steane, Sep 1984.
The small, dirty handcrack past a bulge about 10 m R and up the gully from Fruitless. Start on the LH side of the gully just before a huge boulder.
Stuart Scott, Adrian Herington, 1981.
The face immediately L and around the corner from Surprise Surprise and protected with a carrot bolt.
Editors Note 2021: Currently overgrown and hidden by a tree at the base of the route
Evan Peacock, Mar 1990.
Harder than it looks. Uphill and L of Sweetie and behind that buttress is a brushed slab protected by three carrot bolts. The climb is directly opposite Old Mans Hands, across the gully. Climb easily to the first bolt, then move up R to a small scoop. After the second bolt move up to another bolt then the top. Walk-off.
Editors Note 2021: In need of a brush.
Evan Peacock, Colin Reed, Nov 1989.
Sweetie Buttress
The tall buttress located just right of The Gully as you head along the track. Lower-off at top.
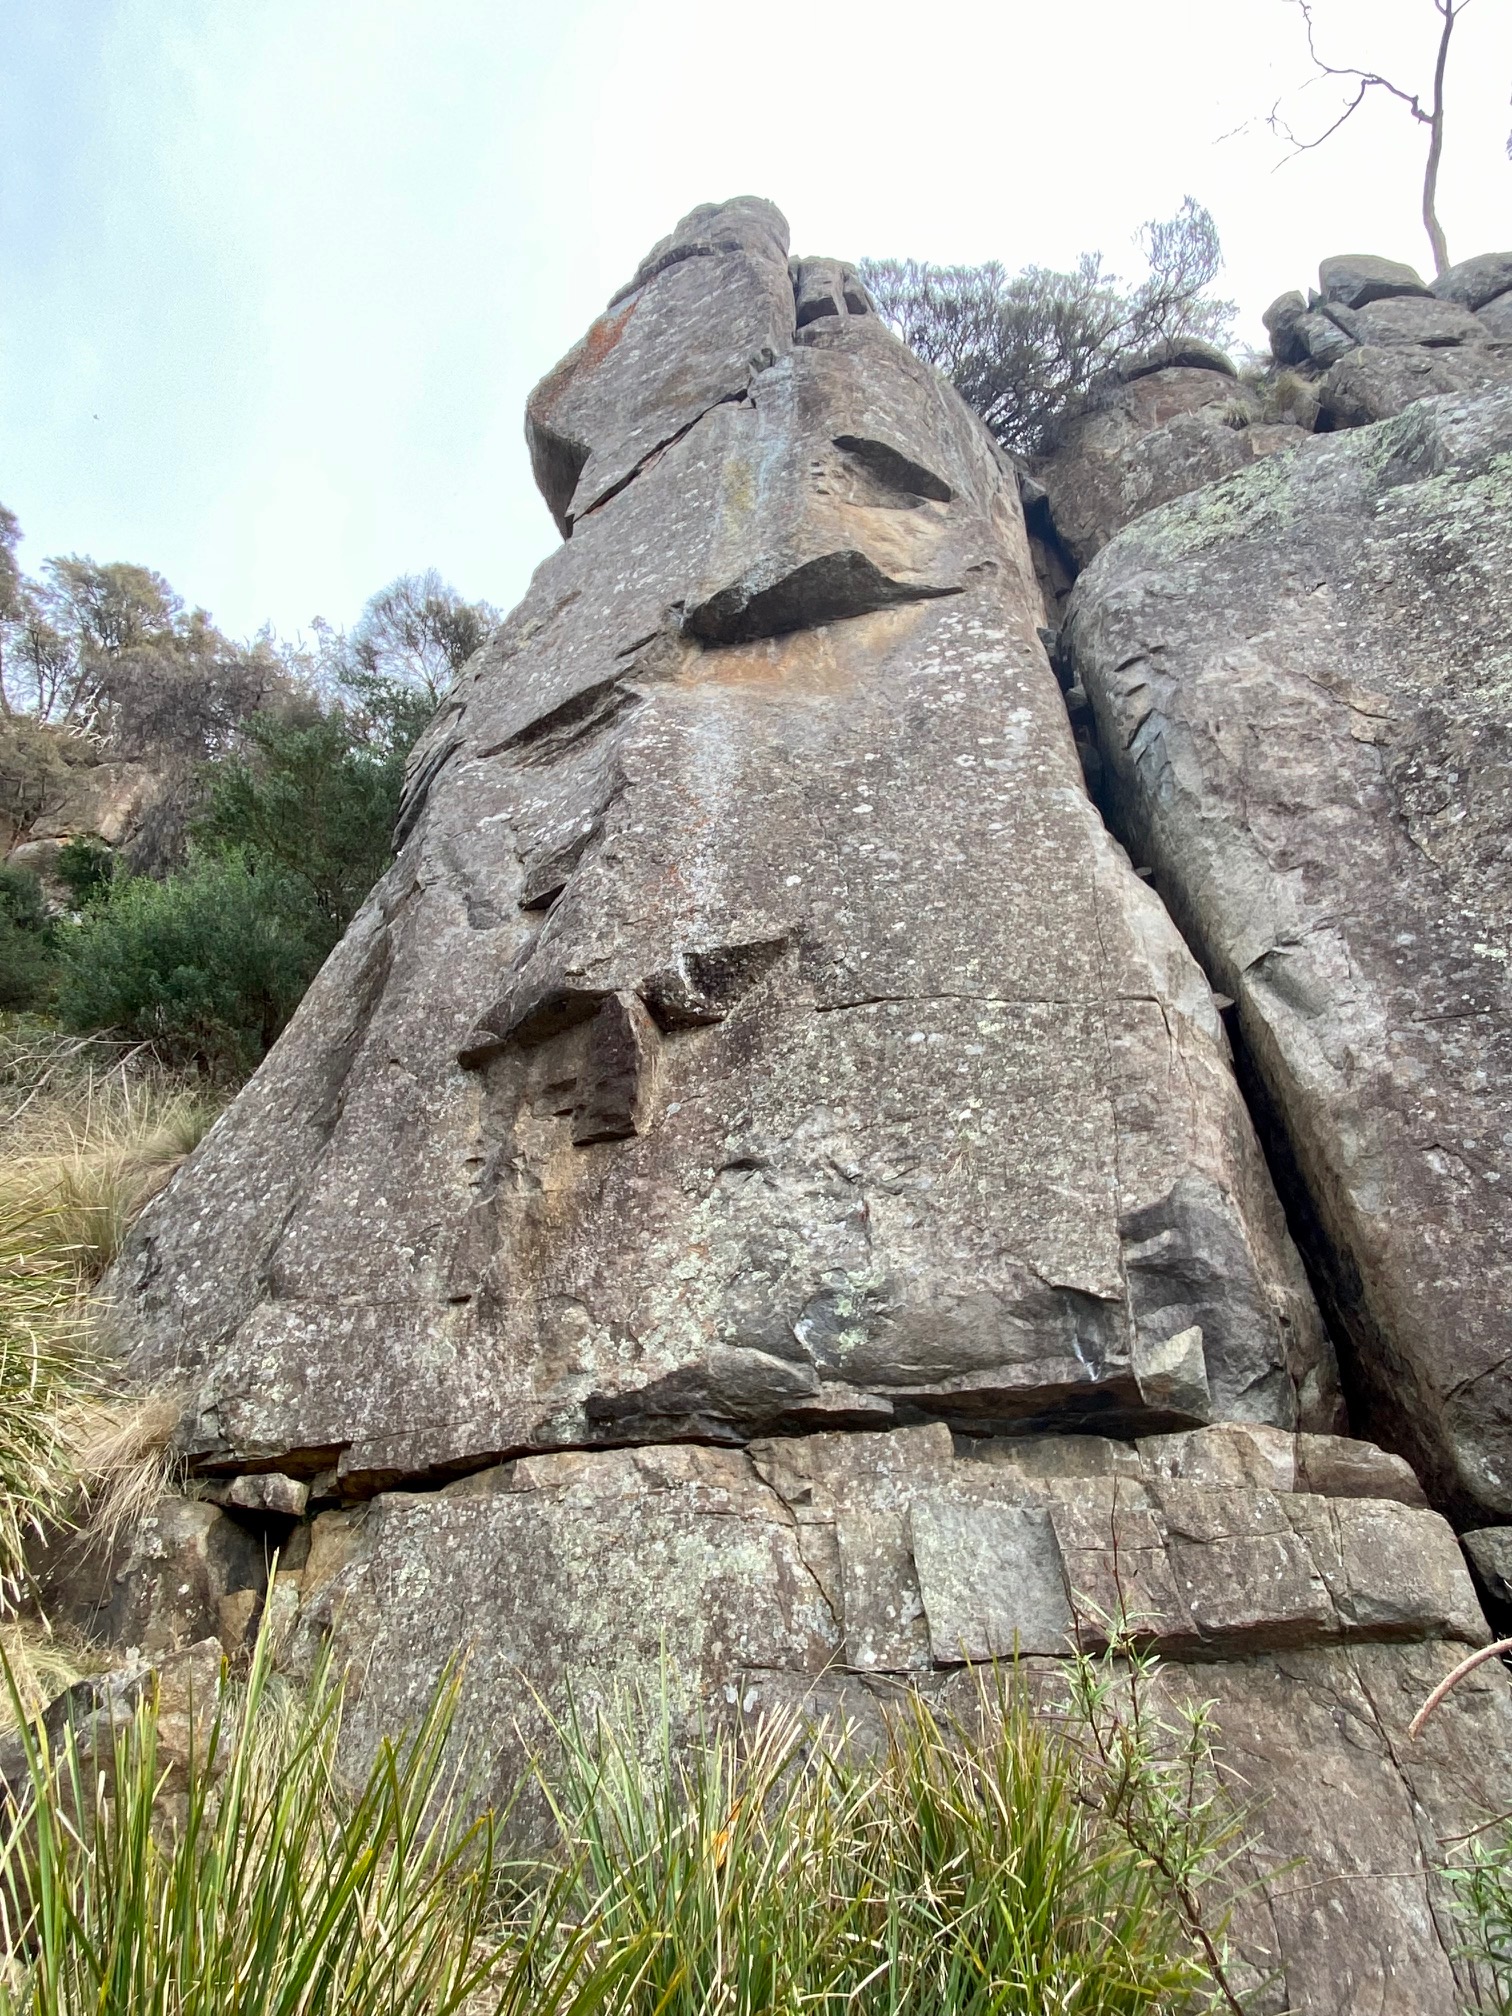
Sweetie Buttress
Airy and exciting. Thin climbing up the face and left arete past two bolts, into a stance at the base of the sloping roof (crux). Arrange your gear (micro-cams useful), then launch out right on underclings and finish up easy crack as for Sweetie to lower-off.
Evan Peacock, Colin Reed, Nov 1989. Re-bolted in 2022.
Carrot bolts to be replaced soon. Start up the thin flake and head out right to clip the first bolt on the lip of the roof. Technical moves lead out right to a stance and the second bolt. Trend back left and climb up on side-pulls and a tiny foothold (crux) to join Acerb. Finish up this and lower-off.
Evan Peacock, Colin Reed, May 1990.
The blackberry bush has returned after a mammoth cleaning effort in 2022 - awaits a gardener to return. Up the wide crack to a ledge, climb the face then hand traverse left, finishing up the crack to a lower-off.
Peter Jackson, Mendelt Tillema, Mar 1971.
Yoda Buttress
The next buttress right from Sweetie in a recess. There is a lower-off above Chocolate and Brittle Little Mothers.
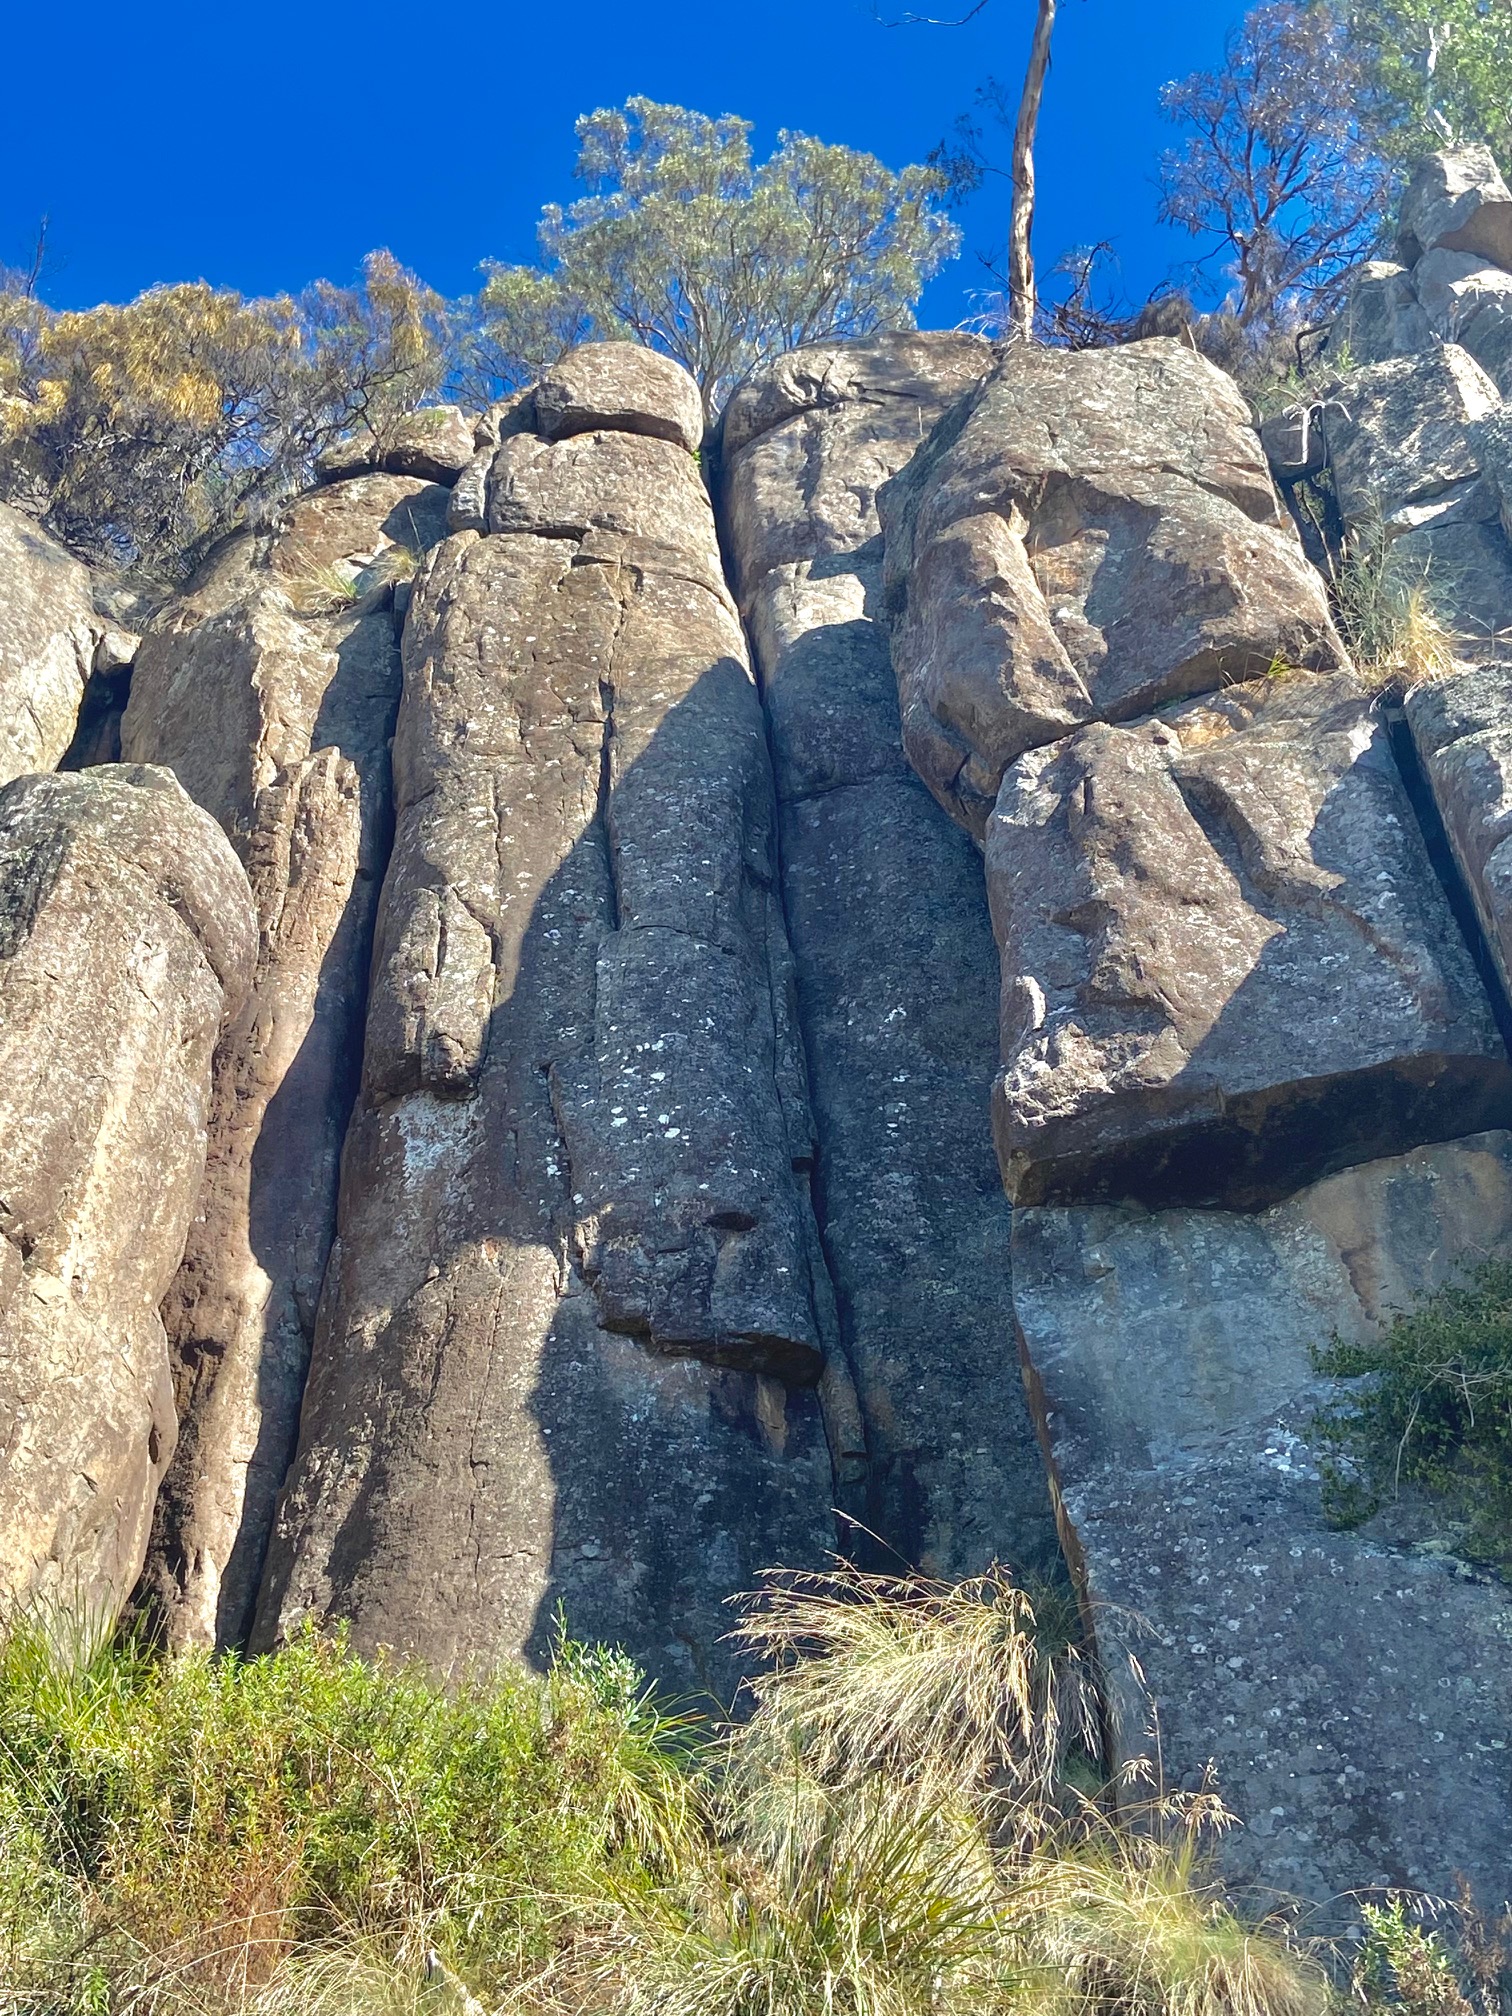
A hard little boulder problem (top-rope recommended) (Editors note: seriously?) with a poor landing. Start on the overhanging mini-buttress just L of Yoda.
Evan Peacock, May 1990.
The clean crack-line left of Yoda. Bridge the chimney and jam the crack to a small ledge on the left, then move right onto the arete and up into the fist crack. Finish by hand-traversing right just below the huge block to the lower-off above Chocolate.
Christoph Speer, Martin Brown, July 2021
Climb the first part of Strawberries until you can undercling and side-pull out right using the flake. Finish up Yoda.
Christoph Speer, Jan 2022
Brilliant, sustained climbing up the thin line in the middle of the face. Start up Chocolate and undercling the flake out left to gain the line. Follow this to the top past numerous RPs, micro-cams and some more reassuring pieces. Lower-off.
A historical note from Al: 'In 1982, I hit the ground from 6m on Yoda after ripping two poor RP placements. Instead of blaming my lack of skill in placing solid RPs, I blamed the poor protection offered by the route. It wasn't until 1984, after direct-aiding off RPs in Yosemite that I plucked-up the courage to attempt the route again. And.. you guessed it, the pro on Yoda turned out way better than adequate..'
Peter Jackson, Dec 1980.
A technical little start - unprotected, but not such a bad landing. Follow the slab 2m L of Chocolate until it joins the layaway above the undercling (and runners!).
Evan Peacock, May 1990.
Sweet hand-jamming. The obvious hand-crack through a troublesome bulge, just right of Yoda. Lower-off.
Peter Jackson, Dec 1980.
Reminiscent of the UK gritstone style. Up the easy face/crack for 5m to the roof, trend out left to the arete and clip the bolt above. Thin moves on the arete lead past RP3 on face to horizontal break (hand sized cam). Continue through open groove past another RP3, then finish up the face to the lower-off.
Protection is adequate despite appearances. Two RP#3s and cams from #0.3 to #2.
Evan Peacock, Roy Langman, Al Adams, Dec 1989. Re-bolted in 2022.
Albatross Buttress
Located just to the right of the Yoda Buttress is an impressive and intimidating buttress split by a soaring crack (Albatross). There is a lower-off on top of the buttress. Further right, the track drops down towards Greenknowe past some lichenous buttresses.
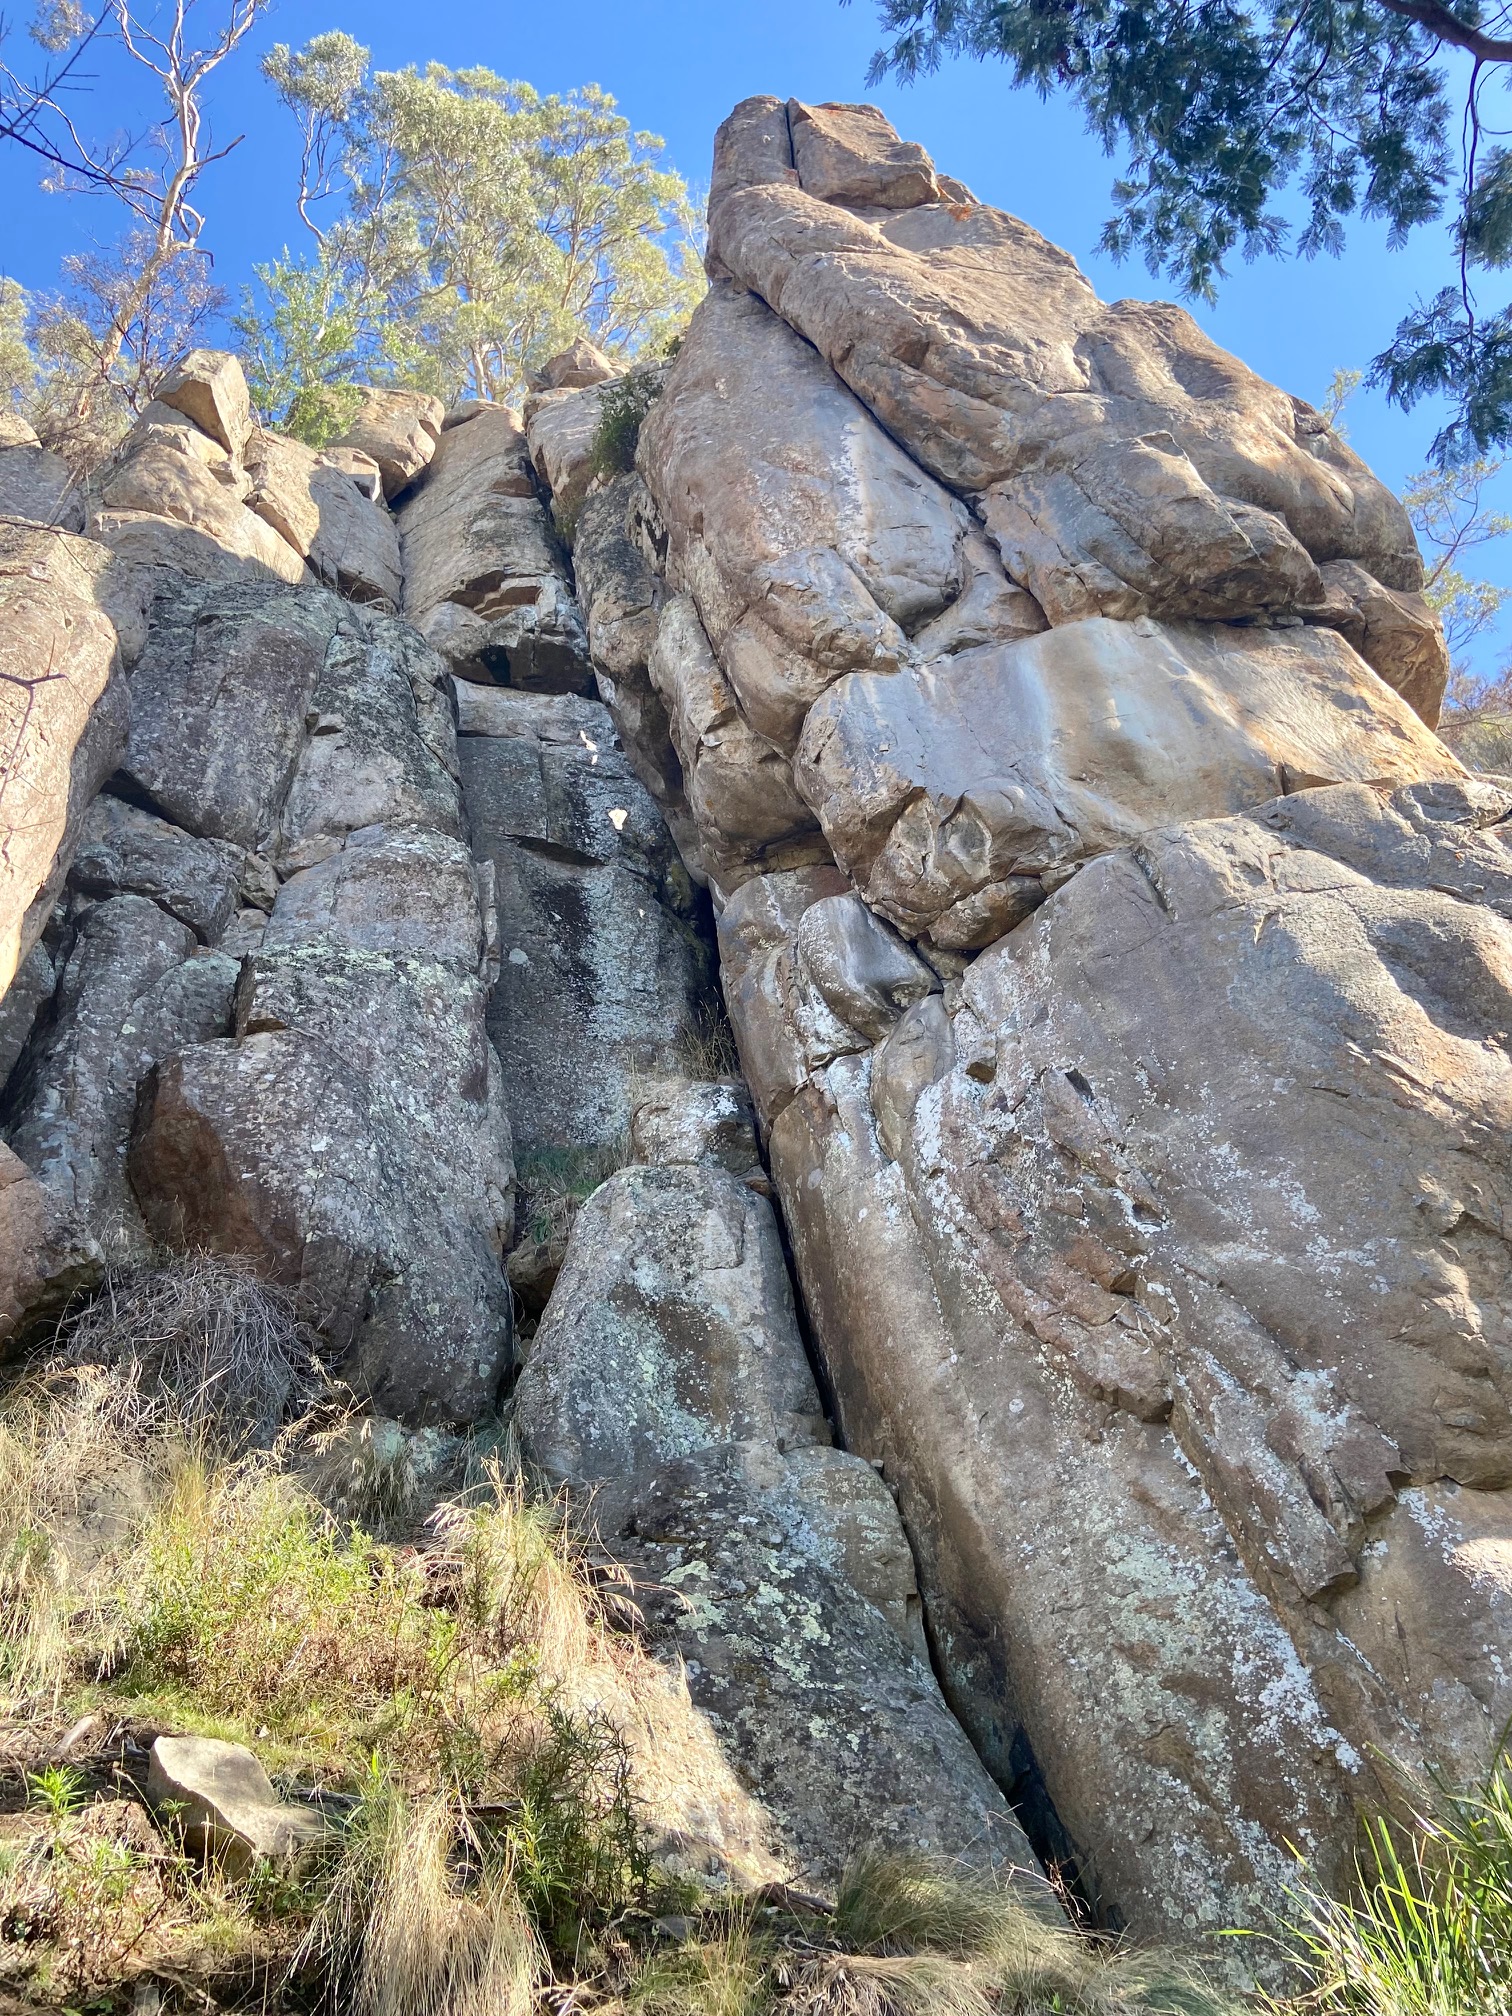
Albatross Buttress
The scene of some epic cleaning efforts in 2021 to restore this route. Uphill in the gully to the left of Albatross is a corner crack. Follow the fist crack to a cleaned ledge, then layback and jam the corner crack above. Finish up the exciting bottomless chimney (taking care of any loose rock at the back) to a lower-off.
Mendelt Tilema, Peter Jackson, Mar 1971.
Adventurous - beware the poisonous vapours! The deep chimney just R of Ulysses.
Garn Cooper, Pete Steane, Dave Gardner, 1982.
The line left of Albatross that looks 3 grades harder (and may be at least 1!). Up the corner to a stance below the bulging roof. Arrange your gear, then commit to a strenuous layback sequence to a stance in a shallow chimney. Interesting moves through this to the finger crack. Finish by traversing right into Albatross to finish up the hand crack.
Fraser L-R, Christoph Speer, Anne Knox, Samson Stensletten, July 2023
The best route at the crag and a historically significant line. The route follows the intimidating, overhanging, slick corner-line. Layback the flakes direct (dubious attachment) or traverse in from the left. Move right, and then delicately mantle to the small ledge and smooth wall. Haul yourself up past the spike and into a stance at the base of the bottomless crack. Follow this with difficulty to the top. Lower-off.
In retrospect this climb was Australia’s first grade 23 - although it was graded 21 after the FA in 1975. The first climb actually given the grade of 23 was Henry Barber’s ascent of Insomnia at Frog Buttress in 1975 (now down graded to 22). For over 40 years it was falsely reported that Lewis used a point of aid for rest on Albatross’s 1974 first ascent. In interviews for Gerry Narkowicz’s book on the history of Tasmanian climbing in 2018, Lewis and his belayer Lyle Closs, categorically state that the route was done free. Barber who was originally credited with the first free ascent of Albatross the following year, ironically fell off the route, the only climb that he was reported to have fallen off during his visit to Australia. The climb was subsequently upgraded to 23 and is universally considered rather hard at this grade. So, it seems that at the time of Lewis' ascent it was the hardest piece of climbing done in Australia by quite a margin, but the grade was under-estimated by Lewis at the time - as was typical of his harder routes.
Ian Lewis, 1974. (the first record of this ascent appears in the Jan 1975 edition of Mountain #41, where it is graded 21).
The face and slab on the front of the buttress to the right of Albatross has been climbed on top-rope. A decision was made not to bolt this due to its proximity to Albatross. Still worthwhile having a play though if you're at the anchor. Run the rope over the front of the buttress, and climb Albatross until at the base of the crack. Step right and up from here and follow the tricky face and delicate slab/groove above, finishing through the short crack to the anchor.
Martin Brown, August 2022
Yeti Flakes, Unfinished Symphony & Fingers and Thumbs Buttresses
The series of buttresses on the same contour and to the right of Albatross don't provide much value currently. They are all extremely lichenous and the quality ratings and grades given in the original guide aren't providing much inspiration for a mammoth cleaning effort to resurrect them...
Start about 15m up the gully R of the Albatross buttress. Climb up to the horizontal break below the roof, then launch up the face (small RP's).
Evan Peacock, Steve Ford, Grant Rowbottom, Aug 1992.
Start two sub-buttress R of Albatross on the same contour. Face climb up the thin flake on the LH side of the buttress.
Gerry Narkowicz, Pete Steane, 1981.
On the right side of the gully between Yeti Flakes and Unfinished Symphony is a crack. Scramble up the gully and jam to the top.
Jeroen Jansen, Cyril Scomparin, May 2022
Start on the front of the next buttress right of Yeti Flakes, a few metres R of a large recess. Climb up the crack to the ledge. Follow any of the variety of lines up (bounded on the R by a small square-cut pillar).
Chris Dawson, Mary McWhirther, Sep 1974.
Thoughtful footwork required to negotiate an undercling. Start at the thin crack splitting the front of the next small buttress R of Unfinished Symphony, behind a big sheoak. Climb the crack past the undercling flake, to the break. Straight up the face of the buttress to top.
Editors Note 2022: Originally a * route. But needs a brush to restore it.
Phil Robinson, Chris Rathbone, Jul 1976.
Short and sweet... Seems rather changed now from the original description. Start from the gully about 6m R of Fingers & Thumbs. Traverse L and diagonally up on sizeable footholds and around arête to join the thin crack line at a suspect flake, 1m R of F&T. Thinly protected. Continue up past the flake to horizontal. Follow wide crack to top. An alternative variant is to climb F & T for 3m and then traverse R for a metre to the bottom of the thin crack line Follow this to the top past the suspect flake and wide crack, as for the original route (17).
Editors Note 2022: Originally a * route. But needs a brush to restore it.
Doug Bruce and Team, 1985.
The direct start.
Evan Peacock, Apr 1990.
The boulder problem up the detached pinnacle on the RH side of the gully R of Fingers and Thumbs.
Garn Cooper, 1986.
Greenknowe Buttress
This buttress is located directly below Bulging Biceps Buttress and about 80m to climbers right and downhill from the Albatross Buttress. There is a lower-off for Caged and Greenknowe.
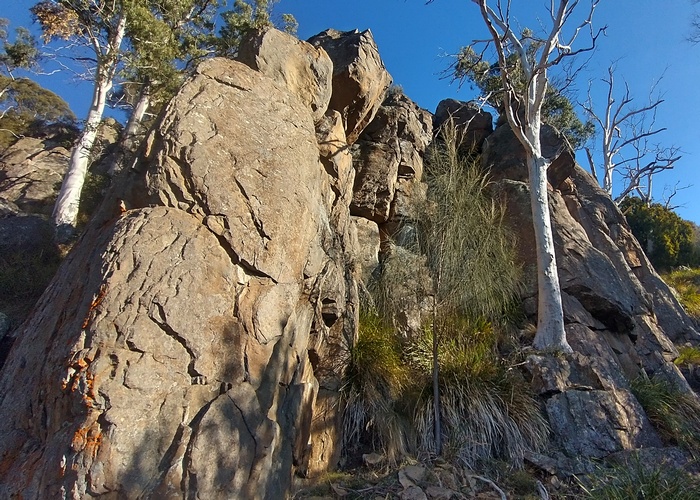
From Fingers and Thumbs go downhill to a prominent buttress/pillar lower than the rest. This route climbs the arête 10m L of Greenknowe. Start up the face R of the arête, then move onto the arête at the horizontal, finishing straight up. Poorly protected.
Garn Cooper, David Loone, 1985.
The line just R of Hooning the Block. Finish up Hooning the Block. Poorly protected.
Dave Gardner, Ross Adams, 1986.
The crack 10m right of the of the large leaning pillar and 18.5m left of Greenknowe. Rock seems ok, coould be an error of judgement...
Dave James and Xinyu Zheng July 2122
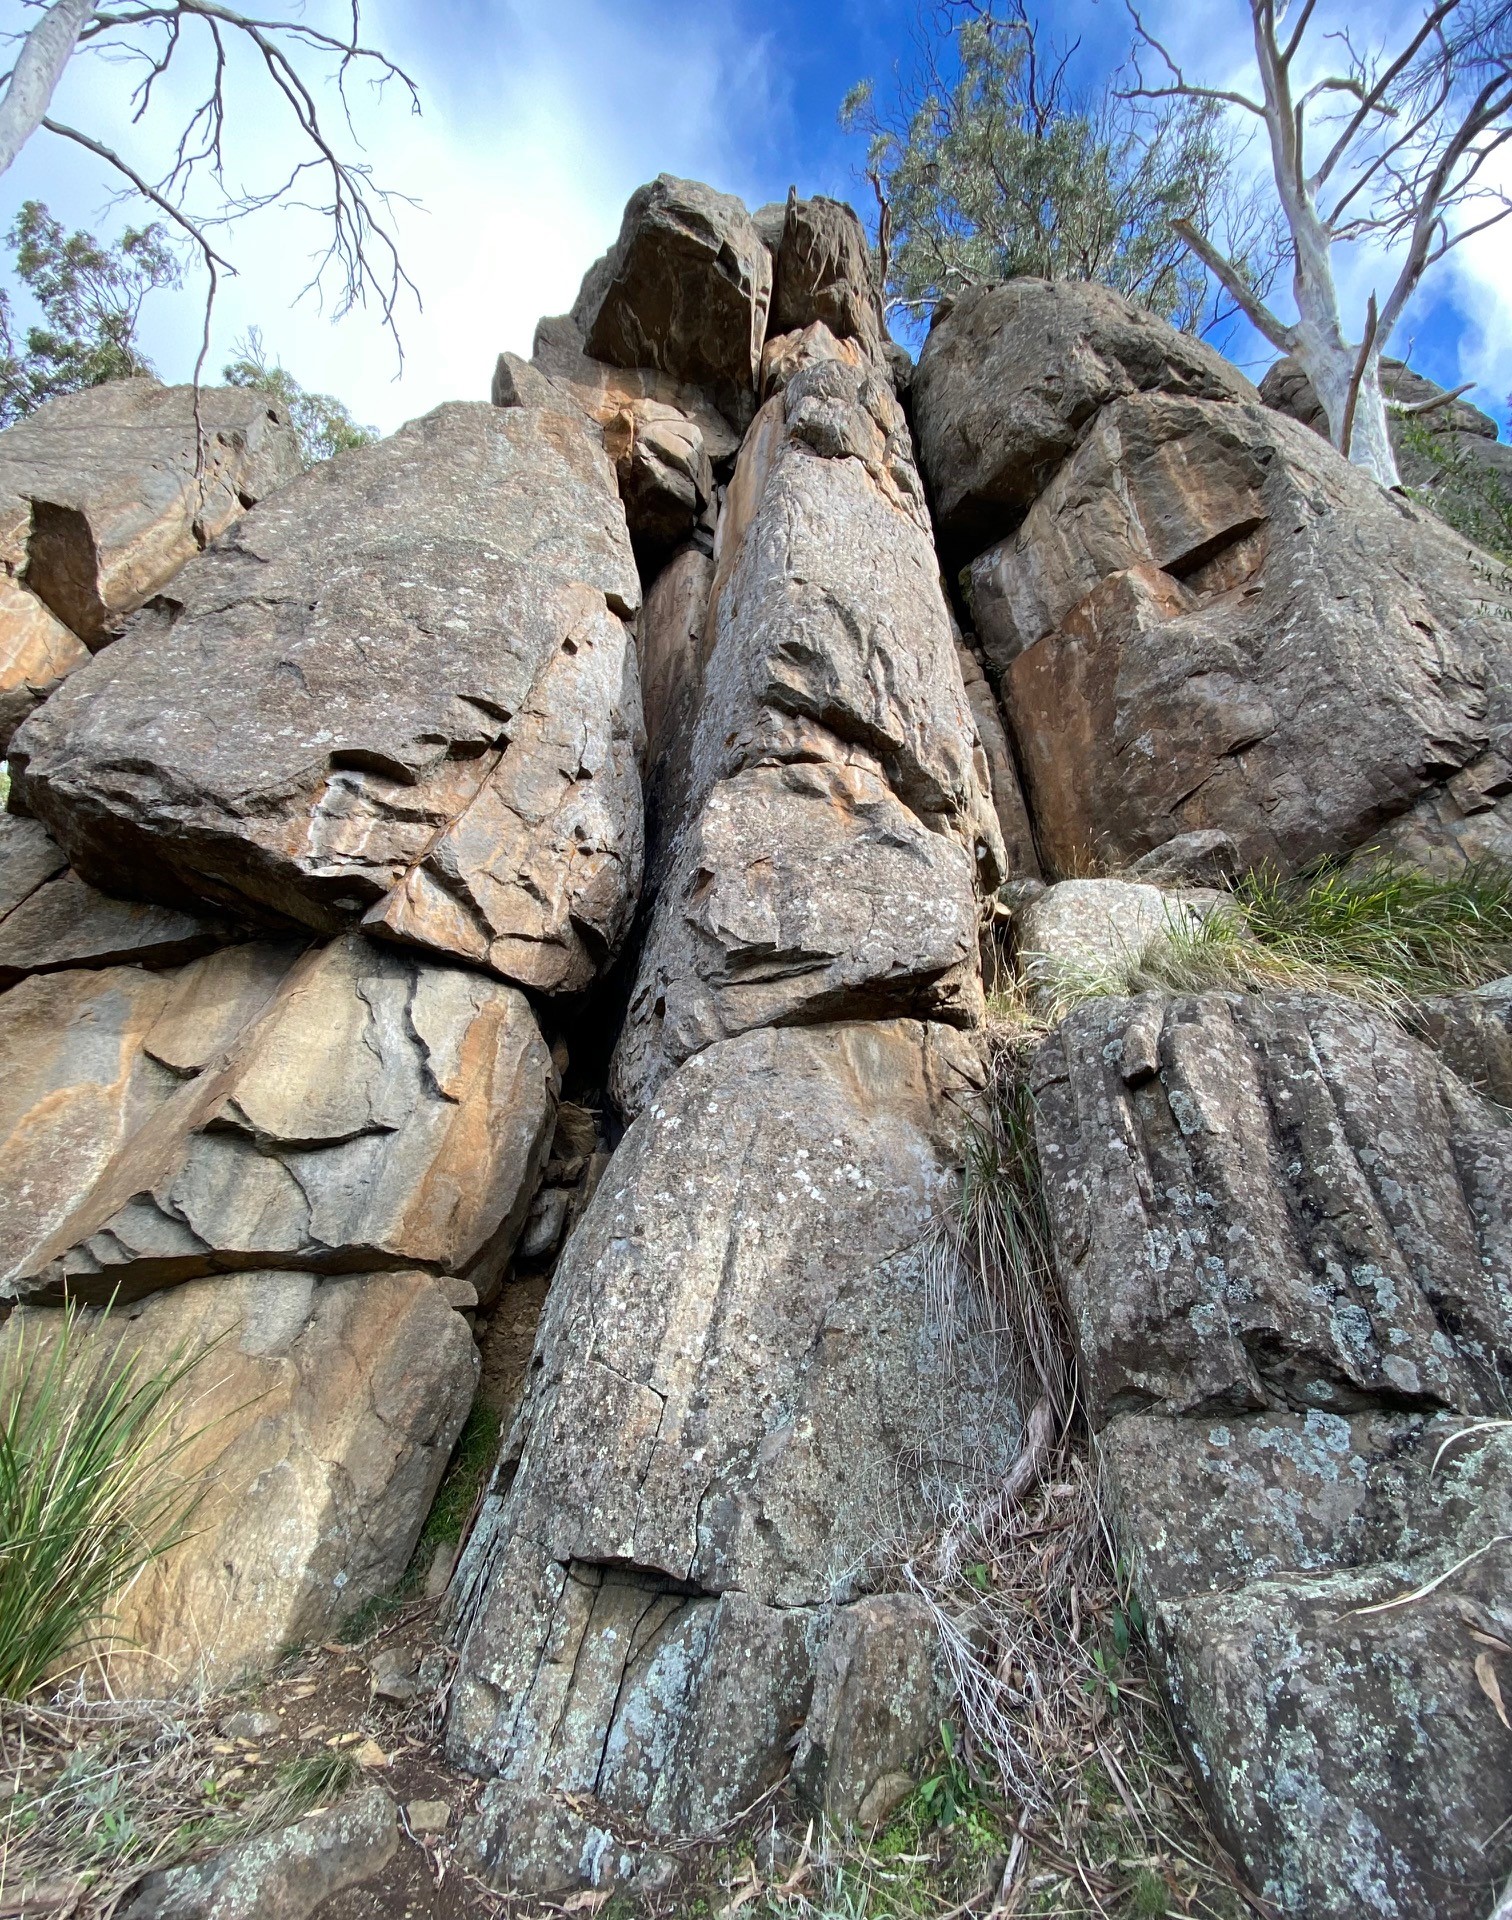
Greenknowe Buttress
The arête a few metres L of Greenknowe. Nice climbing but lichenous and poorly protected. The start was originally protected by slinging a branch on the now dead tree.
Garn Cooper, Noel Ward, Sep 1984.
Adventurous climbing for the grade. Climb the smooth chimney, trending right to the nose of the buttress past the first roof. Up to the second roof and around it on the left. Continue up the short wall above to the DBB lower-off.
Peter Jackson, Mendelt Tillemma, Nov 1969.
Climb the face 1m R of Greenknowe, with protection at 4m (and after the crux!), to join the aforementioned at its roof.
Evan Peacock, Mar 1989.
Balancy climbing that's worth a few moments. Originally started direct through the scoop with only a single piton for protection. Now you just need to follow the bolts through the bulge to a lower-off. A small cam in the seam to the left protects the start.
Marcel Jackson, Peter Jackson, Oct 1989. Retro-bolted in 2021 with FA permission.
From the middle of the buttress just R of Greenknowe move up on big holds to the ledge on the RH edge. Step L for protection behind a suspect flake, then finish directly up the middle.
Peter Jackson, Noel Ward, 1984.
Biceps Buttress
The Biceps Buttress is situated directly above the Greenknowe Buttress and just to the left of the Papillon Buttress. There is a lower-off above Bulging Biceps/Triceps. Grade 4 downclimb off the back of the buttress for descent from Joyride and Juvenile Hall.
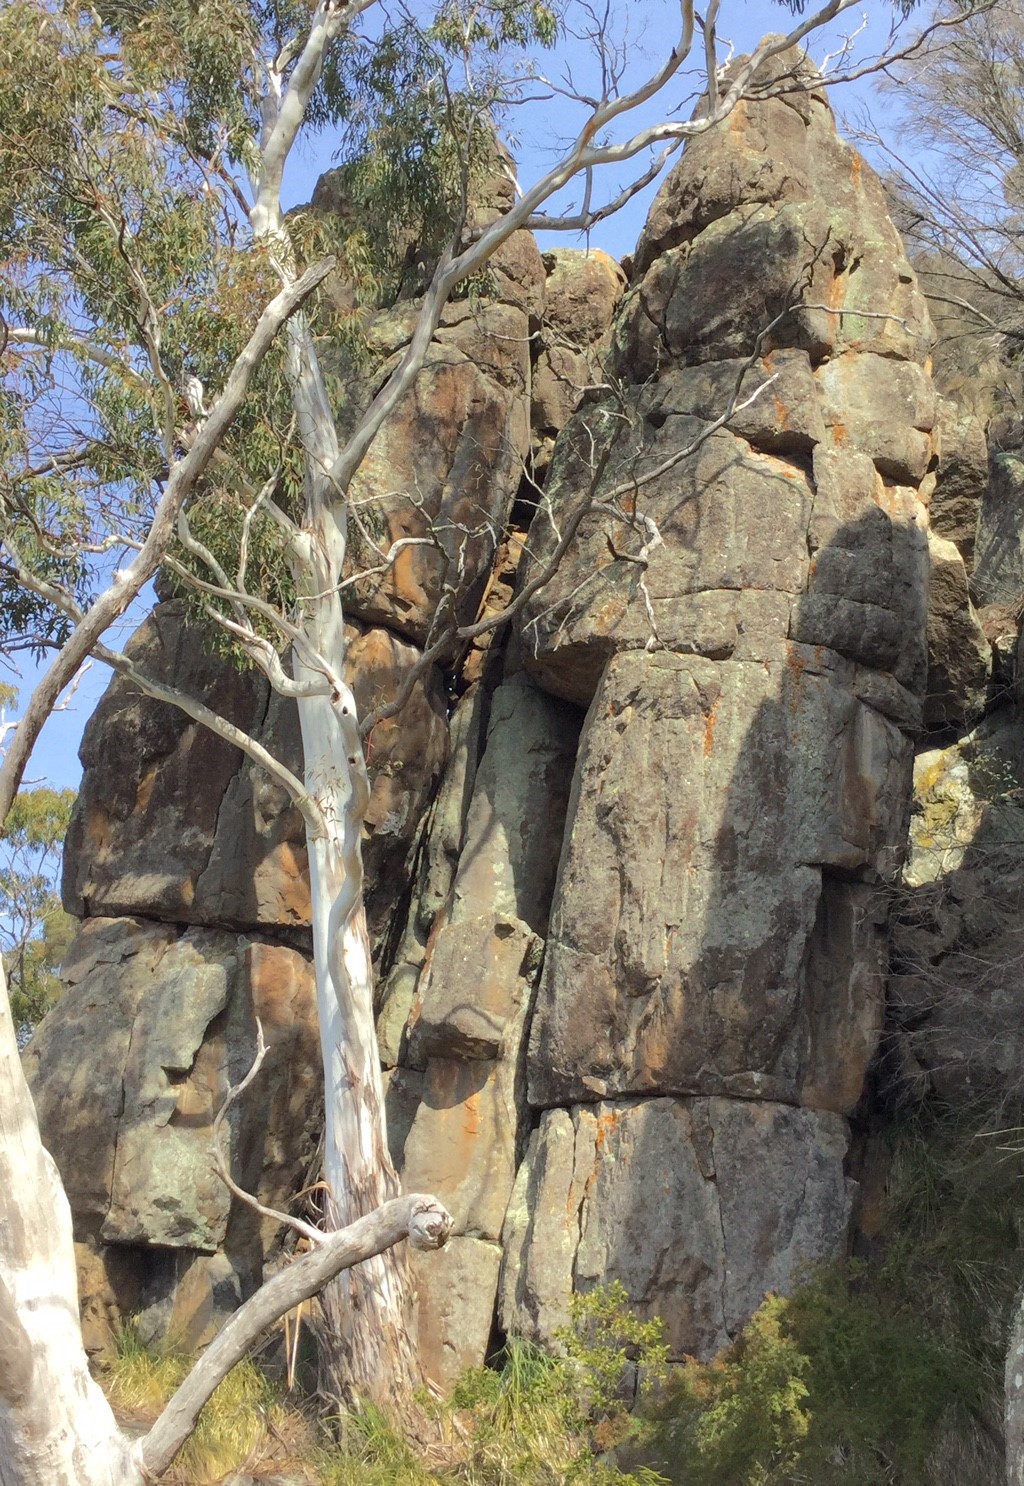
Trickier than it looks. At the left hand end of Biceps Buttress a leaning gum tree sits in front of a slabby arete. Start behind tree and mount the small bulge, then continue up the face to the top. The challenge is to find the RP placements and not use the tree.
Al Adams, Simon Stubbs, Paul Taylor, Nov 1987.
The scene of more possum magic. Follow the sinuous hand-crack and finish up the easy chimney to belay on top of the buttress. Grade 4 down-climb off the back or traverse (stay roped-up) to the anchor above Bulging Biceps for descent.
Al Adams, Garn Cooper, 1987.
Cracks and chimney just right of Juvenile Hall. Good for the grade and doable without mature sized cams.
Dave James, Tim Whelan, June 2022
Load-up on creatine. Originally starting off the block in the gully, an extended start was added in 2021 and is now the way to go. Climb into the sentry box and escape this moving up and right past three bolts, avoiding the temptation to step onto the block (yes its contrived). Follow the thin crack (good RPs) above the last bolt, then continue more easily to the top and lower-off.
Al Adams, Simon Stubbs, Nov 1987 (Bulging Biceps - 18). Hamish Jackson, Gordon Broome, July 2021 (Bulging Triceps - extended start). Re-bolted in 2023.
Papillon Buttress
Papillon Buttress is at the same level and immediately right of Bulging Biceps Buttress. The flat area in front from where the topo image is taken, is Lunchspot Ledge. There is a lower-off to service Blue Turtles, Snoober and Papillon. Easy walk-off right for Canary.
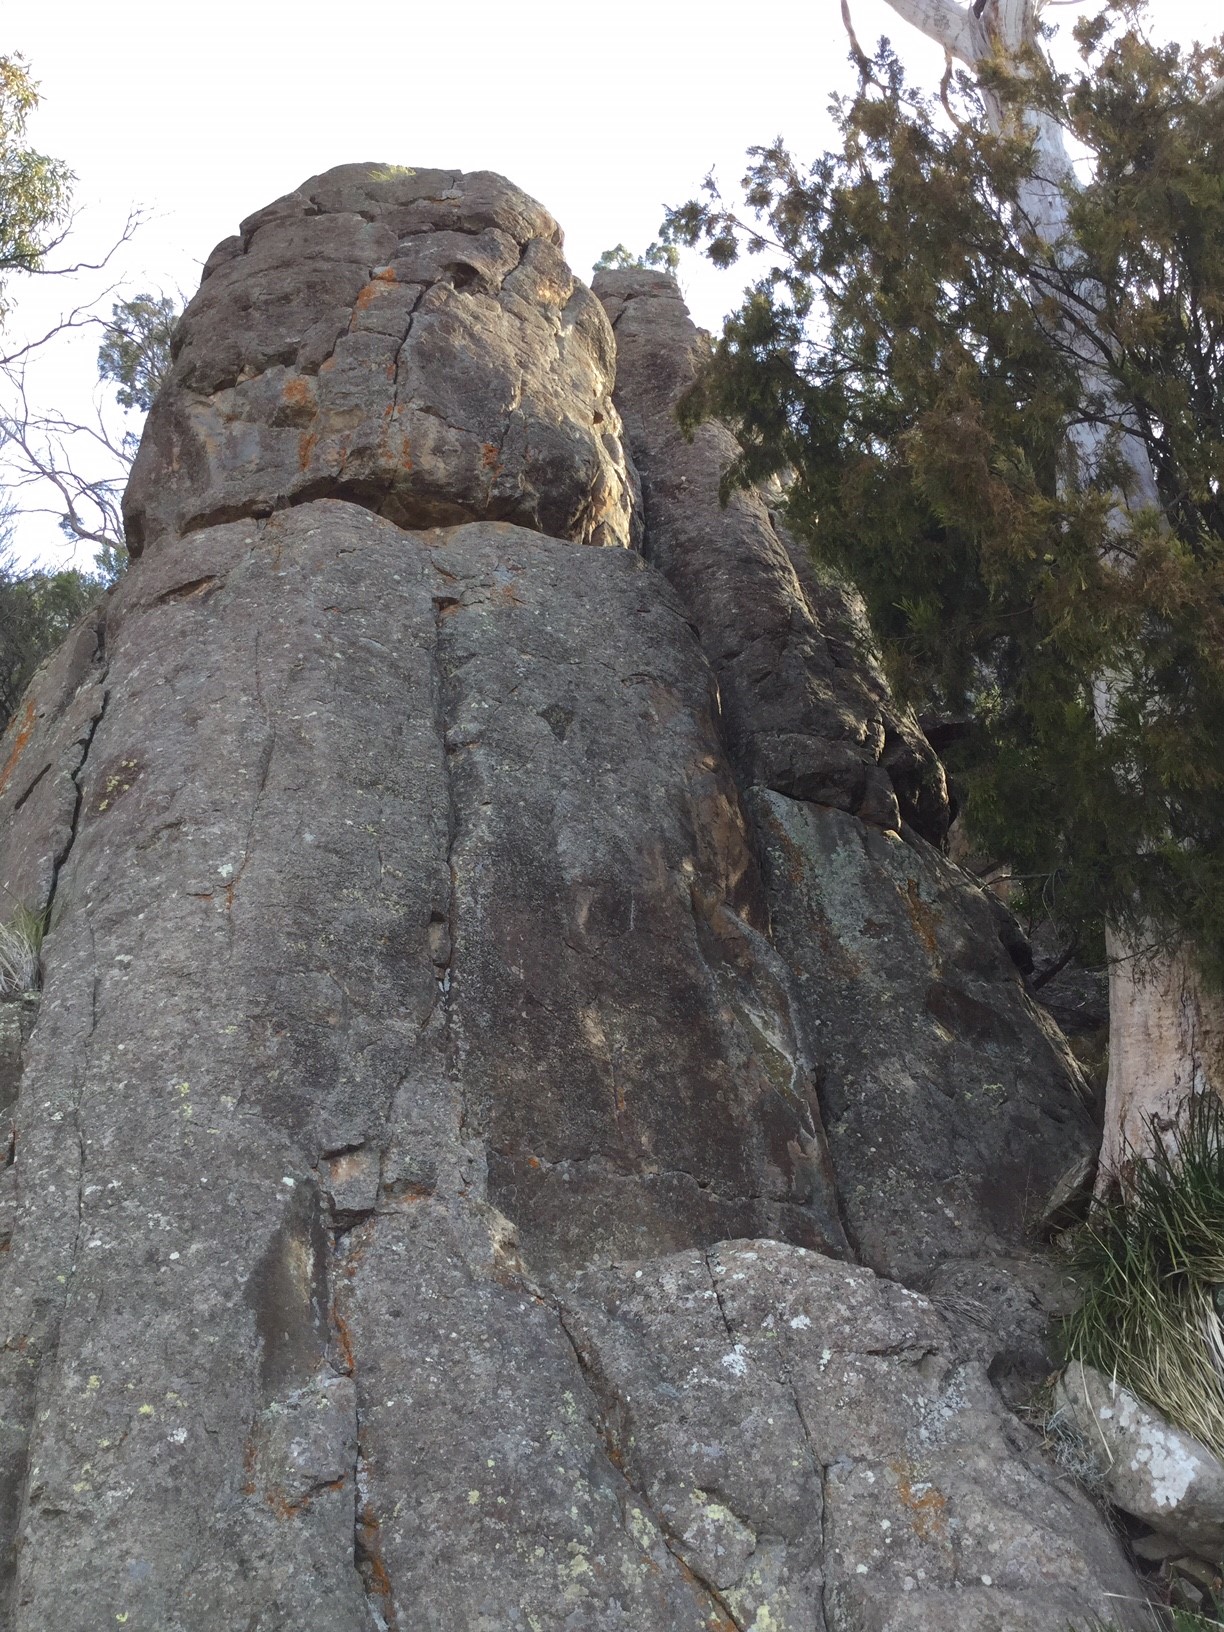
Papillon Buttress
Above Lunchspot Ledge is a dead gum tree standing in front of the buttress. The start of Rocket Fuel is located 5m left of the dead gum at a leftward facing flake. Climb the flake to a ledge with a large block on it, then follow the multiple crack system above to the top.
Al Adams, Pete Steane, Jul 1984.
Needs taking to with a brush!. Climb the line that starts 1.5m right of Rocket Fuel. The flake down low is loose.
Al Adams, Martin Rose, Sep 1987.
The naughty thin line up the face of the buttress, which continues through the bulge and up the face / cracks above. Protection is decent, but you'll need to work hard to place the small gear (RPs / micro-cams) in the thin crack. Lower-off at top.
Peter Jackson, Bob deCesare, Jan 1981.
Contrived. Climb Papillon to the ledge, then climb the arete without using the corner.
Jeroen Jansen, Stella Lawless, May 2022
A good first lead. Papillon is the obvious hand crack just left of the dead gum. Jam to a small ledge and up the corner to belay on top, being mindful of some suspect blocks at the top of the corner (avoided by stepping left). Lower off as for Snoober or belay on top and walk off.
Peter Jackson, Bob Bull, May 1971.
Hidden behind the native cherry is a nice route worthy of your time. Start 2m right of Papillon and climb up the face and into the thin finger crack. Continue following the line to a fist-width crack. Surmount this and top out next to Papillon and Snoober. Belay on top and walk-off easily to the right.
Lyle Closs, Ian Lewis, Jul 1972.
Start just right of Canary as the buttress turns uphill. Follow the system of thin cracks straight up to the previous climbs overhang.
Steve Hamilton, Hamish Jackson, Sep 1991.
Climbs the enticing face right of Bird on a Wire. The crux is the first moves although the upper section is a little balancy. The main piece of protection is to be found at the first horizontal.
Marcel Jackson (with TR inspection) and Rob Williams 1994?.
Jam the fist crack in the gully around the back of the Papillon buttress. Finishes at the same spot as Canary.
Lyle Closs, Ian Lewis, Jul 1972.
The line up the front of the buttress directly below Papillion Buttress that finishes on Lunchspot Ledge.
Garn Cooper, 1987.
Worth a few moments. The short crack on the small buttress immediately above Papillon Buttress. Walk-off left.
Dave Drake, Geoff Wayatt, 1979.
A clean layback corner leading to an offwidth and the scene of a serious accident. Found 7m right of Middle Aged Crisis and immediately uphill of Fist. Climb the line avoiding the worst of the tragedy by traversing from the top of the shaky block around the nose and up on small holds. Continue straight up. Protection is difficult to arrange.
Peter Steane (Top Roped), Feb 1984.
Lumbar Cruncher & The Danger Hog Shuffle Buttresses
Found above and to the right of the Papillion Buttress. A number of fantastic climbs on excellent quality and interesting rock. Lower-offs exist at the top of each buttress. Further past the Danger Hog Shuffle, the cliff-line starts to peter out until you come to the Wailing Wall.
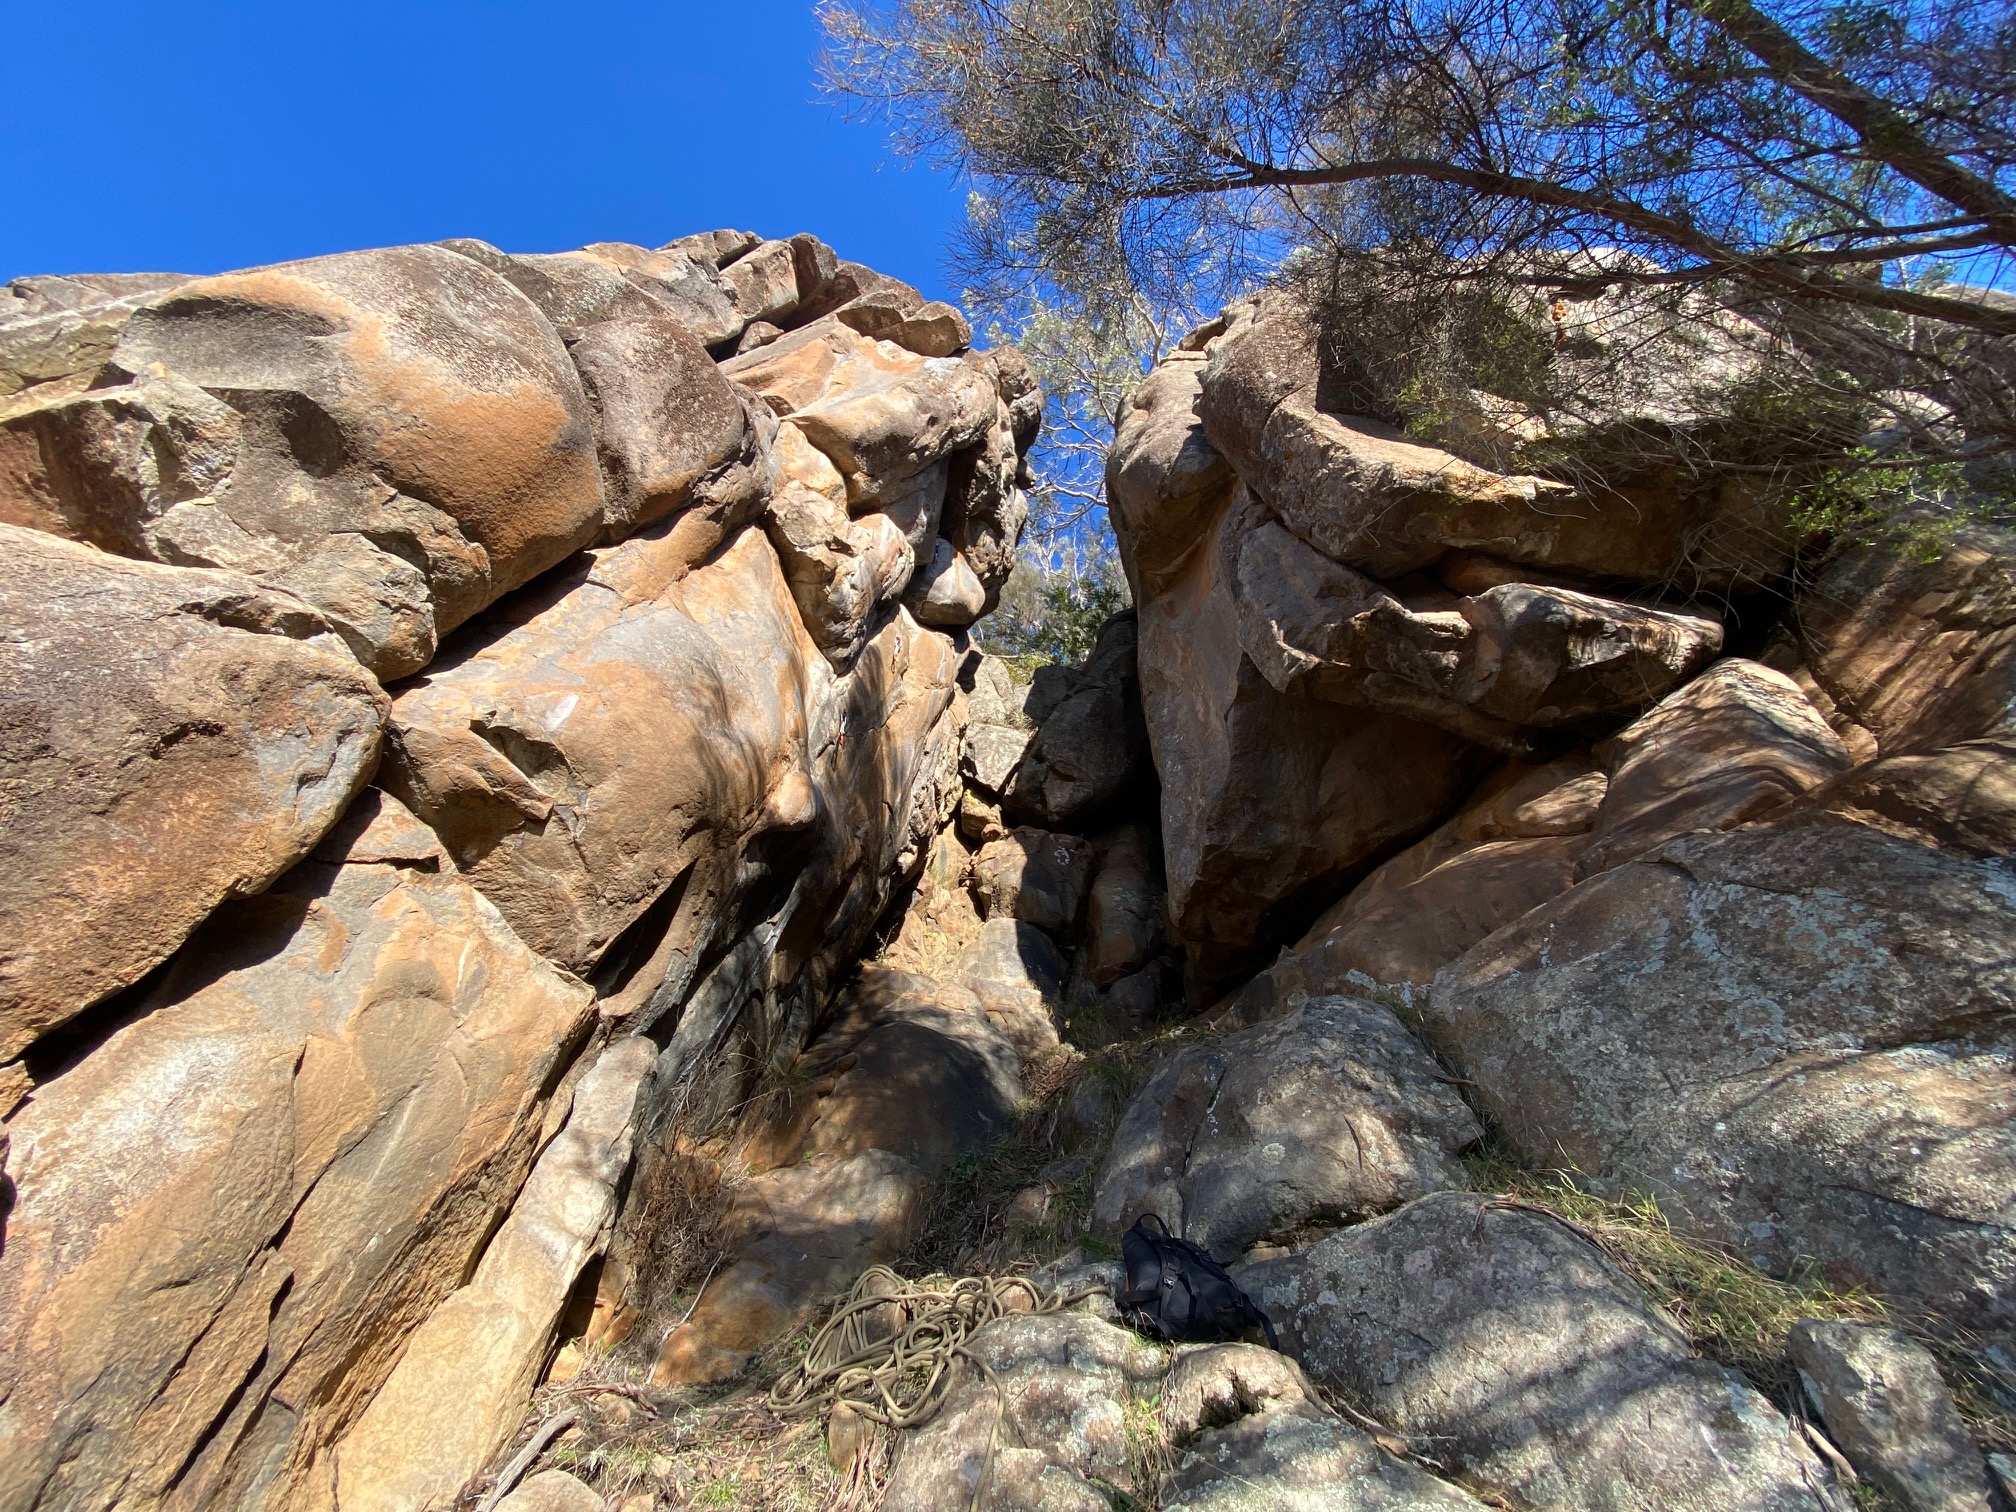
Lumbar Cruncher Area
Start about 20m right of Heidelberg Direct on the left hand side of the second of the two prominent recesses, and opposite Rudge. Climb up the crack for 4m, then traverse left around the awkward bulge and up to the ledge. Surmount the offwidth - the chockstone here in the photo is reportedly now missing and makes this section the crux - then climb the large curving flake at the top - careful of rockfall.
Asahel Bush, Phil Robinson, Jun 1975.
Starts 1m left of Expiry, and crosses this climb at half height. Climb the intermittent cracks on the front of the buttres until the ledge at the start of the off-width on Expiry. Clip bolt high and right, climb face (tricky), or off width for 2m to horizontal break, then make exciting traverse right to arete (crux). Follows cracks on arete to top.
Gordon Broome, Hamish Jackson July 2021
Excellent arapiles-like climbing. Up the difficult smooth wall past two bolts to a stance and thin crack. Up this and through the overhang to another bolt. Traverse left to arete and rest, then head back right and finish up short hand crack and jugs to anchor.
The natural gear is bomber and placed easily from good stances (cams from #0.1 - 0.75 and a #2 for the final crack).
Marcel Jackson, Peter Jackson, Mar 1990. Retro-bolted (with FA permission) in 2021 - two knifeblade pitons were used on the FA to protect the crux.
Harder than the original by going direct through the overhang, rather than traversing left at third bolt.
Hamish Jackson, Gordon Broome, July 2021
Some rather interesting moves for the grade, take a big cam or two. Get upside down and climb onto the jammed block from the left to get yourself established in the wide crack. Follow this to the top and lower-off. A Variant start at grade 18 by entering the line from the RHS.
Lyle Closs, Ian Lewis, Oct 1973 (Original). Jeroen Jansen, Stella Lawless, May 2022 (RH Variant)
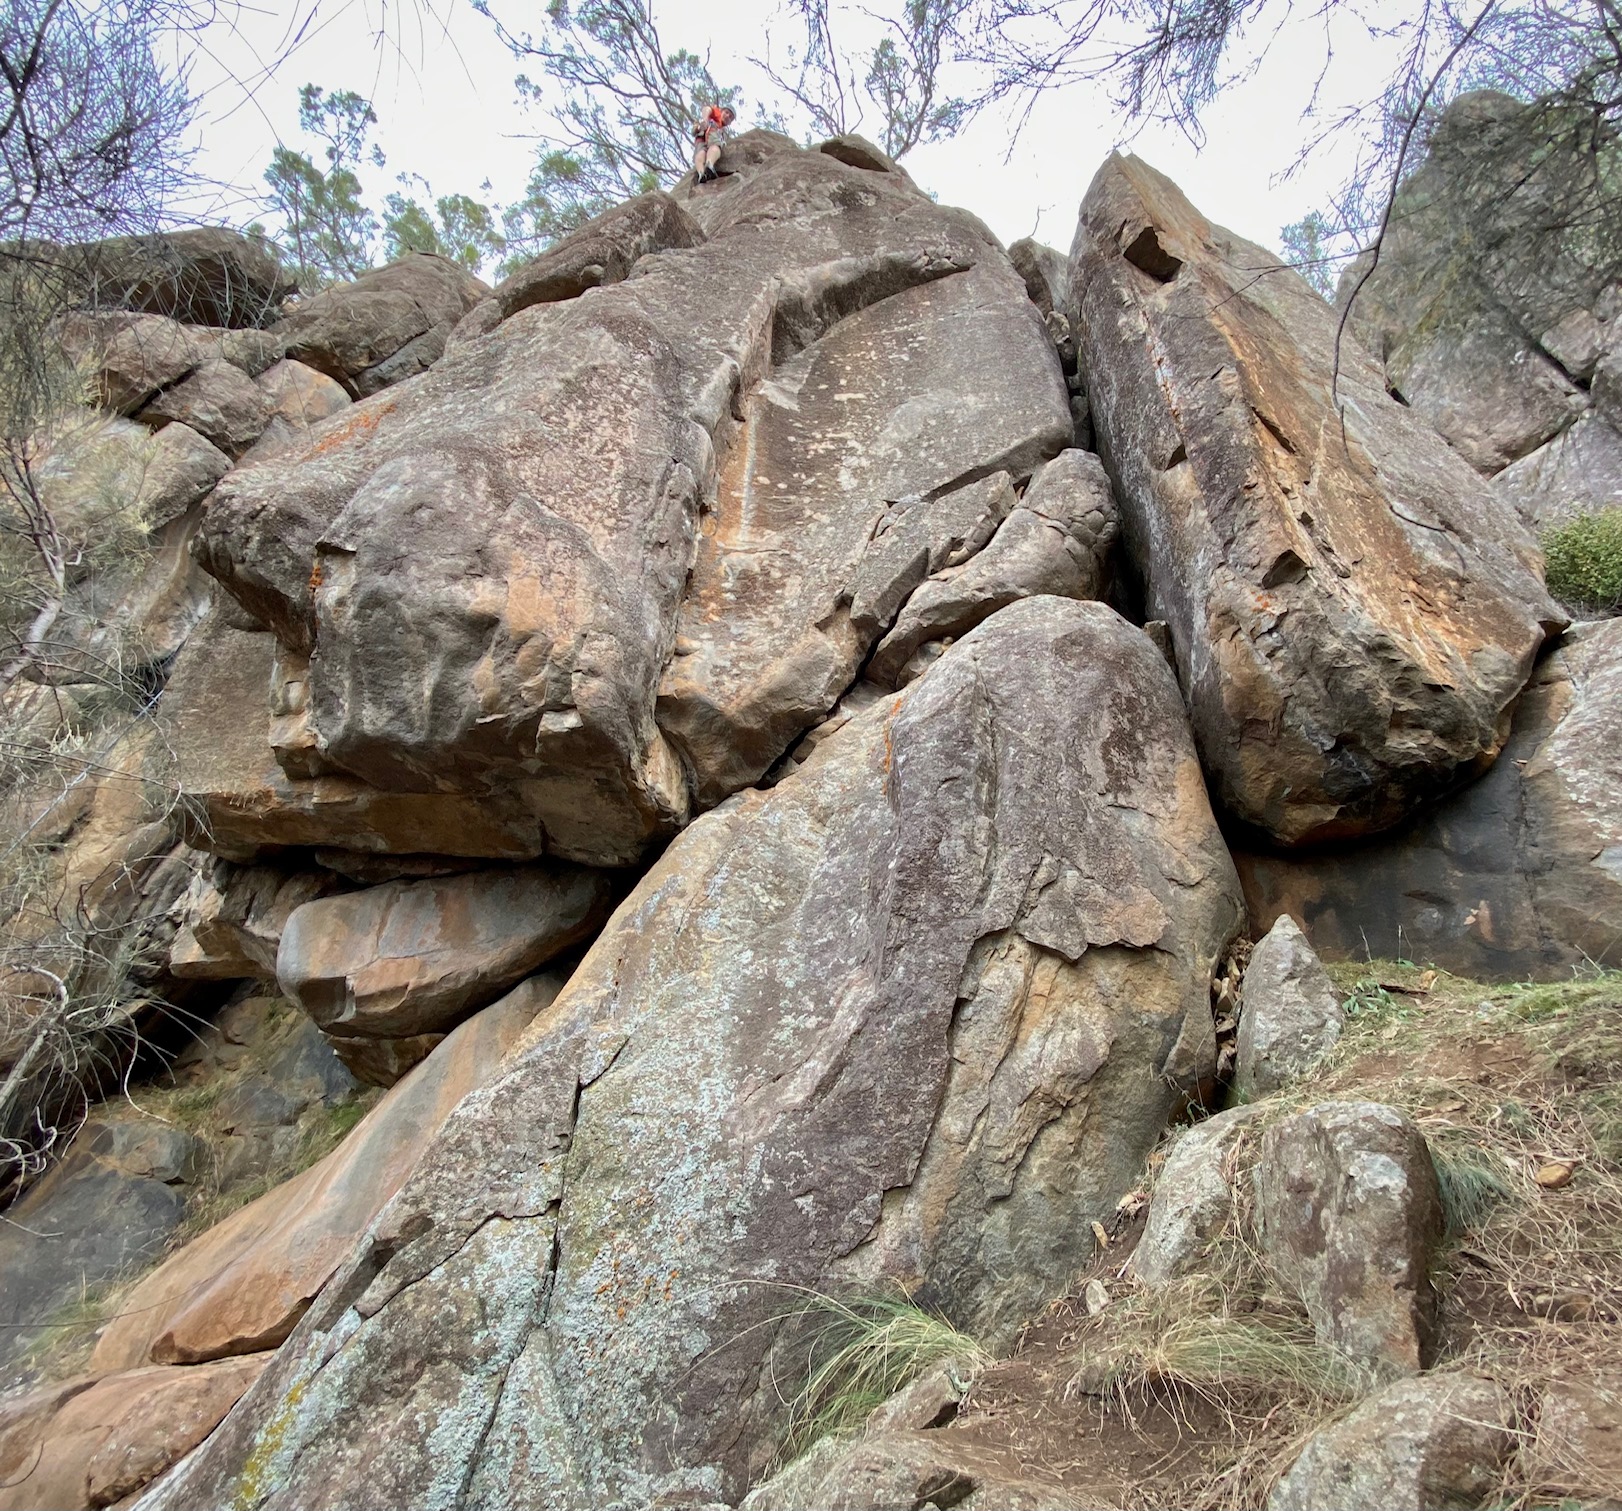
The Danger Hog Shuffle Buttress
Interesting. Bridge the shallow corner and clip bolt, then move up and left around the arete (crux) to reach the crack-line. Follow the crack until the horizontal break and step left around the arete to lower-off. Careful pulling your rope from the anchor as this route tends to jam ropes.
Martin Walch, Garn Cooper, Jun 1986. Re-bolted in 2022.
A good route given it's height. The crack/layaway on the small buttress just right of the Danger Hog Shuffle. Grade 4 down-climb to the right to get off.
Otmar Buchman, 1981.
A few metres right and uphill from Wee Ratty is a small flat buttress. Climb up easily to the base of the thin crack on the left arête. Follow this up, finishing to the right of the main face.
Marcel Jackson, Peter Jackson, Oct 1989.
Exact details unknown but known to be somewhere in the vicinity of Big Electric Cat.
Garn Cooper, Noel Ward, 1986.
The bridging problem to the L of Gilmigrim.
Garn Cooper, 1986.
Beware of loose blocks. About 50m R of Wee Ratty is a higher and more prominent buttress with a square roof at its top. From the front of the buttress climb the wide crack to the ledge. Continue up the face to the small ledge then either pull through the roof or step back R and up.
Garn Cooper, Noel Ward, Aug 1984.
Climb the crack through the bulge at the top of No Hi Jinx buttress.
Ray Lassman
Located on the small buttress just L of No Hi Jinx. Climb straight through the roof on RP's and cams.
Colin Reed, Evan Peacock, Steve Ford, Nov 1990.
Spook Fright
Located about 40 m above the Wailing Wall.
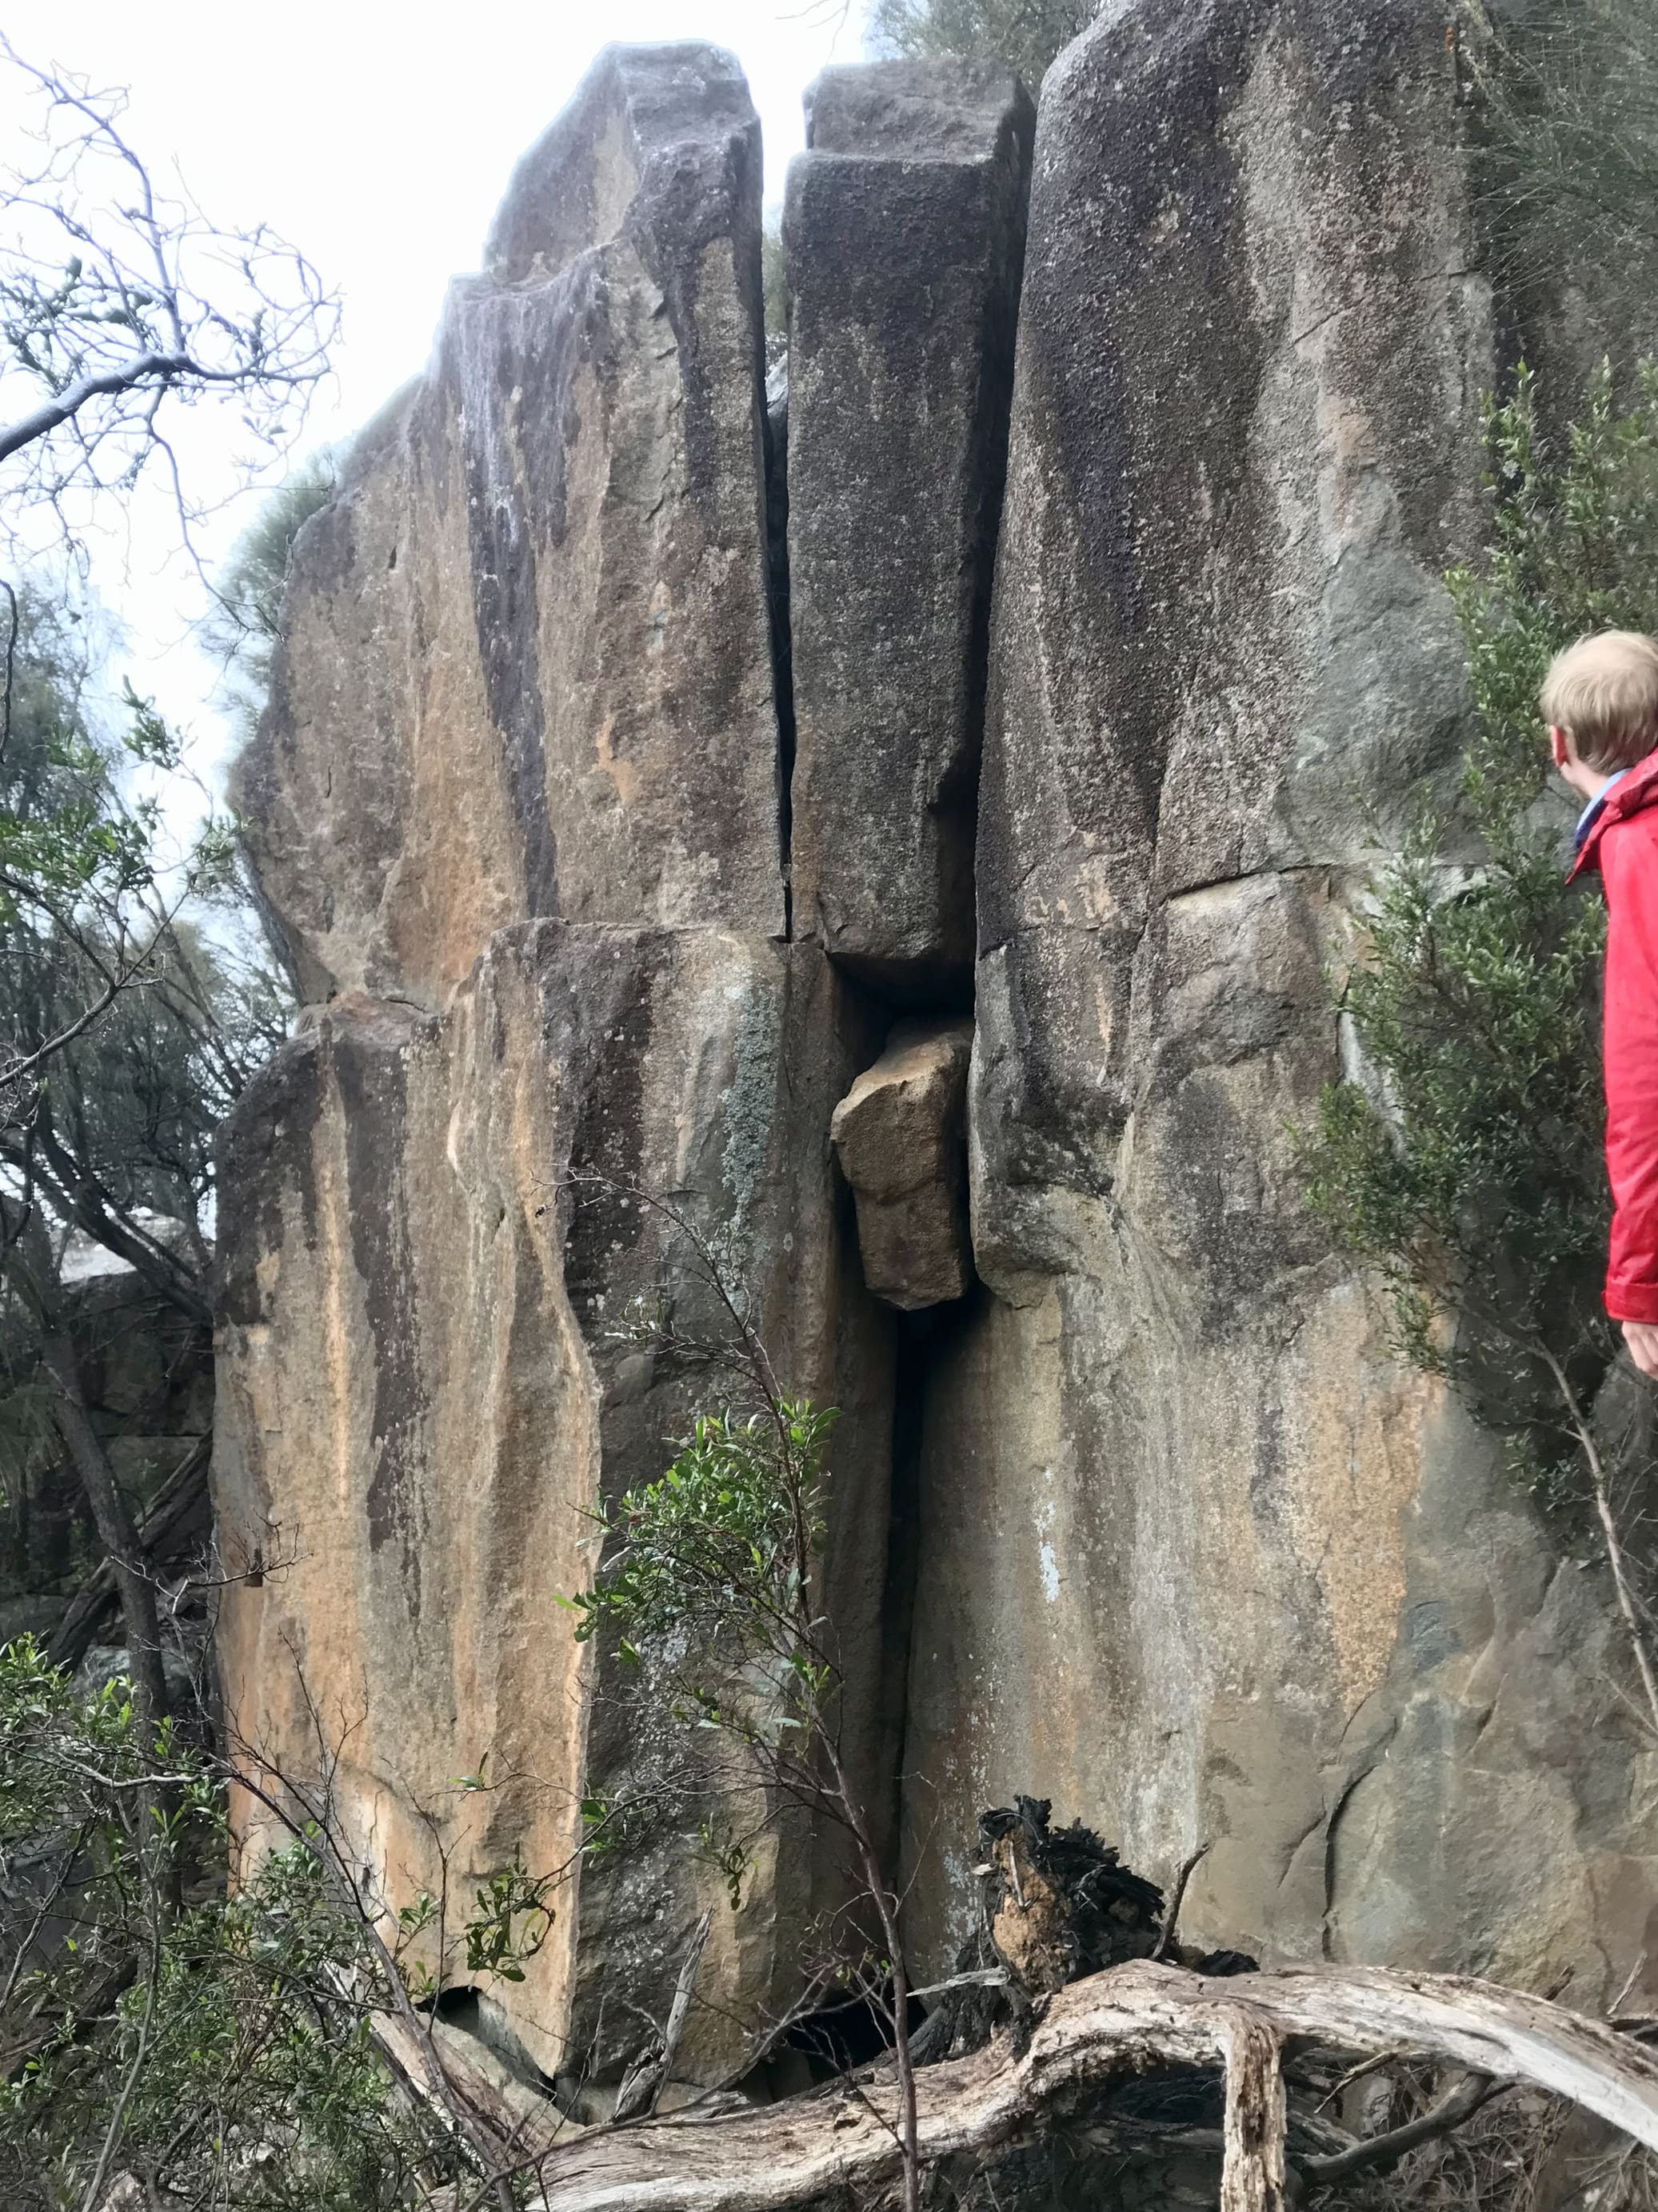
A fun filled 5 meters all by itself. Stonker gear and a few good moves makes it a good warm up before wailing wall, which is a further 40m down the hill.
Chris Lang, Jamie Spencer, Aug 2021
Confusalation Buttress
Somewhere lost between Greenknowe Buttress and Wailing Wall. Doesn't appear to be described?
At that lower contour anyways.
A few other cracks doable here but shorter and less appealing to modern tastes.
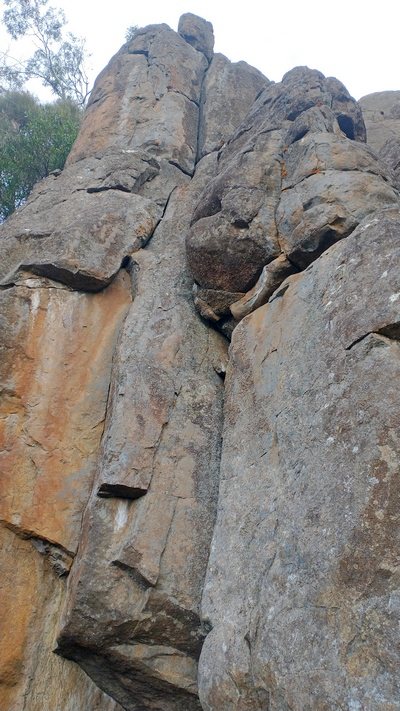
Corner and crack on tallest and proudest part of the buttress, that is, if a topo photo isn't enough...
Worthwhile.
Probably climbed last century or else... Dave James and Tim Whelan. June 2022
Wailing Wall
The last of the major buttresses on the RHS of the cliff. To get there from the base follow the faint ridge-line from the top of the fields up and R of the car park - this makes for a somewhat easier walk than than the central uphill track line. To traverse there from the south, take a slightly downward trajectory across from lunch stop ledge for 5 mins (300m) - the wall faces north so is not visible until you have crossed the ridgeline.
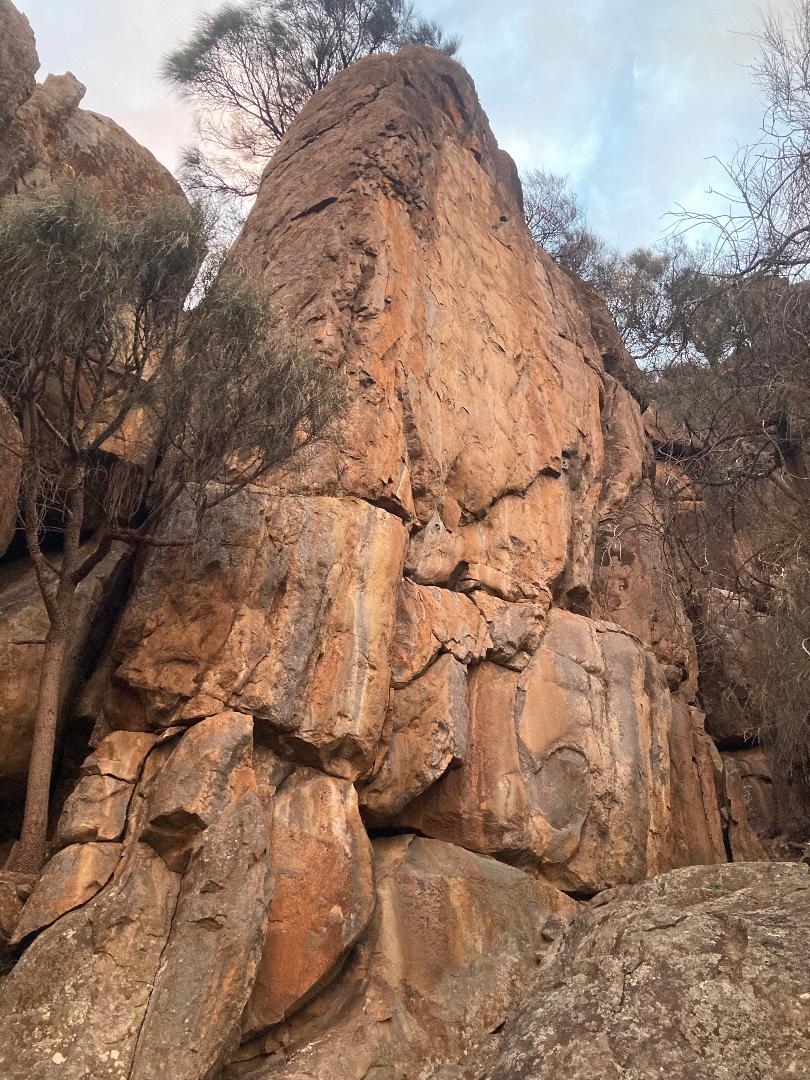
Wailing Wall
Start 3m L of Ashlars' Edge in the corner 2m left of the arate. From the base of the corner climb up and R to a small ledge then gain the arête and continue up it on the left side. Slightly loose. Small gear necessary.
Al Adams, Garn Cooper, Pete Steane, Aug 1984.
Start 5m left of Wailing wall at the short orange corner 2m right of the arete. Climb short short corner (small cam optional), step left onto nose (crux) and continue up wall just R of arete to the small ledge 4m before the top (small cam required here <0.3 camelot). Now climb diagonally right up face to DBB above the wailing wall.
H Jackson and M Brown Aug 2021
Superb and sustained face climbing on what is considered by some as the best rock at Lowdina. Climbs the distinctive blank orange wall past 4BR's (some recently replaced 2021) and a #2 camalot to protect final 4m to DBB lower-off.
Alt start (18m 26): Start for Ashler's edge, up to first BR, then more right up obvious diagonal to reach first BR of WW (run out, or small cam at feet). Adds 6m of gr 22 climbing.
Marcel Jackson, Hamish Jackson, Jan 1992. Alt start H Jackson 2021
Start just to the R of Wailing Wall and climb the obvious crack/chimney.
Chris Dawson, Mary McWhirther, Oct 1974.
The wider crack about 2 m right of Argonautica. Not really offwidthing. No.5 handy but not essential.
probably someone last century but otherwise Dave James and Tim Whelan June 2022
Climbs the short arête and wall of perfect dolerite about 4m R of Argonautica. A knife blade was placed in the horizontal on the FA.
Rob Williams, Marcel Jackson, 1994.
Radical Centrist Buttress
This block has a lovely clean orange front face and is found 80m right and 30m up hill from the Wailing wall. Head north from the wailing wall crossing a minor gully at 50m, and a minor ridgeline at 80m. The buttress lies 30m up the hill.
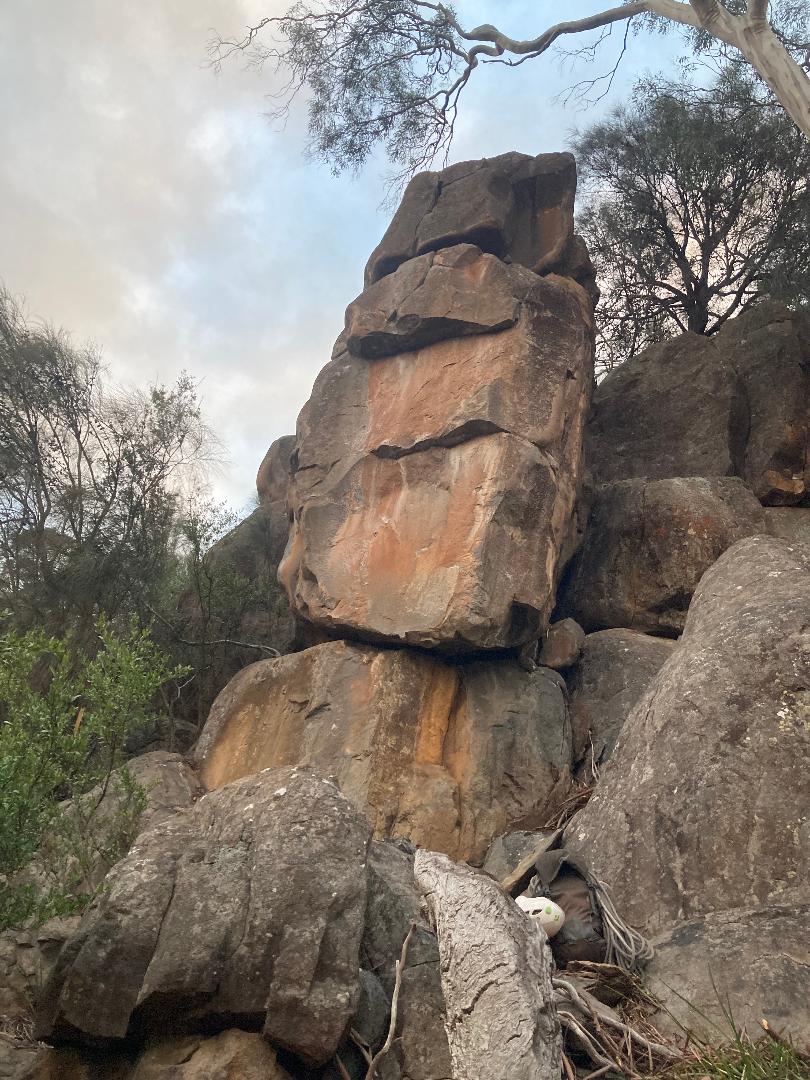
Radical Centrist Buttress
Start at the bottom right and move up the orange wall and small overlap with difficulty (crux - requires an usual number of moves left and right to facilitate progress to finally gain the upper left quadrant before the rooflet). Up seam above rooflet, then crack to top. DBB
H Jackson and G Broome Aug 2021
A great companion route to RC. Climb steep face right of arete past 2 FH and funky moves, then gain finger crack, onto ledge, then hand crack to finish.
G Broome and H Jackson Aug 2021
Topless Buttress
Located downhill and across the gully from Wailing Wall.
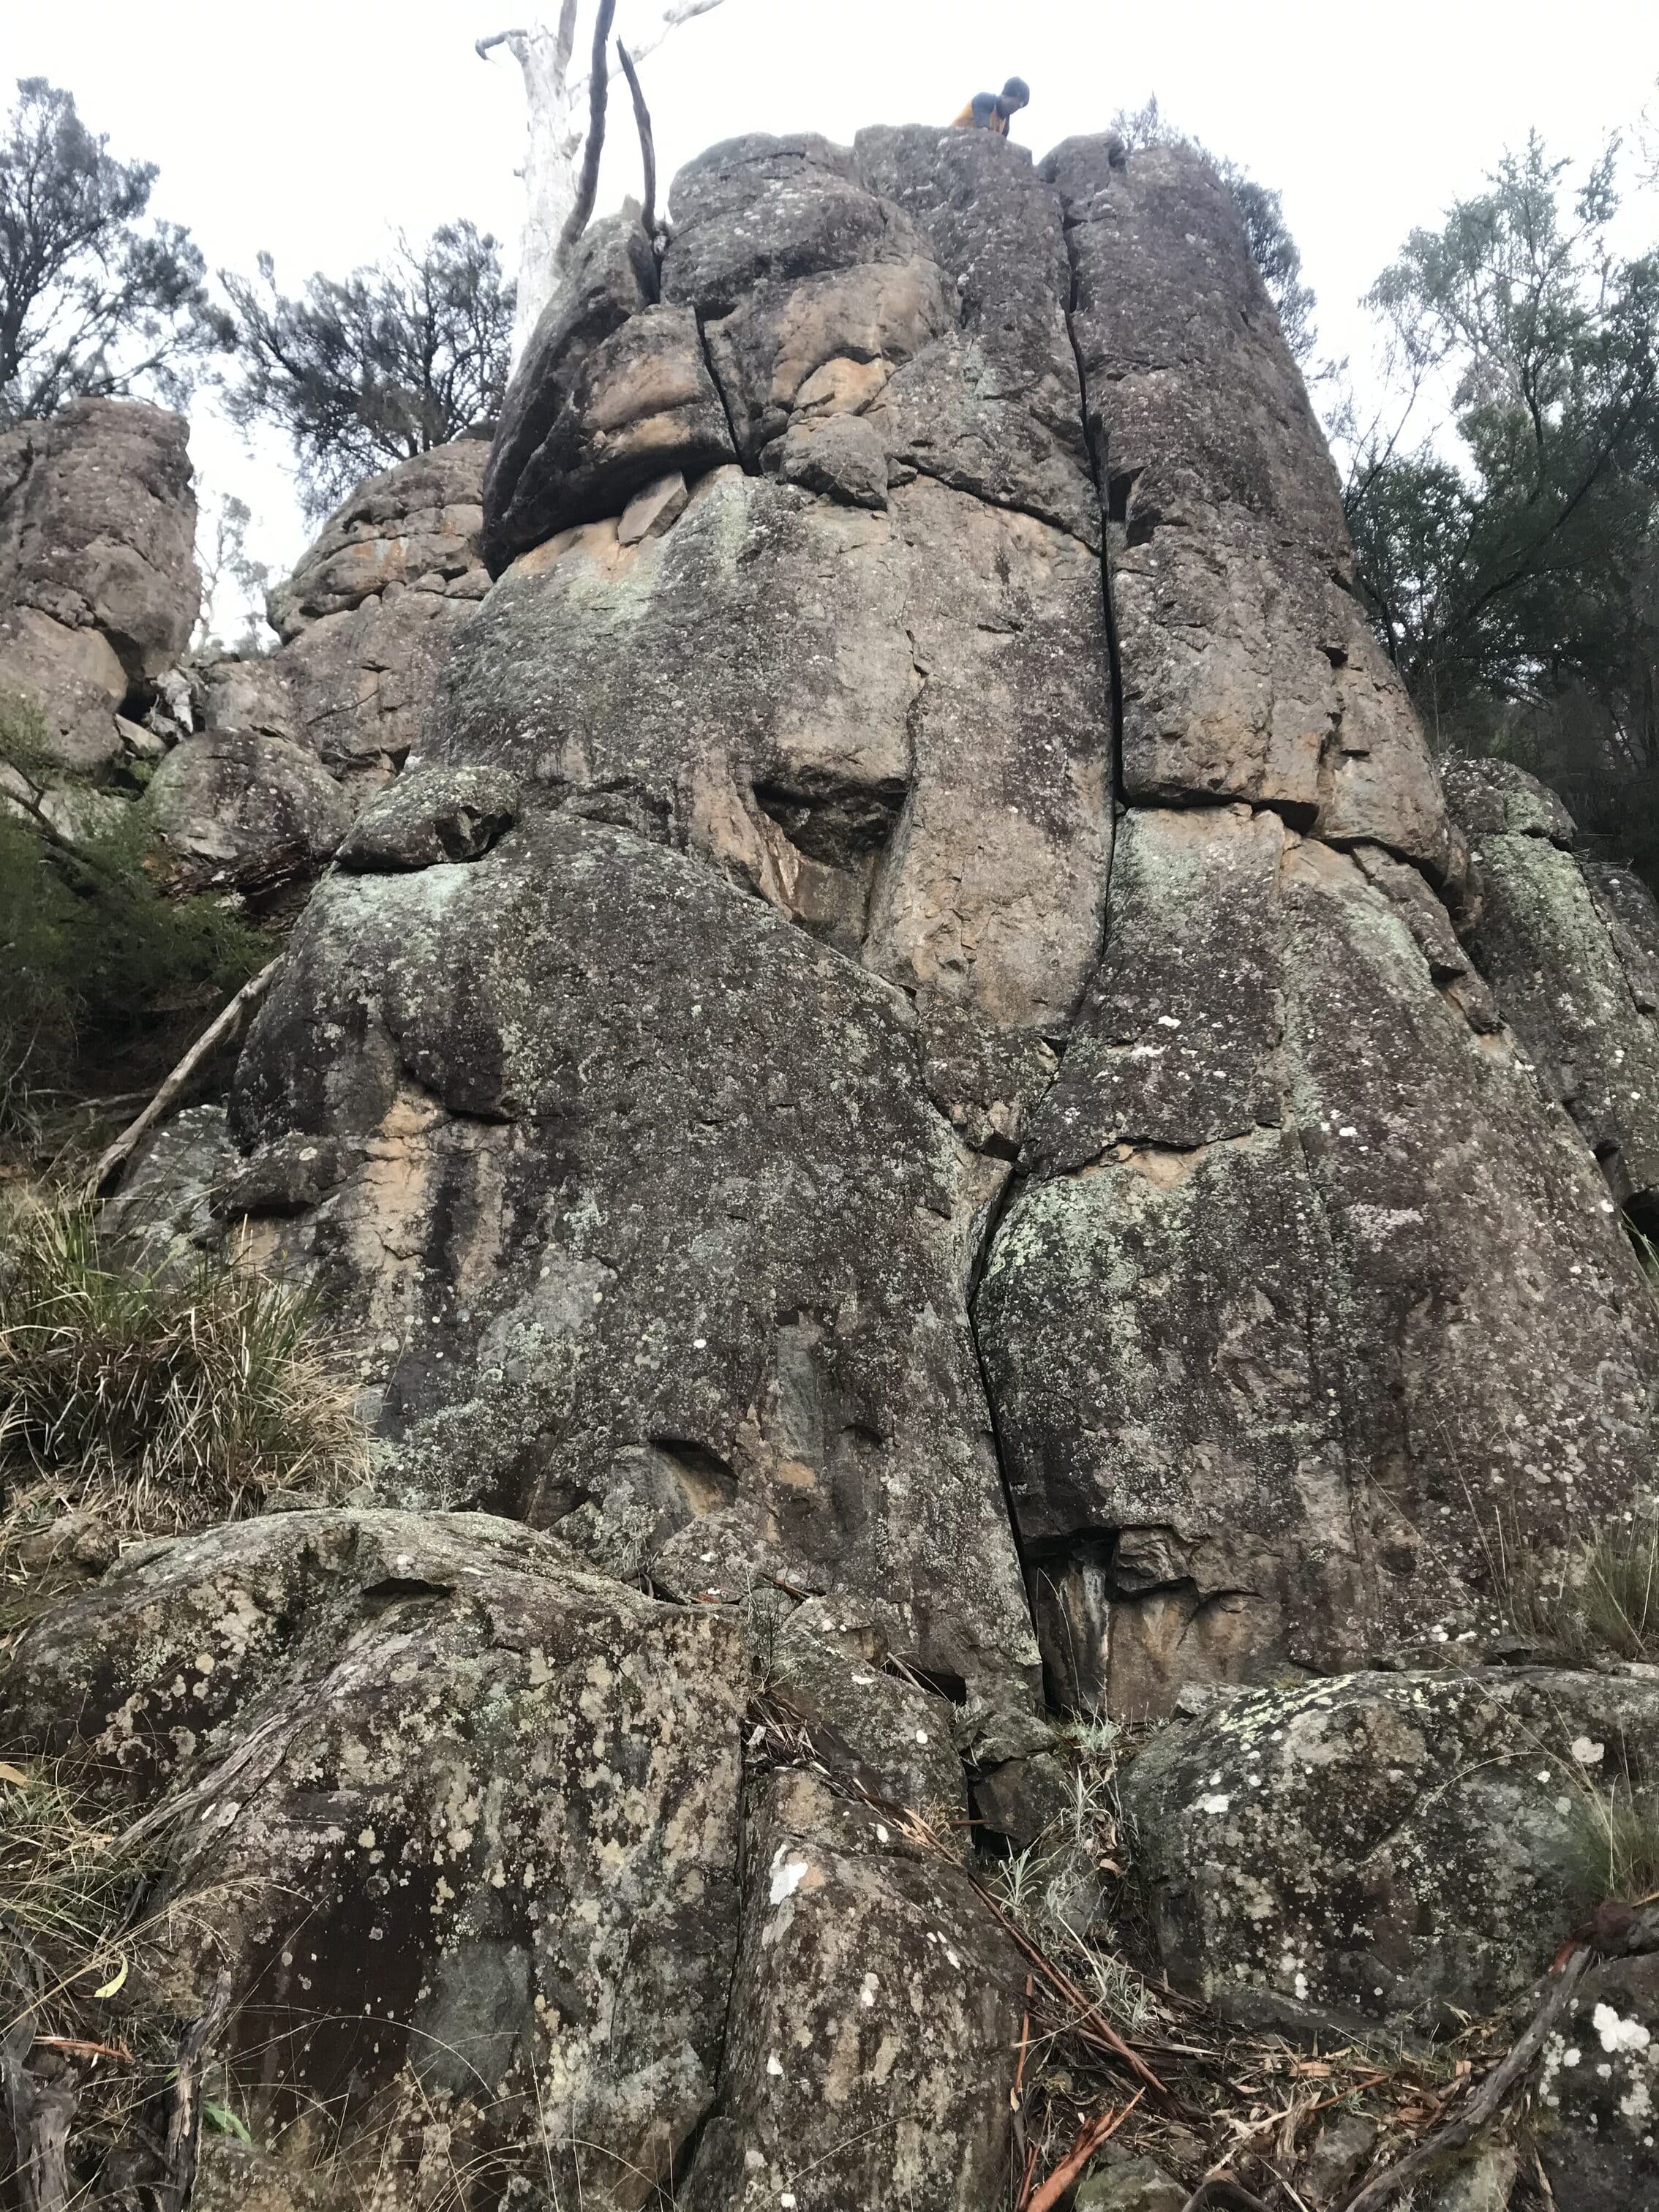
Topless Buttress
Climb 'Topless on 24s' to the horizontal break, go left and up the left-most groove. Bonus points if you sling the dead branches emerging from the crack.
Jamie Spencer, Chris Lang, Aug 2021
Climb 'Topless on 24s' to the horizontal break, go left and up the middle groove.
Chris Lang, Jamie Spencer, Aug 2021
The obvious clean fist-sized crack line, made for learning to jam. Two micro cams are nice, stonker gear to the top.
Chris Lang, Jamie Spencer, Aug 2021