
Coles Bay
 5mins to 40mins
 Mostly morning Sun
 Granite - Slab to Roof
Introduction
The climbing at Coles Bay offers some of the best in the state, on pure white granite boulders and cliffs. It is the ideal place to head in the winters when the weather is too wet or cold everywhere else. In summer it can get quite greasy but with a little hold preparation this does not inhibit the climbing and there is the added bonus of the crystal clear sea water to swim in. At present there are three better developed bouldering areas, Harlequin Buttress, The Pharos and the Bain Marie. There are, however, numerous other smaller/undeveloped areas.
Access
Coles Bay (on the Freycinet peninsula) is located midway down Tasmania's east coast. The township of Coles Bay is about 2-3 hours drive from Launceston or Hobart. The fastest way to get there from Hobart is to travel on the Tasman Highway through Sorell, then drive to a clearly marked turn off to Coles Bay about 20 minutes past Swansea. Most of the bouldering has been done in the Whitewater Wall area, which is inside the Coles Bay National Park. You are required to pay park entry fees, if you are planning on staying more than a few days, it is worth getting a year pass to the National Park, worth about $18.
Camping
Free camping is available at the Whitewater Wall campsite, managed by Parks and Wildlife. Facilities include a long drop toilet and a patch of dirt, bring your own water (can be filled up in Coles Bay) To get the WWW campesite drive through Coles Bay and take a left turn along the Sleepy Bay road (toward Cape Tourville), follow this until you reach a dirt turn off to Bluestone Bay on the left (just before the Cape Tourville lighthouse comes into sight). This is a 4WD track and following the recently (2016) upgraded roads, 2WD/SUVs vehicles may find it impassable due to the deep drainage channels unless they have really high clearance: there has been more than one car that has had the guts ripped out of it in the past.
Alternatively if you've got cash to spare pay campsites are available closer to town along with numerous holiday homes to rent in Coles Bay. There are a few shops, a bakery, a cafe, and a service station in Coles Bay.
GPS
The Lodge Boulders
These boulders are on the left just before the Freycinet Lodge and include the obvious highball slab on the main road and the boulders directly behind it.
On the boulder directly behind the roadside boulder, further from the road. Takes the easy step on the left. More like a scramble than a boulder.
CW
On the boulder directly behind the roadside boulder further from the road. SDS under the obvious rising groove right of the previous problem. Up groove, step up to right to gain rounded top with hands, move across face to exit left. Great climbing!
CW
Takes the line between Scrambler and Follow The Yellow Brick Road. Starts using wide double underclings, goes straight up. Uses good sidepull on FTYBR, pull to good hold high up in centre of face, top out. Short but sweet!
CW
Up slabby bulgey arete just right of FTYBR, via high tufa-like protrusion.
CW
On the end of main roadside boulder furthest from road. Start on left, pull around 'arete' using obvious good side pull, high step up/rock over on right, easy to top.
CW
Gil start just left of previous problem, up and left to obvious high sidepull, up. Rock is quite crystally. Short but good.
CW
Super hard thin face just left of previous problem.
Excellent thin highball slab up main roadside boulder, starting just right of centre.
CW
Two obvious boulders on Cape Tourville Road. Described as you approach them from Coles Bay.
This problem is on the first obvious boulder on the left not long after turning off onto the Sleepy Bay road. Goes up the left side of the face. Mantle onto ledge (crux), follow easy rounded arete to top.
CW
Thin slabbing up the water streak just right if previous problem.
Sleepy Bay boulders
There has been some bouldering done on the coast at Sleepy Bay, but the rock is not the best. To get to Sleepy Bay drive into the National Park and take the first left. Drive for a couple of minutes over the hill and park at the Sleepy Bay car park.
Sleepy Bay roof
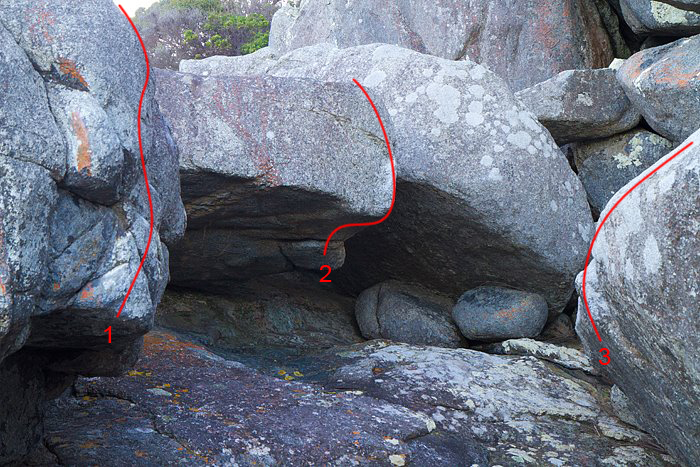
From the car park follow the walking track for 50m until you get to a hand rail with a gulch down below. Scramble down into the gulch to find this roof just above sea level. There is potential for 4-5 more problems on this roof.
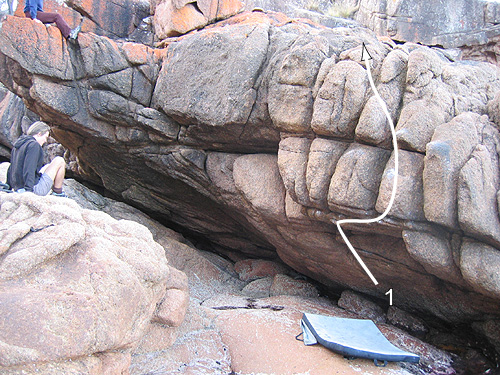
Sleepy Bay Roof
Sitstart on good holds under roof and climb out
Underworld Boulders
Keep going along the track down to the gravely beach. From here follow the coast around southwards for 200m to find some boulders and walls which are about 50m to the north of the Underworld. You need very low swell and tide to climb here.
This slab is about 50m before the main walls.
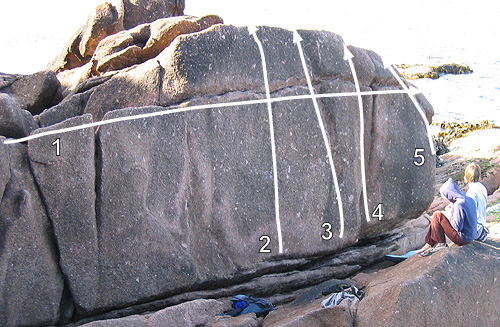
Traverse break L-R
Jump to break and top out
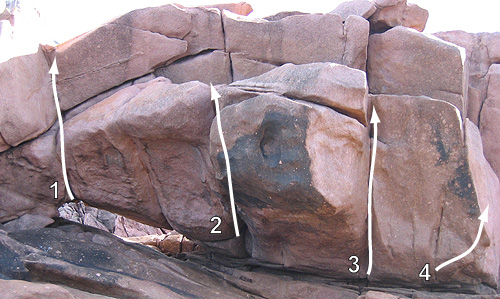
Flake
Flake
From jug above bulge crank up and left
These are the shorter walls to the right at the main area.
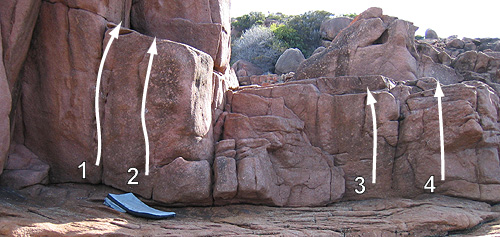
This is the main wall. I don't know if any of these lines have been done - they are very high and hard.
The Underworld Cave
This next problem is found in the Underworld proper (i.e. in the large cave where the routes are). Access by walking to the southern end of the small cliff line and then traversing back north at the waters edge.
Unnamed
★★V4?(SDS)The roof crack in the back right of the main cave. Sit start on a finger crack, to hands, to fists and jugs. It has been climbed up to the point where the crack peaters out (V4), but a harder and obvious finish/extension on face holds is still waiting to be climbed.
The Sea Level Traverse
There are a lot of walls, caves and free standing boulders along the Sea Level Traverse. The Traverse goes for several kilometres south along the coastline from Sleepy Bay. There are parts of the traverse that are quite tricky, especially if there is a swell running. There is a reasonable amount of potential here, but only a small amount of development has been done so far.
Stud City Limits Area
These square cut walls are found about 50m before the Horizontal Chimney, about 20-30 minutes along the traverse. The problems are good training for Hazards Main Wall, which looms menacingly above.
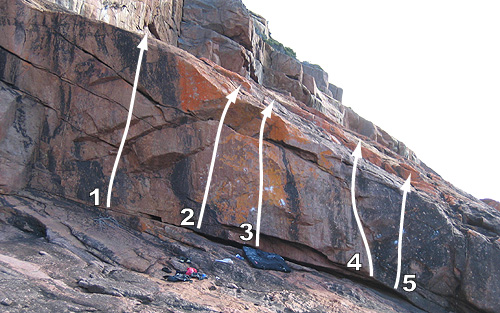
Project
Face using pocket
Awkward sitstart below bulgey arete
Leftwards flake
Black slab
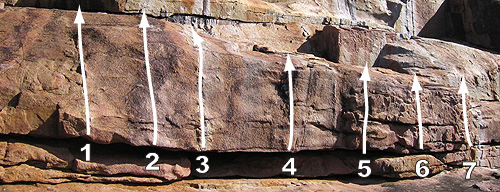
Slab
Slab
Seam to slab
Jugs to mantle
Sitstart on undercling to jugs
Dyno from break to top
Jugs
Carp Bay Point
There are some very nice white boulders at the end of Carp Bay Point. They have seen a minimal amount of development but have numerous quality problems.
Mainland Boulders
These boulders can be found on the Cape Tourville side of the point. Access by scrambling down the fixed rope (purple) west of the midden. Boulders described from left to right.
NOTE: please do not walk through the midden.
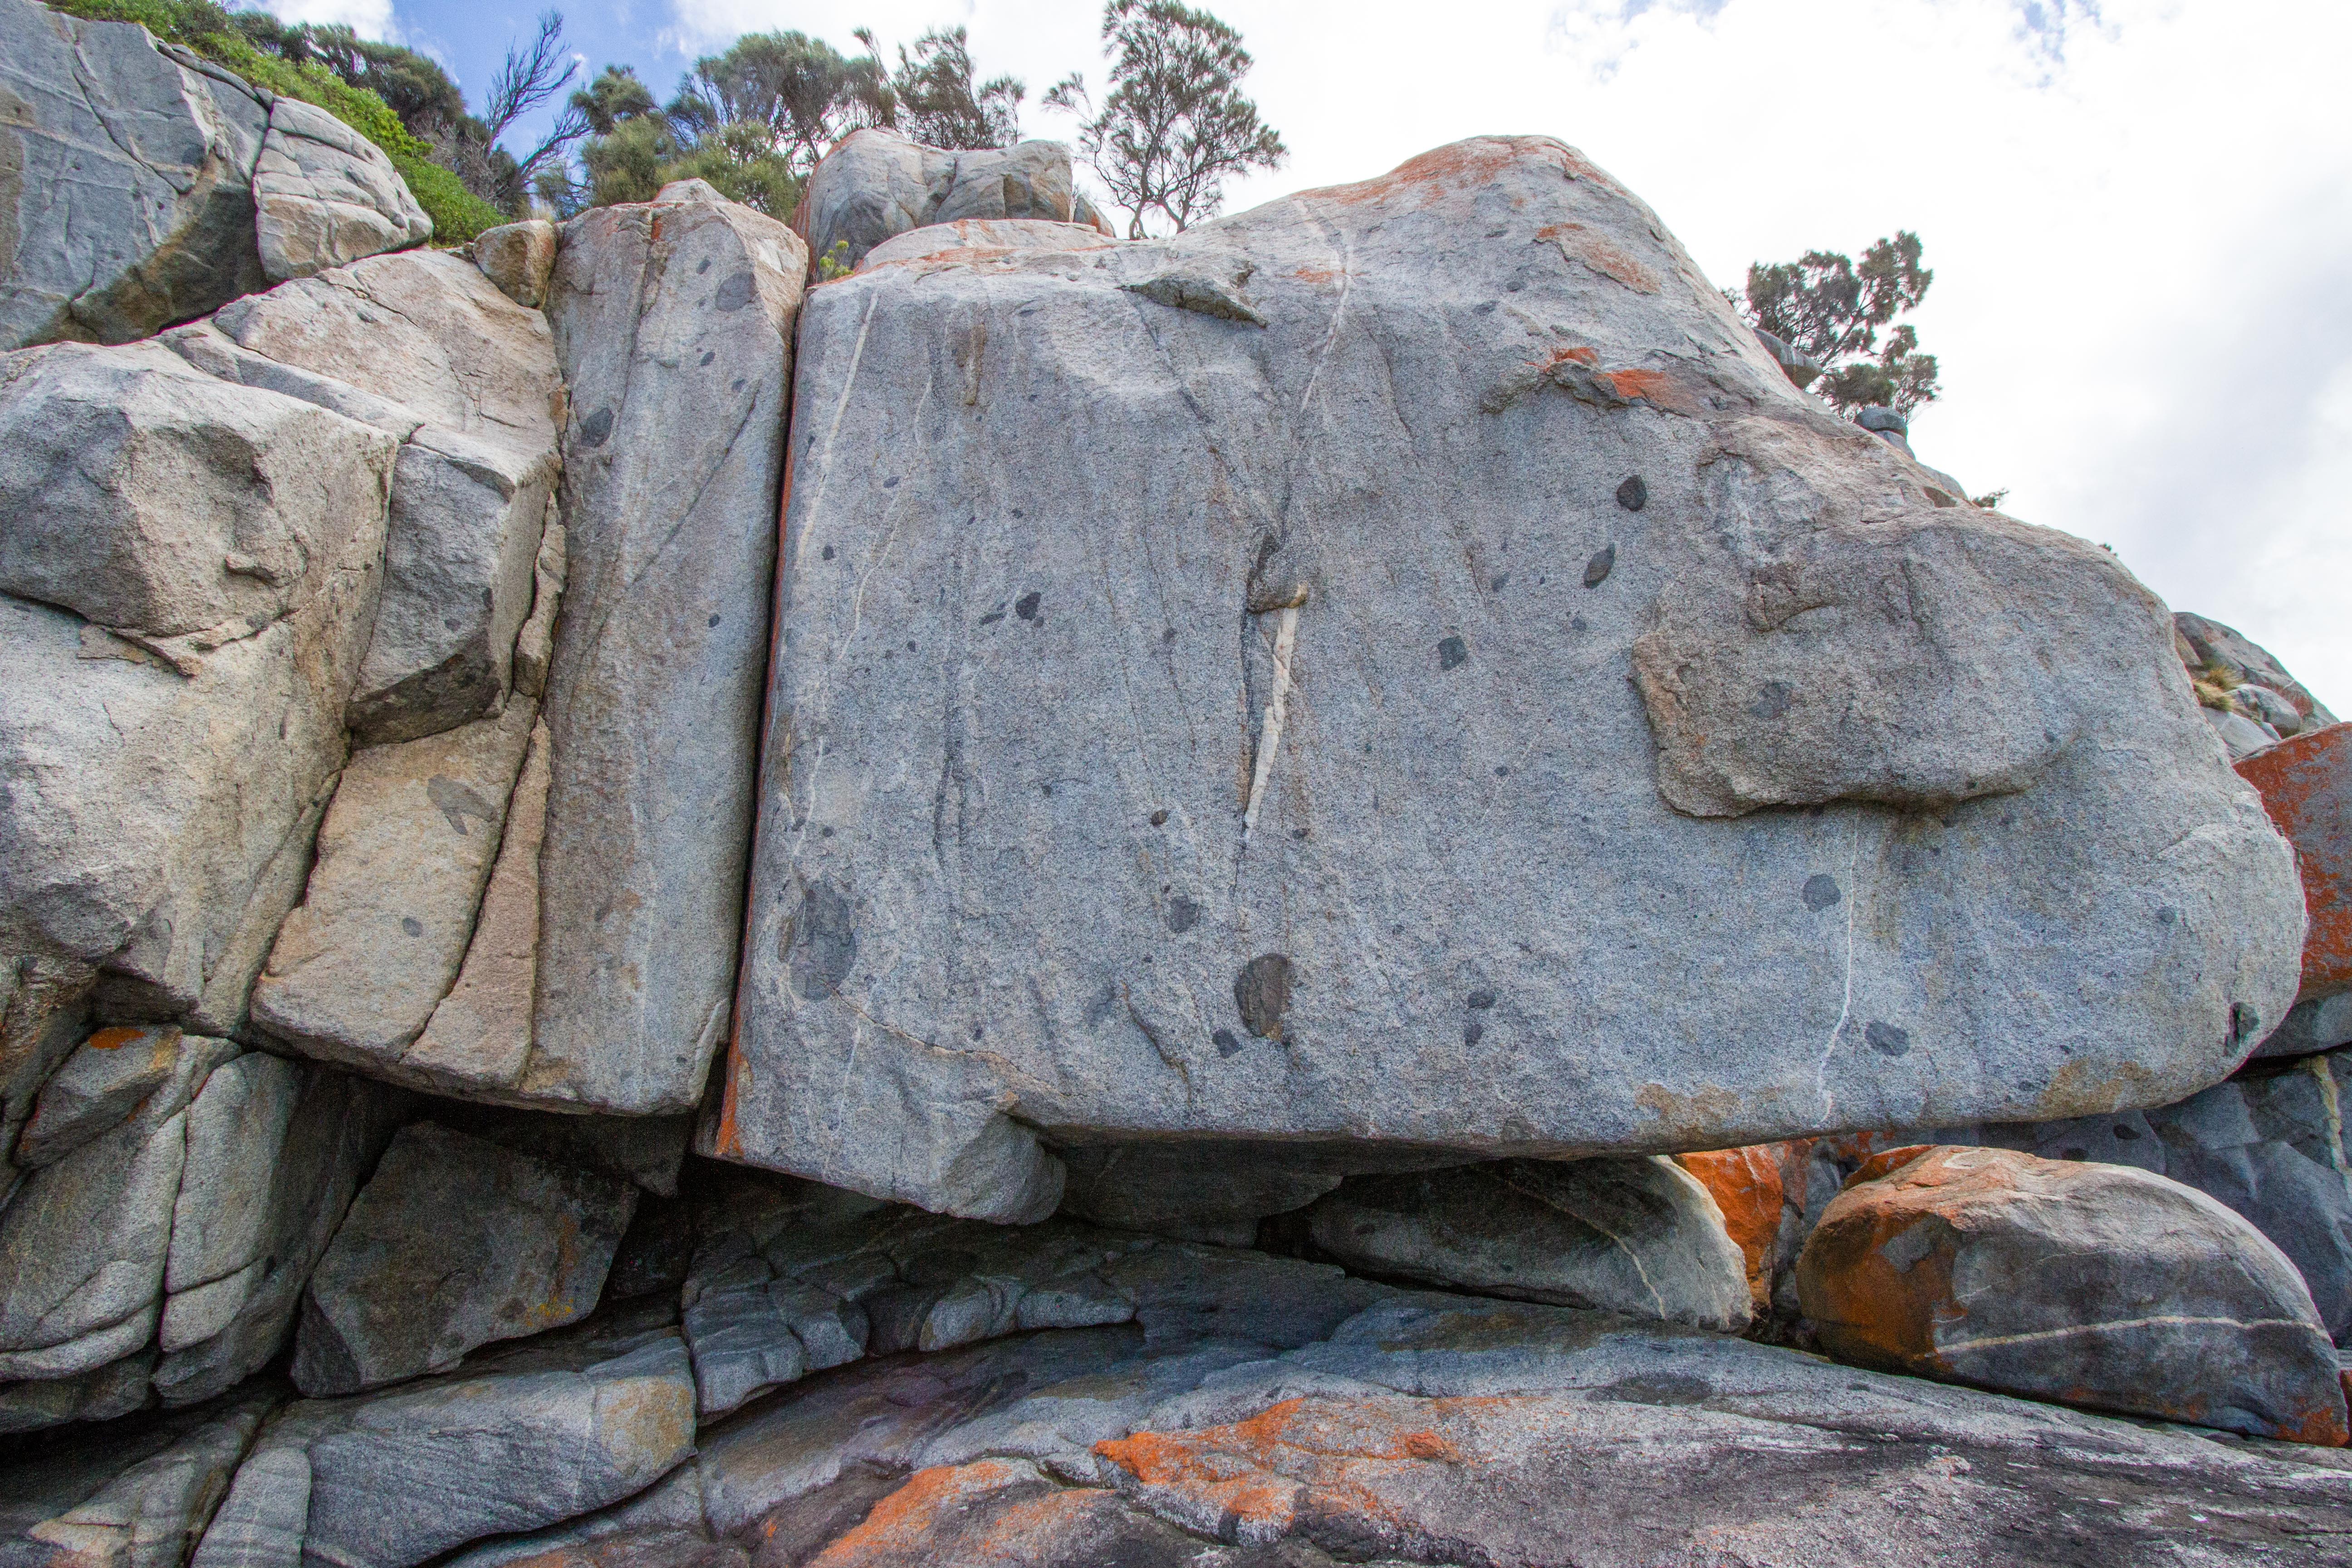
Unclimbed
High face and corner.
High corner.
M Hitchcock 2016
Highball hand/finger crack.
Stand start with amazing undercling.
M Hitchcock 2016
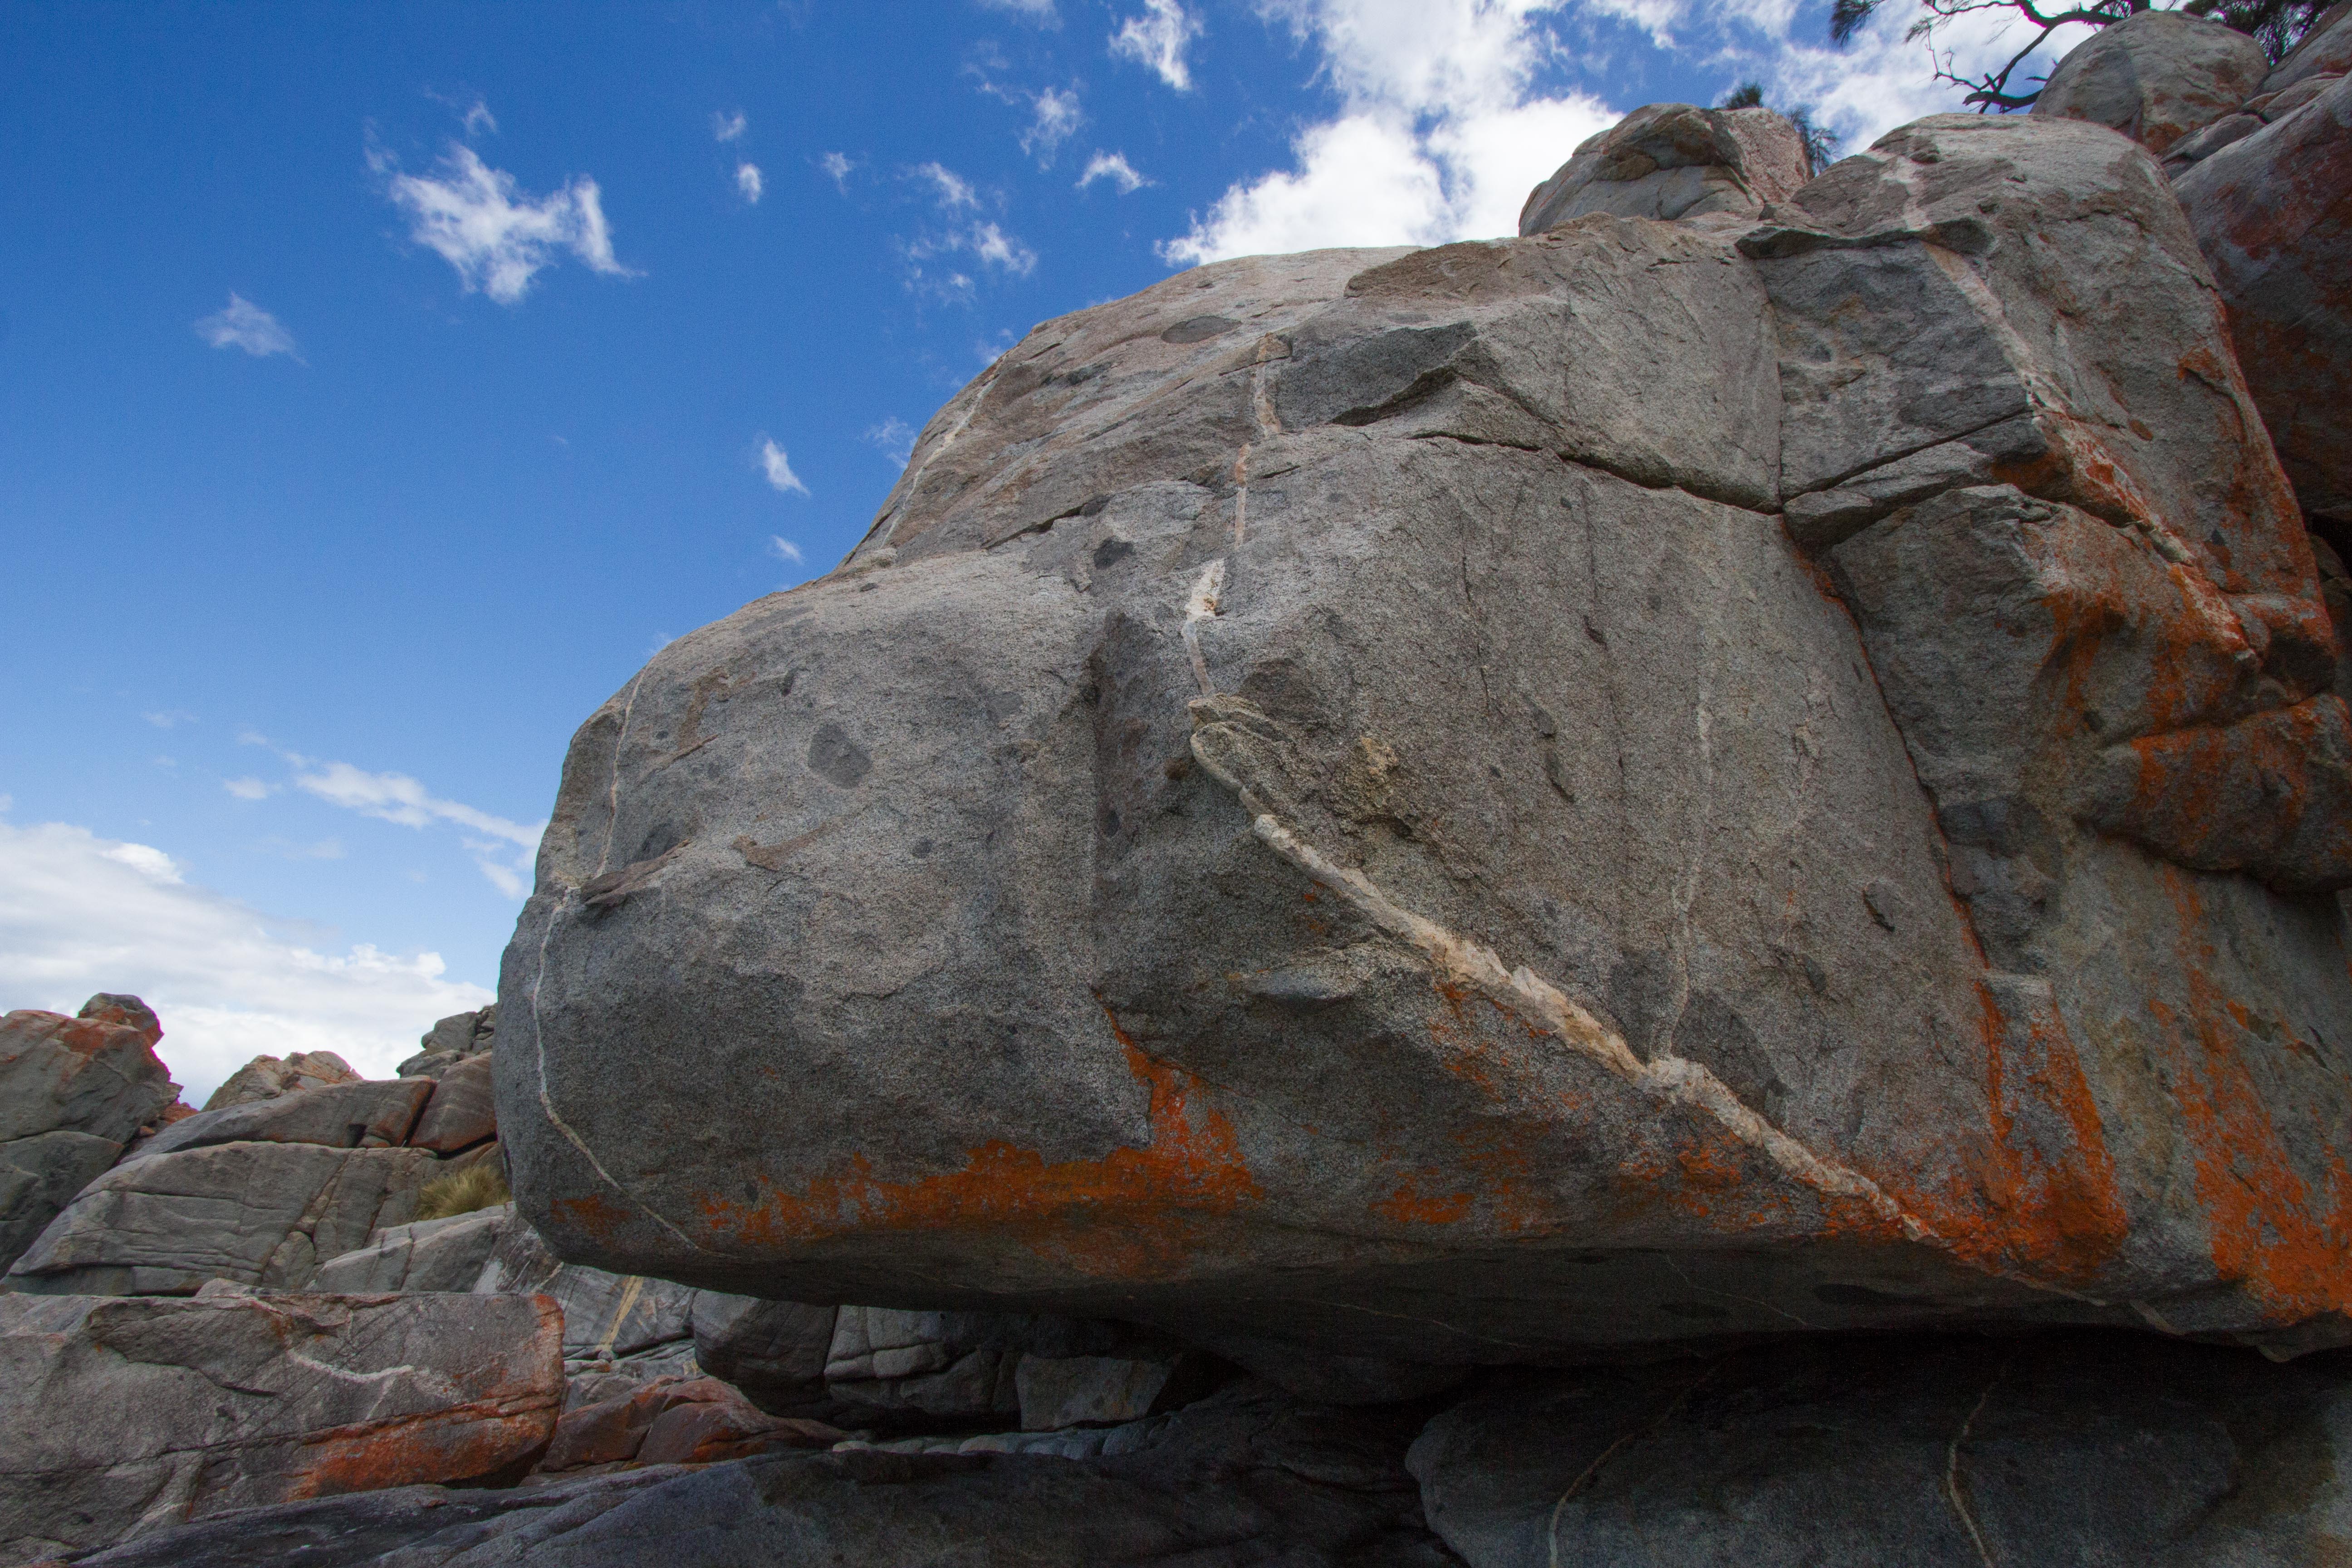
Vera Wall
Climb the front of the arete.
M Hitchcock 2016
Quartz dyke.
M Hitchcock 2017
High corner.
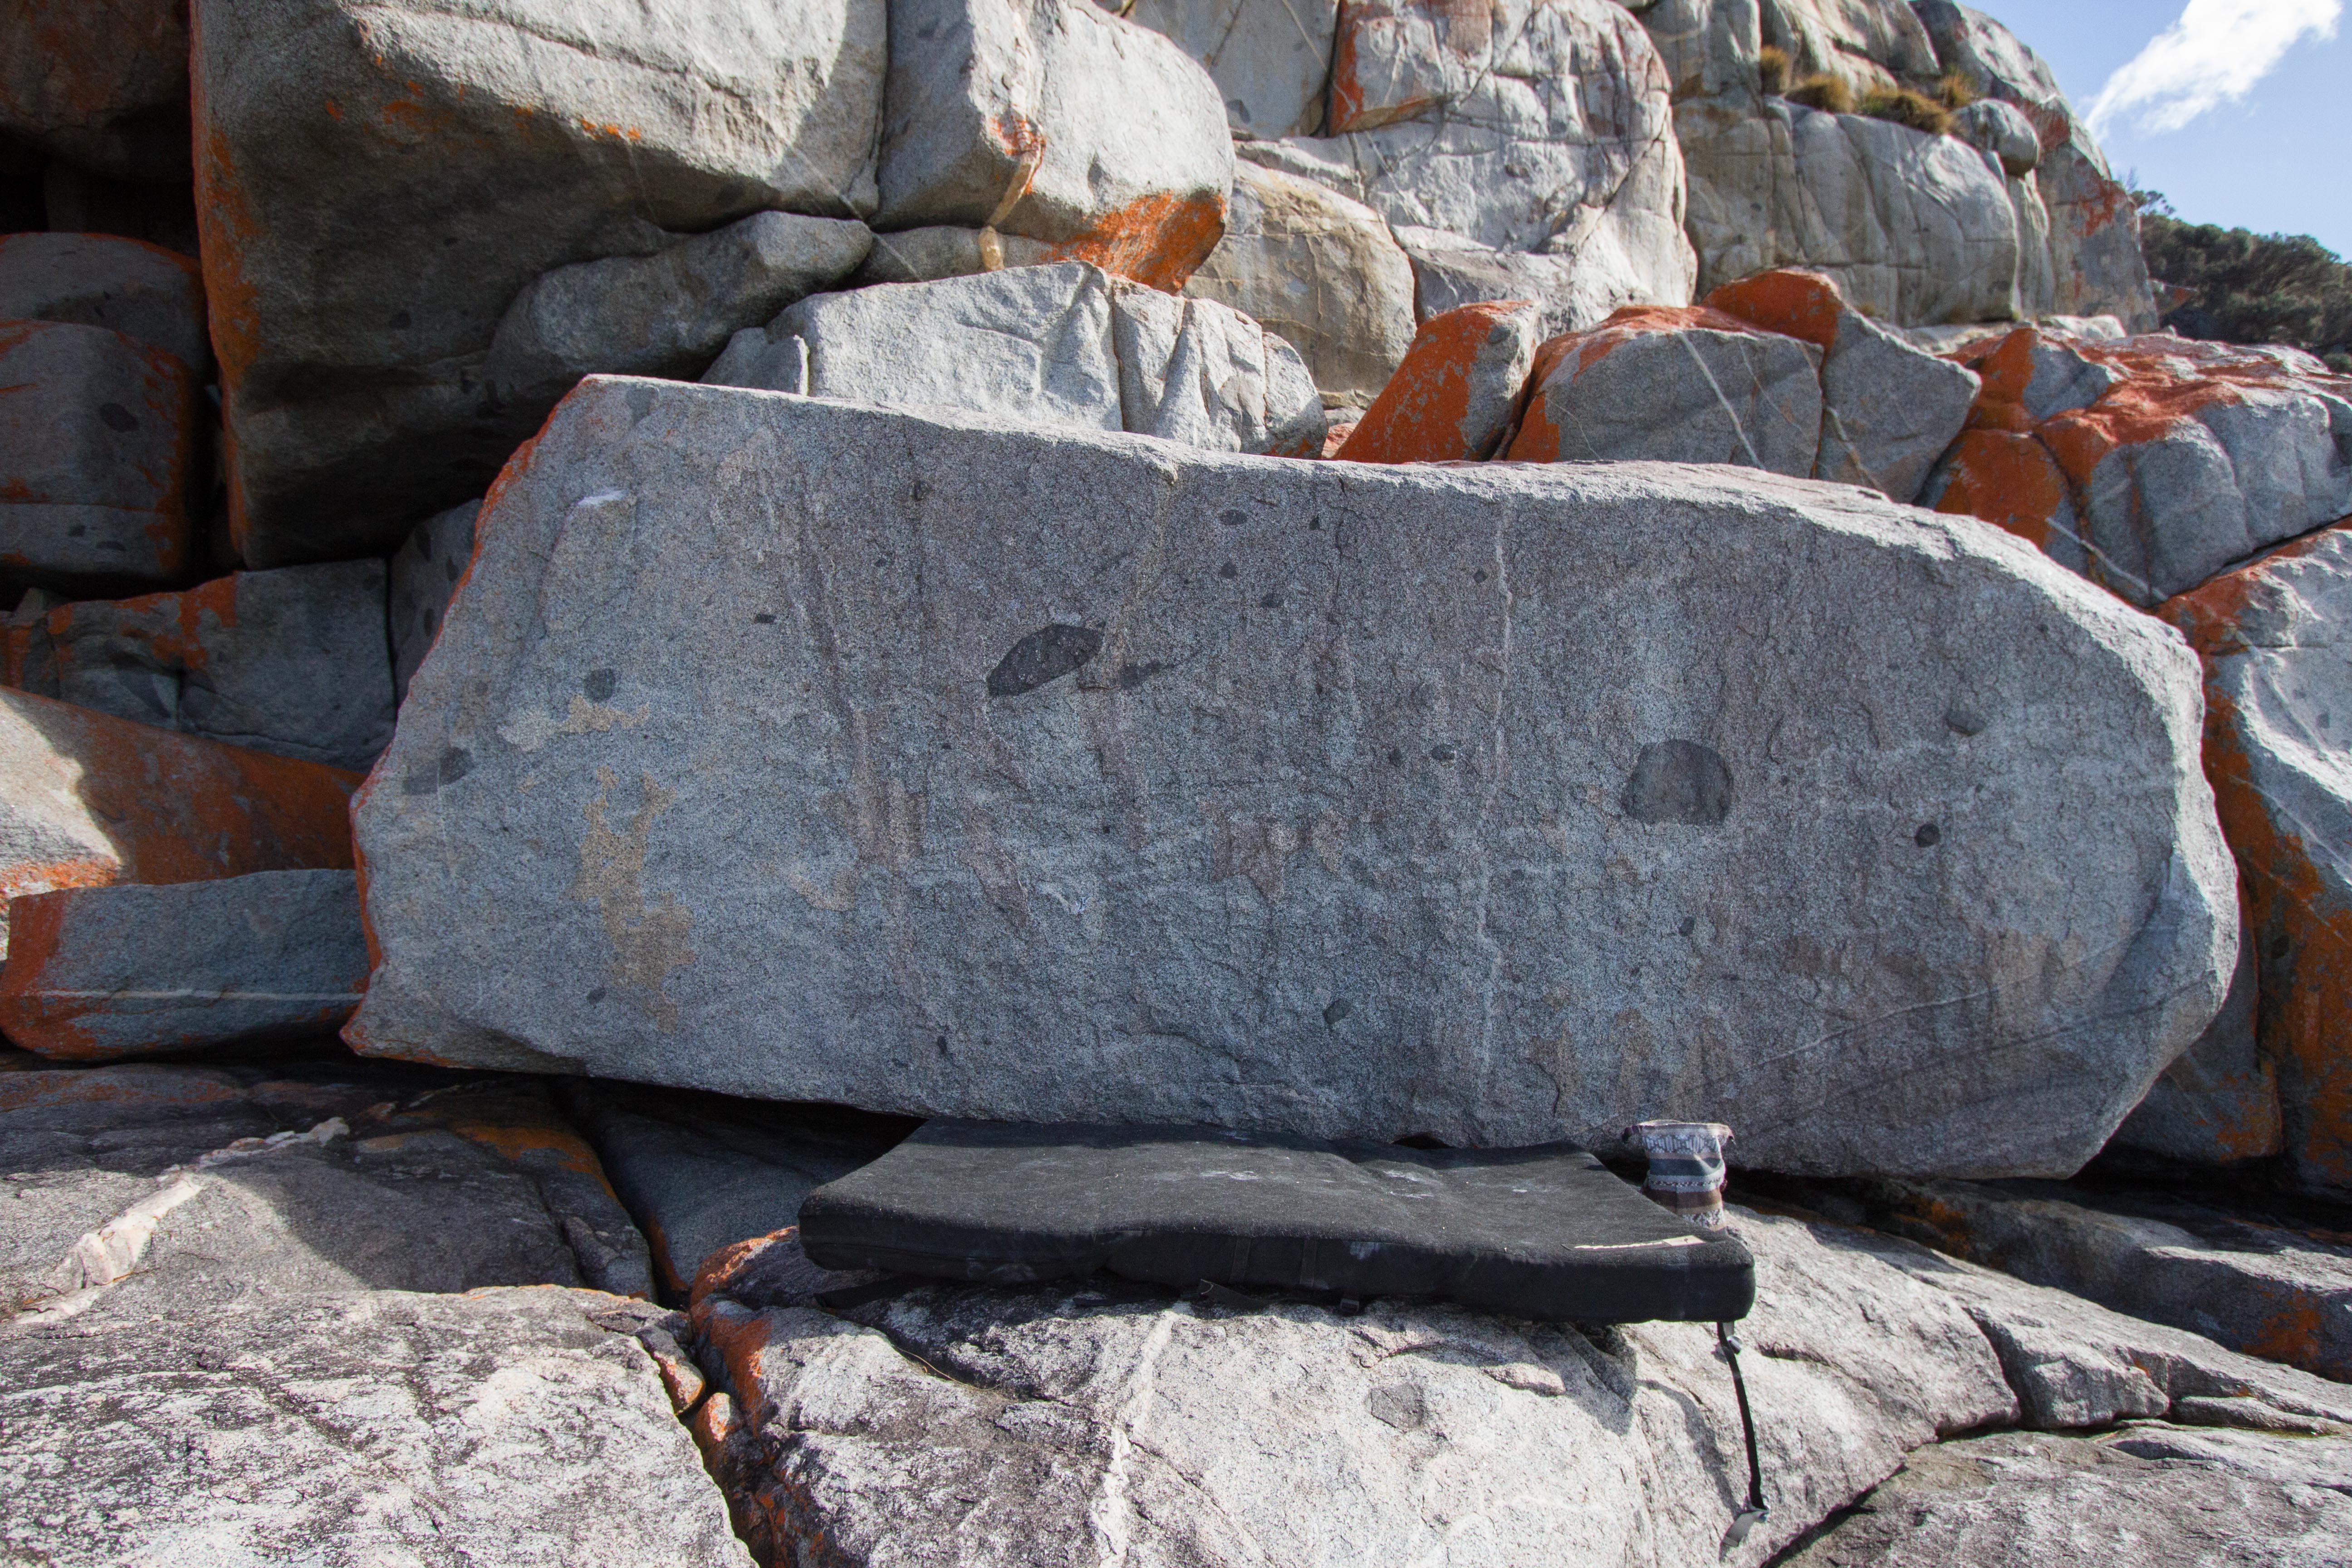
Tales of Light
Short arete. Starting with LH side pull next to a RH crimp.
M Hitchcock 2017
Hard pull off small holds. Decent feet though!
Sit start the blunt arete with LH pinch and RH on high crimp.
M Hitchcock 2017
Unnamed
V0(SDS)There is a hole between #6 on Vera Wall and #1 on Tales of light. Crawl in and start on the low horizontal. Pull to the lip and top out.
M Hitchcock 2017
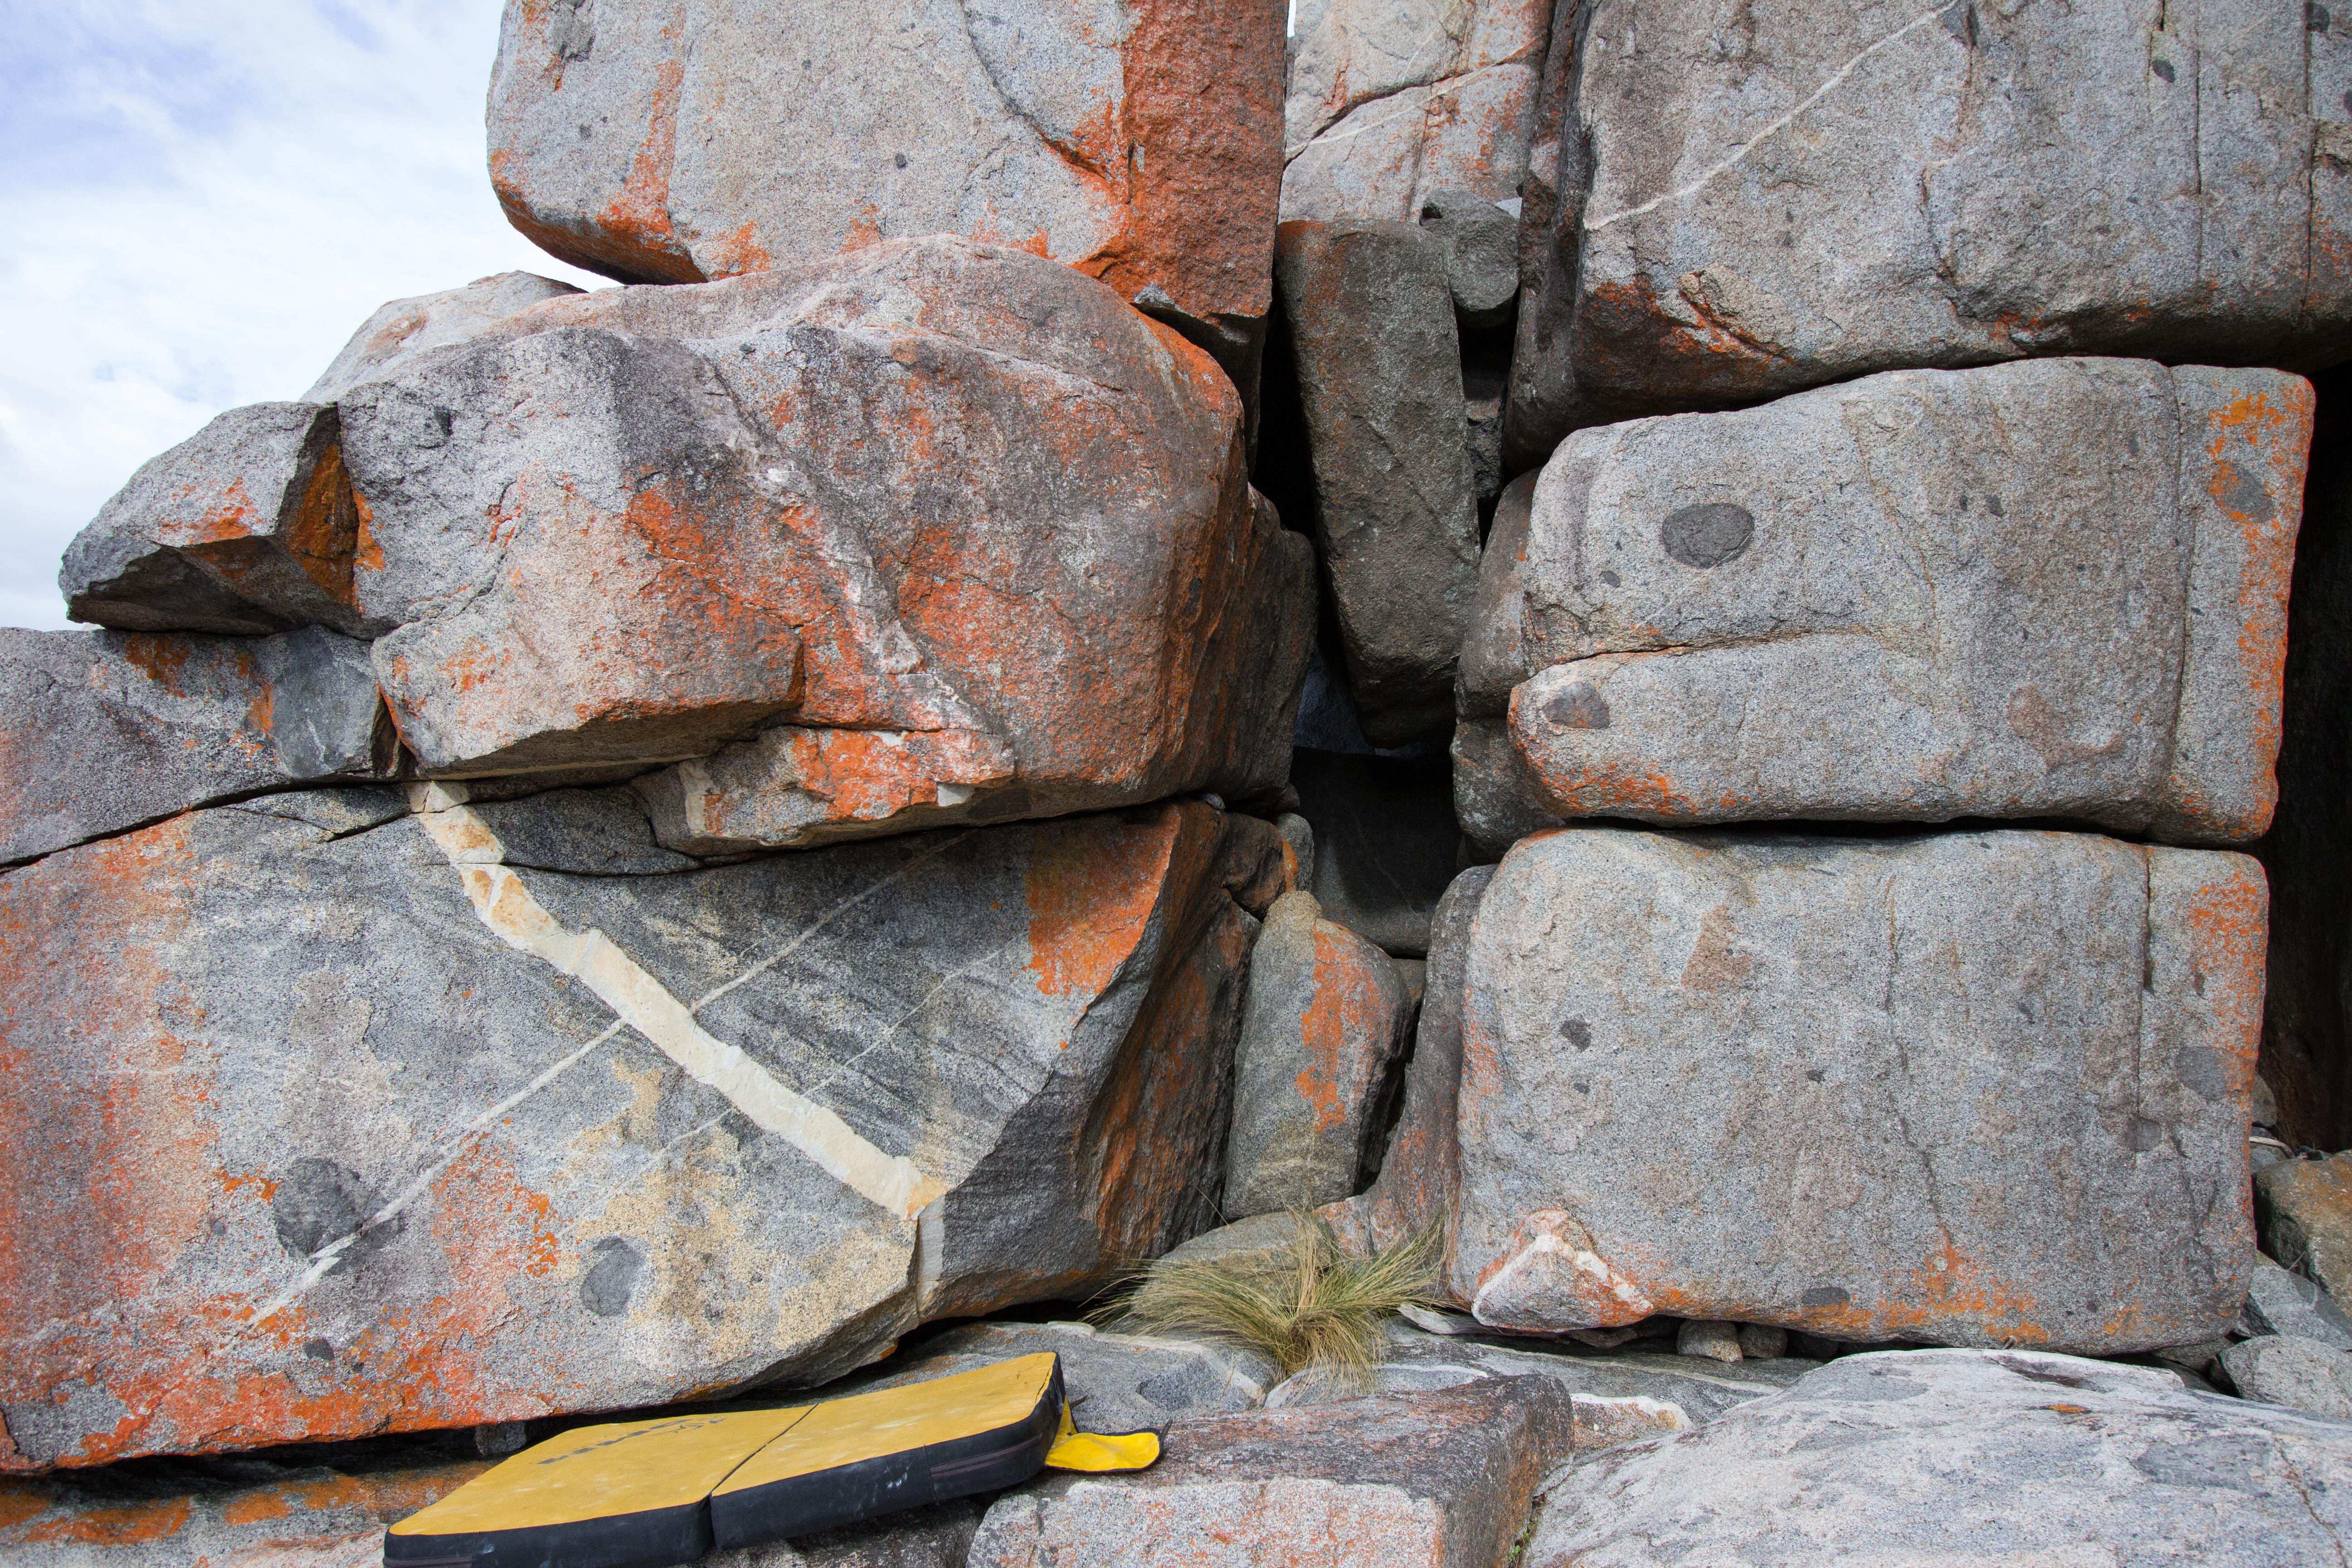
The Gump
Sit start with lowest horizontal.
M Hitchcock 2017
Sit start in low horizontal. Dyno up to jugs.
M Hitchcock 2017
Start in horizontal. Big static move to top horizontal.
M Hitchcock 2017
Gumpy cave crack
V0(SDS)In the cave next to The Gump (climber's right). Sit start with both hands in the horizontal crack. Jam and layback up the vertical crack. topout by following the crack leftwards into The Gump.
M Hitchcock 2017
Bizarro
V3(SDS)Sit start hugging the ticktack in the back of the cave.
M Hitchcock 2017
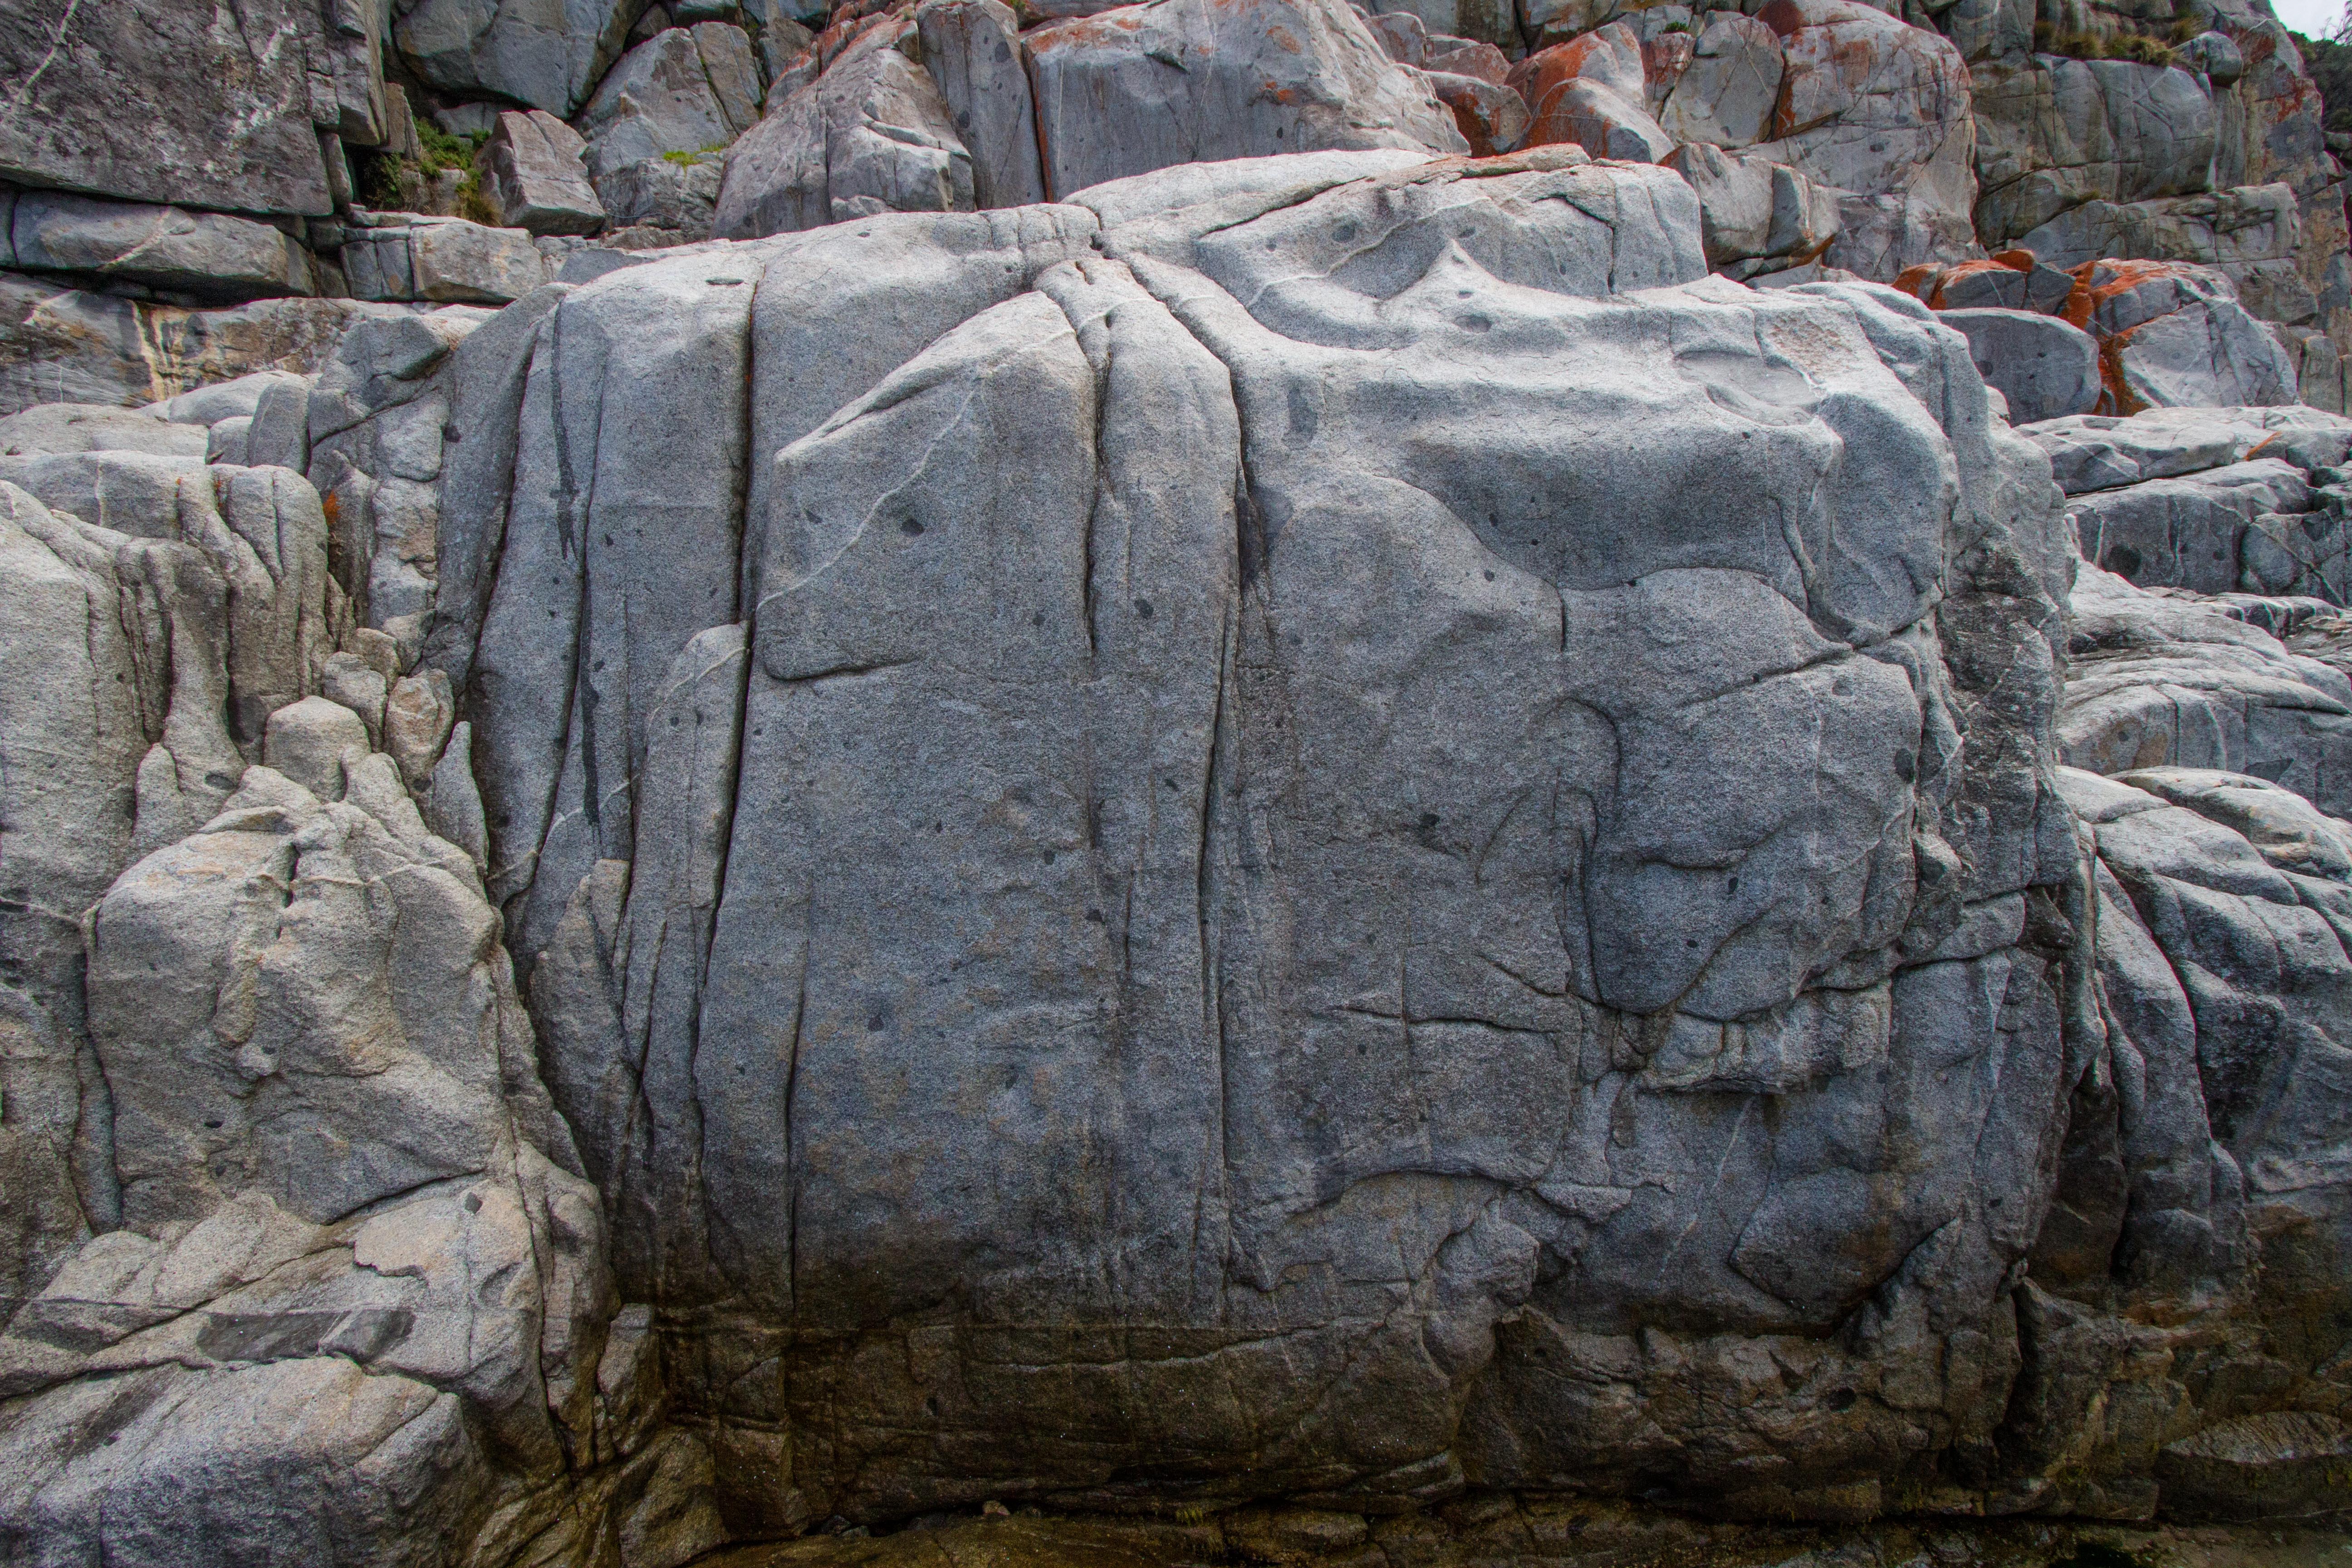
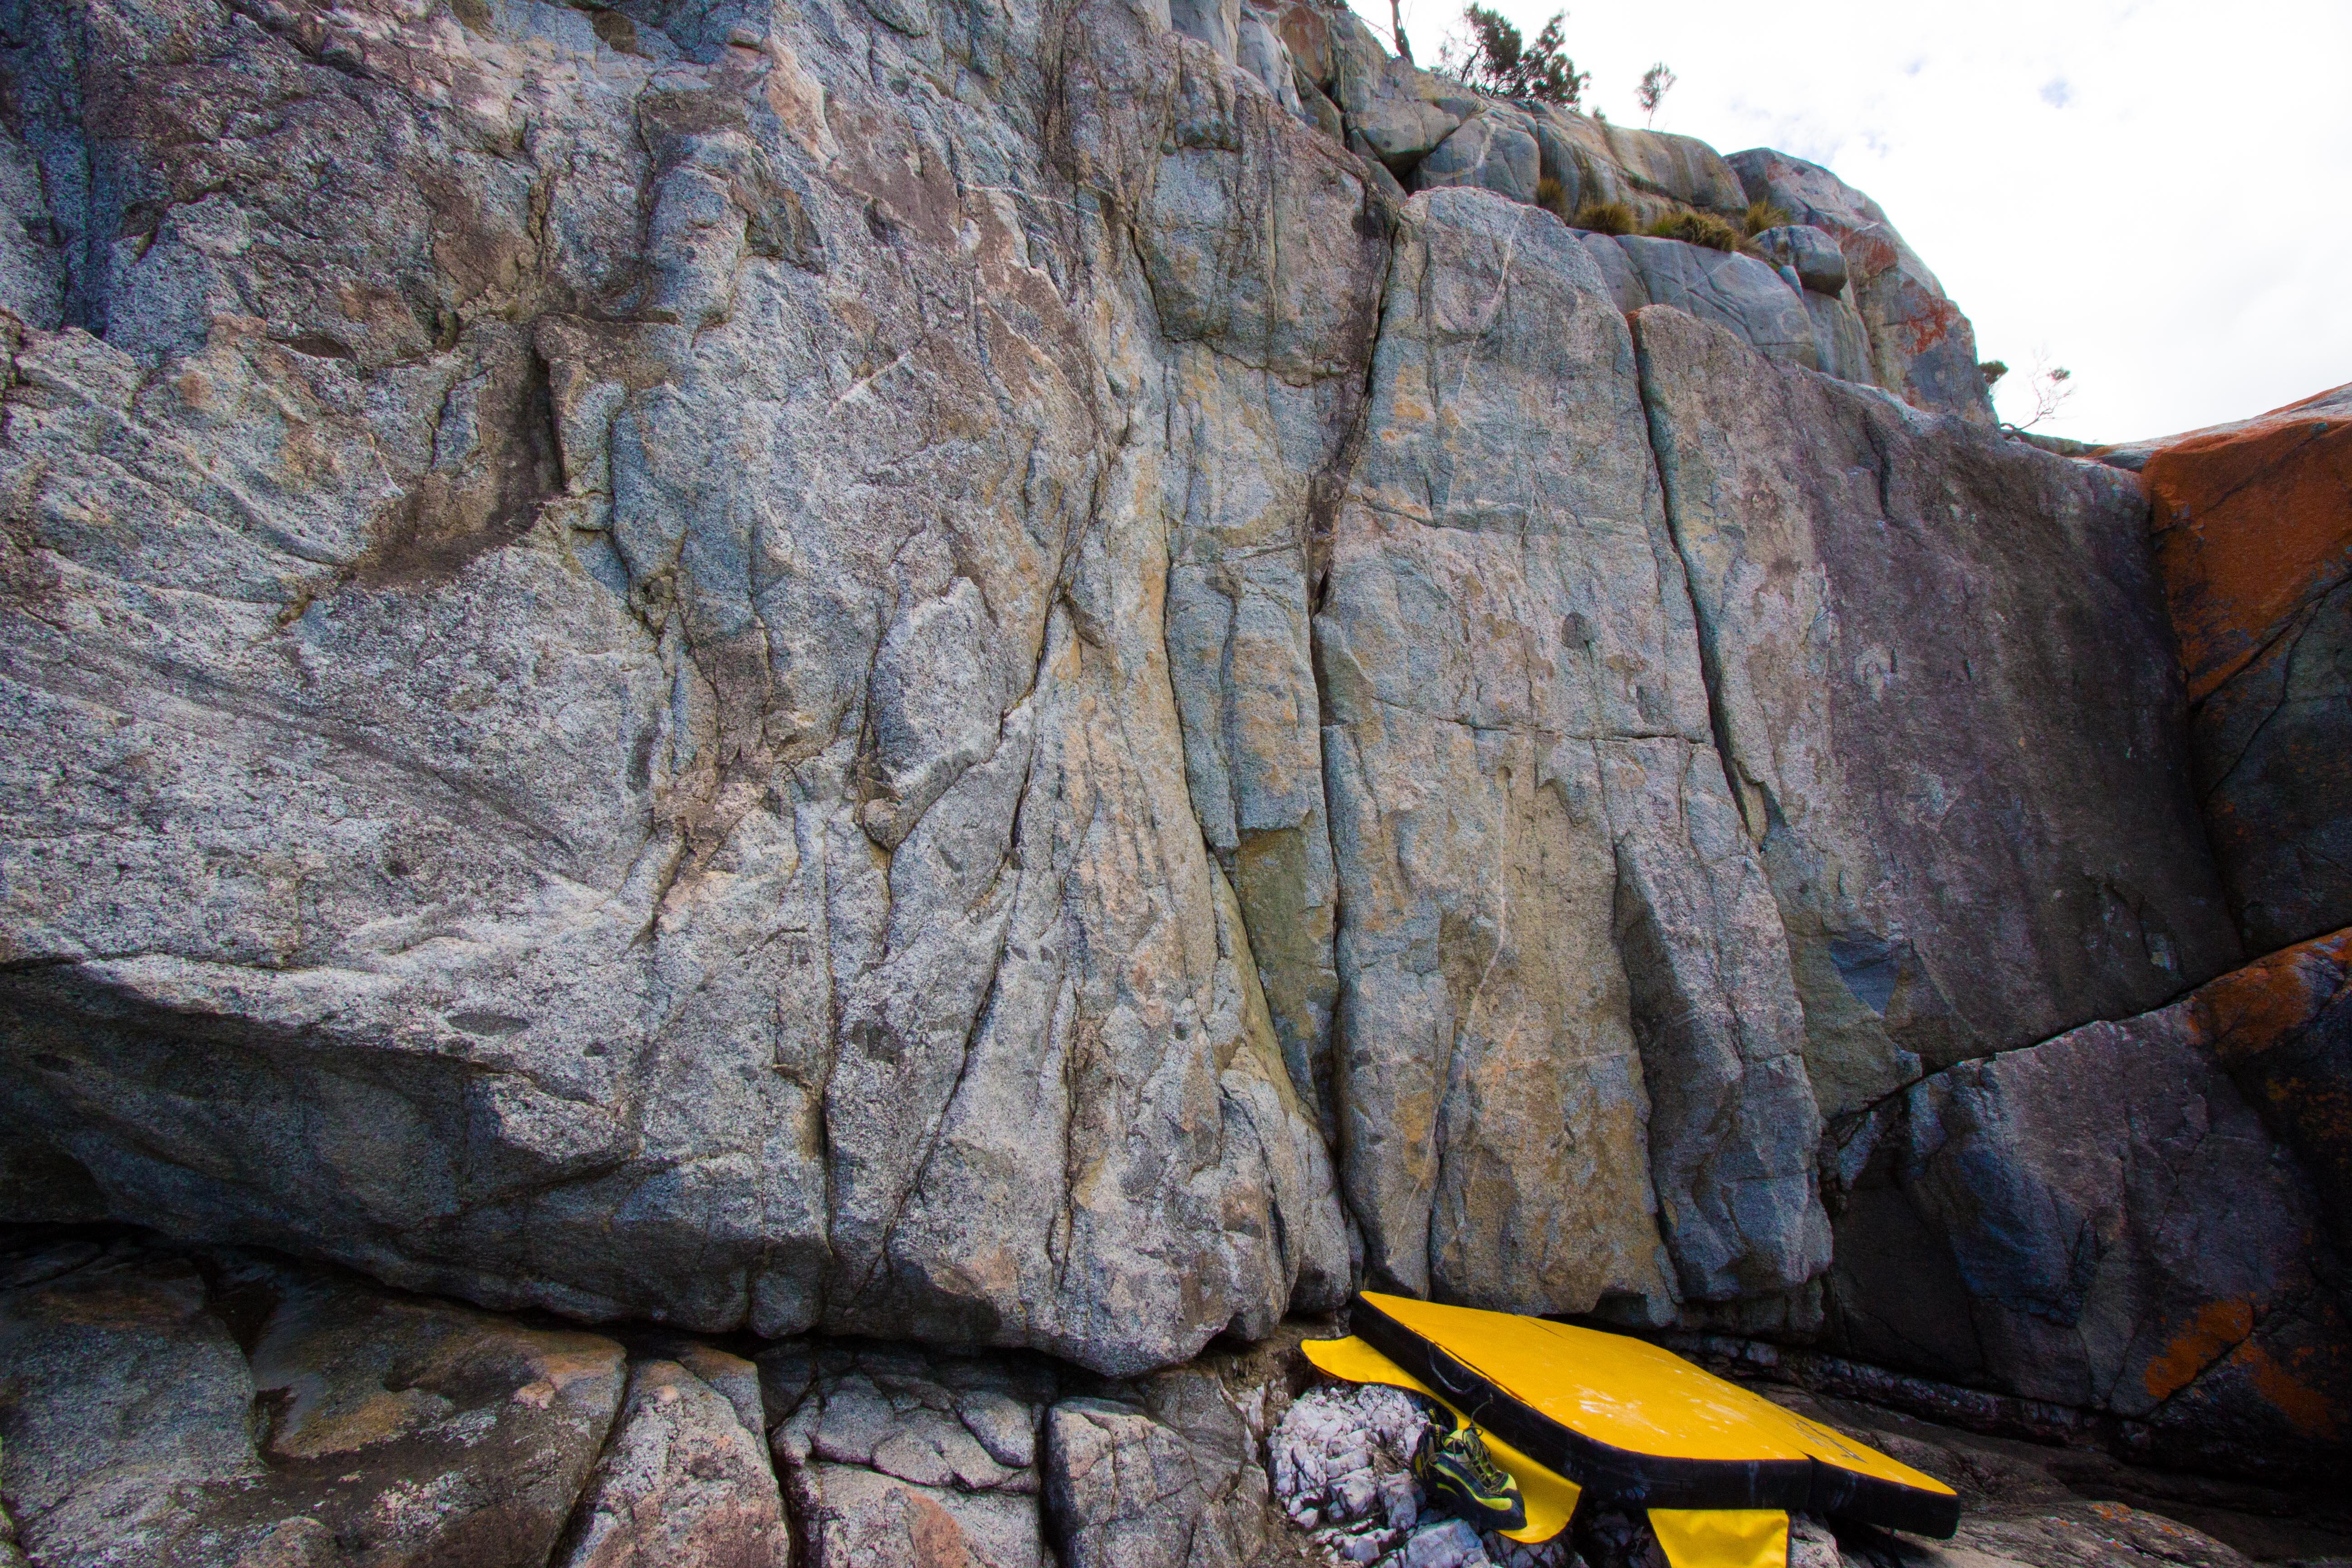
Nook wall
Crack and broken face.
M Hitchcock 2016
Crack
M Hitchcock 2016
Ledge to sparse holds on the face.
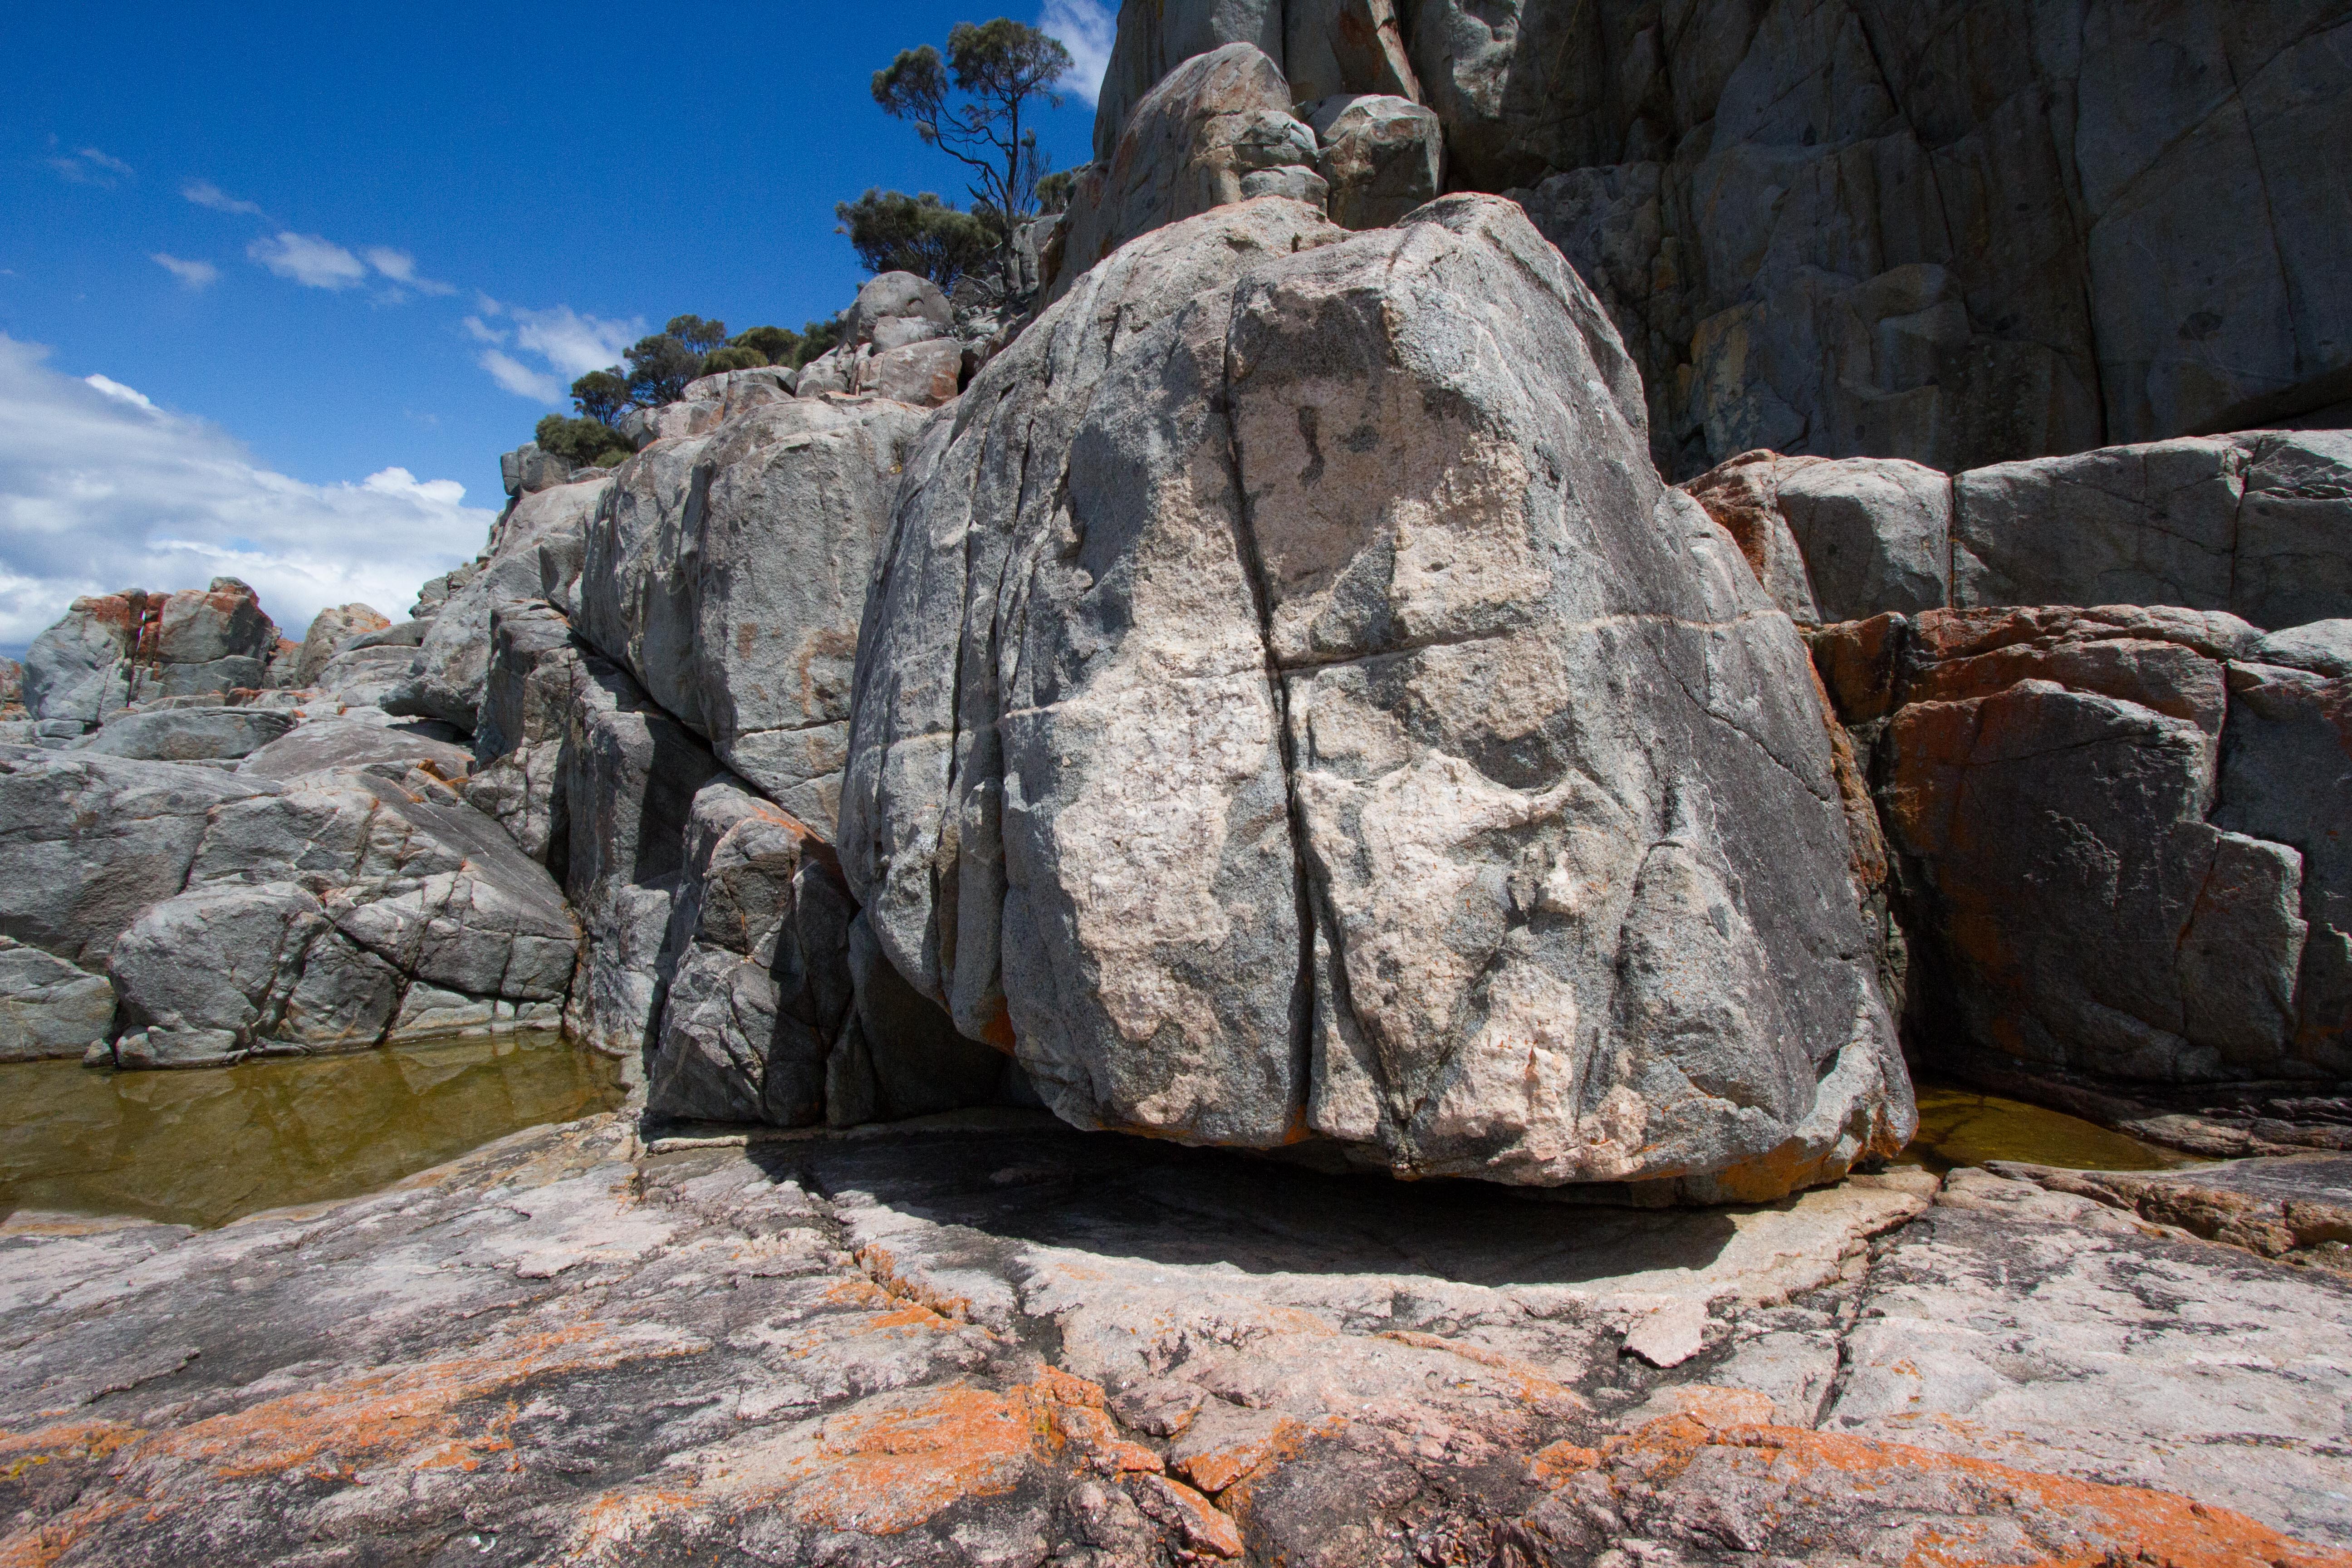
Sit start with quartz undercling
M Hitchcock 2016
Sit start with good quartz hold.
M Hitchcock 2016
Easy slab.
M Hitchcock 2016
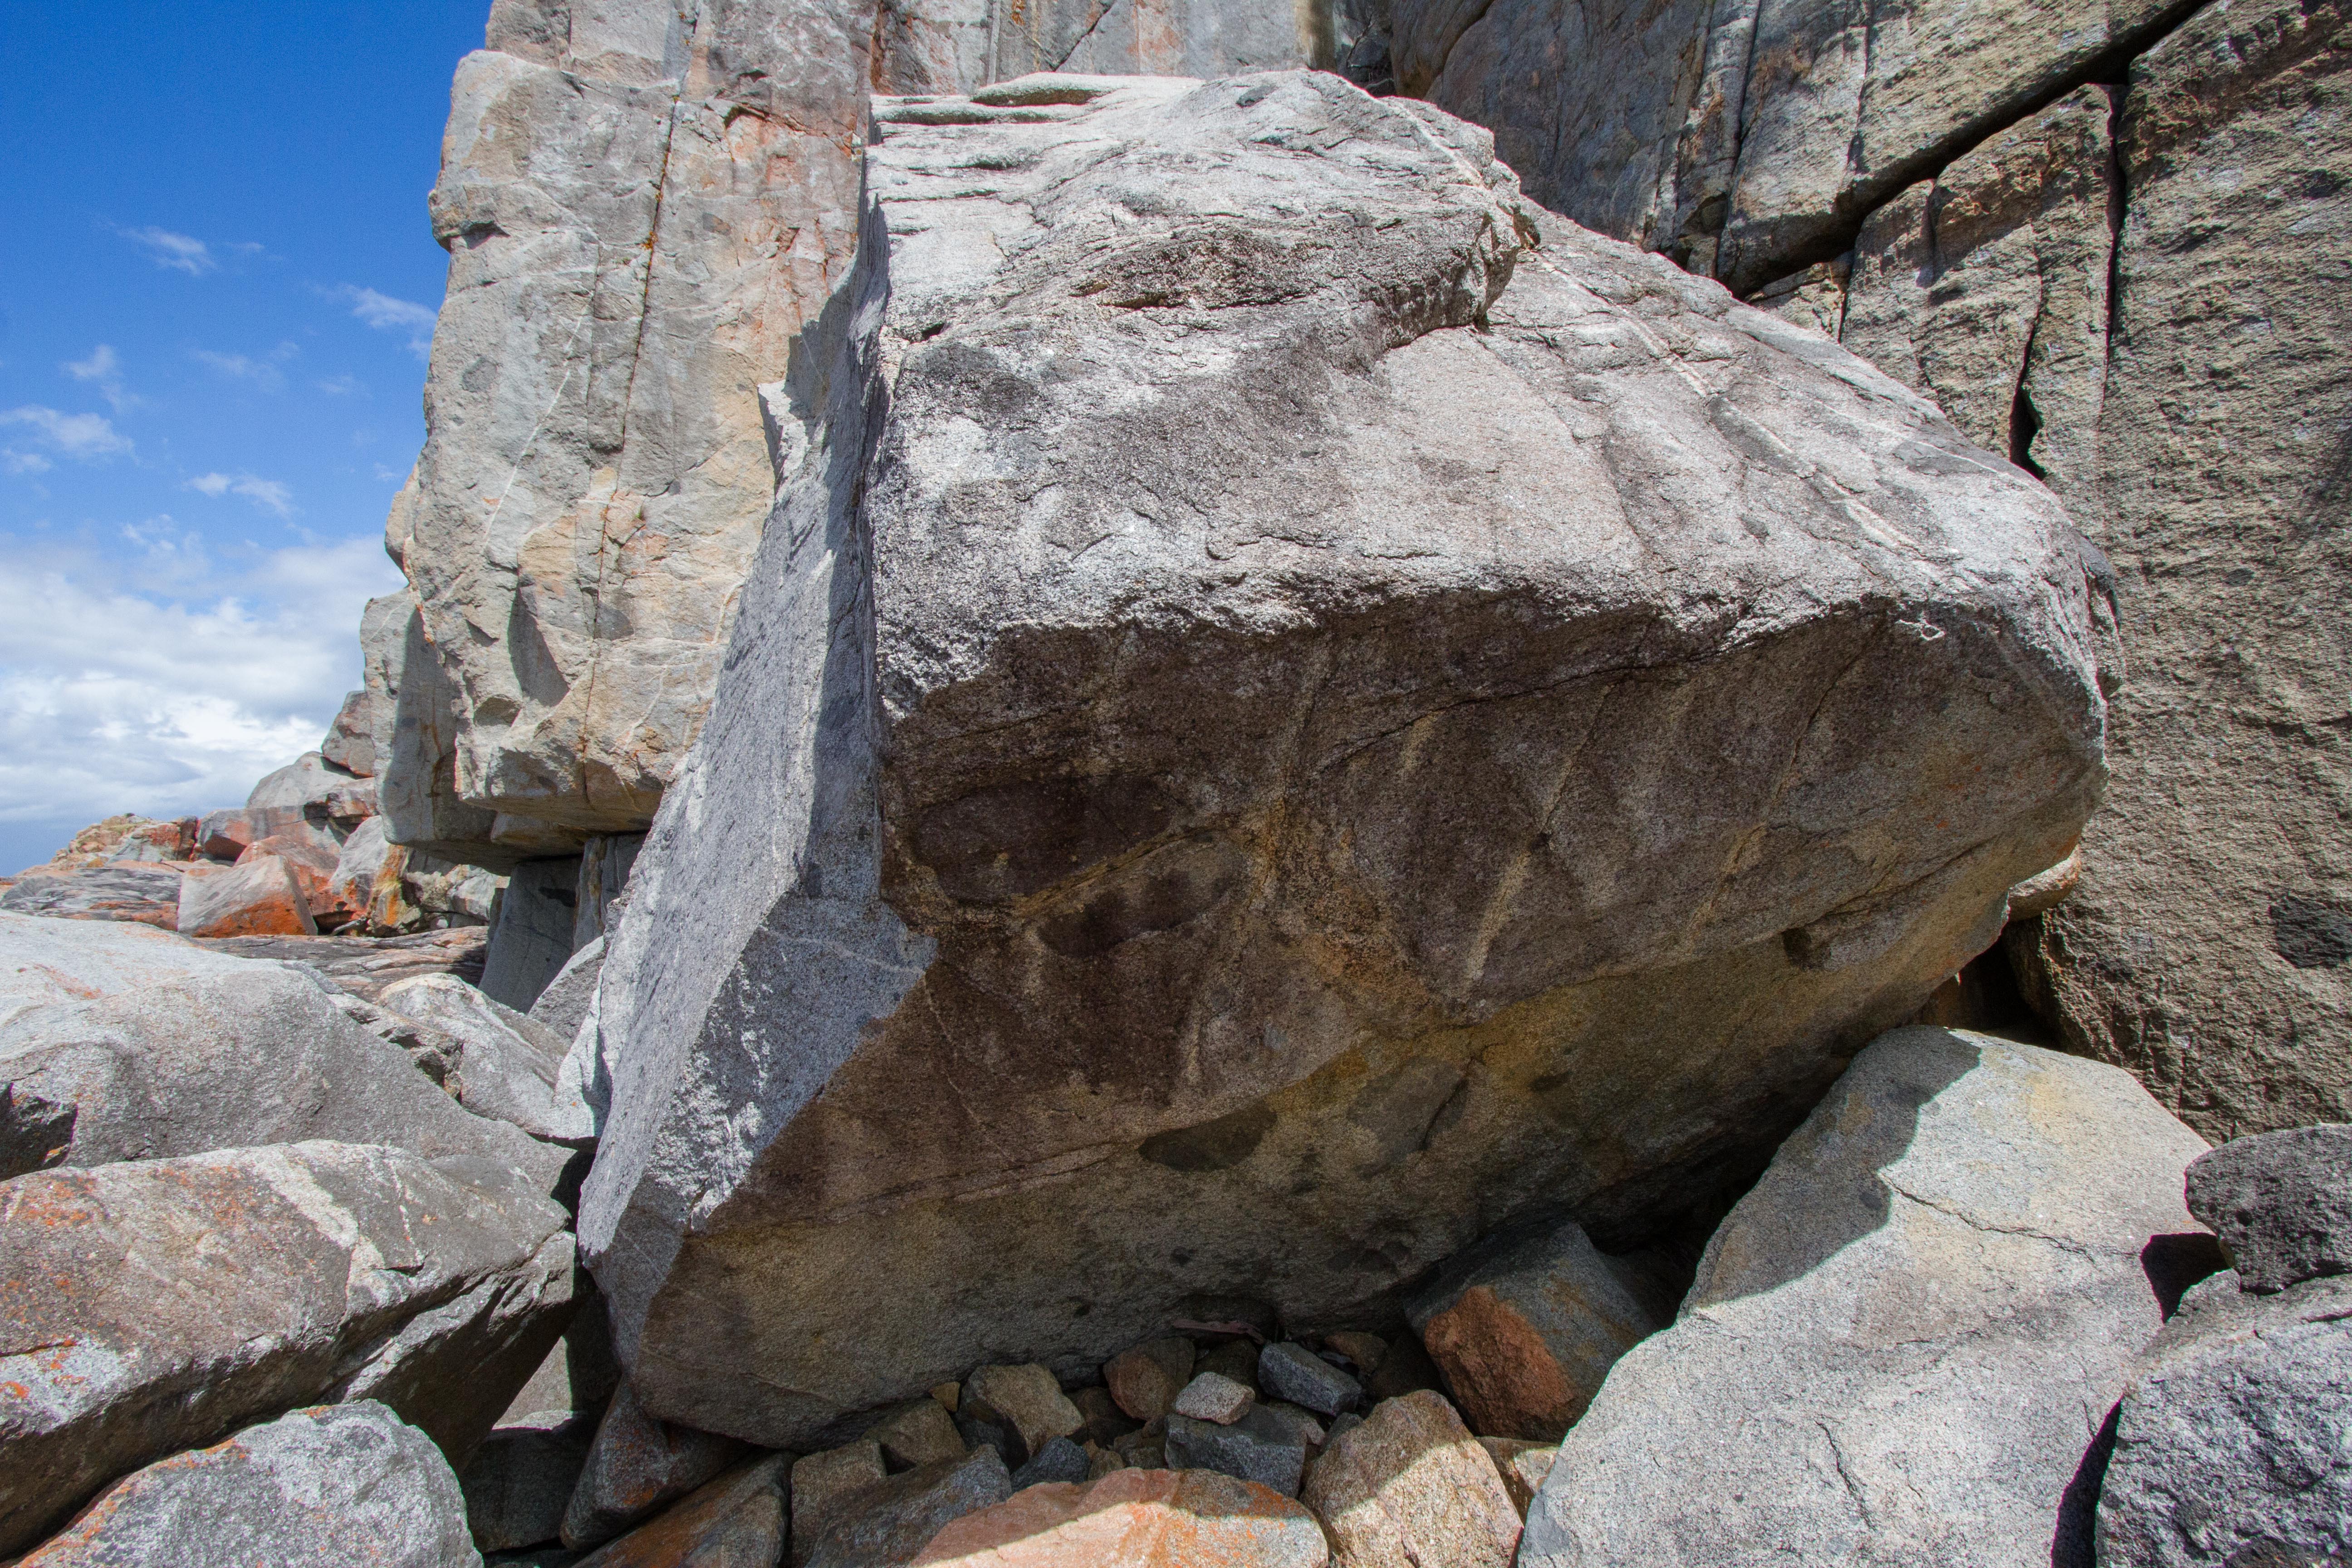
Back boulder
On the boulder above and behind 'Happy, Happy, Joy, Joy'. Climb the featured face.
M Hitchcock 2016
Sit start with double underclings. Challenging moves lead into an easier mantle.
M Hitchcock 2017
Sit start with LH undercling and RH side pull on the arete.
M Hitchcock 2017
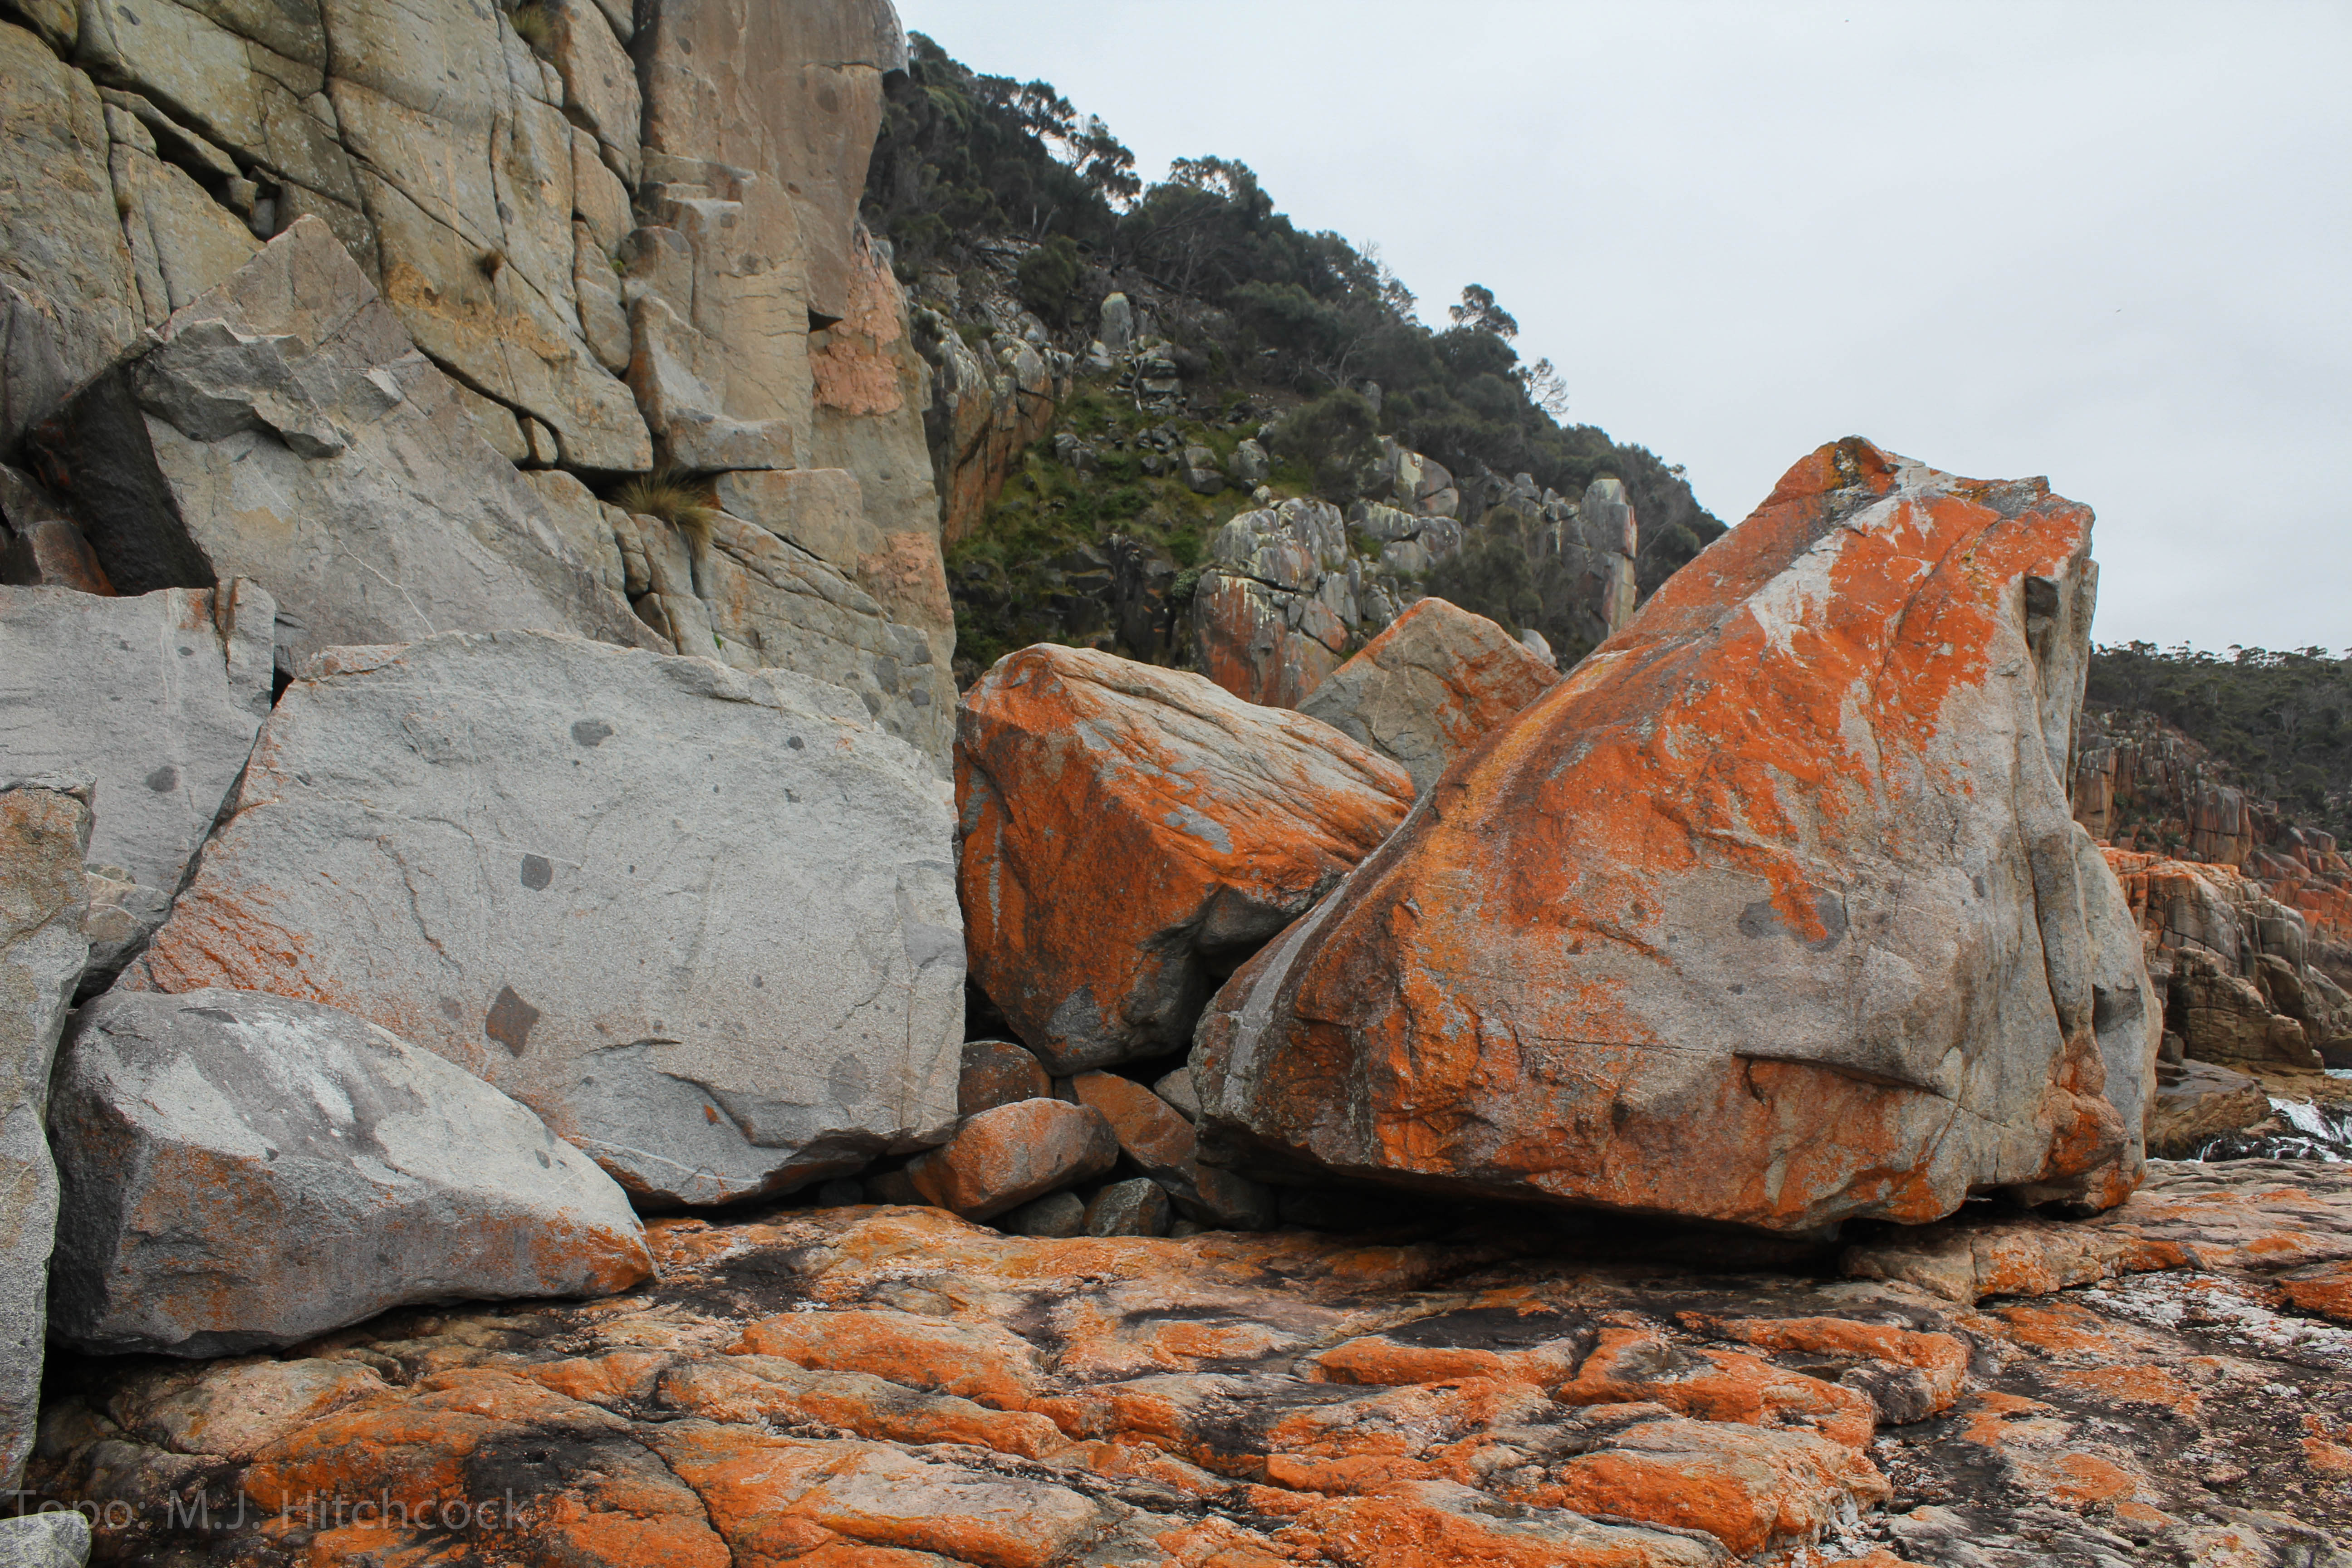
Joy slab
Climb the Slab.
M. Hitchcock 2010
Climb the Slab on the other side of the Last Chance boulder. Slab has been climbed along the full length. All about the same grade.
M Hitchcock 2016
Face to Arete.
M Hitchcock 2017
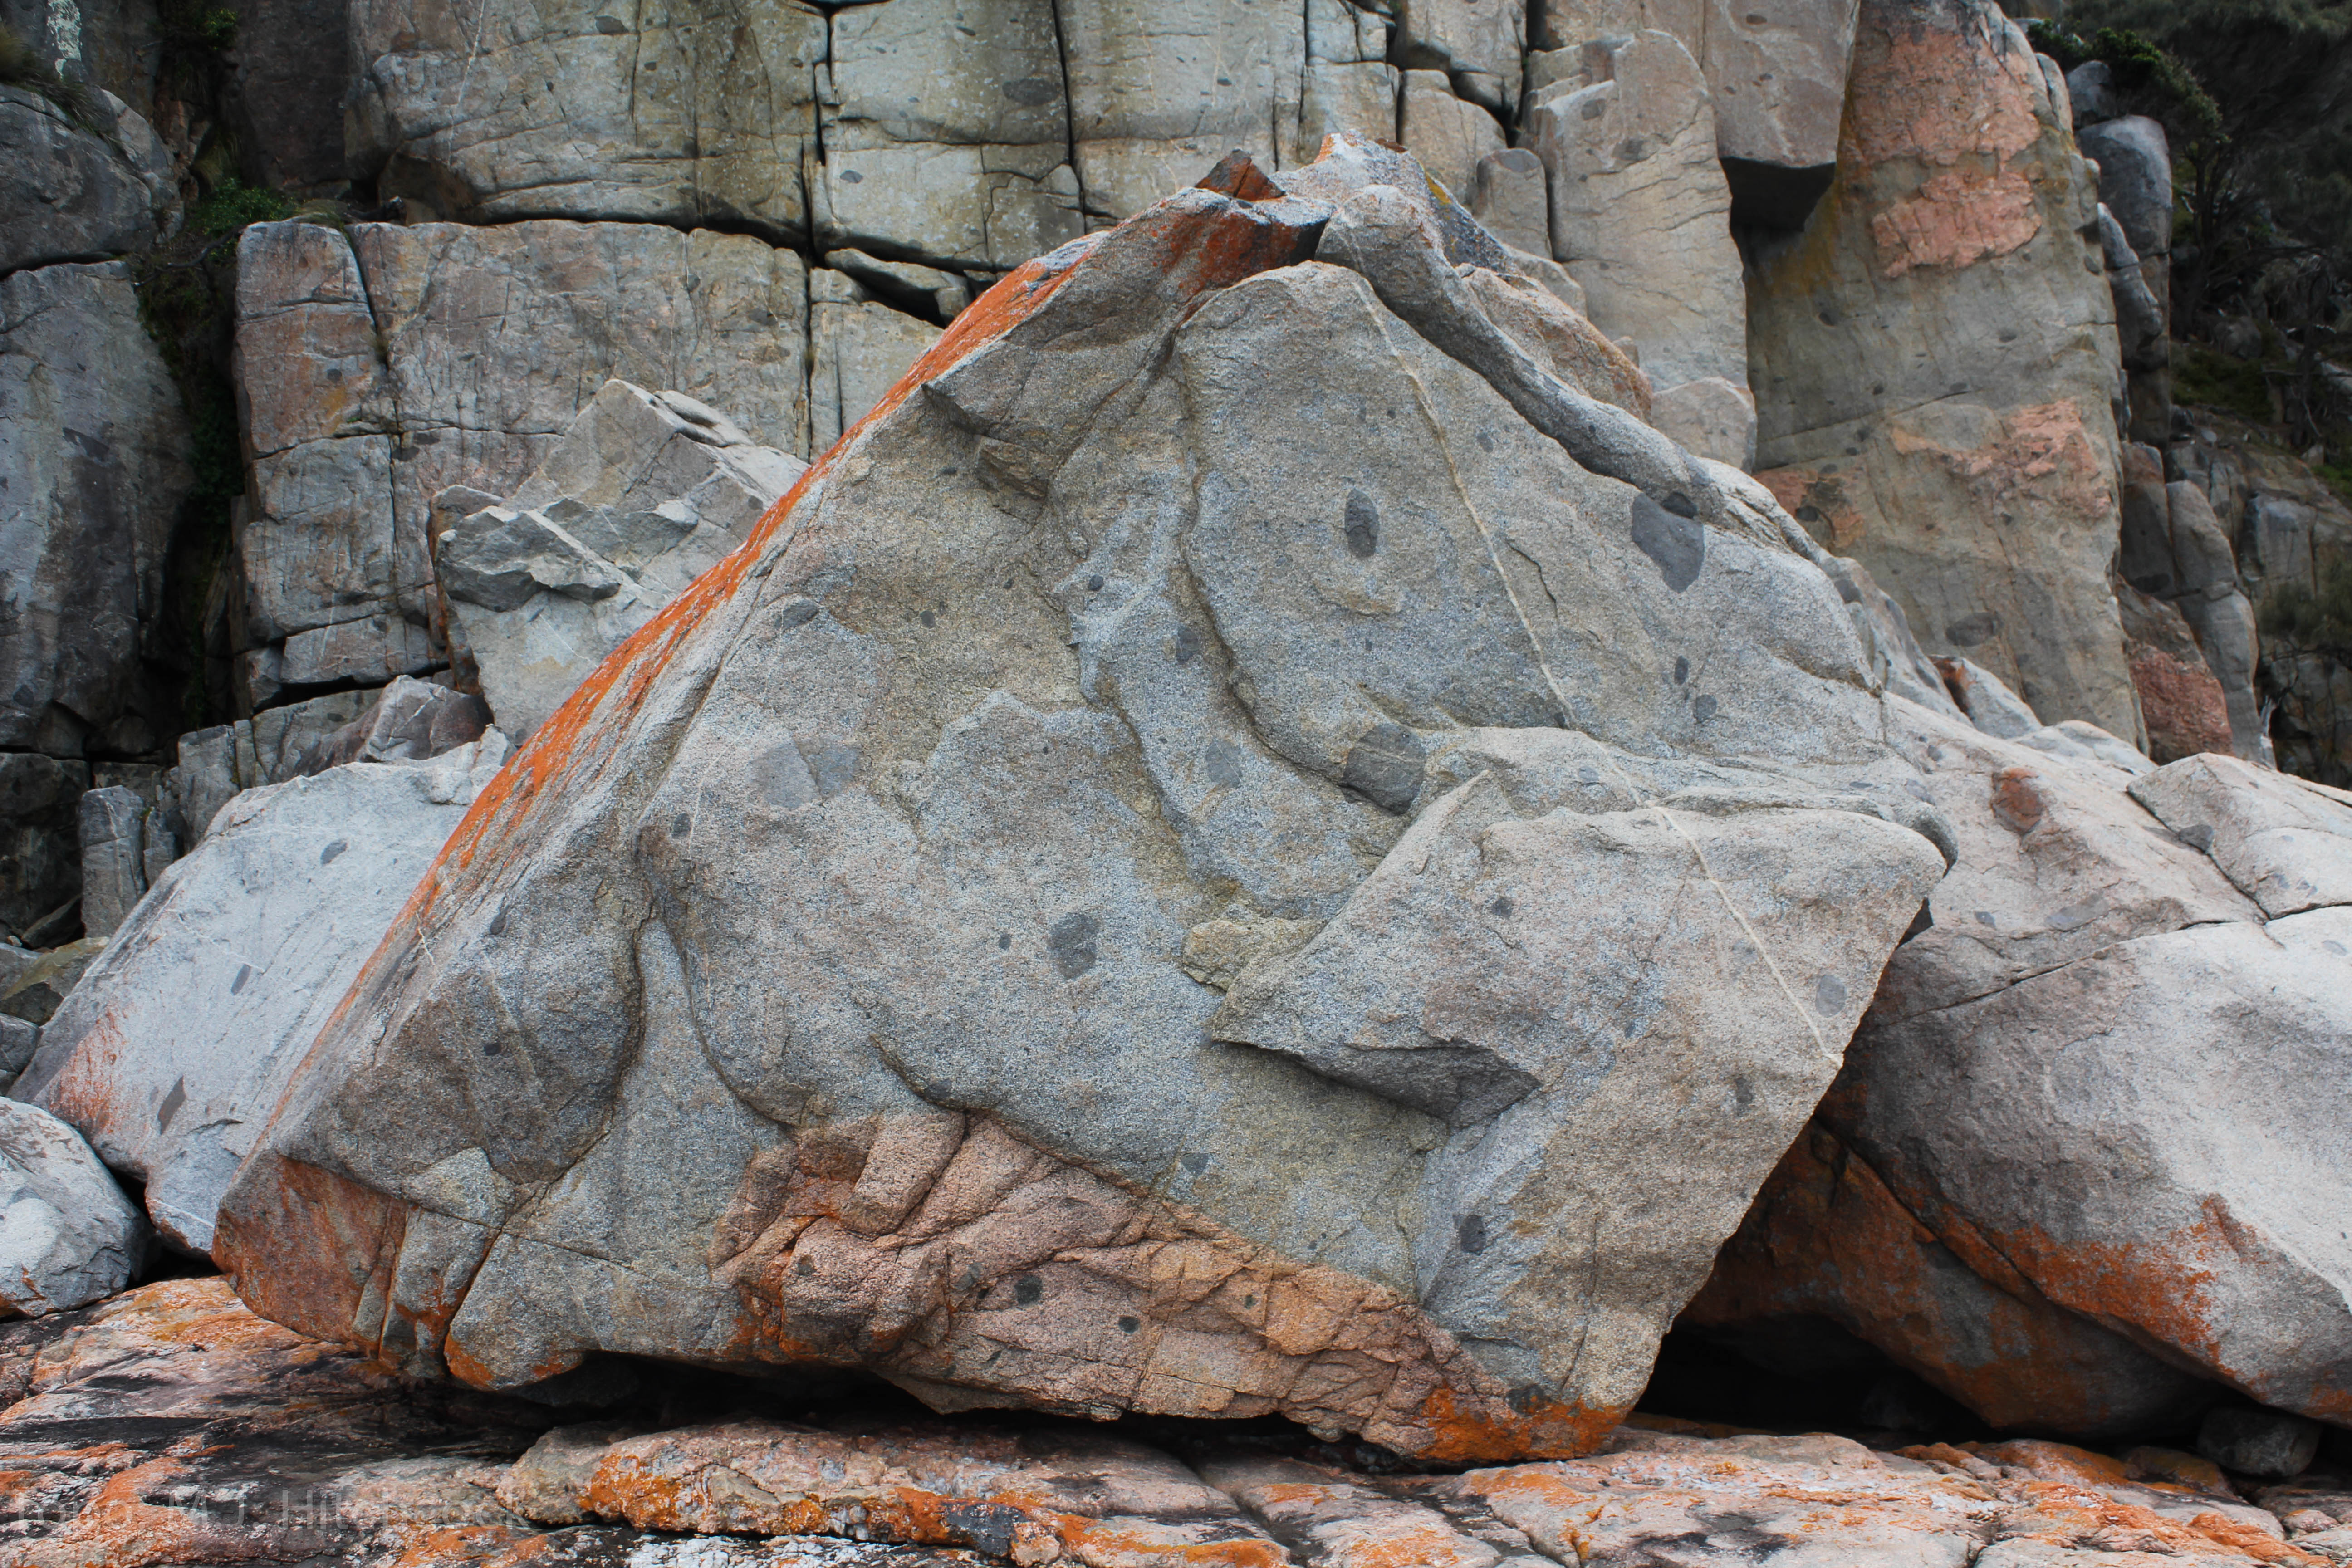
Last Chance
Up the large holds in the the middle of the boulder
M. Hitchcock 2010
Climb the right side of the arete.
M Hitchcock 2016
Sit start at the back/left of the cave. Follow a series of sloping rails to increasingly larger moves to a desperate throw for the top. UNCLIMBED PROJECT
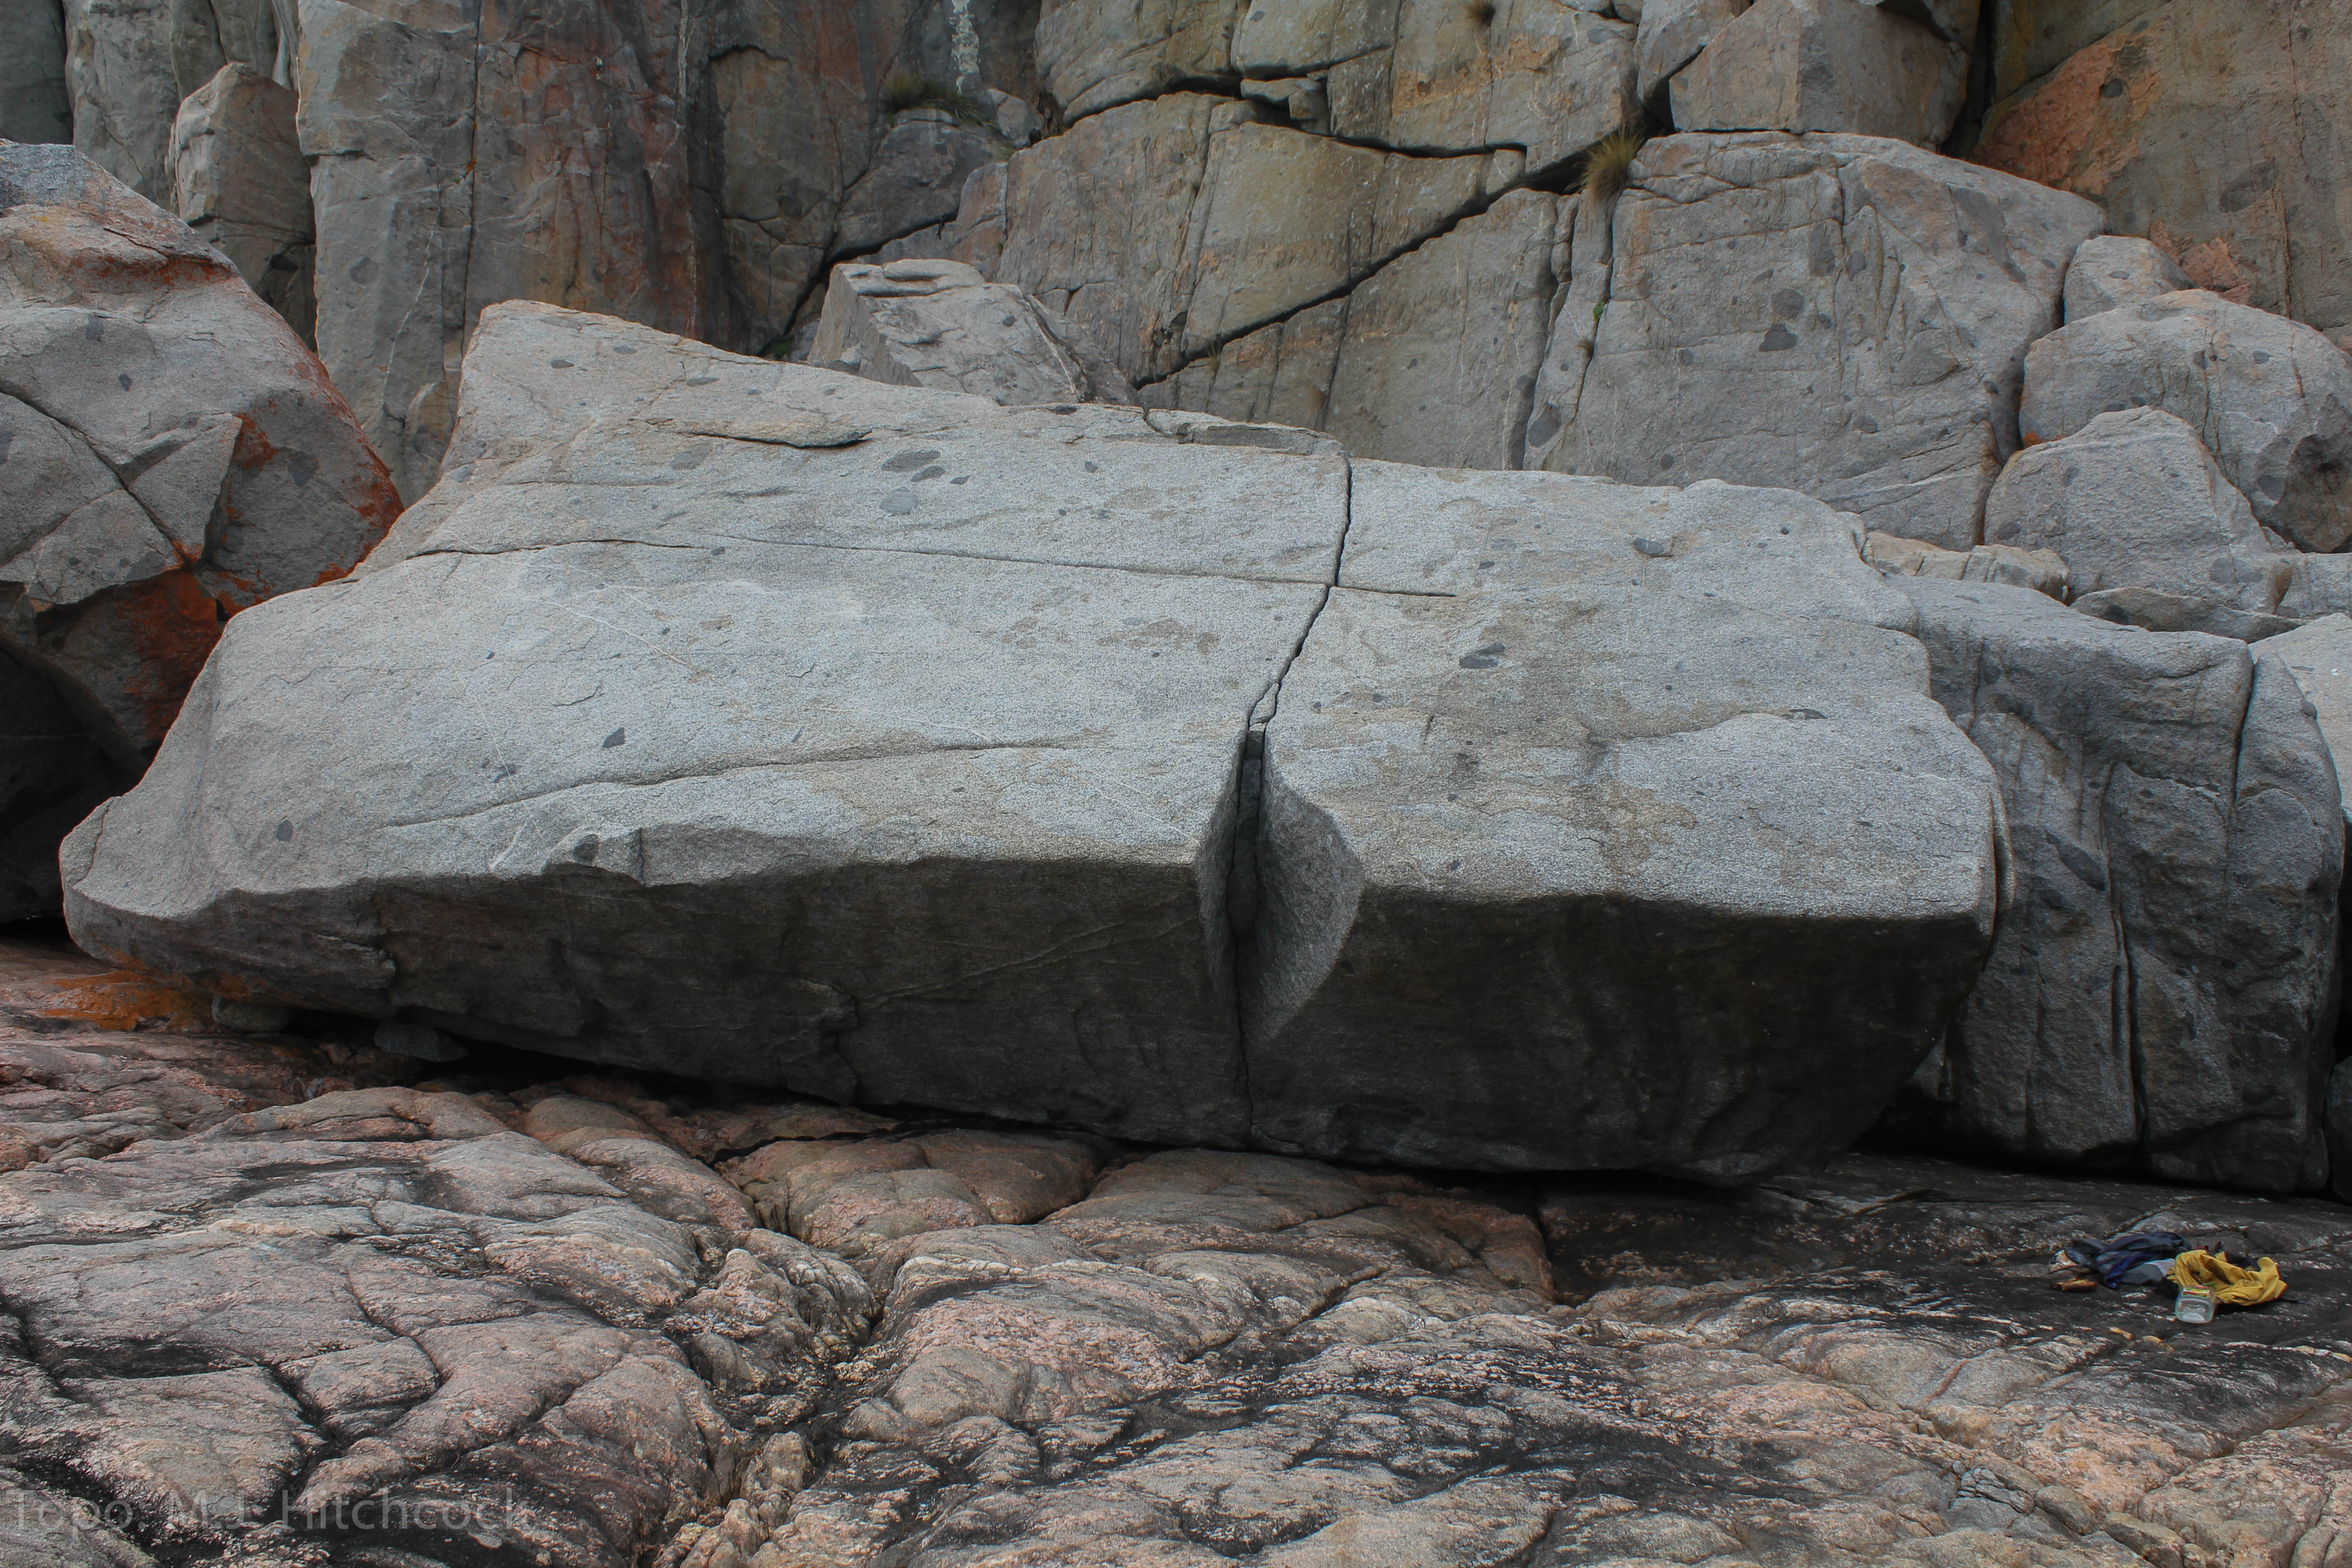
Dad's block
Climb the easy slab. Sit start has been done, but only for comic value. Sit start with LH pinch and RH in dish (goes around V1).
M Hitchcock 2016
Mantle the jug into the slab.
M Hitchcock 2016
Start of the jug and traverse right on slopes, finish on Chip off the old block
M Hitchcock 2016
Creative thinking will help your sequence up this problem.
M Hitchcock 2016
Mantle the blankness. Start with hands on the blank arete and feet underneath.
M Hitchcock 2017
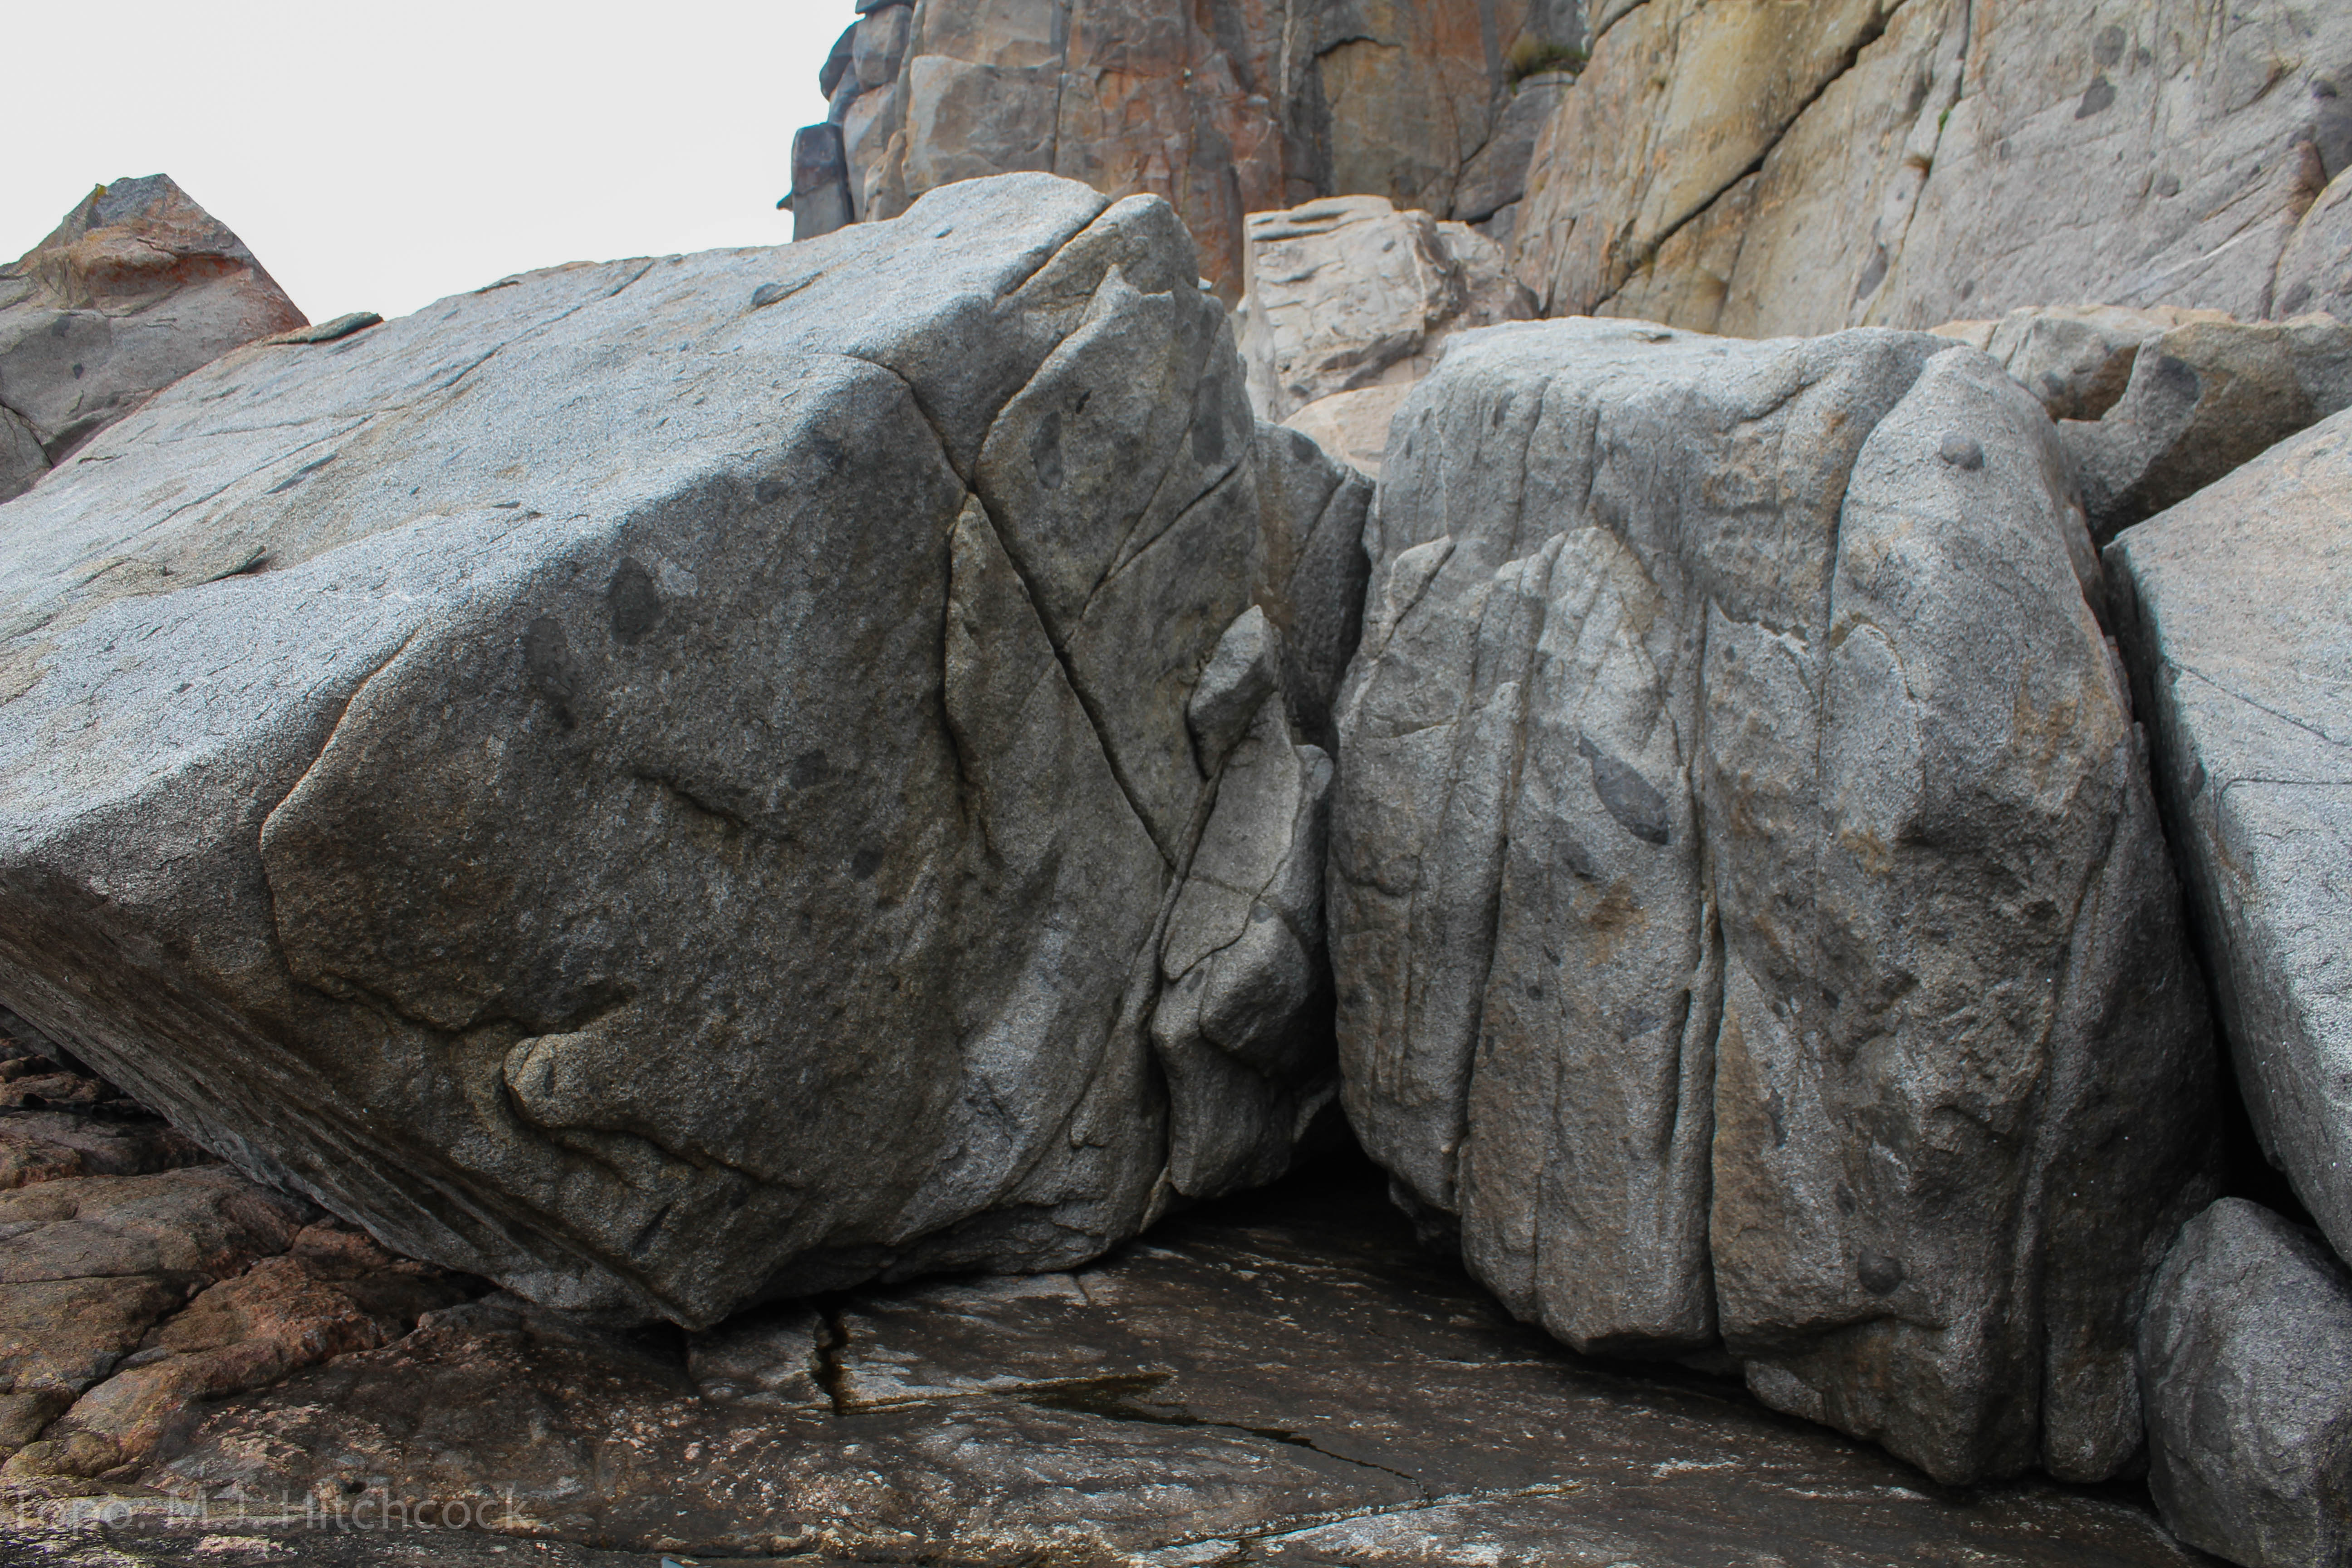
Dad's block
Starting on the low jug, head up and traverse the arete.
M. Hitchcock 2010
Starting on flake head upwards.
M. Hitchcock 2010
Climb the cracks.
M. Hitchcock 2010
Climb the arete using opposing seams
M Hitchcock 2016
Let's not get sentimantle
V1(SDS)Mantle on the low boulder just behind the arete of The World Seams Difficult
M Hitchcock 2016
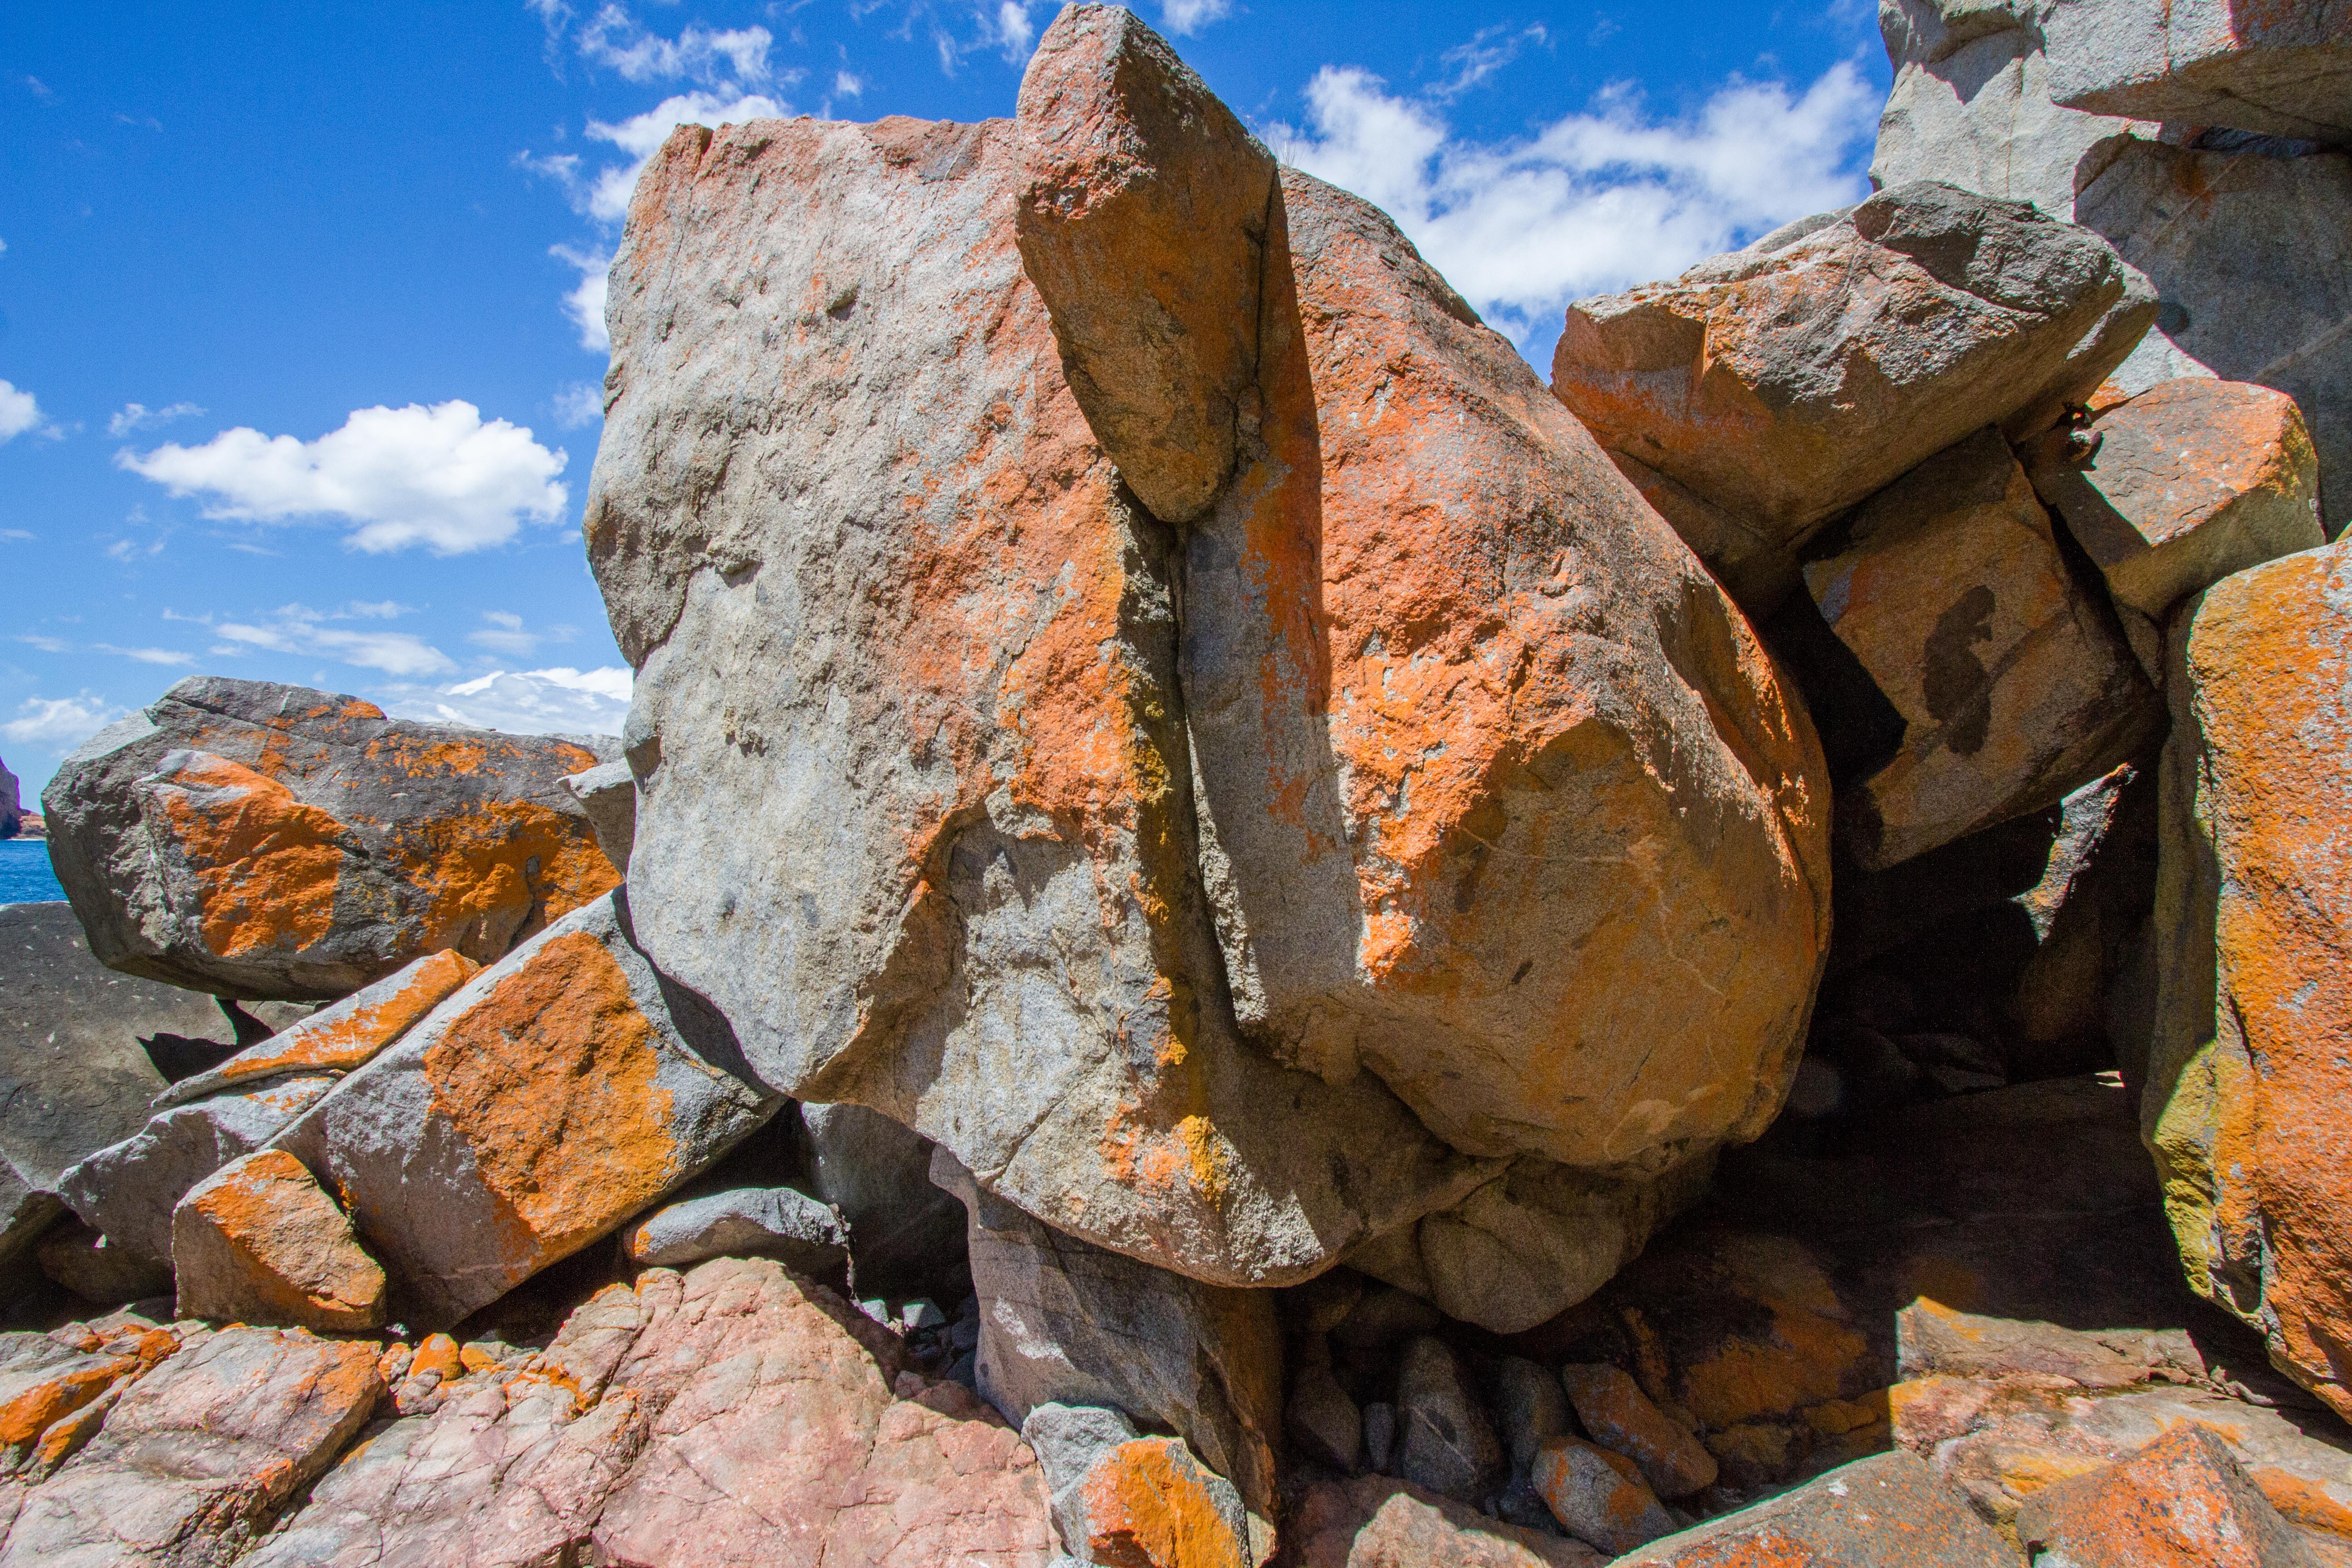
The Point Boulders
The next boulders are on the point that juts out to sea. The outmost area, which is actualy an island, has yet to see any development.
Access by scrambling down the Wine Glass Bay side of the point and traversing out at sea level. Purple fixed line to start with, but then you'll have to time the waves and run. There are also some more problems to develop on the small walls between the island and point.
Best not to access this area when the swell is up.
On the inland side of the boulder is an easy ramp, this is the decent route.
M Hitchcock 2010
Just right of 'The Decent of the Dinsosaurs', climb the slab.
X Zheng 2016
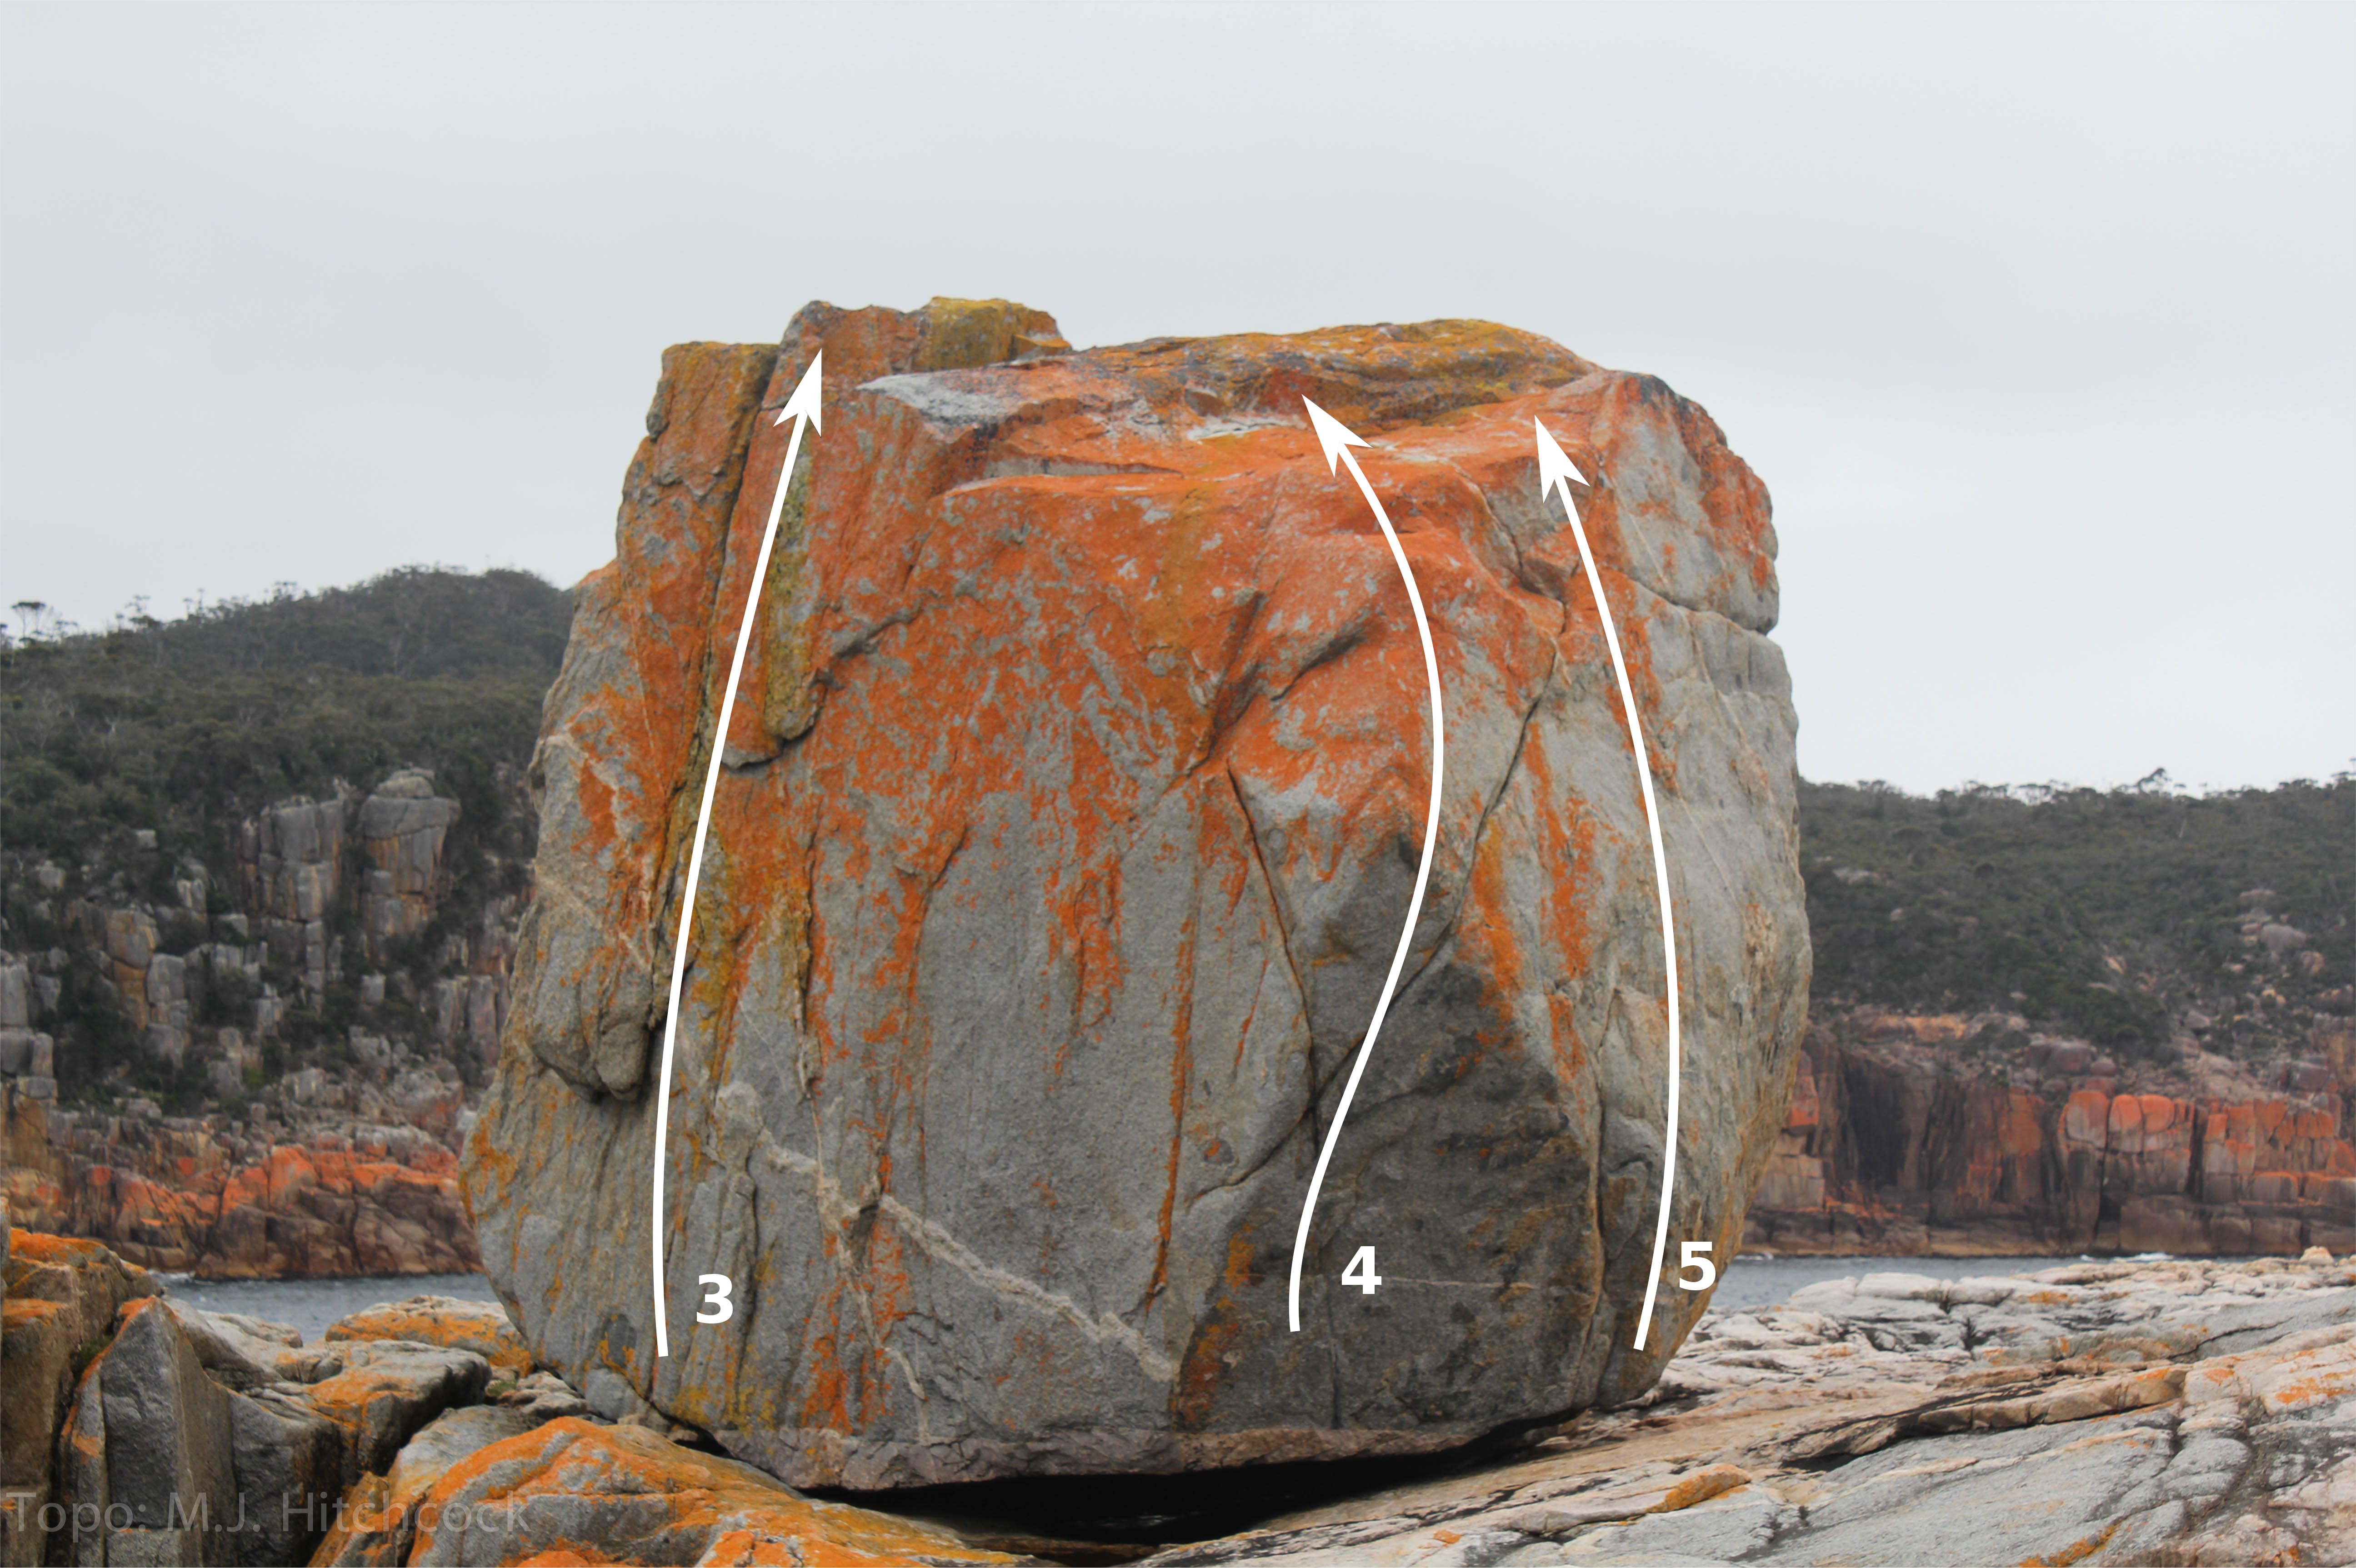
Dinosaur east-south side
Sit start with jugs, heading up through the double undercling and a reach finish.
M Hitchcock 2016
Climb the arete with some wide pinches.
M Hitchcock 2016
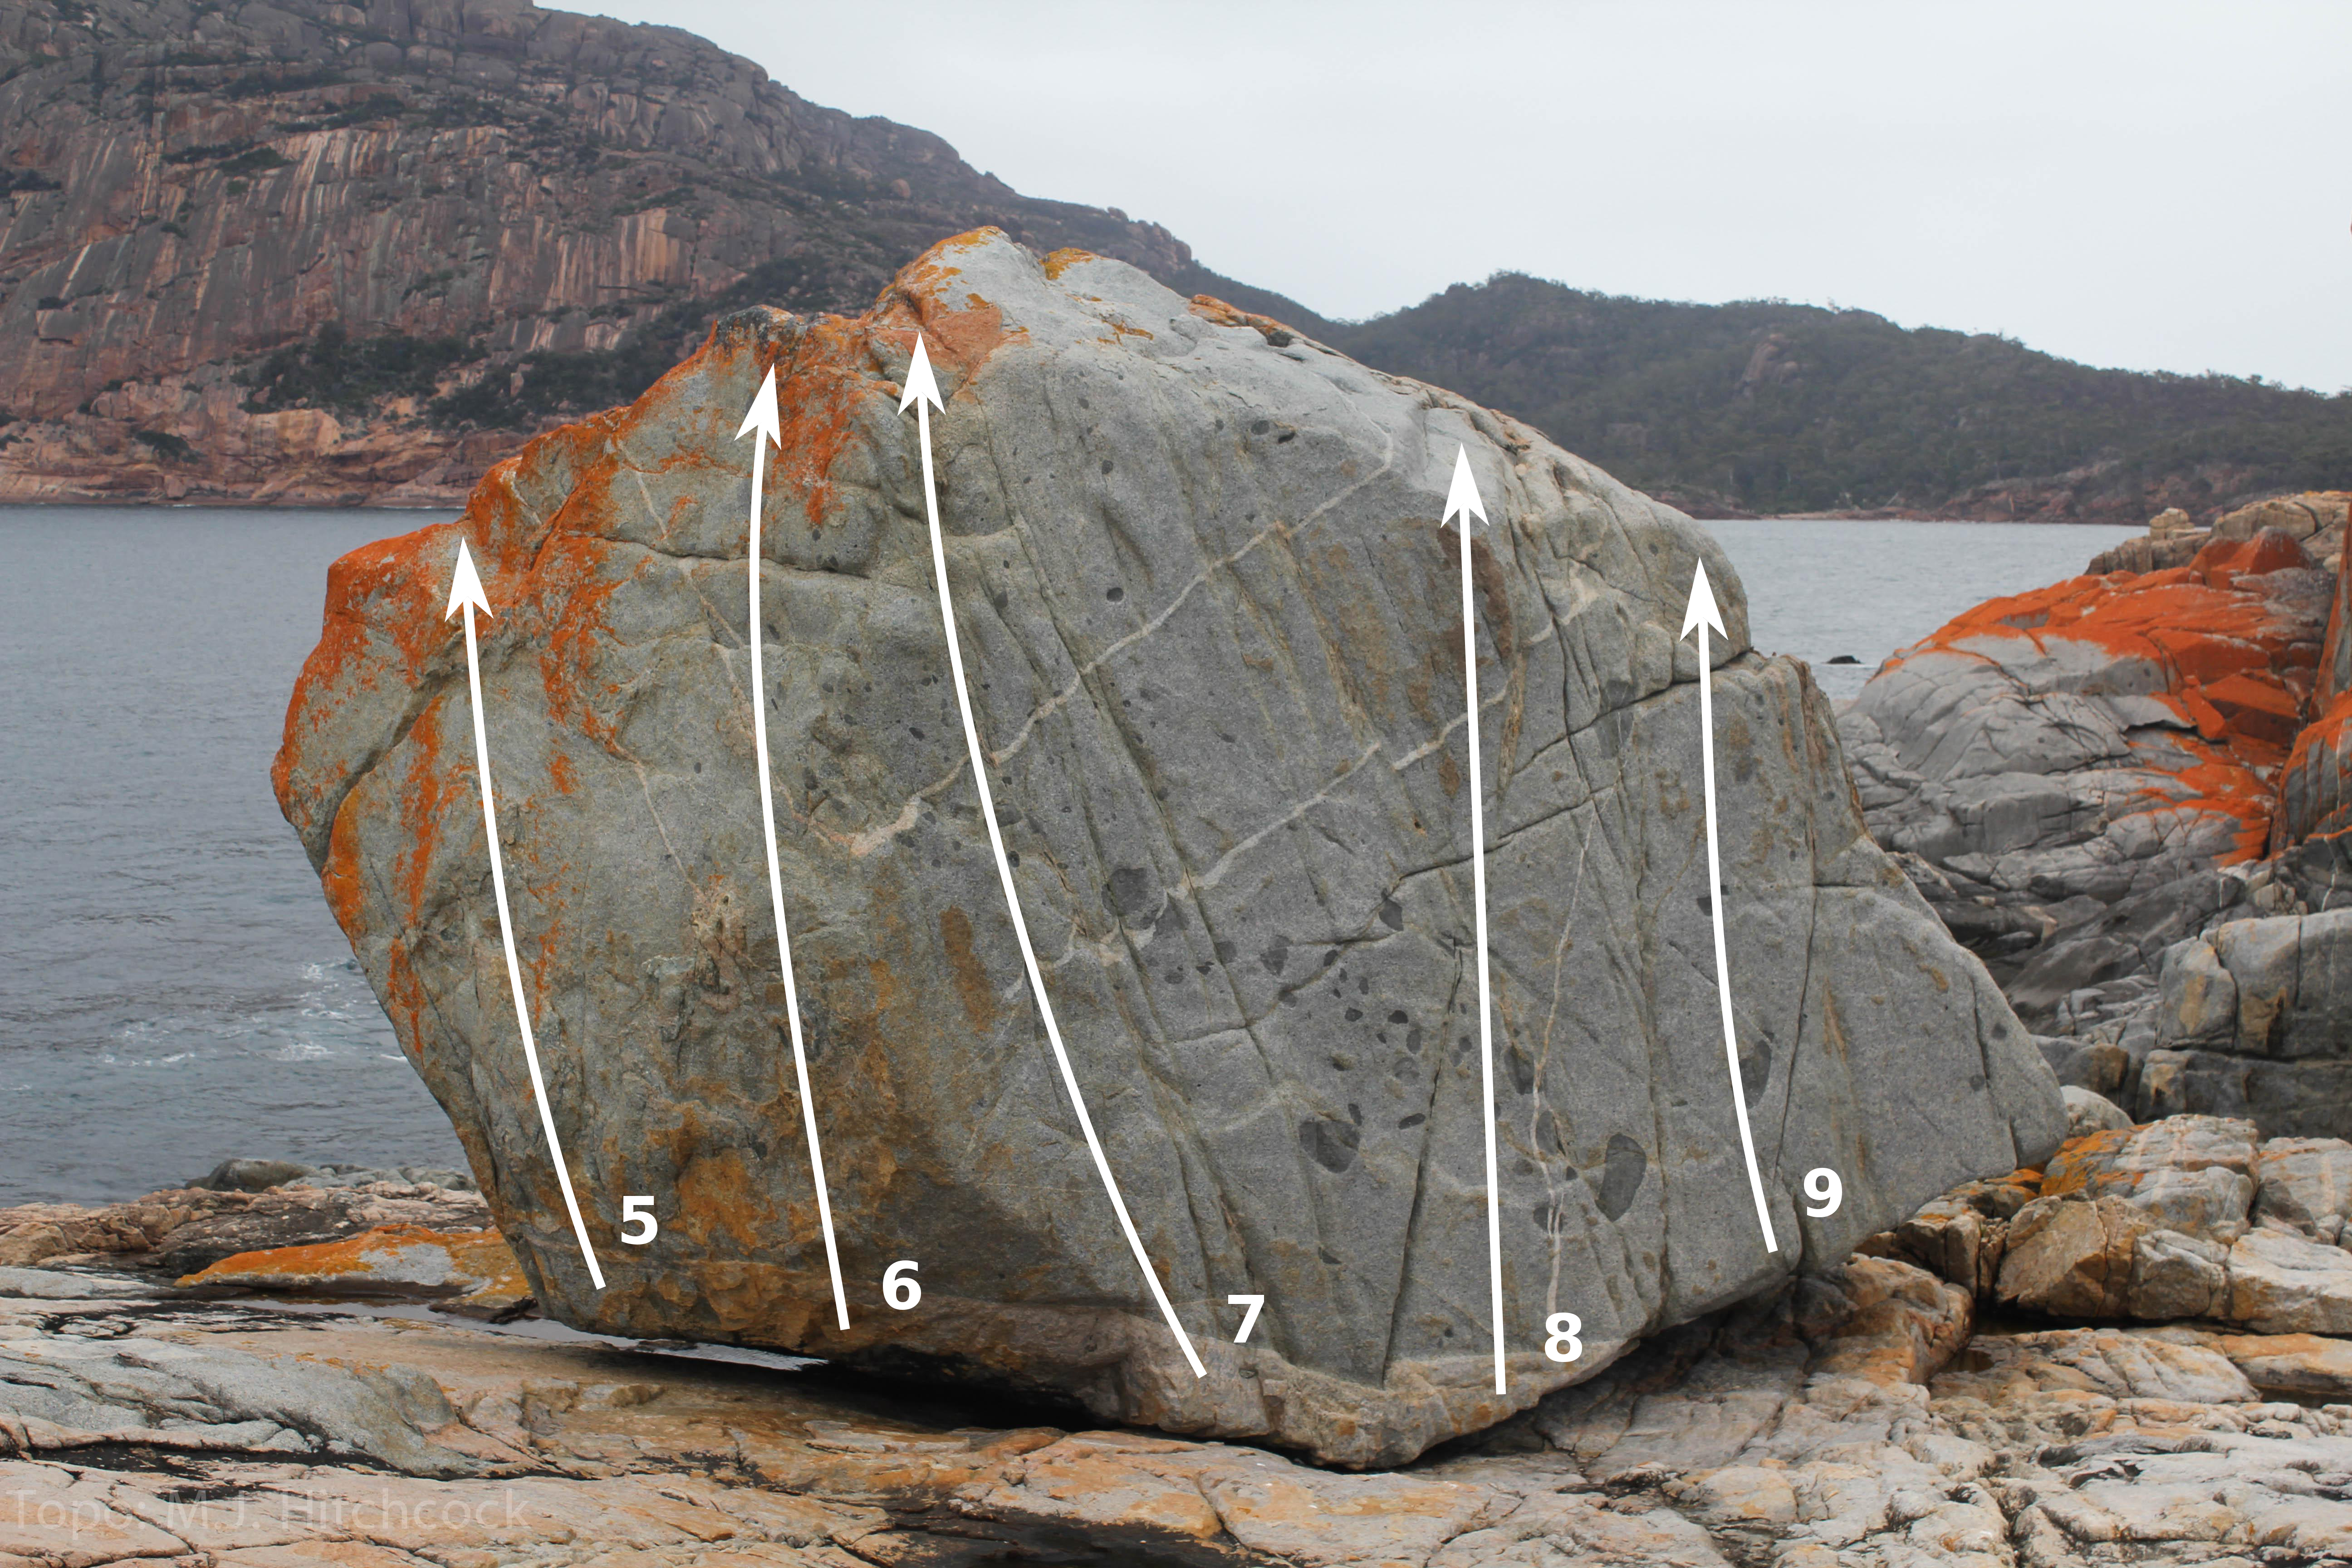
Dinosaur north side
Climb the face just right of the arete on good holds.
M Hitchcock 2016
Rightside of face on large moves between great holds.
L Bussolini 2016
Climb the arete starting with RH slope and LH crimp.
M Hitchcock 2016
Climb slightly right of the middle on small slopes.
M Hitchcock 2016
Climb the right side of the face on great holds.
M Hitchcock 2016
The following problems are on the next boulder out.
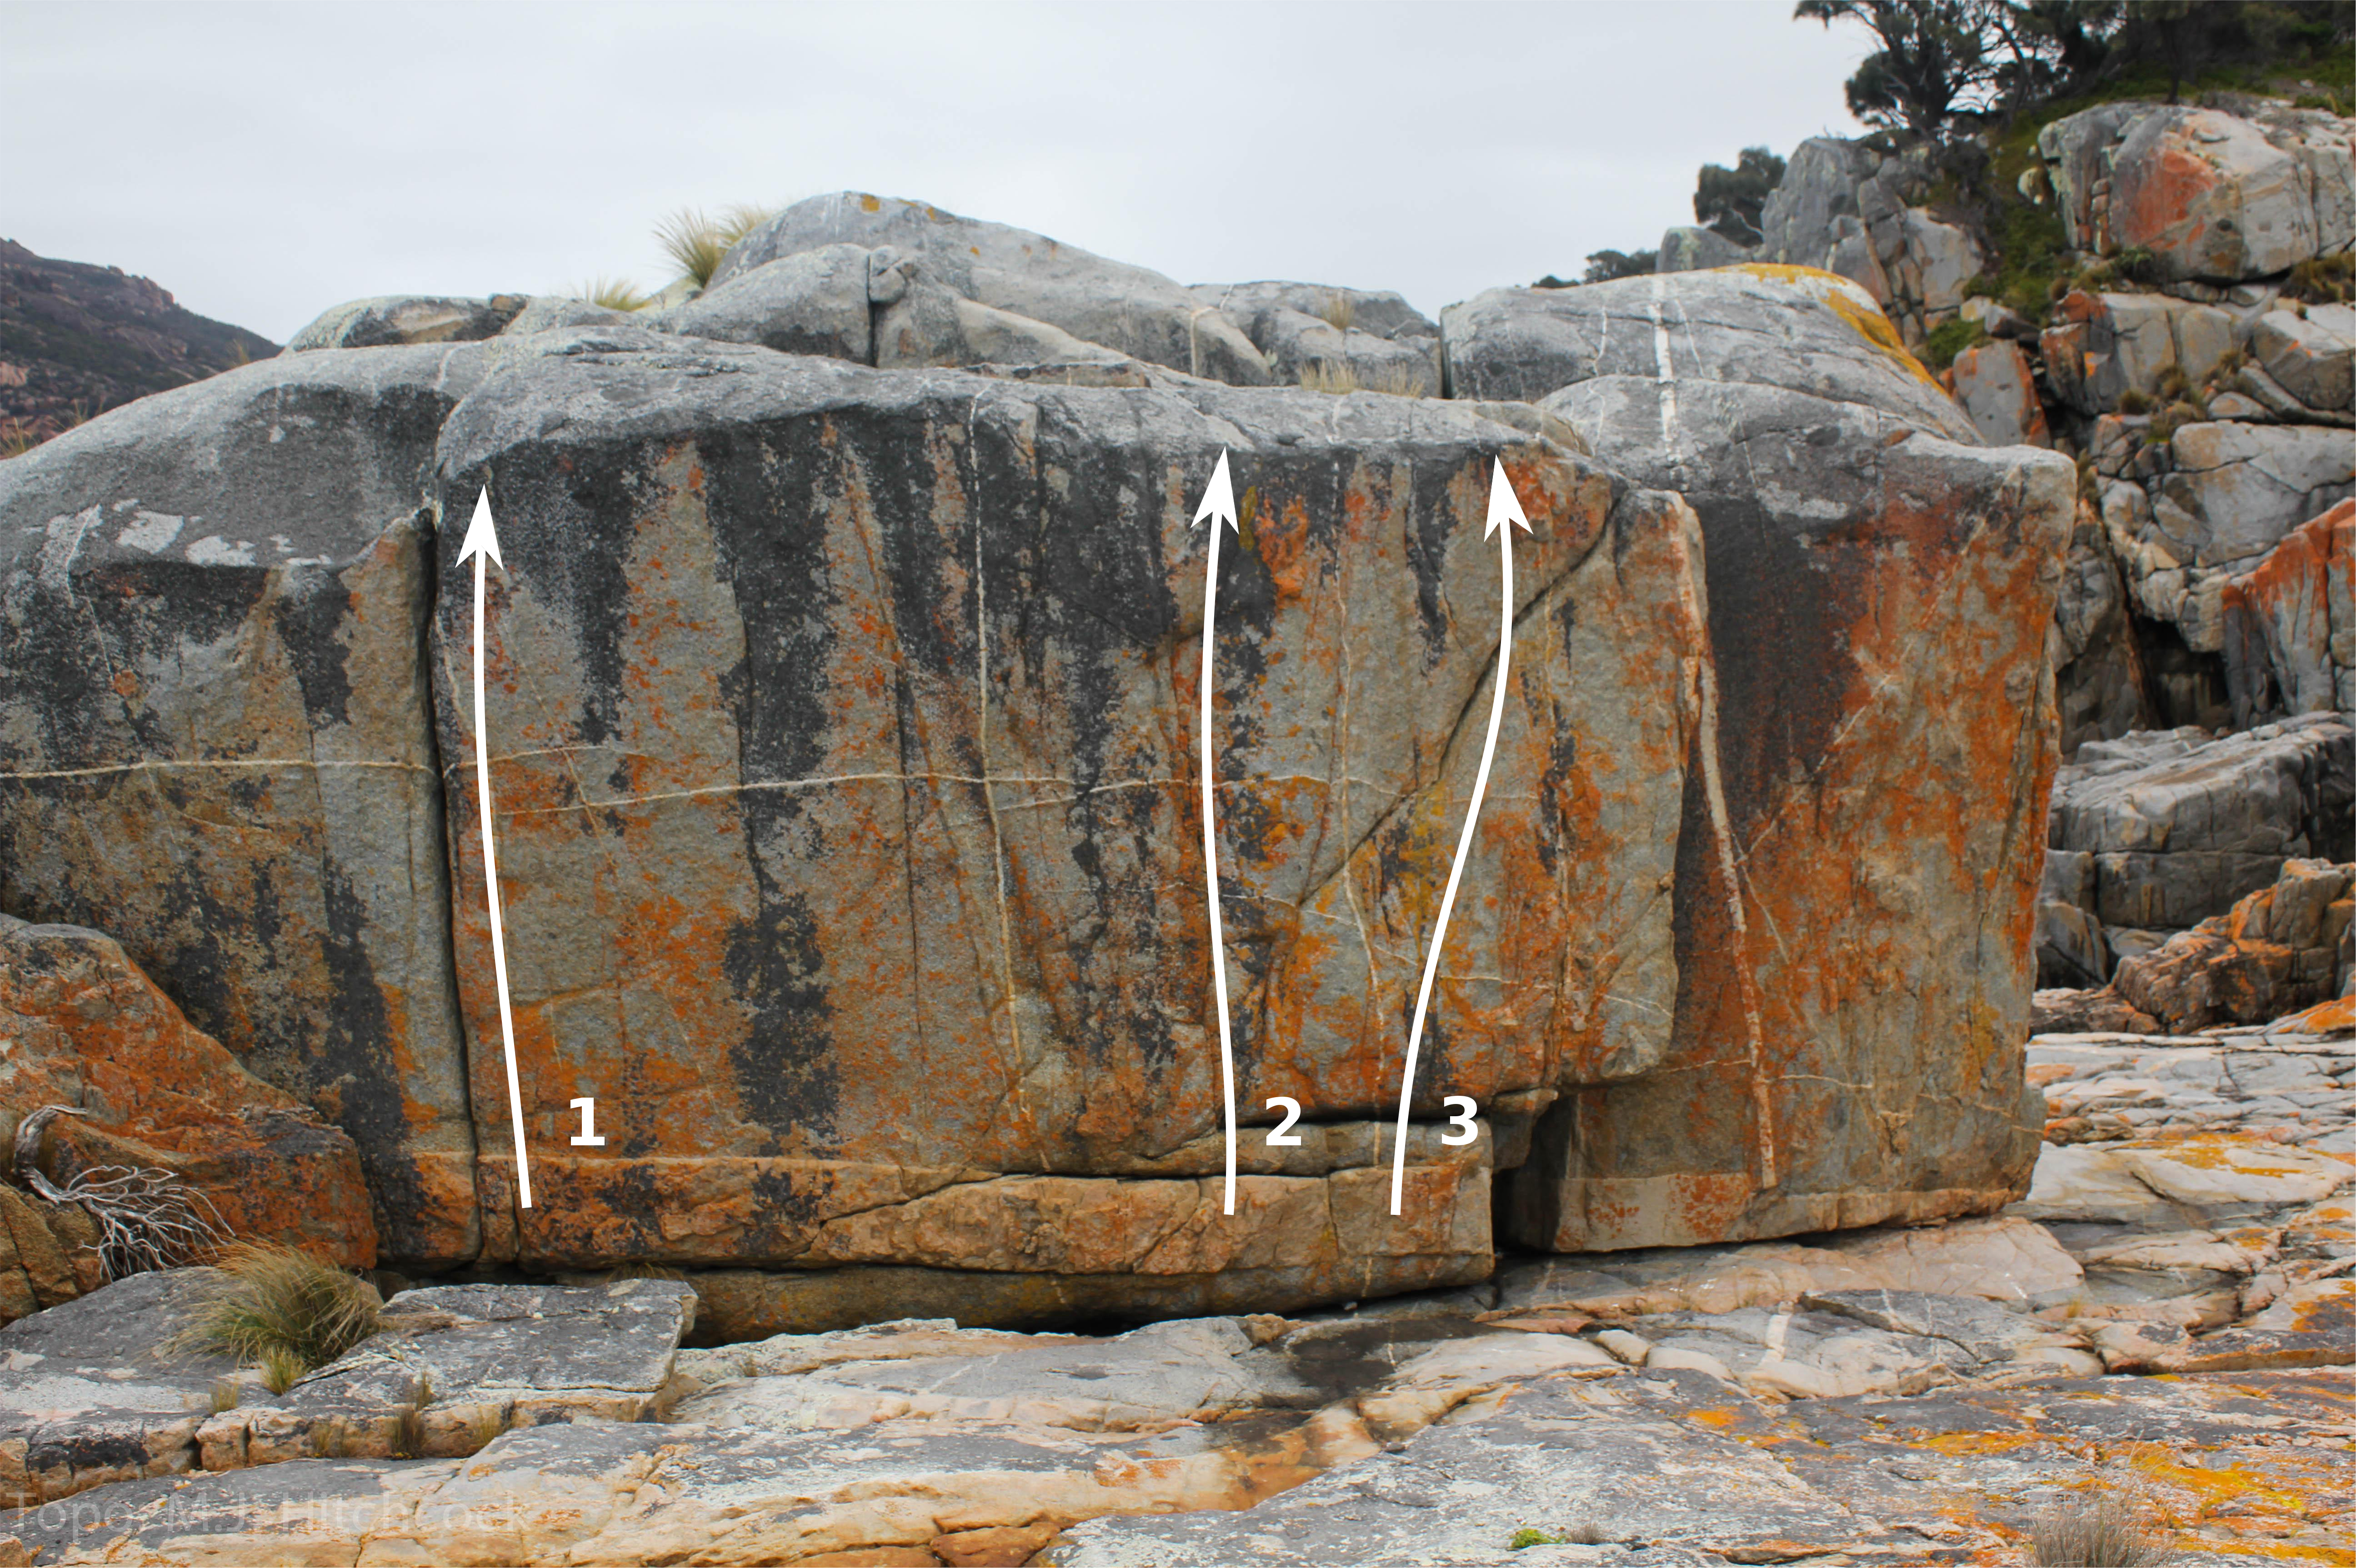
Oystercatcher east side
Crack
M Hitchcock 2016
Climb the face. The shorter you are, the harder it is.
M Hitchcock 2016
Climb the face with the diagonal crack. Pretty good!
L Bussolini 2016
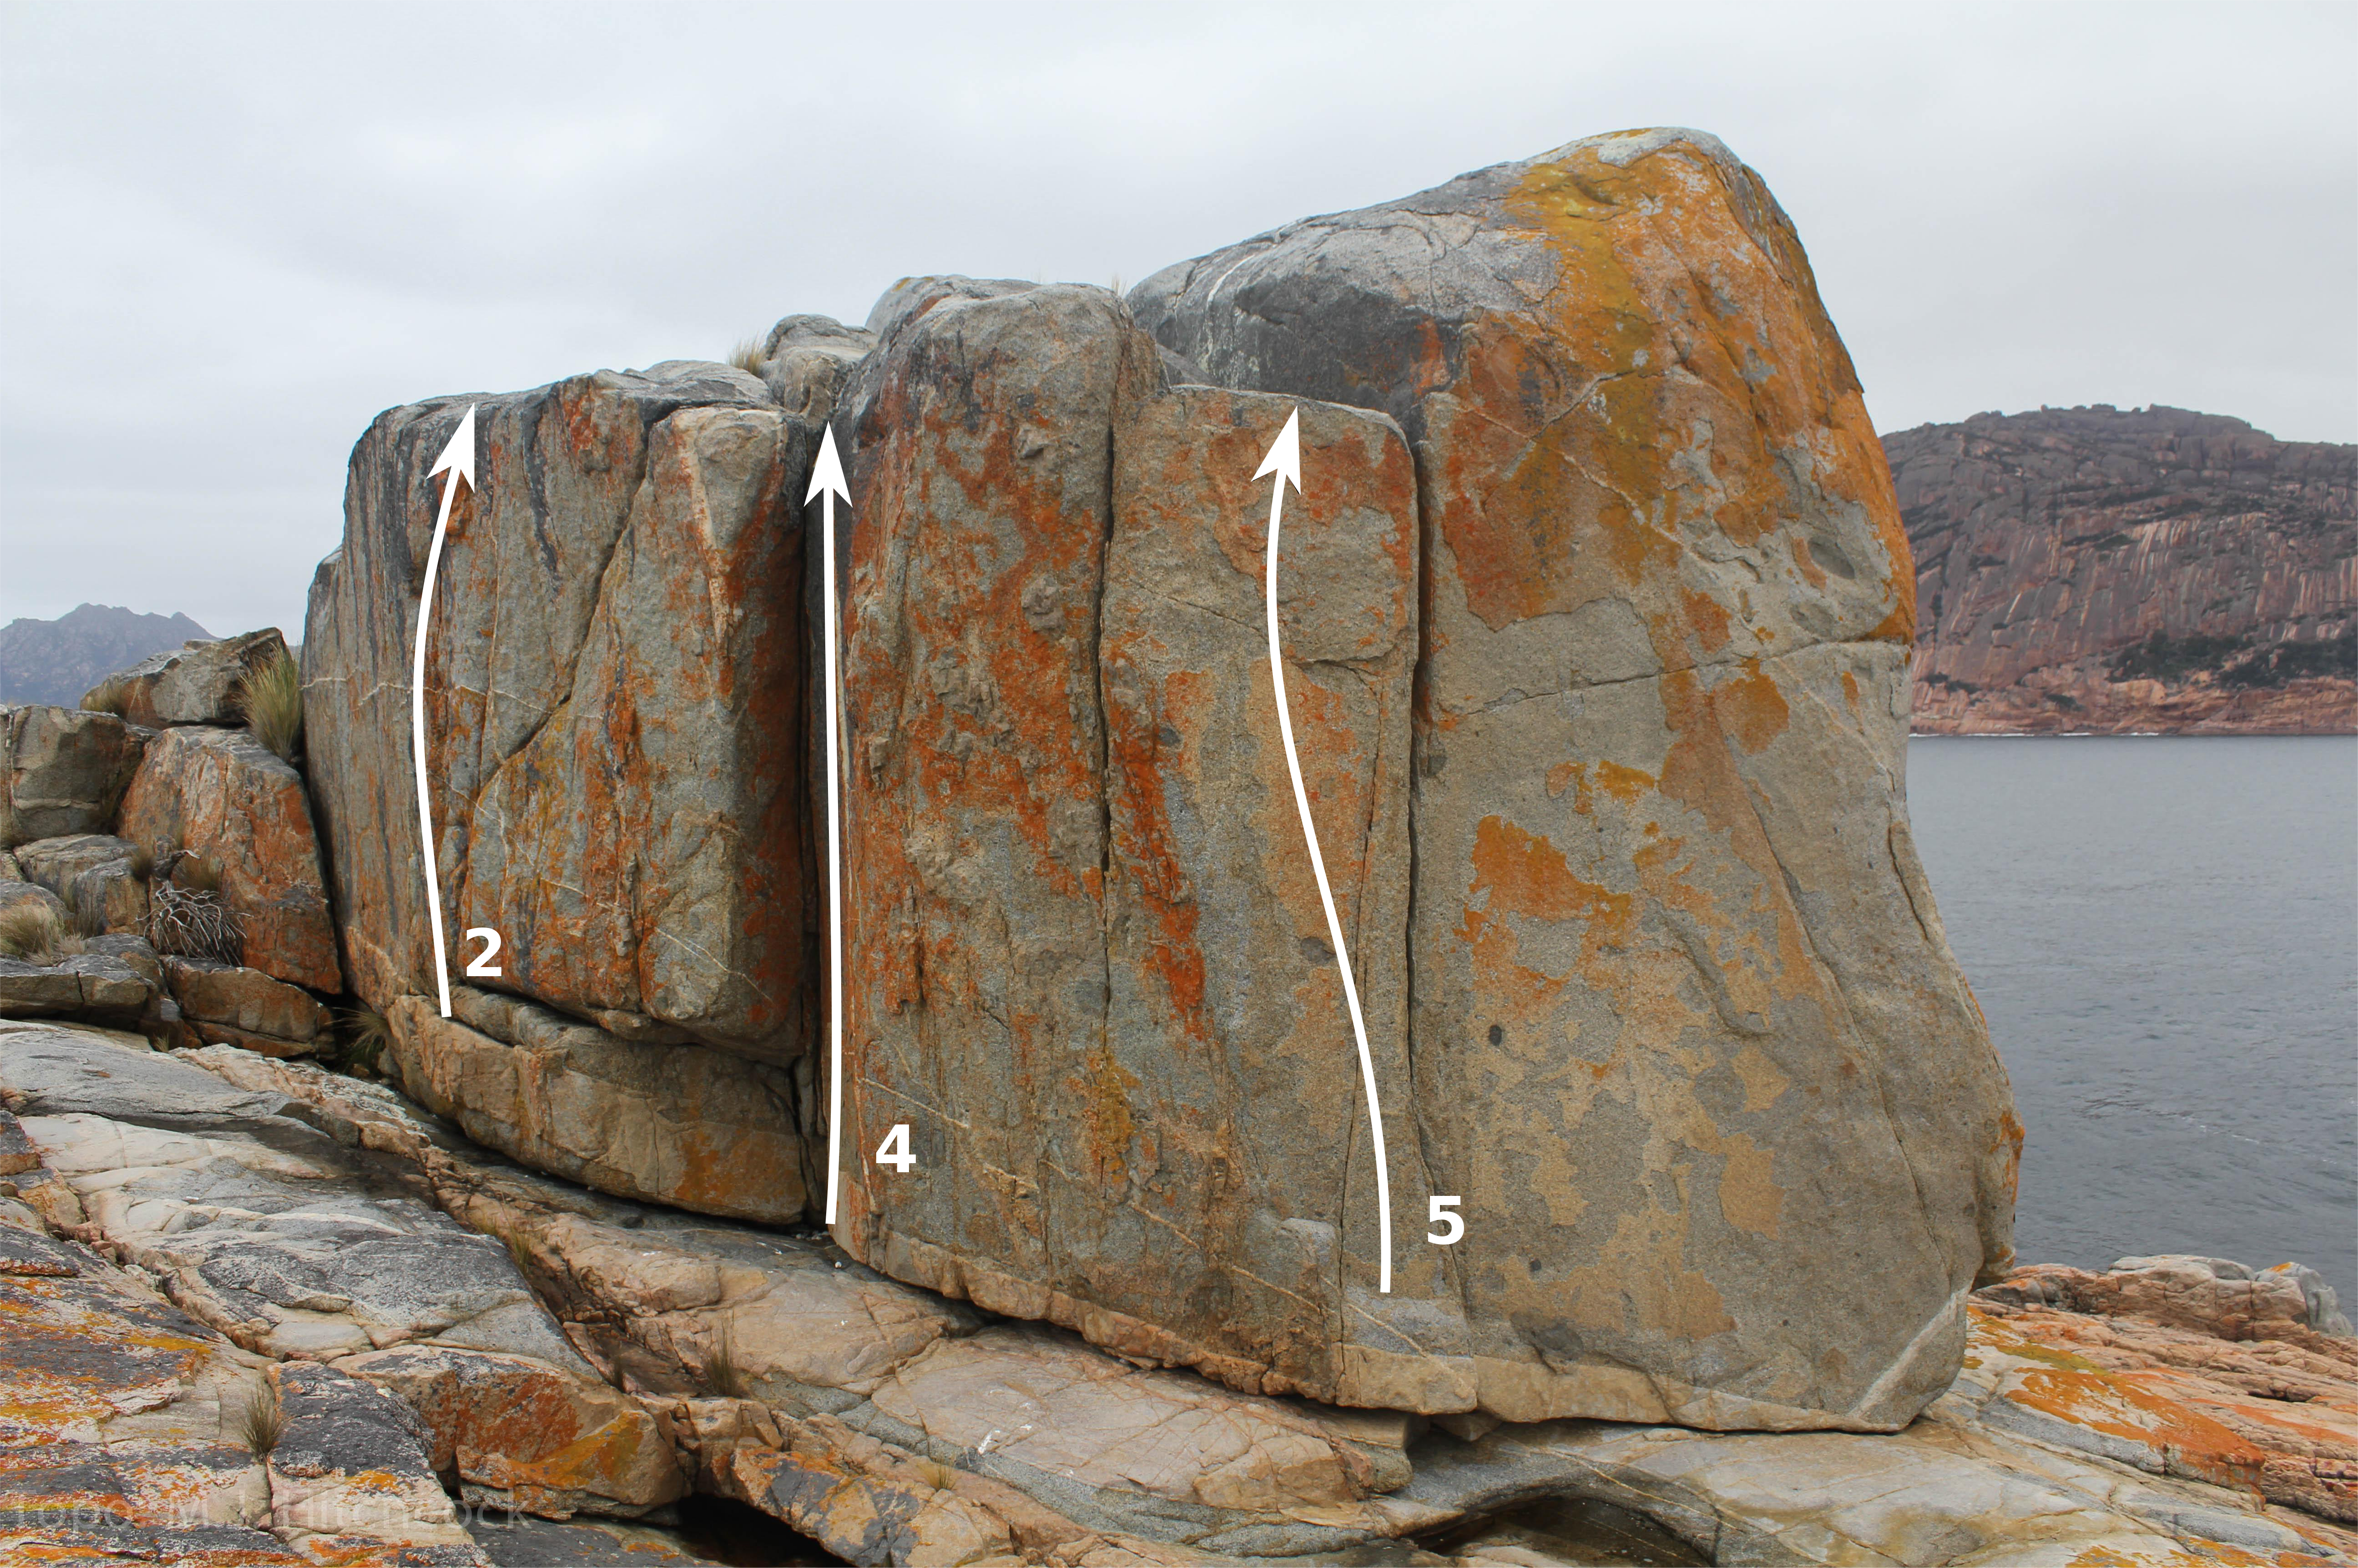
Oystercatcher north-east side
Corner crack
M Hitchcock 2016
Climb the crack using either both or the right crack. Either way is about the same difficulty.
M Hitchcock (using both cracks) and X Zheng (using only right crack) 2016
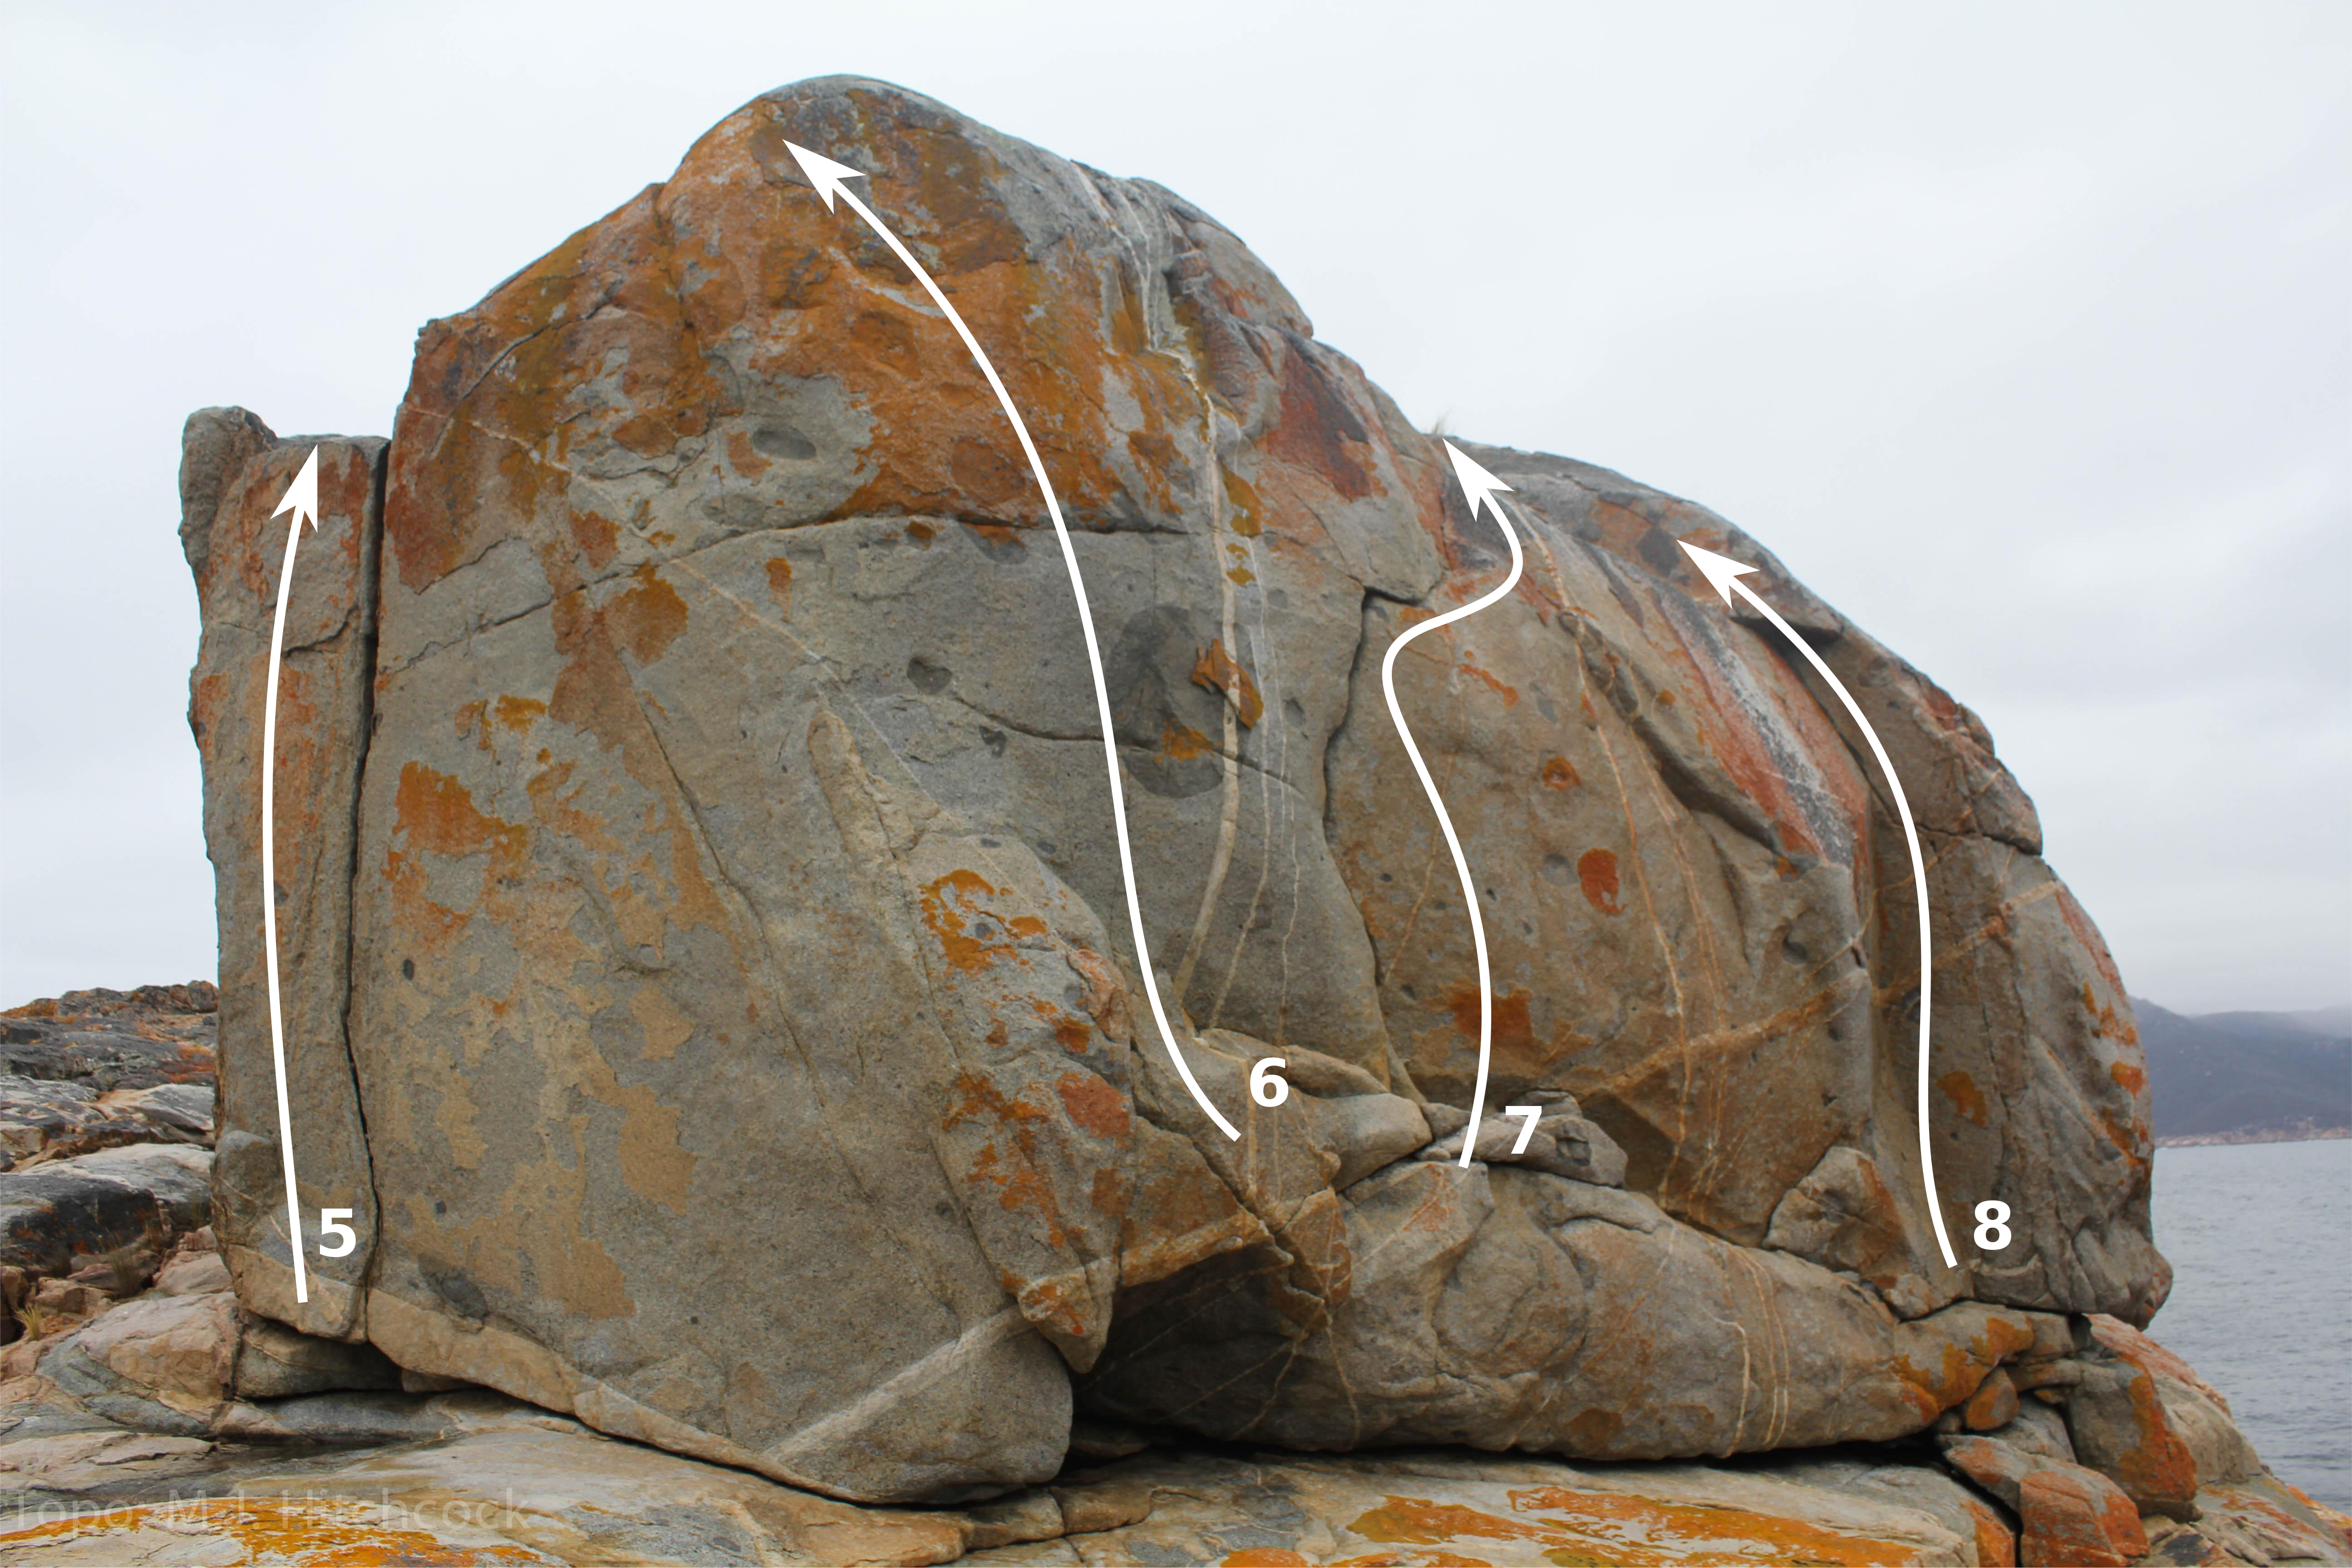
Oystercatcher north-west side
Slab.
Dogleg crack.
M Hitchcock 2016
Climb the easy corner above a poor landing.
Little Bluestone Bay
Little Bluestone Bay has some good bouldering on nice white granite. To get there take a right hand turn down the 4WD track just before Whitewater Wall and follow the track south to the coast.
The following blocks are immediately to the left from where the track meets the coast.
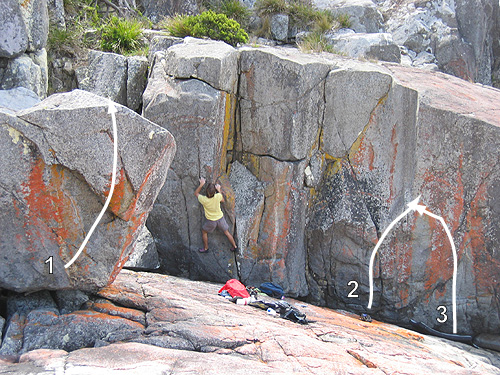
These lines are on the backside of the block with the V8
Start in the ditch with opposing slopers. Up via pinch and slopes to mantle. Quite shouldery.
T. Krauss, 2012
Start on the good hold and move up through slopes and the good nose to tricky mantle.
C. Johns, 2012
Start on the good flake and mantle. Don't use the crack on the left.
The Pharos
From Little Bluestone Bay follow the coast leftwards (east/north) for 200m until you see the prominent pinnacle of the Sentinel. The Pharos is a group of edges just to the south of the Sentinel.
The following face is on the way to The Pharos. Soon after passing travel land (roped area), you'll find the delightful face up on the left. Somewhat hidden as it faces north and away from you.
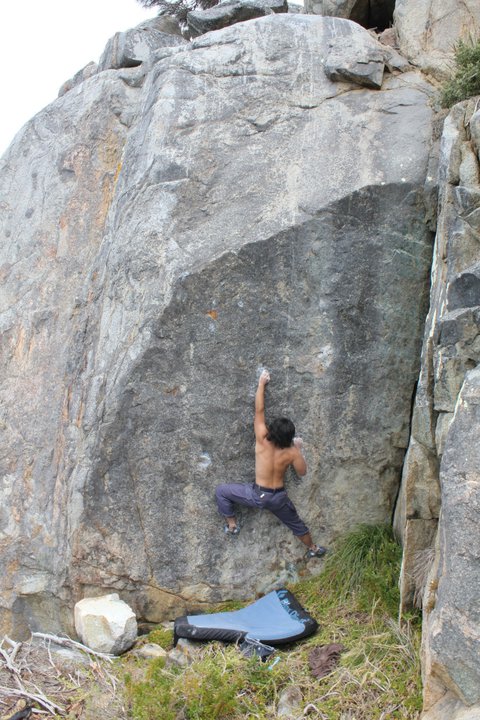
Blank Topic
★★V7(SDS)Start low on furthest right crimps. Do a couple moves on sharp crimps to gain the arete and follow the jugs to top out. Be careful topping out, the rock can be crumbly and a fall from the top wouldn’t be ideal.
R. Sklenica
The following block is 40m to the left of the Pharos proper.
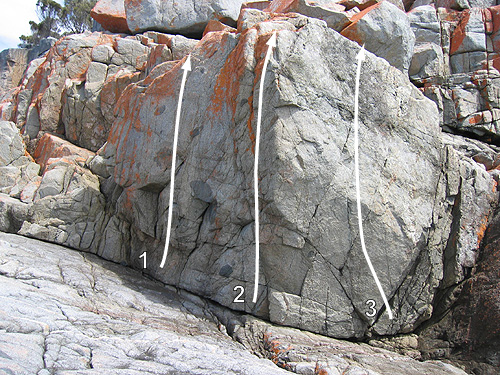
Starting in the crack, move to the undercling and leap to the finishing jug.
M. Hitchcock 2010
Climb the arete from a sit start. Despite the two other problems on the boulder having good rock, this one seems to be a bit gravelly.
M. Hitchcock 2010
Large moves between very good holds leads you into some slabby moves near the top.
M. Hitchcock 2010
This next problem is above the far left Pharos. Clearly identifiable with the triangular top of the boulder.
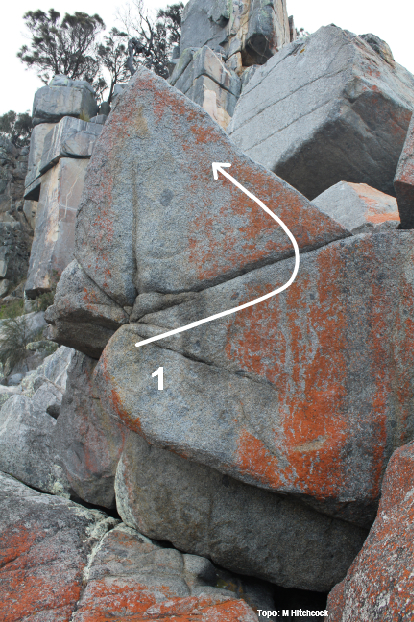
The Pharo's Headstone
★★V4(SDS)Start on the jug in the middle of the face, go right following the seam and then left up the arete to topout on top of the triangle.
M. Hitchcock 2010
Barefoot
V1(SDS)The short arete to the right of Pharo's Headstone.
M. Hitchcock 2010
Pharos arete
★V6The right arete of Pharos headstone, start with left hand on low side pull and right on sloping arete.
R. Sklenica
This is the far left of the Pharos.
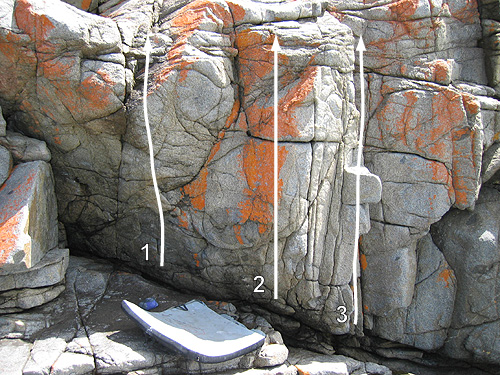
Steepish face from jug
Face L of arete
Easy corner
This is the left hand side of the Pharos.
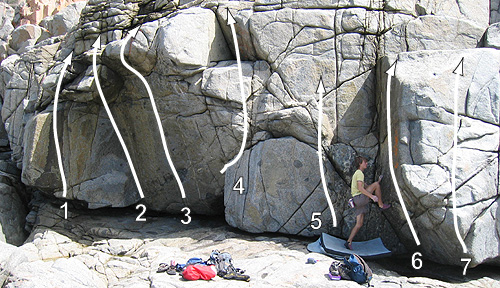
Hard and thin start climbing up the corner and around the roof. The stand start goes around V4.
Start with obvious right crimp and low left hand slot, a few hard moves to reach the break, follow this to top out right. (A direct will be possible)
R. Sklenica
Up on jugs
Cracks L of corner
Face L of arete
Jugs up arete
Start as for #7 (V2) but traverse right, keeping low. After three distinct cruxs finish up the corner (past #2 V6?)
Y. Hattori 2010
Flake in corner to R
2m right of corner
There are 3 different cracks up the slab to the right
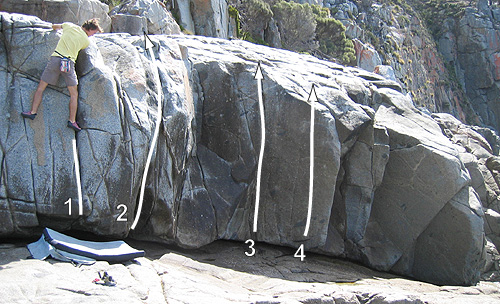
Crack and bulge
Awkward sitstart in steep corner to flake system. Stand start is V2/3
Thin crack
Face using right arete
Directly above the right hand end of the Pharos is a slabby block.
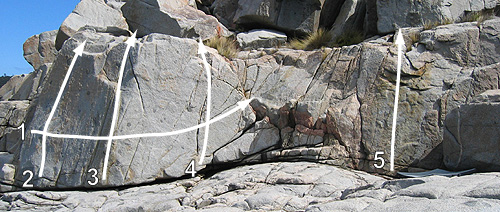
Unnamed
V?The crack just to the left of Rosetta traverse. Not the best landing.
Thin L-R traverse
M. Hitchcock 2010
Arete
Face just right of arete without using holds from the V2's on either side. Start with lay away and tiny crimp, high step to gain slightly larger crimp then big moves through decent holds to top out jug. Avoid the small footer out to your right.
Crack without using holds over right
Slab
Areas South of Little Bluestone Bay
Second Ramp
There is potential for a half dozen or so moderate problems at the southern end of the Second ramp. Landings are good but don't roll too far or you'll end up in the drink.
Lego buttress
There is potential for about two dozen problems, most less than vertical, between Lego and Hammer Buttresses.
Rubix Cube Buttress
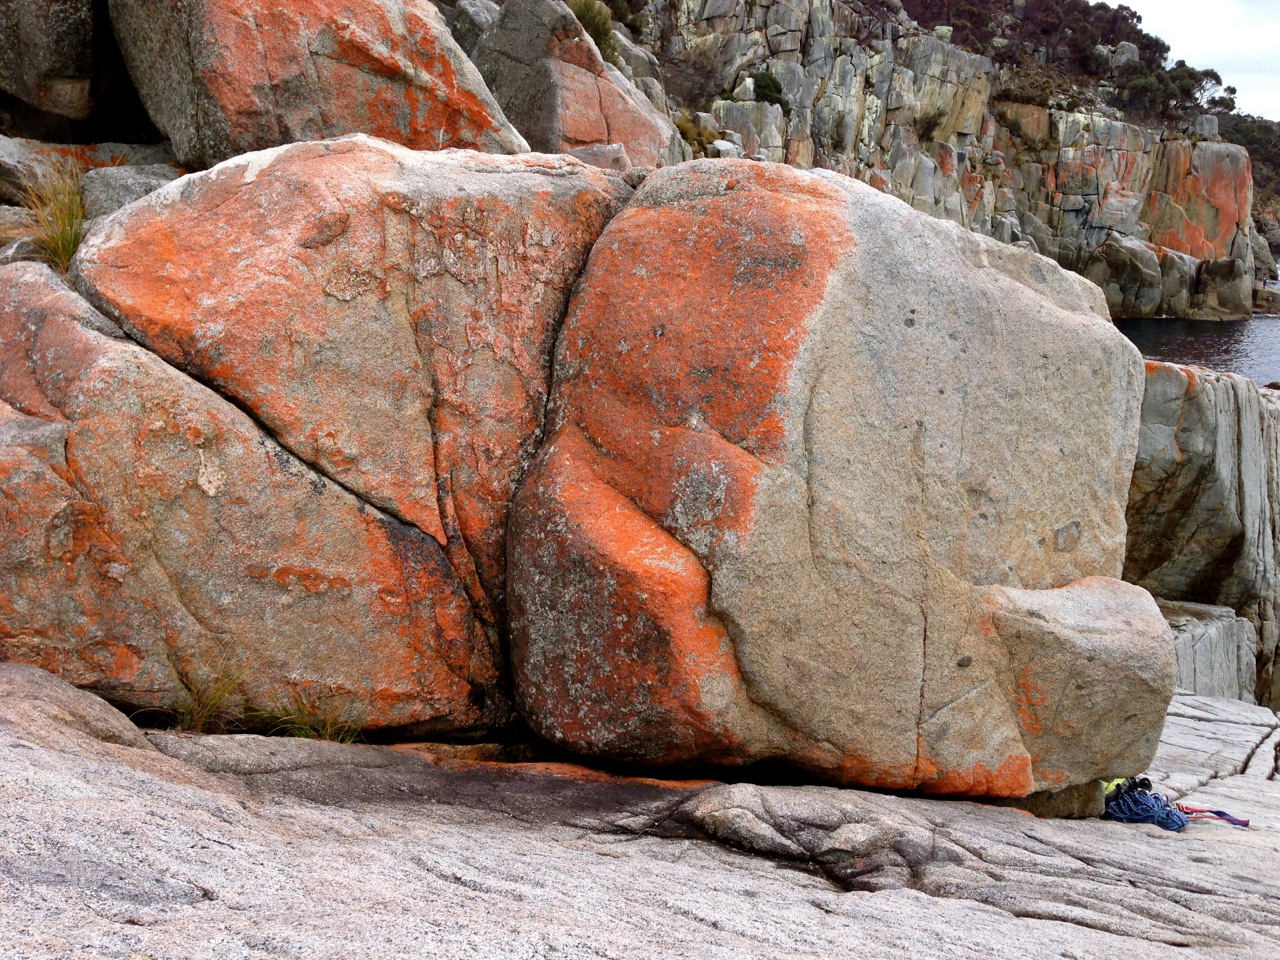
Sit Start just left of corner, pull up and top out straight via mantle
Sit Start in corner and climb up using corner and slopers on right
Sit start using sidepull on the left and shallow crack on the right, do a move or two gaining a higher hold on the left and top out via slopey mantle. Try to stay on the right as much as possible.
Sit start on juggy shelf, mantle and mantle to top
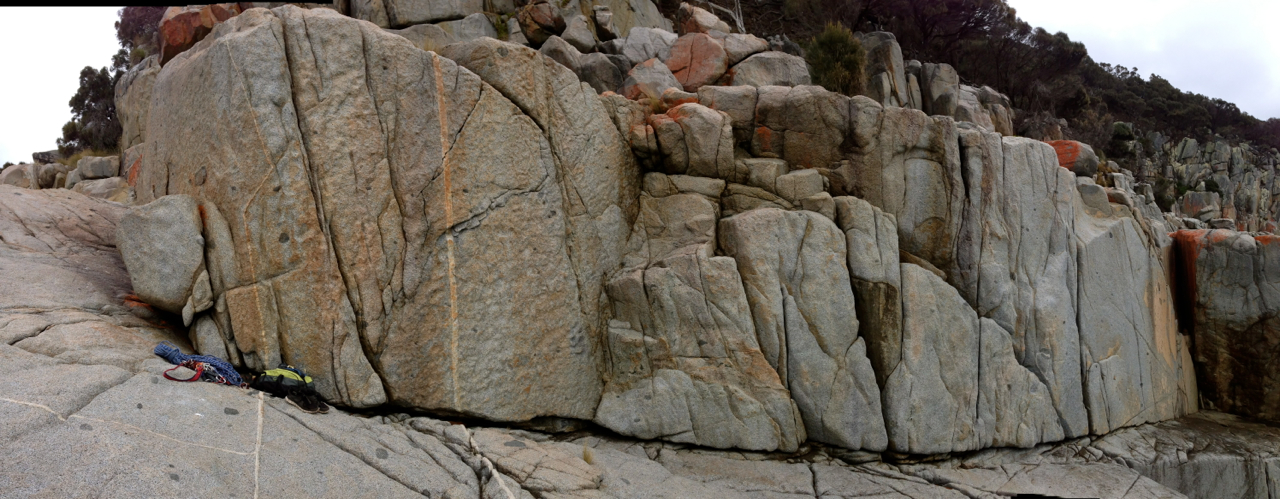
Sit start at the side pull/crack, mantle onto ledge on the left and top out as for #4
Sit start and climb the slightly left trending diagonal cracks with slightly dicey top mantle
Sit start as for Goodbye Fingerprint, climb the right trending diagonal cracks with underclings, crimps and pockets to topout over highest point above crack on the right.
Stand start with blade-like feature and crack, move up the crack to same topout as Vein Fracture. Don't use feet on the right.
Sit start on flakey feature and move up to top-out straight above
Sit start in the crack and move up to dicey mantle, better bring a spotter.
Sit start in the crack and climb straight up to top either via stepping onto the right or staying on the left.
The Bain Marie
From Bluestone Bay walk northwards along the shoreline for about 200m and you will come to a rocky platform with several boulders and small cliffs on it. This is the Bain Marie.
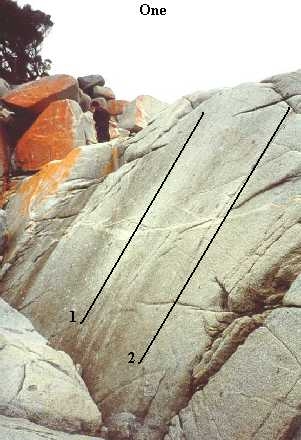
Up slab.
Up slab.
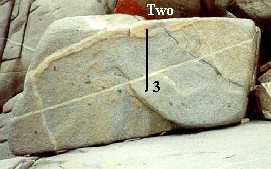
Start on crimp and undercling, pull on and bump up to top of boulder.
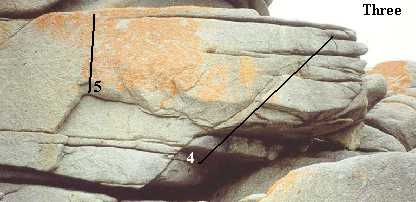
Start at back of roof on jugs, pull out through roof on jugs and around lip to top out.
Sit start up into undercling and top out.
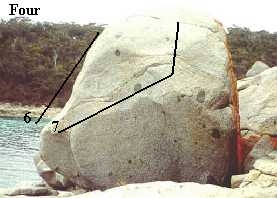
Up easy angled slab on side of boulder.
Start on left and traverse across on edges and then up.
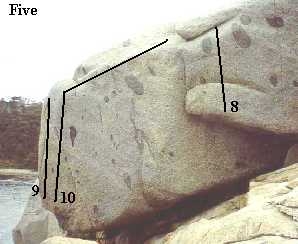
Start on underclings then into side pull and up over top.
Start on undercling sidepull jump to high sidepull up flake. (interesting foot stab helps) Sit start will go much harder V11?
Start under roof, up to thin seam, big moves to top. Mantle or traverse. V5 start by not using the bad rock for feet. Both ways are fun.
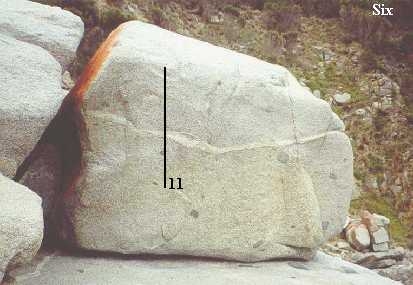
Sit start on crimps and up.
Start on flake right of 11. Be careful on the mantle not to fall into the ocean.
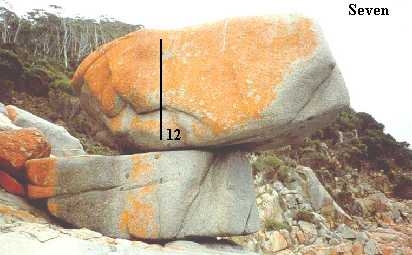
Very easy if your very tall, very hard if your very short. Start on break, up into undercling then up to top.
Forgotten, But Not Lost
About 100-150m further north of Bain Marie. Approach either along the coastal boulders or head up into the Sheoaks and drop down the gully just south of the boulders.
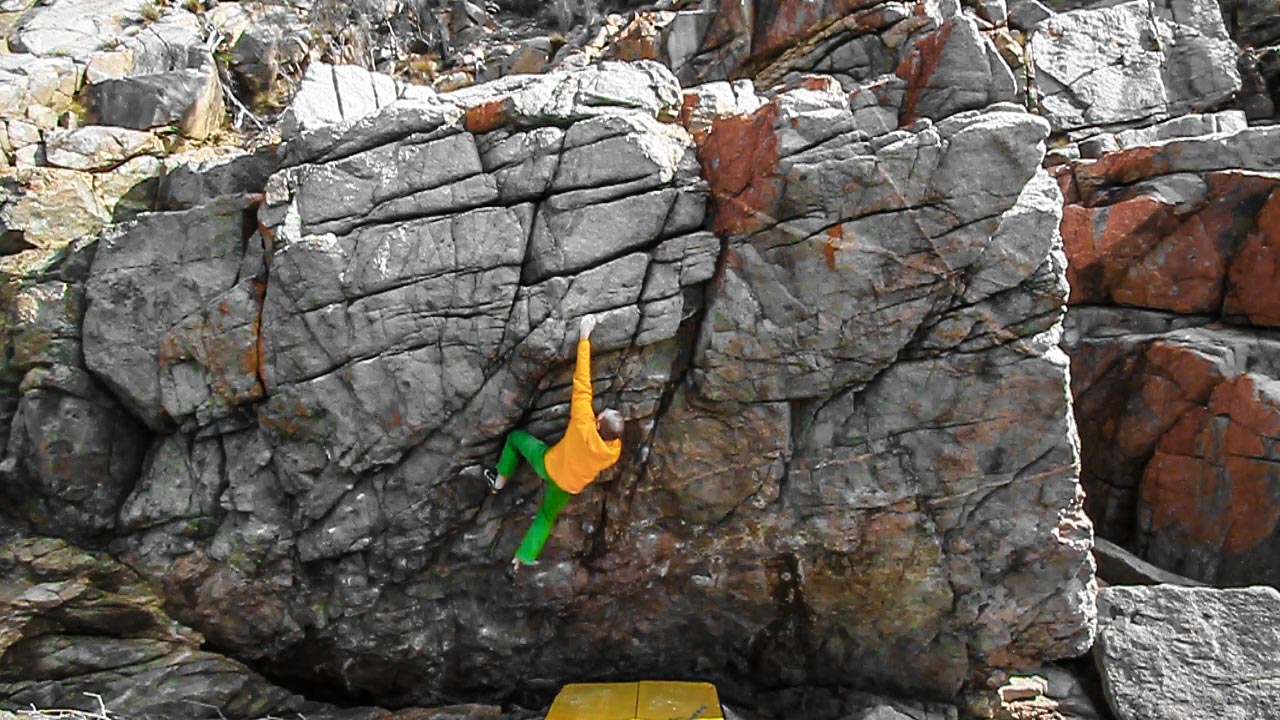
Rockpool wall
Sit start with double undercling jug. Biggest moves between really quite amazing holds.
M Hitchcock 2017
Sit start with RH pinch and LH side pull. Head slightly left and up.
M Hitchcock 2017
Sit start with large jug. Great moves lead upwards through solid holds.
M Hitchcock 2017
Sit start just right of Caramel Cheesecake. LH crimp and RH pocket.
Sit start the arete.
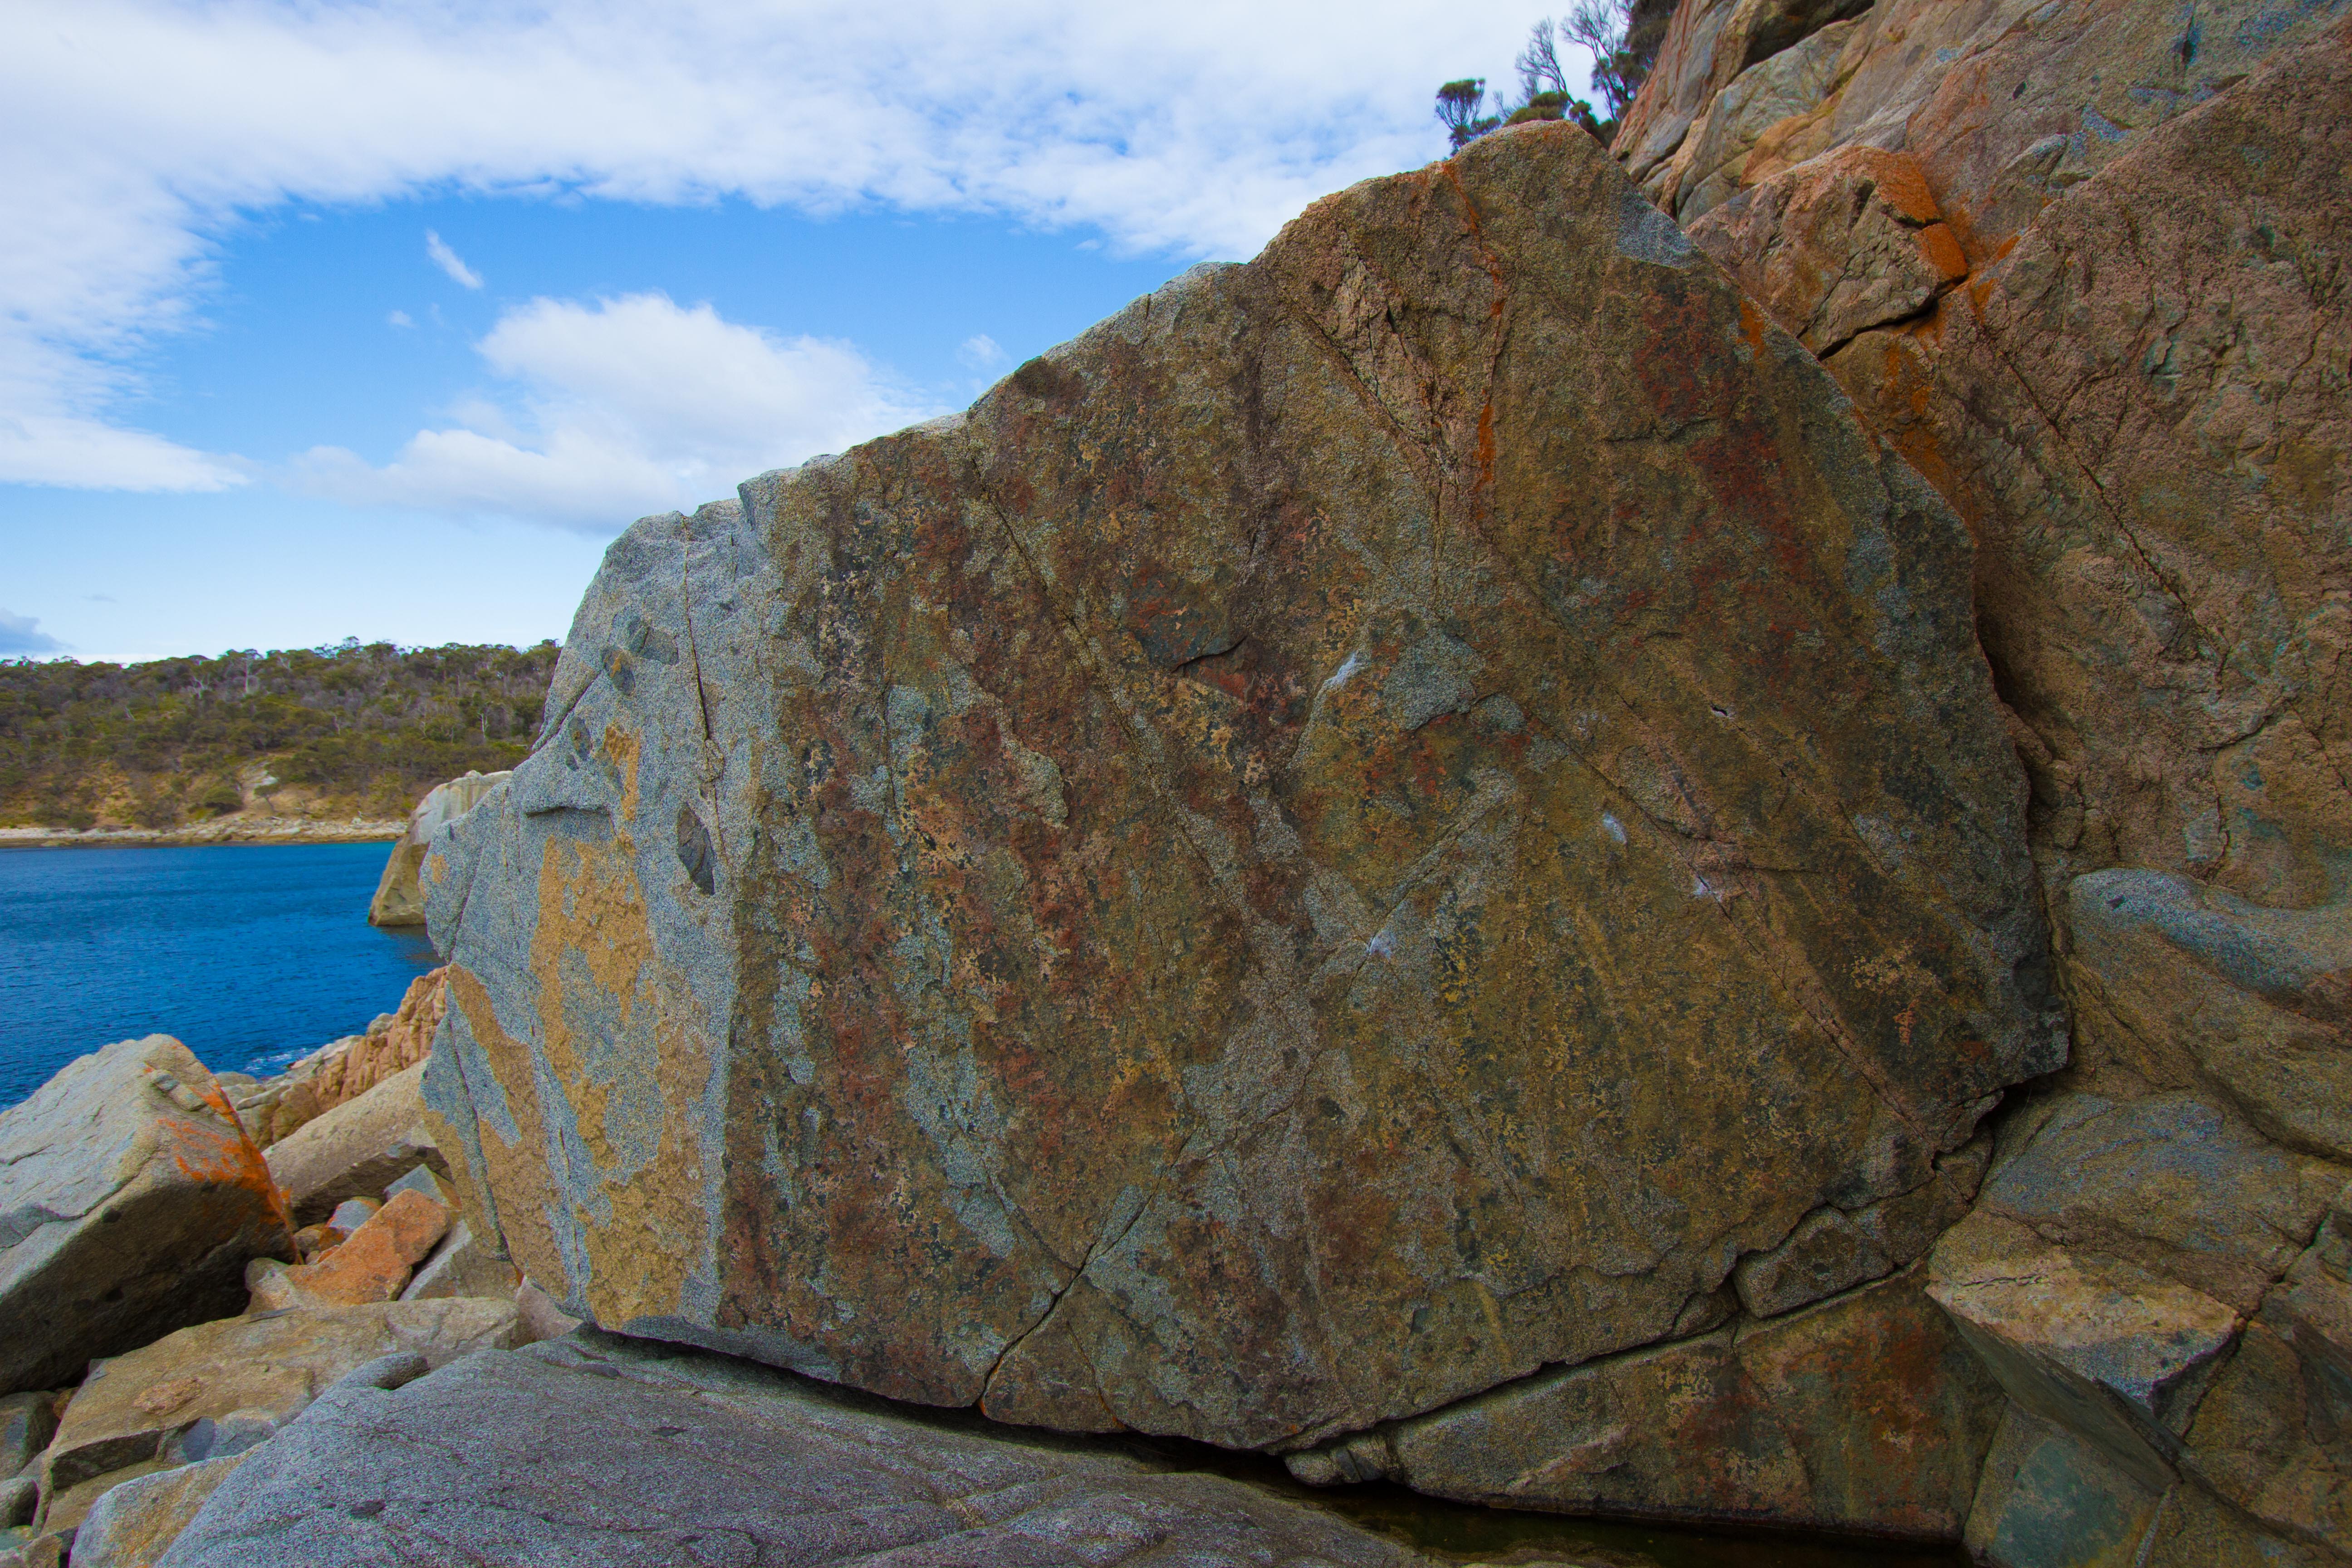
Forgotten but not lost
Up the wall from crap feet and good hands.
Thin face.
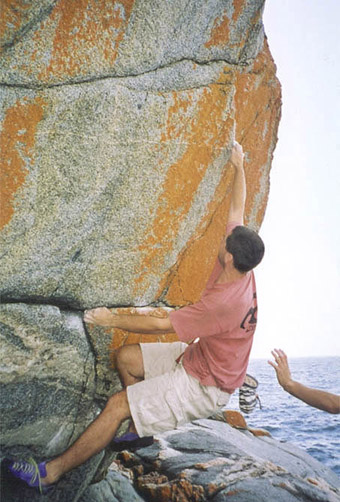
Opposite "Forgotten...". Climb the overhanging face just left of the arete. Start with LH on horn in horizontal and RH on horizontal. Either top out to the right or jump off at the jug.
South Bluestone Boulders
On the southern edge of bluestone bay there are quite a few scattered problems. Approach either via a long scramble from Bluestone Bay or drop down the edge from the top of White Water Wall.
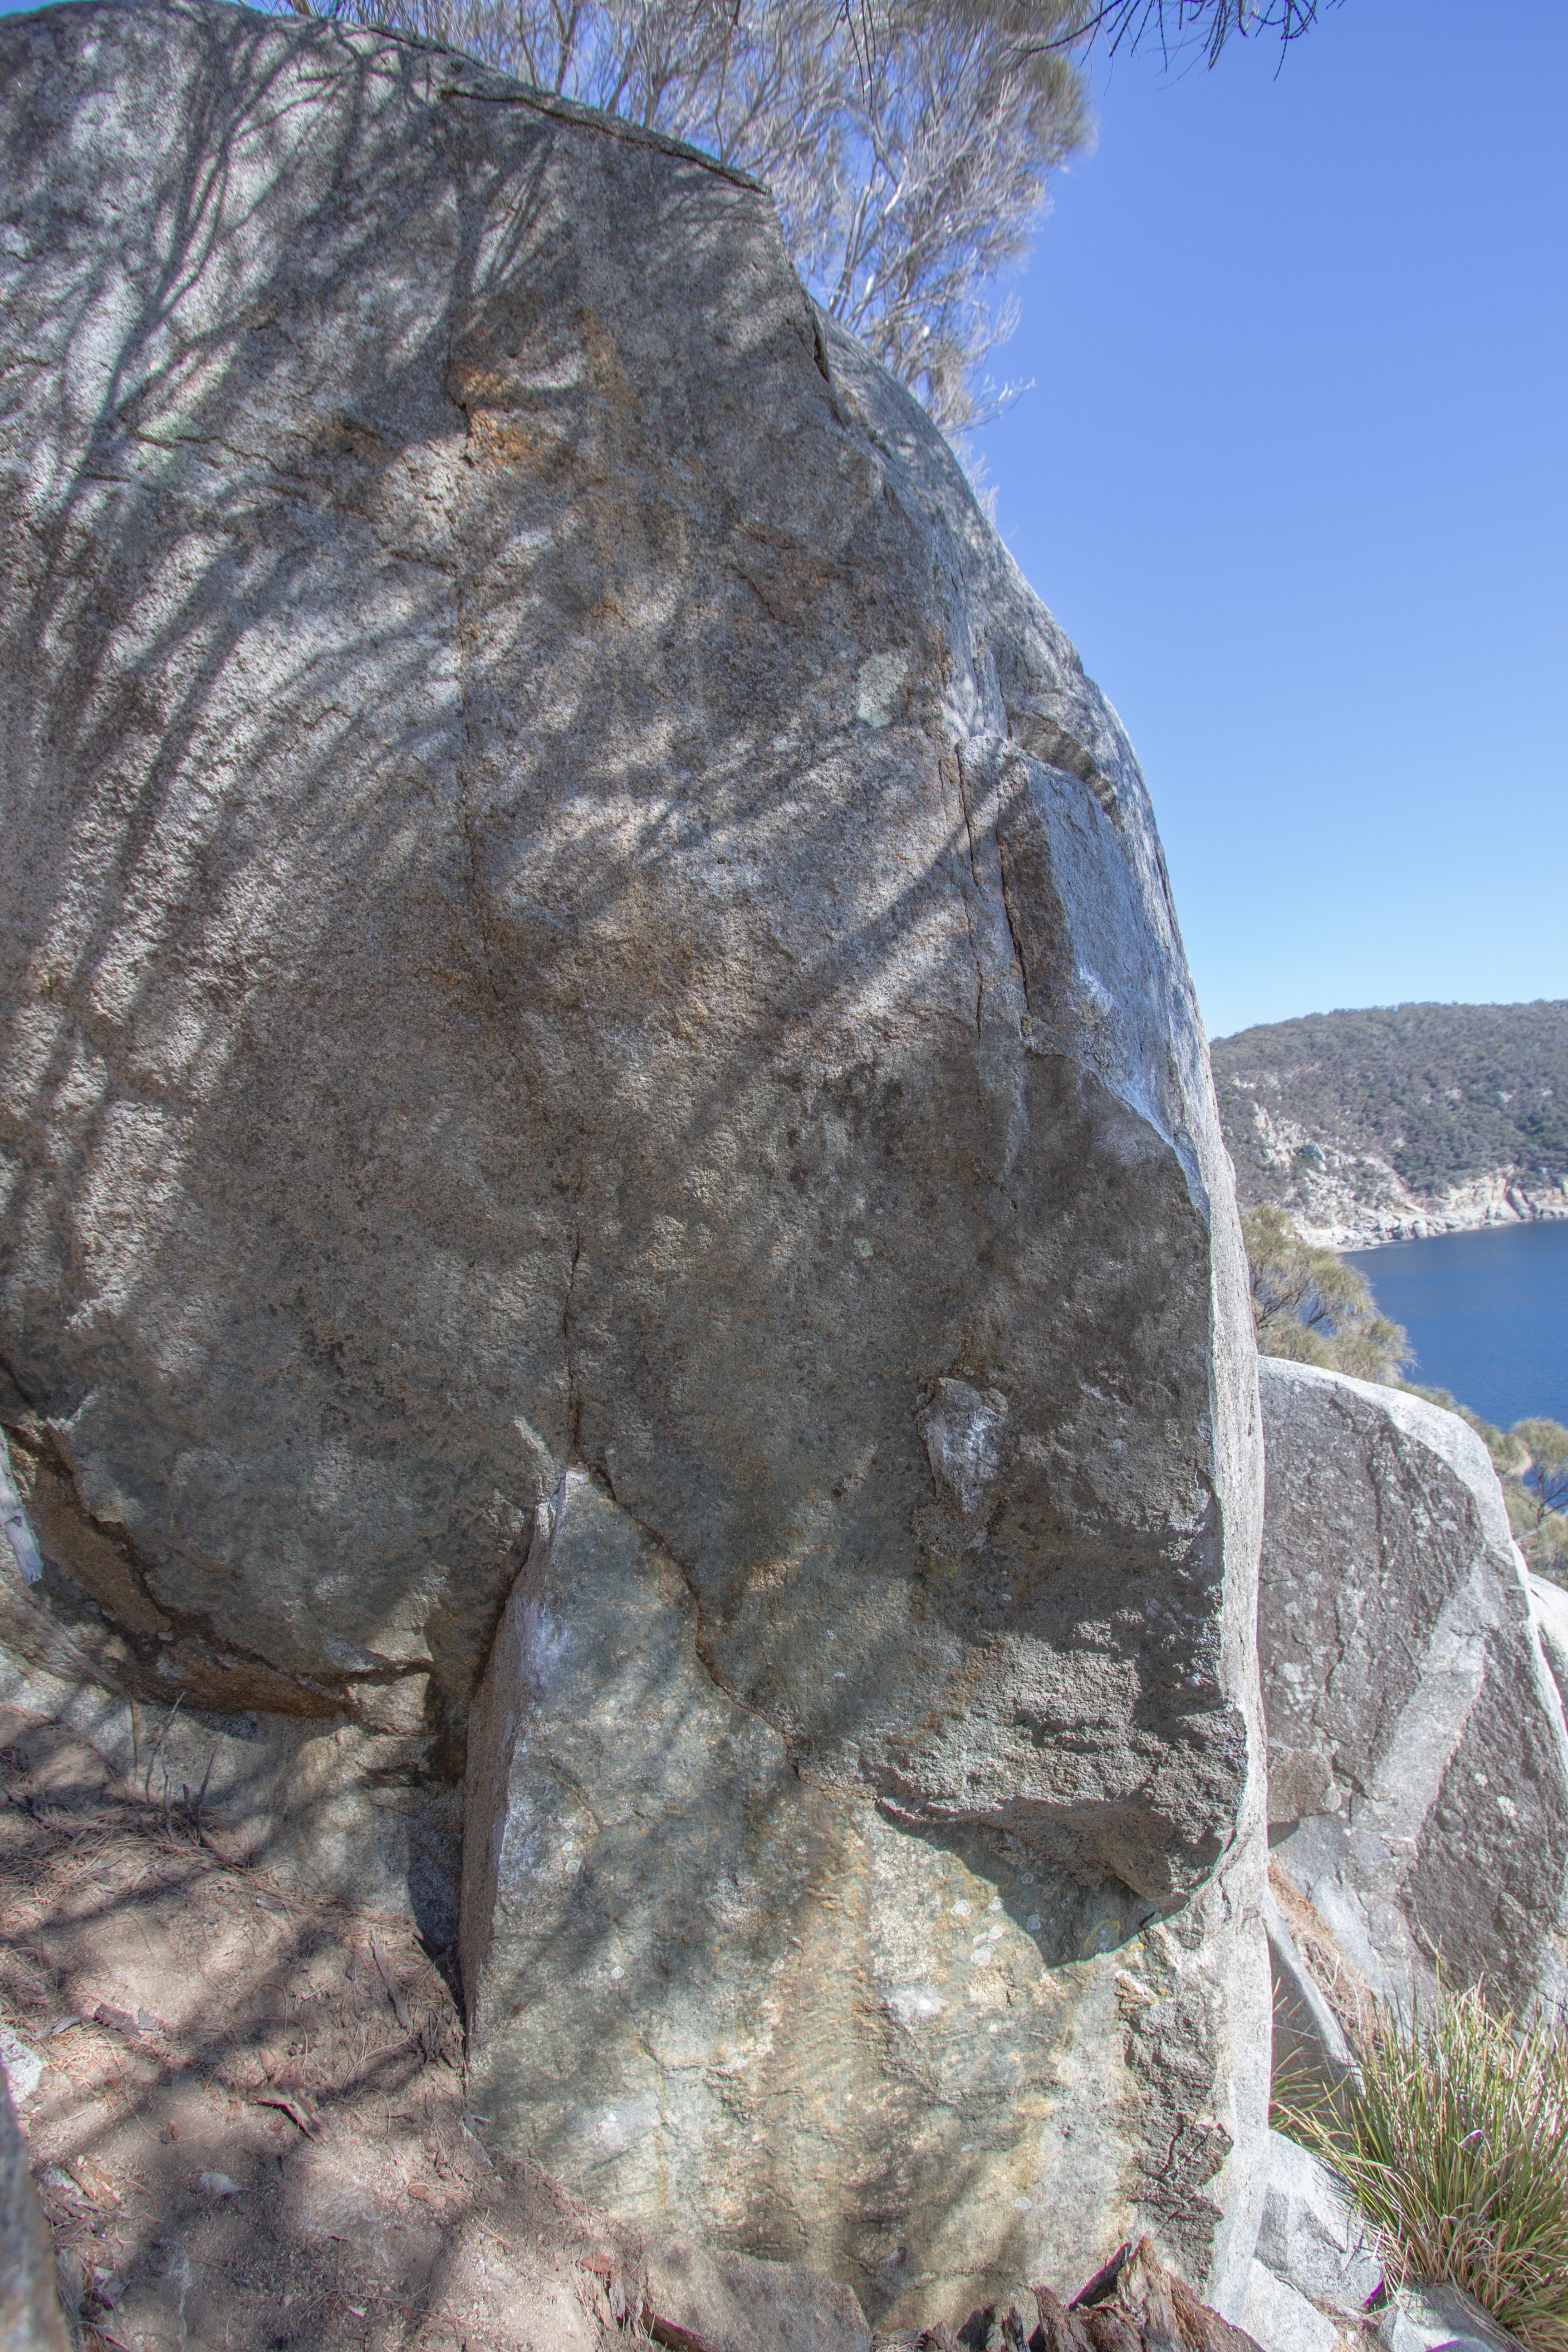
Confianza Boulder
Sit start with opposing aretes (tall climbers) or on the right arete (less tall climbers). Tension and compression your way up. Not as high as you feel, but the landing makes up for it.
M Hitchcock 2018
Whitewater Scramble Boulders
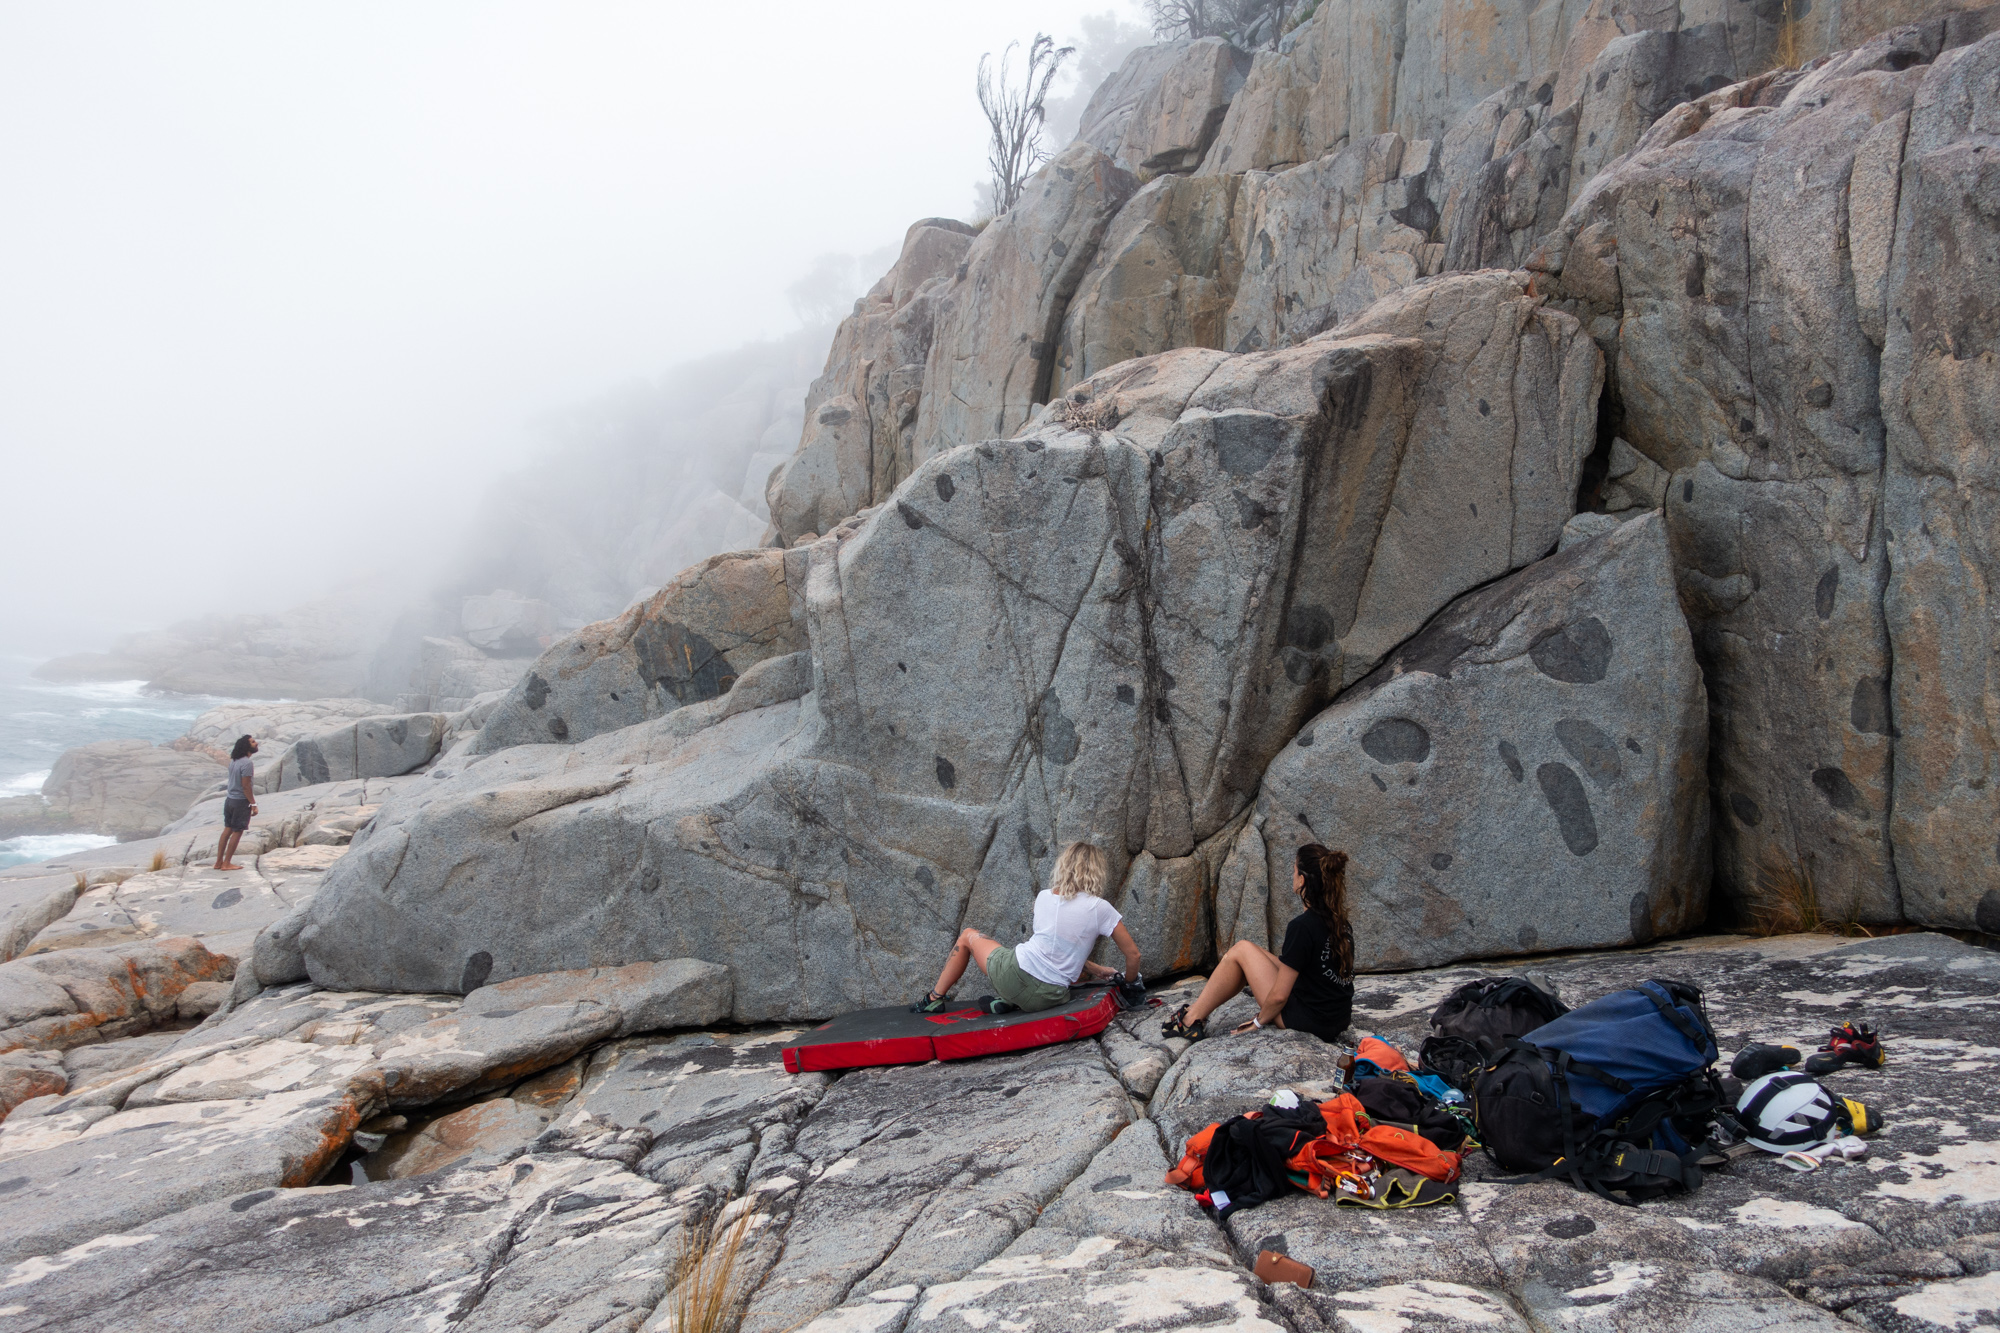
Kim Walls, Johanna Hæstrup
Kim Walls, Johanna Hæstrup
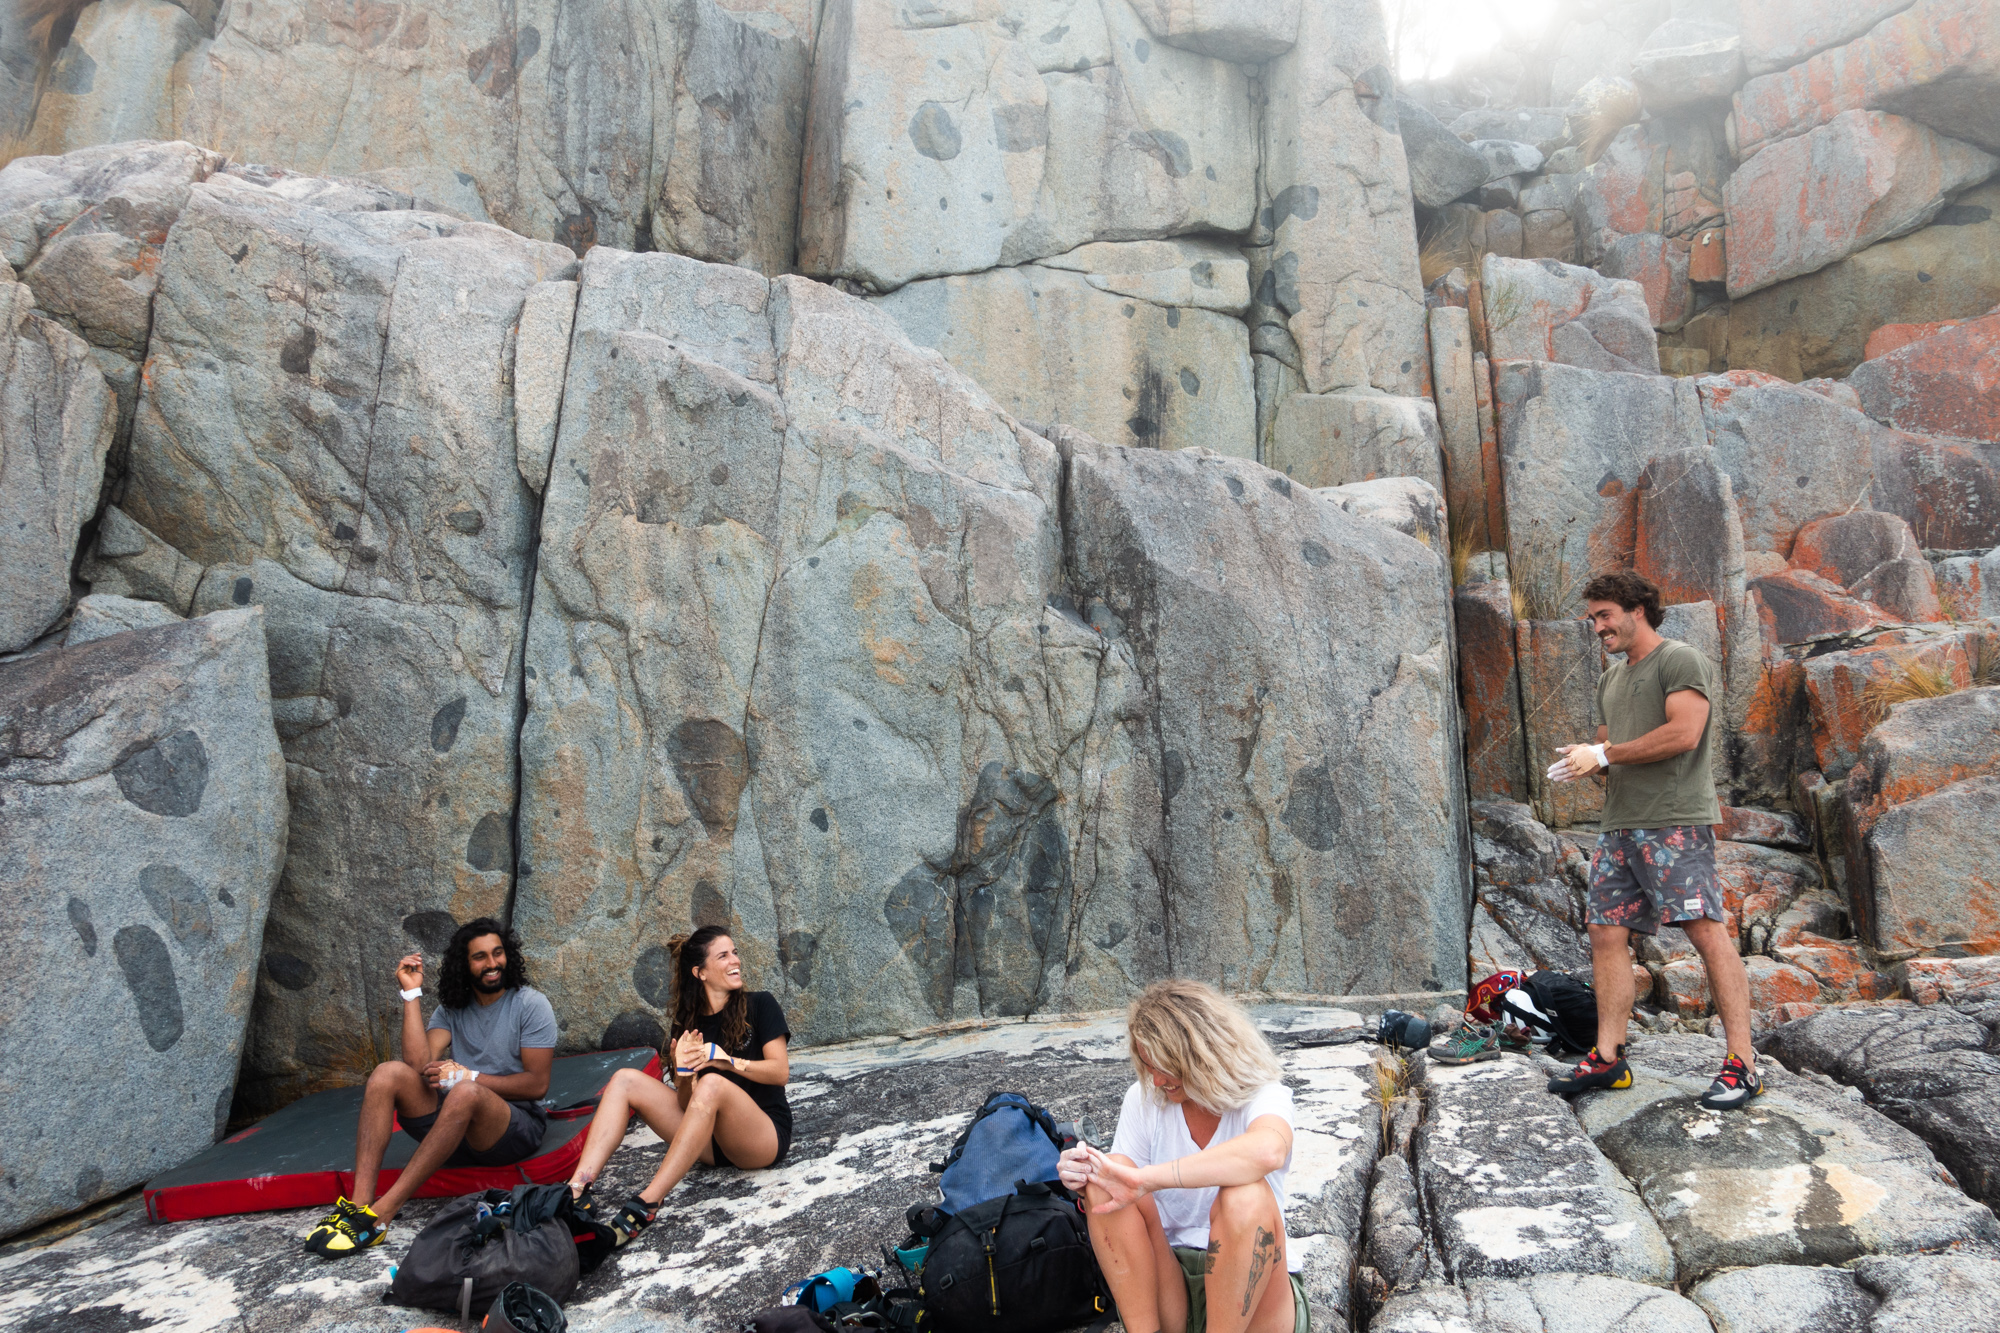
Haiku Wall
Through the small squeeze in the corner.
Kim Walls, Johanna Hæstrup
Up the hand jam crack, move up and right to crimps avoiding the undercling, then up to topout.
Kim Walls
Sit start on the positive crimps then straight up.
Kim Walls, Johanna Hæstrup
Harlequin Buttress
At Harlequin Buttress there are a number of boulders with quite a few good problems ranging from easy to very hard. From the turning circle at the end of the road walk straight ahead to the cliff top, follow it rightwards for about 50m until you reach the top of some steps. Follow them down on to a ramp and to the boulders.
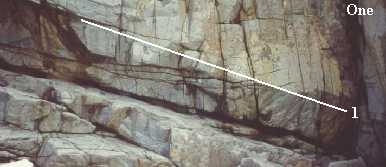
Start in corner and traverse left to jugs, can be done the opposite way at a similar grade.
There are various sit start problems which can be done along the traverse that have not been recorded.
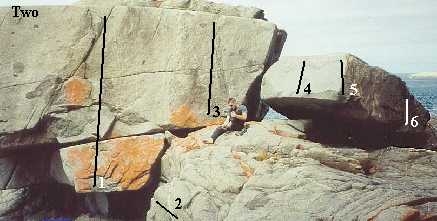
Hang start on lip with feet on block, pull up to ledge and top out.
Traverse wall.
Up Slab
Hang start on lip and mantel over, desperate for some easy for others.
Hang start on arete, up right trending to top out.
Start on crimps, hard pull to top.
Bolted Boulder
Sit start with left hand on sidepull/jug and right hand on sidepull or jug. Move up via left hand sidepull crimp and move straight up to top out over the middle of the face.
E. Robson, 2012
This problem is located on the face to the left of "Better Be Safe"
Stand start via balancing on the sharp blade-like feature, be careful to, when falling, not impale yourself on said feature!
Step onto the wall and make some delicate moves to top out via the highest point of the face.
T. Krauss, 2013
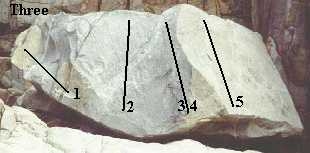
*Only here for historic reference, unclimbable since rockfall in 2012*
Start on jug traverse left for 5m to top out.
Up Slab.
Up slab near arete without using arete.
Sit start, up arete.
Step up onto the left side of the slab and then carefully move diagonally across. Landing not so good.
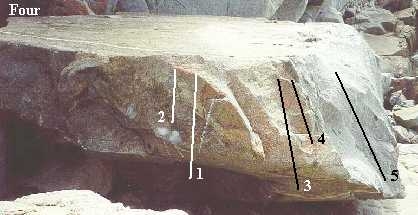
*Only here for historic reference, unclimbable since rockfall in 2012*
*Maybe still possible with use of chockstone?*
Start on break, into undercling, out to crimps to top.
*Only here for historic reference, unclimbable since rockfall in 2012*
Hang start on crimps, campus to edge and top out.
*Only here for historic reference, unclimbable since rockfall in 2012*
Hang of opposing side pulls, pop to jug and top out.
*Only here for historic reference, unclimbable since rockfall in 2012*
Start on jug and top out.
Step onto lip and top out.
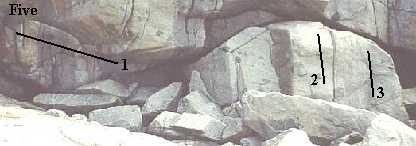
Start on jugs and traverse leftwards.
Stand Start to top out.
Up groove, harder if your short.
These problems are under the large "Jumping Block"
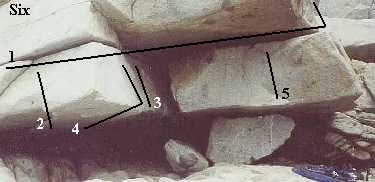
Traverse whole break to end and top out.
Start near end of flake, traverse out then long throw to slope, finish in break.
Hang start on slopes and campus to break.
Hang start under roof as for "Flaked", make a big move and finish as for Campuseis
Start on undercling, out to slopes and up Camuseis.
There is a steep crack line heading out to the arete from the horizontal break at the end of Flake Out. This has probably been top roped in the past, but it would make a great highball finish to Flake Out.
There are a variety of dead hangs on the dimples right of Campuseis. There are also various hang problems in the offwidth, including a foot hang and a chest hang.
Hang start on edge and throw to break.
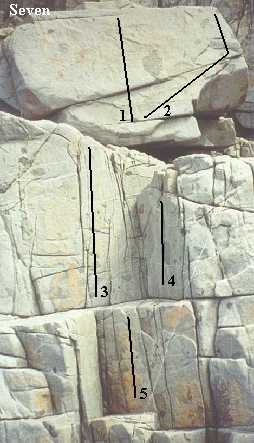
Up slab.
Out to arete and up.
Up face.
Sit start and up.
Sit start, dyno up to jug.
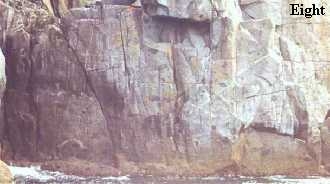
This is the face underneath the main block, there have been many problems done on this piece of rock, all of them within the grade range from V0 to V3, so take your shoes and chalk bag and go exploring.
A full traverse has been done right the way around the zawn to the platform opposite, the blank wall past the platform awaits a traverse. Keep an eye on the sea - it is hard to get out of the water if there is any swell around
Lassie's Wall
The next boulder is on the ramp above Lassie's Wall
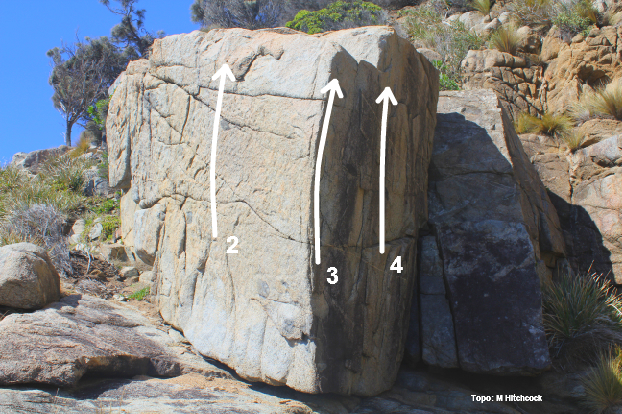
On the uphill side, climb the large underclings. Not sure who orignially climbed this.
Two hands on low flake, climb straight up using sharps crimps and side pulls.
Fraser L-R 2021
Arete
Face.
The following problems are on the far righthand side of Lassie's Wall cliffs.
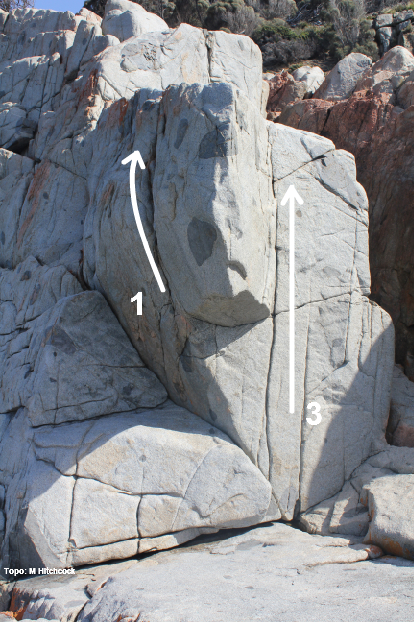
Climb the lefthand crack.
Climb the overhanging arete easier way from the the left side, starting on block and finishing with airy campus moves
Fraser L-R 2021
Climb the overhanging arete from the right (harder).
Climb the righthand crack.
M. Hitchcock 2010, but previous ascents likely.
Friendly Point Road
The boulders below can be found on the Coles Bay Dam Road leading out to Friendly Point. Only a couple of problems have been done, but potential exists for quite a few more although extensive cleaning is required.
This boulder is the third boulder on the left and is about 5m off the side of the road. The problems marked below have been cleaned.
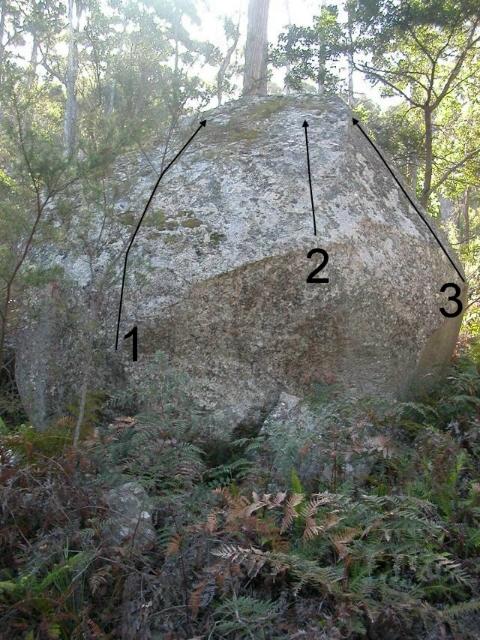
Tamogochi Boulder
Up the face right of the arete.
Friendly Point
These problems are at the Friendly Point crag. From the end of the road to the southern end of Friendly Beaches, walk south around the coast for 20-30 minutes until you turn a corner and come across a substantial crag with several sport routes. You'll come out on the top of the sport routes, with the boulders down below. To get down follow the stepped flake that separates the two tiers on the right (While looking south).
There is also a small boulder on top of the cliffs, with some easy problems.
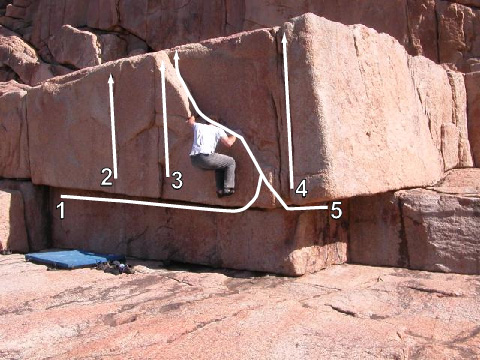
Mini Person project.
Straight up seam, sitdown potential also exists.
Start under the rooflet.
Up crack and arete.
Sit start under the rooflet. Its a bit tricky coming around corner and nicer to do as a stand start, starting where Bisso is climbing.
Mt Amos
There are hundreds of boulders scattered around the flanks of Mt Amos. Unfortunately there are very few decent problems on them. There are some nice ones on the very summit that have good problems.
Honeymoon Bay
There is some bouldering here on the large granite boulders on the beach. Easy problems can be done up the slabby side and a slightly harder problem exists (about V3) which can be done up the slightly overhanging face. Rock quality is what lets the place down, with most of it being quite gravely and crap.