
Clifton
 60 min
 Morning sun
 Short coastal dolerite buttresses
Acknowledgement
by Matt Perchard (after previous work by the Jacksons), originally published in Craglets.
Introduction
THIS CLIFF IS CLOSED AT TIME OF PUBLICATION.
The Clifton Cliff is on a coastal reserve (just), however the cliff is most easily accessed via private land and the land-owner has made his intentions perfectly clear with signs such as 'No trespassing ... Traps have been set'. If you visit the crag over the farm land then be prepared for the consequences of your disregard for the law. Having said that it is still possible to access the cliffs at sea level via kayak or sea level traverse along the coastal reserve from clifton, on calm days, however it is a long and not particularly easy walk (1hr). If all this hasn't put you off, read on. This crag has some excellent routes in the sub-twenty grade region. The dolerite rock is generally very secure and is characterised by an abnormal number of overhangs and roofs. Some routes traverse around these whilst others go directly through them. Although a lot of the routes are in the easier grades there should be enough harder routes to keep the better climbers going for a while. Much of the countryside around the crag slopes down to the sea one-hundred metres below at a fairly ferocious angle, so either (i) take an ice axe with you for self arrest or (ii) take extreme care in the area. This is especially true when descending to the lower cliffs. Due to this potential for accident Clifton (and especially the lower cliffs) cannot be recommended as a good place to take absolute beginners.
Access
The best access is via the coastline from the Clifton Beach car park. In the past, access was possible by driving up the farm road to the white house up on the hill. Unfortunately the landowner in the front block of land, as discussed above, does not want his property infringed upon. To access without crossing private property you need to follow the coastline, firstly below the choss cliffs at the western end of the beach. At the end of the cliffs is some scrambling that you might want to put your rock shoes on for, and isn't possible with much of a swell. Once past this section, follow the coast southwards keeping on the seaward side of all fence lines. When the Clifton Crags first come into view after 40-50 minutes you should notice a 3m roof (with a tree silhouetted above it) on the far side of the crag. This is Carnap. The next buttress to the right is fairly blocky and has Duke on its left-hand edge. A rather broken section of rock which extends 20m to the right, and terminates in a gully with a 4m wide chockstone wedged at one third height. The next buttress to the right is split into two by the obvious right trending crack of Matchless. And the final buttress to the right contains the easy cracks of Suzuki, Honda and Trumpy. If you turn around and look back toward the beach, you should notice a lone she oak on the skyline. Directly below this at sea-level is the Tea Leaves buttress. As the climbs are described in the left-to-right ordering, they are not described in the order of approach. The first buttress approached on the main cliff (as described above) contains the Trumpy crack-line and the last visible route is the overhang of Carnap.
Crag Steward
Rock climbers please contact the Cliff Steward (southarm@climbersclubtas.org.au) if you have any queries or concerns regarding social or environmental impacts of rock climbing at this crag. Do not email regarding general travel, seasonal advice, or lost property - this is not the Steward’s role. If you have important safety information to communicate (e.g. risks due to recent and large rock falls) please also consider updates on thesarvo forum, facebook group and/or online guidebooks as appropriate. Please copy in cct@climbersclubtas.org.au if you feel you have a high level concern which may imminently impact the crag or climbing community.
Non-climbers, other users, land managers: please also contact cct@climbersclubtas.org.au if you have important climbing related queries at this location.
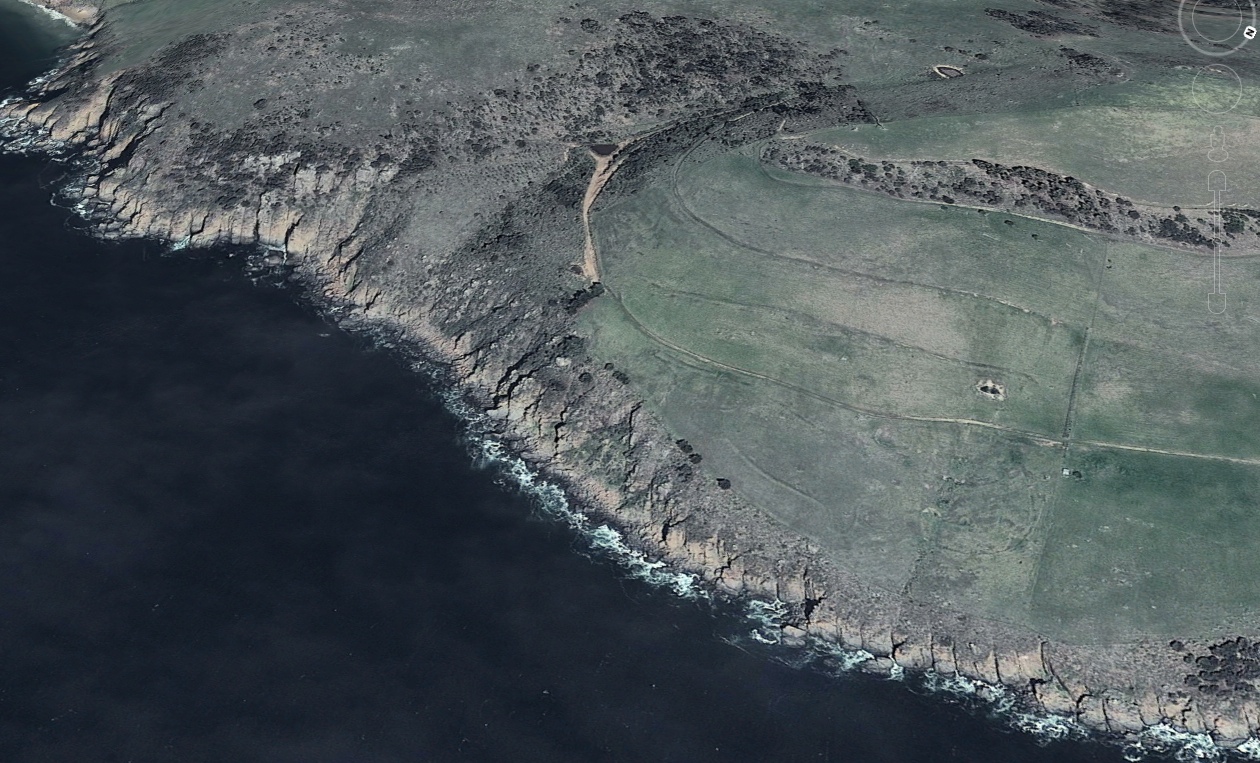
Image from Google Earth
Main Area
Immediately left of the main Carnap buttress, the hillside extends upwards to some smaller buttresses. The most striking of these has a roof split by the offwidth crack of Land of Plenty. The hillside between that climb and Carnap is fairly gentle and provides a descent route from climbs to the right.
From Lemming go down and to the left, until you come across an easy south facing corner. This is it.
This small, sloping, slabby faced buttress is about 20m left of Land of Plenty. Start on the right-hand side of the buttress, beneath the undercut base and loose looking blocks. Climb up the blocks, then traverse to the extreme left of the face to clip a piton in the horizontal crack. Move up thinly to another piton, then finish up the crux face above.
John Moore, 1970.
P.Jackson, M.Tillema, Oct 1970.
One of the most striking climbs at Clifton and sustained for its length. Start in the gently sloping corner a couple of metres left of the roof line crack. Go up the corner for 3m, then traverse right across the slab to the vertical crack line. Climb through the bulge in the hand crack, then follow the fist/offwidth crack upwards through the 2m roof to finish. Don't forget the #4's for this one (that is, #4Camalots not RP's). More of an experience than a climb - a definite must!
1976.
The next set of climbs are on the main face. This is characterised by the roof of Carnap.
Probably the most impressive route at Clifton, with an improbable looking crux in an improbable situation. Hard. Start in the obvious corner on the largest buttress below a large roof. Ascend the corner past a sloping ledge on the left at ~ 15m (possible belay) and continue up left crack through bulge to main roof. Traverse left (crux) then continue up the easy wide crack to the top.
M.Tillema, P.Jackson alt, Oct 1970.
Start at the layback corner just right of Carnap. Layback up the corner past the halfway ledge to a bulge at 15m.. Step back right to a grassy niche. Surmount the curved and fragile flake on the right then step back left into the bulging crack. At the roof traverse right (crux) to the big ledge. Either belay or climb the last 5m to belay at the top.
D.Groome, J.Moore, 1967.
Start beneath a V-shaped bottomless chimney. Climb up to the chimney on poor rock. Enter the chimney (crux) and continue up to a ledge and the large flake on the left. Continue straight up the wall on small holds to finish.
P.Stranger, 1968.
Start at the small blind corner to the right of Speed. 1. Climb the corner to the ledge. Move left to the arete (just right of the Speed crack) then ascend this (crux) till a traverse right leads to a small block and ledge. Continue straight up to a ledge and belay. 2. Place a #l RP on the first layaway (16/17) then run for the top. A Clifton pearler.
E.Peacock, G.Cooper, Nov 1982.
A good route up right of Paper Plane, which basically follows the thin cracks on the right-hand side of the face.
Evan Peacock, 1983.
After this climb, the cliff is broken by a gully. The next climbs are on the buttress to the right.
On the second pitch at the hand traverse, move left and go up through the small roof via the wide crack. Continue to the horizontal break to belay.
Ian Lewis, 1972.
J.Moore, D.Groome, P.Jackson, 1967.
A fairly poor route up the right-hand side of the buttress. Climb up the corner on the right of the face for 10m. Move left into the hand crack on the arete and follow this and the face above to the top.
D.Groom, 1968.
The next 20m of cliff is fairly broken and is not worthy of any routes. The broken section terminates in an obvious chimney which includes a large chockstone at one-third height. The small buttress to the right has a few routes on it.
Climb the face left of Matchless. Wires and a bolt for protection.
Evan Peacock, Dec 1990.
A classic. Start on the right of a large block up to the left of Triton. Surmount the block on the right then go up easily to the base of the flake/crack and good protection. Layback the flake (which gets easier with height) to the small overhang, then finish up the delightful crack above.
John Moore, 1967.
Start below the left end of the overhang on the right-hand side of the buttress. Climb up to the base of the small corner on the left. Ascend the crack till a semi-hand traverse right leads under the roof. Step up from the tree and enter the bottomless chimney. Follow this awkwardly to finish.
John Moore, 1967.
The final buttress is small and contains three old crack-lines.
Start around to the left of the buttress, just right of the gully. Layback the initial overhang and then follow the obvious wide crack to the top.
Start on the left-hand side of the chimney in the middle of the buttress. Climb the finger/hand crack.
Start immediately right of Suzuki. Climb the chimney and thin cracks on the right-hand side of the chimney.
The next set of climbs are located at sea level. It is possible to descend down the steep grassy slopes anywhere to the north of the upper cliffs. However, extreme care must be taken not to slip on the loose rocks or slippery grass. On reaching the boulder beach, head south past Noir City and Stops at the Top to the long line of Straw Dogs.
N.Ward, P.Jackson, Feb 1981.
To the right of Straw Dogs is a small buttress which contains two excellent routes. The lines follow the two cracks on the seaward face of the buttress.
This is the left crack. Although short, the climbing is pretty full-on so it shouldn't disappoint. Well protected.
Roger Parkyn, Jun 1991.
Similar in style to Noir City. Scramble up the block to get started, then power up the steep crack.
Adrian Herrington, Oct 1982.
Tea Leaves
The Tea Leaves are further north along the foreshore. On a calm day it is possible to walk along from the above climbs to the buttress, but at other times it is necessary to descend from the hill top on the northern side of the Tea Leaves buttress. About half a kilometre back from the start of the upper cliffs is a lone she-oak. Descend, very carefully, about 50m north of that tree trying hard to avoid Molten Sheep Couloir (which is where the farmer dumps his carcasses). Just before reaching sea level, the overhang of Tusk is passed.
Start on top of the boulder under the bottomless crack left of Souchong. Jam up the crack until beneath a large block. Surmount this then continue straight up the easy slab above.
Garn Cooper, Nov 1982.
A good little overhanging climb with a strenuous crux. If the water level allows start on the left-hand side of the face and climb straight up. Otherwise start in the middle of the face, climb up to the roof line and then traverse beneath the roof to the edge of the crag. Pull blindly around the overhang, past one good jug, then continue easily up the ridge to belay.
Peter Jackson, Oct 1979.
The line through the bulging roof between Earl Grey and Souchong.
Adrian Herrington, Oct 1982.
A superb route on excellent rock with a technical crux and a very enjoyable finish. Use a small pocket to get around the overhang. Continue up the (crux) line to the obvious curving flake. Move up left and finish. Adequate protection.
Peter Jackson, Oct 1979.
Start to the right of Earl Grey at the flake system running through a roof.
Evan Peacock, Nov 1984.
Good rock and easy hand traverses are the order of this climb. Follow the upper line from right to left, exiting up the face just before the ridge to finish.
Peter Jackson, Oct 1979.
There is a deep cleft to the right of the main crag. The climb takes the face of the buttress to the right. Escape from the top is tenuous and mars the enjoyment below. No protection.
Peter Jackson, Oct 1979.
A classic little route with terrific rock architecture, superb protection and strenuous climbing. Up the hill to the right from the Tea Leaves is a small buttress with a very pronounced overhang. Ascend the corner on the right to the roof. Jam out, down and around this, then finish easily. Belay at the cave.
Peter Jackson, Oct 1979.
Henna Cliff
The climbs on Henna Cliff are located at sea level, two-thirds of the way to the traditional Clifton crags. Access is rather obscure, but walk past the obvious spinney of gums below the cultivated paddock, across the fence and then on the rise the cliffs location can be determined by sighting a semi detached pinnacle. To the right of the pinnacle (looking out) is a huge fallen block. Henna cliff is adjacent to the pinnacle. Descend next to the pinnacle, with extreme caution.
Climb delicately straight up to the horizontal line (no protection). Move right, then follow the obvious crack with good protection. The crux comes at the top and the exit is very loose. Fifteen metres of scrubby cliff remain to the top, but it's best to belay first.
Peter Jackson, Nov 1979.
Start at the obvious crack to the right of Cormocephalus. Climb the straight crack which gradually peters out to a subtle finish on the unlikely looking wall. The crux is the last 3m and can be well protected by a small wire. Protection is good.
Peter Jackson, Nov 1979.