
Sandfly
 10 mins
 Dolerite
Acknowledgement
By Steve Thomas
Introduction
Located at Sandfly, found by Steve Thomas and developed from Christmas 2010 onward by Steve Thomas, Chris Welsh and Eli Robson.
Access
From Hobart take the Southern outlet toward Kingston (10 mins). Just before Kingston change onto the Huon Highway and drive for another 10mins until you reach the Sandfly / Longley cross roads. Take a left turn here and drive past Sandfly shop/servo on your right. 200m further on, turn left into Sandfly cricket ground and park. From here follow the pleasant marked trail through the bush reserve for approx 10 mins, until the river valley can be seen. Follow the trail as it continues alongside the creek. The path approaches and enters the trees until a trail branches left down to the water. From here you should be able to see Christmas Boulder directly across the water, and the Sandfly climbing crag just upstream. Cross the river using stepping-stones or if the water level is high then wade through the shallows, very refreshing for tired feet, particularly, after a hard days bouldering!
Christmas Boulder
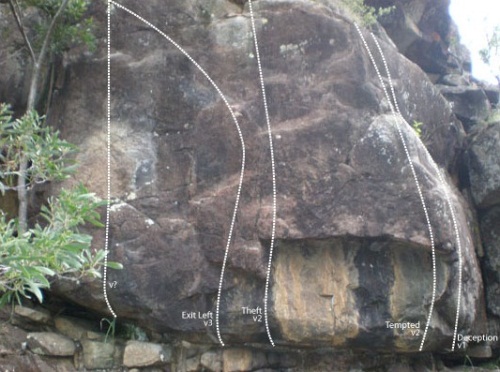
Make a hard mantle onto small ledge at chest height, up to pinch and top out.
CW
Up the centre of wall on small edges exiting left.
CW
Pull on to wall using small rail and straight up on edges to good hold at top.
CW
The next arête. Resist the temptation to use the jug on Deception! V2 with the stand start.
CW
Up on small edges until the cunningly concealed jug at two thirds height can be reached, from here carefully top out onto the ledge above.
CW
To escape from the previous problems follow the curving crack with chock stones (VE) to the top, then carefully descend above Christmas Pud until big ledge is reached. Finally descend via Treacherous Gully (VE) to the right.
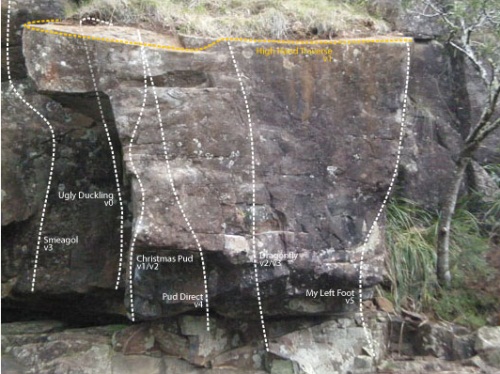
Up middle of face to long reach for top and grovelling mantle to finish.
CW
Thrutch up the corner crack or bridge the corner gracefully… Exit to right. Watch out for loose blocks.
ST
The face through the overhang without using arête or crack on either side. Start with hands on the underside of the overhang (If you can reach it that is! ), and make a powerful static move onto the face, then grapple with the overhang above until a bold move for the top can be made and strenuous mantle to finish. A dynamic start loses a grade and other variations can also be found at about V5 for those who are somewhat shorter.
Start with both hands on the rail left of the arete, up to good hold on arete, lay off this to reach overhang and then a bold move to reach the top of the overhang followed by a no foot mantle to gain the top.
Start with both hands on the rail left of the arête, up to good hold on arête, and up again to shallow shelf, delicately move right onto face and surprising, awkward top out.
ST
Start underneath the overhang on good holds, up via a block on the right and the nose on the left until two slopes can be reached, hold the slopes, set feet and make insecure move left to good hold on arête, pull onto face and exit delicately as for Christmas pud. (Some deterioration has occurred recently reducing the quality and possibly the grade of this route).
CW
Start under overhang on good holds and move up until small edge can be reached, pop up again for bigger edge and potentially strenuous pull onto face, have a rest and summon courage to step up on slopes or good small edge and mantle to finish.
CW
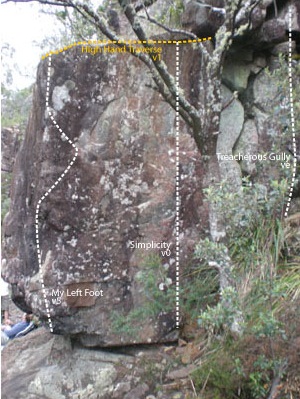
The arête. Start at big hold, using this ascend arête to gain a small crimp on the right and using this (strenuous) ascend until a long bold move gains the top, followed as usual, by a mantle to finish.
CW
The right hand side of the face around from My Left Foot.
CW
Climb up Simplicity or Treacherous Gully until the top of the boulder can be reached, traverse left around the first arête and excitingly around the second arête then exit as for Ugly Duckling.
CW
The ascent/descent corner right of Simplicity. Watch out for loose rocks.
ST
Second Tier
If you‘ve flashed all the problems on Christmas Boulder or you are bored or have limitless time and energy, you might want to try the problems on the second tier. To reach them follow the Treacherous way. This entails climbing Treacherous gully and the block above Dragonfly and then scramble up until you reach flattish ground below the boulders. There is, perhaps surprisingly, plenty of flat ground here for pads and spotters and from here you can move left or right to access the problems, bearing in mind, for your own safety and that of others below, the perils of loose scree underfoot and of the big drop that awaits the careless. On a more positive note the view from up here is excellent.
In the centre of the boulder just to the right of the tree. Up on positive holds to positive top out.
ST
Project. Thin edges to high top out.
Tomahawk Boulder
To get to Tomahawk boulder, go left from Christmas boulder until you come to the end of the cliff. From here go upwards and leftwards into the trees on a diagonal line following intermittant paths for about 100m. Tomahawk boulder is the largest of the boulders you will find along the way and lies about 10m from the top of the hill. It is about twice the height of Christmas boulder which makes it pretty high. It gets plenty of sun after about midday, and is worth a visit just for the view. The climbs are described from left to right.
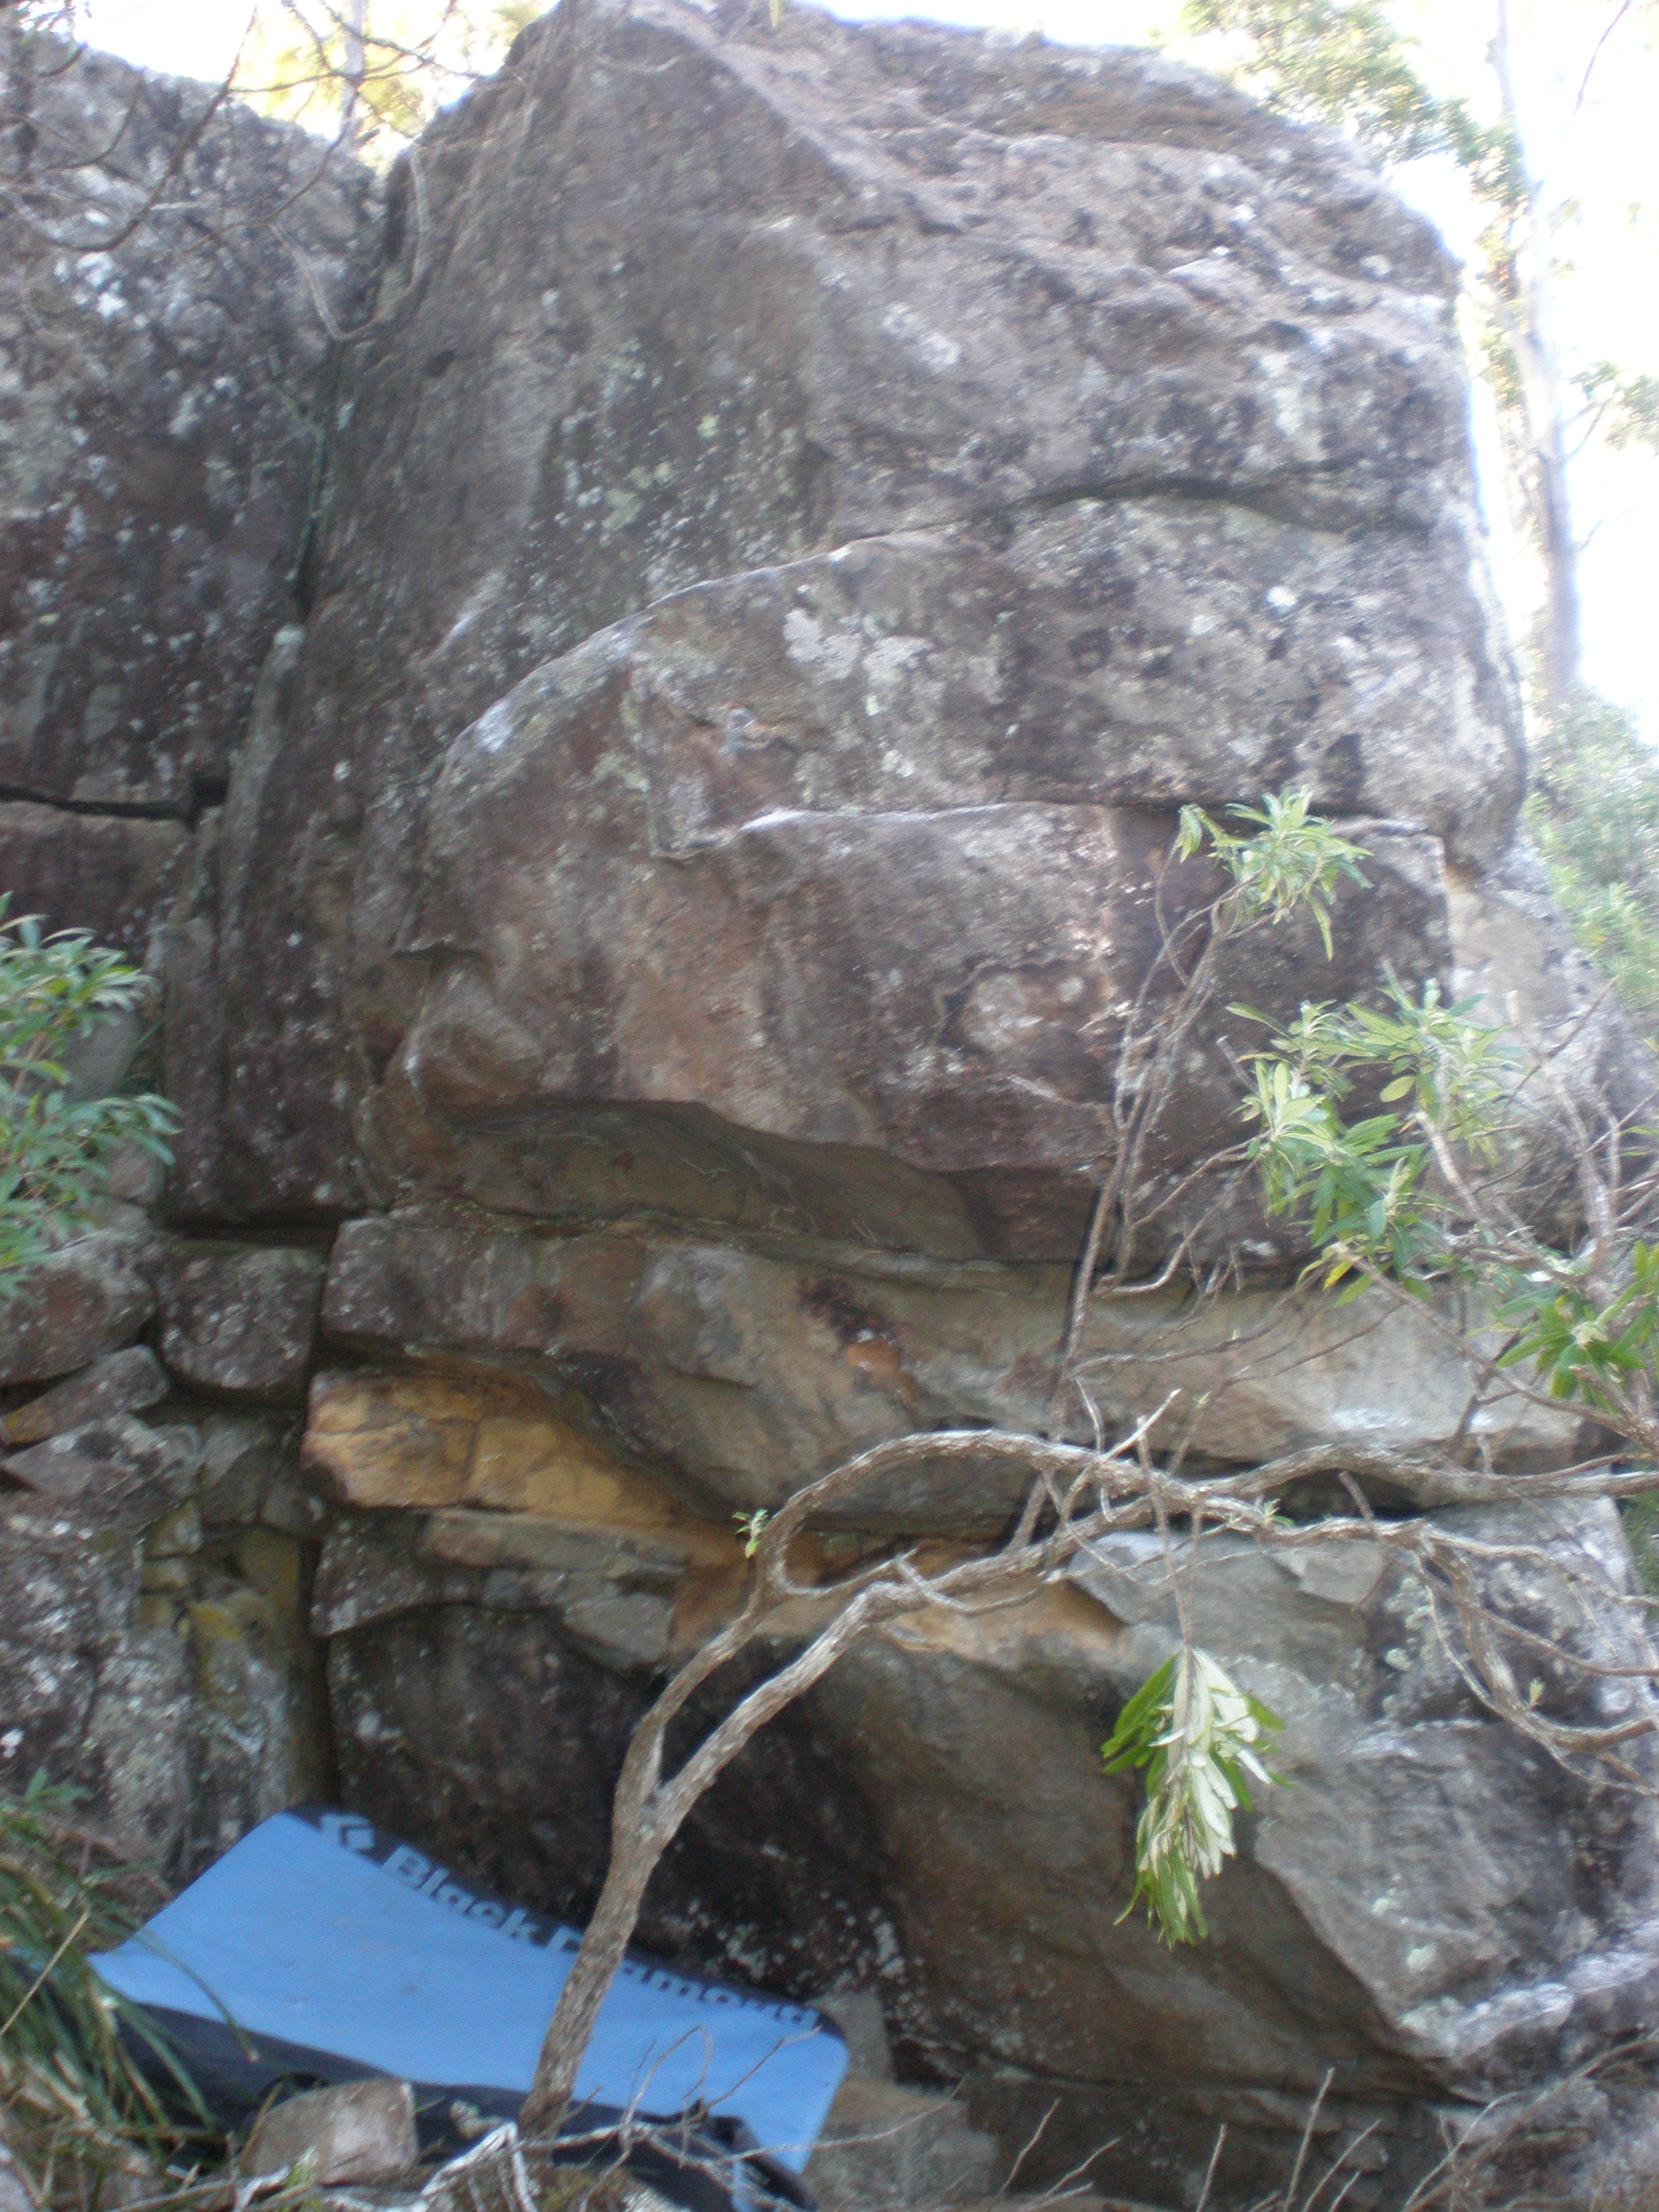
Start just right of the corner below a mantle shelf. Climb the overhanging wall on good holds and go through the mantle shelf to finish up the prow.
ST
To the right of Squaw in about the middle of the wall. Go up the overhanging wall on good holds, then through thinner ground and top out up the sloping nose.
CW
From the right hand end of the wall, ascend the overhanging wall on good holds, move through the bulge on smaller holds until a good hold can be reached and then finish airily.
CW
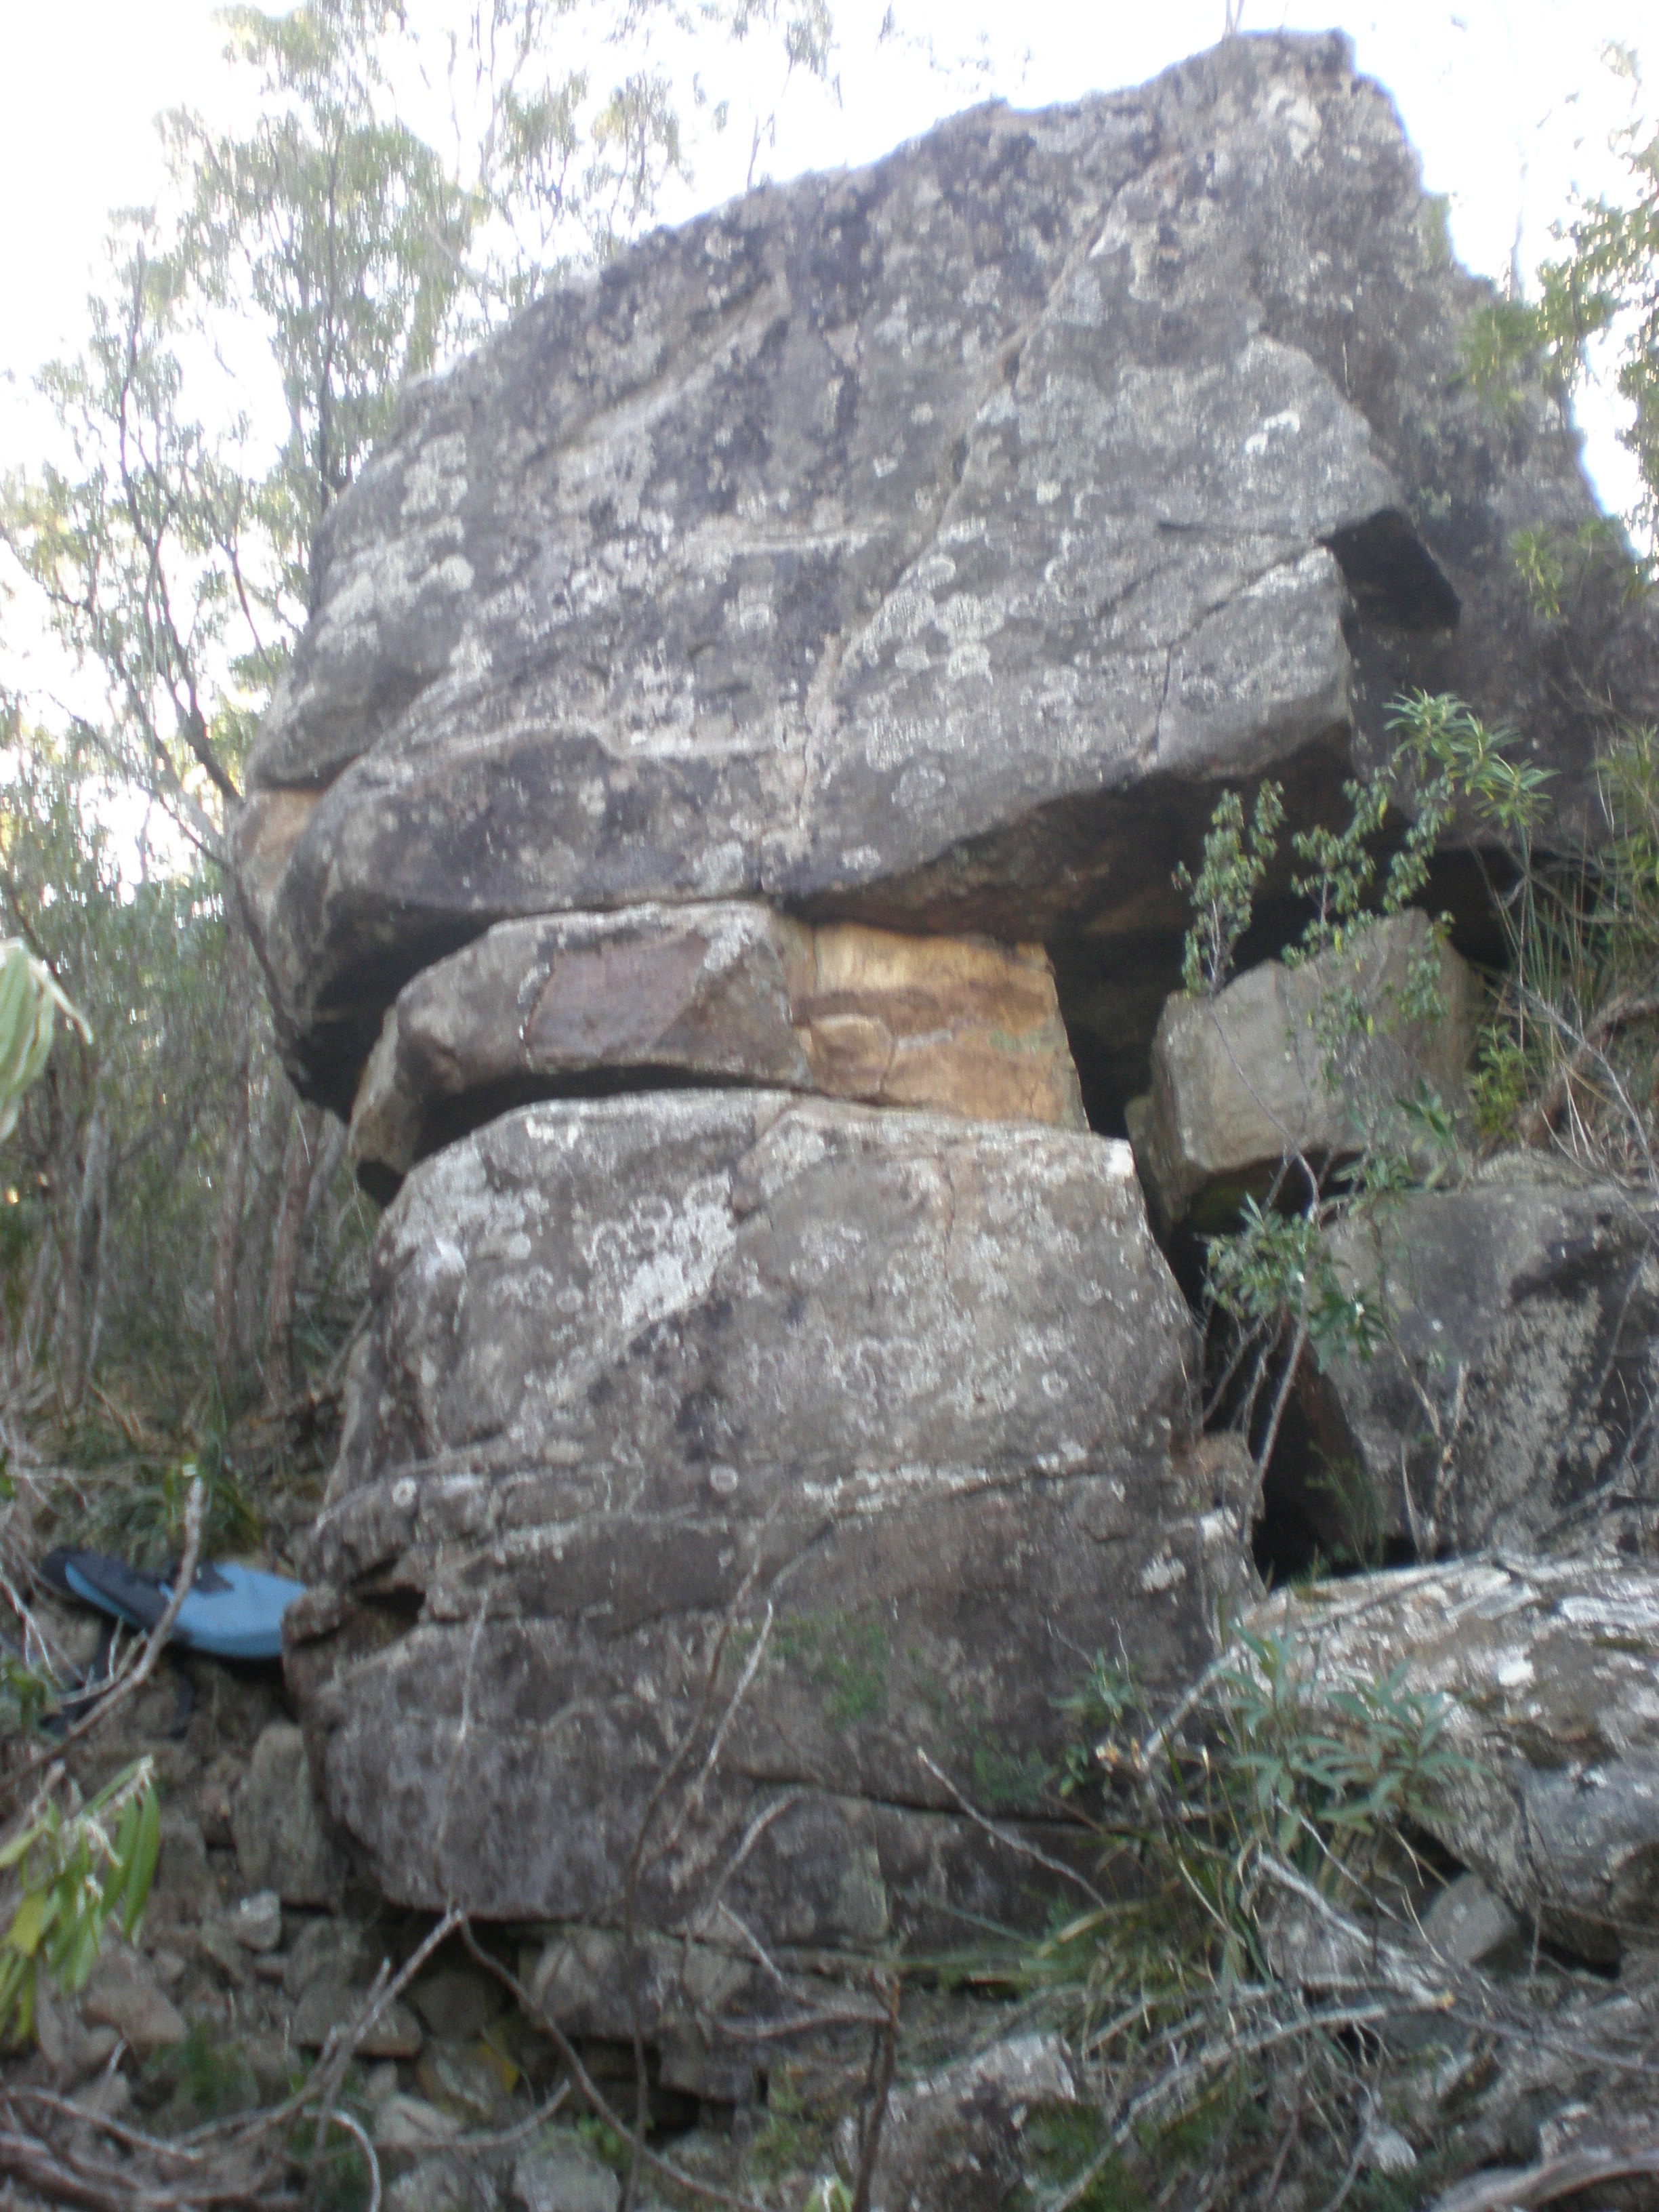
From the left hand side of the front face of the boulder, ascend easily enough until a small shelf can be reached, surmount this and then up the slab airily to a mantel shelf finish.
cw
Shares the same start as Indian face but then trends rightwards following the line of the seam to exit at the top right hand side. (The landing would be poor from here).
CW
South Sandfly Boulders
The next few problems are at the South Sandfly Boulders, accessed from Sandfly Road (C622), same as for Dog Leg Bend (c.f.). Turn onto the road just before Margate, drive 200m past Nandroya Vineyard (which is on the right) and park near the chain gate on the R, beside the vineyard sign. If coming from Sandfly look out for the vineyard signage on your left. There is enough room to park a few cars on the roadside with out blocking the gate or obscuring the vineyard sign. Jump the gate and follow the road to the river and head left up the river for 20 minutes. If the water is low it’s a pleasant rock hop up the middle of the river or if it’s up there’s a very rough track on the left of the river - generally following the bank. You can get a graph of the water flow online at water.dpiw.tas.gov.au - search for "North West Bay Rivulet At Margate". The levels rise and fall quite quickly after rain. At levels higher than 1 cumec the water will be flowing over the weir and the walk will be more difficult. Please note that the land either side of the access road is privately owned by John Rees from Nandroya wines and he’s allowed us access so do the right thing and pay a visit to the cellar door after bouldering and purchase a bottle or two.
Battlement Boulder
Stand start under the obvious overhang just left of the middle of the boulder. Climb up to the overhang, power your way to the top. Gymnastic
ST
SDS to Zenith. Start directly underneath stand start, continue up Zenith.
CW
SDS as for Nandroya. Traverse left under o/hang, finish up Zenith.
CW
SDS on right. Up via big move off small hold on face. Stay to the right of and don't use the good hold in the centre groove.
CW
Traverse L-R or R-L. Easy warm-up.
ST
Start as for Nandroya. Do the first couple of moves then move right, finish up the bulgy part of the arete via slightly tricky mantle + R high step.
cw
SDS as for Zenith. Traverse right under o/hang to finish up Page Boy.
CW