
Suspension Bridge Area
 5-20 mins
 Afternoon sun
 Vertical dolerite buttresses, up to 25m high
Crag Steward
Rock climbers please contact the Cliff Steward (eskriver@climbersclubtas.org.au) if you have any queries or concerns regarding social or environmental impacts of rock climbing at this crag. Do not email regarding general travel, seasonal advice, or lost property - this is not the Steward’s role. If you have important safety information to communicate (e.g. risks due to recent and large rock falls) please also consider updates on thesarvo forum, facebook group and/or online guidebooks as appropriate. Please copy in cct@climbersclubtas.org.au if you feel you have a high level concern which may imminently impact the crag or climbing community.
Non-climbers, other users, land managers: please also contact cct@climbersclubtas.org.au if you have important climbing related queries at this location.
Above the Suspension Bridge
Access: These first routes are around the track that heads south from the suspension bridge at the First Basin. See map. Council has also very nicely placed distance markers on the track starting at the Suspension bridge. These make handy guides to the climbs.
Ice Scream Buttress
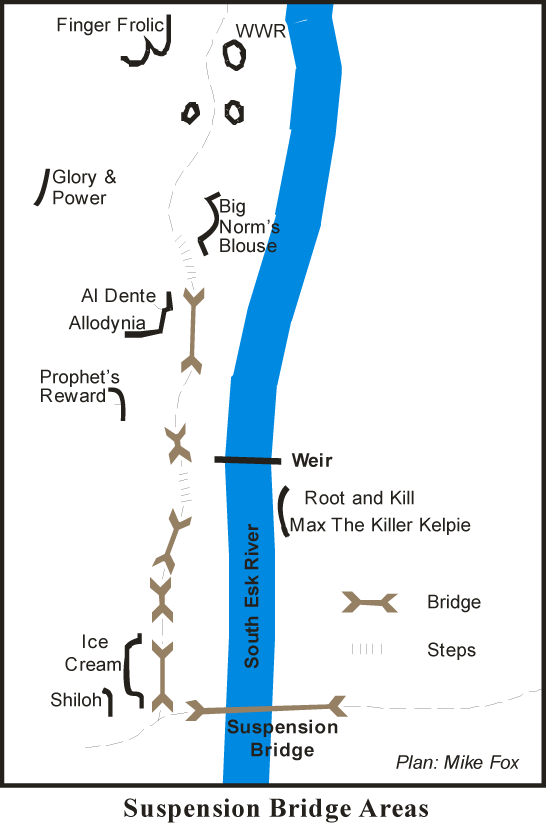
Access: From the first bridge on the Duck Reach track stand and look at the cliff. Straight in front of you is an orange and black face with two FH. This is Ice Cream. Above this and slightly downstream is a large block with 3 FH this is Shiloh. The face on your immediate left is Zerubbabel and Spooksville.
Climb on the left of the arête past three FH. DBB.
Narkowicz, 2001.
Climb the blank face to the horizontal break, which is only 16 if you have the reach, then continue up.
Narkowicz, McMahon, 2000.
The next route right up the stepped scoop. Originally done with a piton runner.
Narkowicz, Bennet, McMahon, 2001.
Cause it tastes so good. By which ever way appeals to you climb on to the grassy ledge beneath the black and orange face with 2 bolts. Climb this to crack and then up to the DBB.
There are obviously a few climbs possible in the amphitheatre right of Ice Cream. This next climb is on the pillar on the right and above the amphitheatre. Access either by climbing up to it or scrambling up from the upstream end of the bridge.
Climb the face and thin crack protected by small wires. Requires a degree of commitment so may be beyond most blokes. Worth doing so you can get to the next two climbs which are must do’s if you have an interest in the obscure.
Narkowicz, McMahon, 2000.
20m up hill from Not By Might is a pinnacle with one bolt. Take a wire as well.
Narkowicz 2001.
20 m further up hill and upstream from Treasures in Heaven is another little boulder with 2 bolts. Use your ingenuity for the belay.
Narkowicz 2001.
The 50 m of track from marker 4 contains some excellent climbing combined with easy access. A Prophet’s Reward is visible from the track just before you get to marker 4. The crack and off-width on the left may look appealing but don’t be mislead. Climb the bolts to the right instead. Best access is by scrambling up the track just past the marker.
The only reward you’ll get here is a good pump. Excellent climbing just beware of knocking anything down on to the tourist track and the unsuspecting public. Climb up past 4 FH to a DBB.
Narkowicz 2001.
Allodynia Buttress
On the upstream end of the wooden bridge just after marker 4 is a large buttress. Access by climbing down off the bridge or walking across the gully from the downstream end of the bridge.
The first route on the left (up hill) end of the buttress. Start on the stacked boulders and pull the bulge to easier climbing above. If the stacked boulders are no longer there (or you simply want a little more of a challenge), starting off the ground increases the grade to 28.
Up arete past 2 U-bolts to horizontal break (1/2 friend) then up thin crack past another U-bolt to DBB. Worth doing at 21 by pulling on the first bolt.
Fox, Kearnes, 2002.
Climb up the face past the two eye-bolts to the horizontal break and the up the thin crack passing 2 more eye bolts. Keep going over the bulge past a U bolt to a DBB.
Fox, Kearnes, 1996.
Step off the bridge onto the large hand crack and corner 2m right of Allodynia, or if you really must, go all the way to bottom to start.
Big Blouse Buttress
Access: from the top of the stairs after Allodynia step over the fence and walk over to the she-oaks hanging over the cliff. There is a DBB which raps straight over Big Norm’s Blouse.
Superb, pumpy climbing up the face from the ledge on the left of Big Norm’s Blouse. Climb the crack on the right of the face then clip the first U-bolt and continue left past another 3 U-bolts to a DBB.
DeCesare, Fox, 2002.
Although it’s tempting to only rap to the ledge, and climb the face past 3 FH, you actually get better value if you go all the way to the ground and wack some gear into the crack at the bottom.
Selby, 1999.
The corner 2m to the right of Norm’s Blouse which goes up to a flake/off-width. Actually climbs very nicely.
Climb the twin cracks 4m right of Lady Midnight’s Daughter to the ledge then step right at the FH and over the top.
Not exactly clip or die with 4 FH and a DBB but good and powerful. Continue straight up the arete above Little Gerry’s Knickers.
Narkowicz, 2001.
Across the river (cross on weir) and down stream about 50m are two more climbs.
Look for a flaring crack that blanks out after about five meters, spot the bolt above this and your there. The crack to the bolt, then right to gear, back left to another bolt then up past bulge to DBB.
Bissett, Tierney, 1997.
Just right of R&K is a broken looking face. Climb this to a slot, then over the bulge to same DBB.
Tierney, Bissett, 1997.
The next two climbs are above Allodynia Buttress and best accessed by scrambling up the slope 10m past the top of the stairs after Allodynia.
Another exercise in curiousity value. Visible from the track as pinnacle on the skyline 40m above Allodynia Buttress. 2 FH, the first can be tricky to reach. Single bolt belay on top.
Narkowicz, 2001.
From the top of the stairs an orange buttress with a FH on the face is visible 40 m uphill and slightly upstream. Climb the crack up to the first FH then up to the horizontal break (1.5 cam) then move left to the 2nd FH. DBB.
Narkowicz, 2001.
From the second horizontal break of Glory and Power move right and continue up past a FH. Less contrived than GAP especially if you don’t have the reach for the 2nd bolt.
Fox, DeCesare, Bissett, 2002.
Line of four left trending eye-bolts visible 10m up the hill when standing at marker 5.
Johnson, Sam, 1996.
Excellent climbing and a great discovery by young Alex. At marker 5 turn and look downstream at the river. You will see 3 FH on the edge of a pinnacle 20m away. Scramble down to the base then climb up past 3 FH and a 3 cam. DBB.
Wilson, 2001.
30m past marker 5 if look up between the boulders you will see an orange face with 3 FH on it. Best access is to scramble up 10m back. DBB.
Narkowicz, 2001.
Sound’s like some kind of IUD. 150m past marker 6 there is a lump of rock very close to the track. On the right side is 3 FH. The first FH can be clipped by climbing the ledge on the left. Heck so can the second. Worth doing if you’re there. DBB.
Narkowicz, 2001.
At marker 9 head up hill for 40m. The face with 1 FH is just visible from the track. Climb past FH to thin crack.
Narkowicz, 2001.
The Gallows
Access: 50m past marker 10, just before the track steepens to go up the switch back, jump over the fence and go down to the river. From here walk upstream for 100m. Hangman’s Noose is the very obvious prow.
Face on left of cliff.
Gerry Narkowicz, Mick Ling, 3 Dec 1983.
Up over the roof past 4 FH being careful not to impale yourself on the 3rd one. DBB way over the back.
Matthew Mann, 2002.
Either traverse in from the left or the right or go straight up it the river is down. The face with 4 FH 3m right of Hangman’s Noose, meeting it at the same DBB.
Narkowicz, 2002.
Up the blocky chimney and then up the left hand crack.
Mick Ling et al 1983.
Same start as Reprieve but take the right hand finger crack.
Narkowicz 1984.
The hand crack 3m right of The Gallows.
Narkowicz 1983.
Arete/Pillar on the far RH side of the buttress just right of Waiting to be Blown Away. Classic arête climbing with a couple of "Fridge Lifting" moves in the middle. At the fourth bolt there is the option of moving right and turning the arête into a layback. Optional wire for the last move over the top. Rap Chains at the top.
Ian Ferrier 13 Nov 2007.
Second Basin Terrace
10m downstream from marker 14. Jump over the fence and you should see some DBB on the edge of the tier 2m below. Rap off these to the ledge 10m below.
From the main ledge go left on to the grassy ledge and then climb the thin corner.
Narkowicz, 2001.
Climb the sharp arete with 3 FH to the DBB.
Narkowicz, 2001.
Excellent climbing up the bolted corner then traverse right to finish up the overlap and crack passing more iron mongery and a fixed wire.
Narkowicz, 2001.
Improbable climbing up the blunt arete past 4 FH. Worth pre-clipping the first one. Hard to avoid moving right in places but worthwhile if you can.
Narkowicz, 2001.
The thin seam up to the crack 2m right of RYC.
Fisher, 2001.
The Black Face
There are lots of ways to get to this face which has got some of the longest and most enjoyable climbs in the South Esk. The quickest way is to park at Duck Reach and walk back down the river on the track till you get to marker 15. 60 steps down river from there you should see a tree with a chain around it (provided some well meaning idiot hasn’t removed it). Alternatively you can walk up from the First Basin and 60 steps past marker 14 see the same tree. Or if you want to be different you can walk in from the Denison Grove car park. This has the advantage of taking you past the Retirement Village cliff. Abseil from the tree to the base of the cliff which is 35m. There are 2 rap stations on the ledge 10m down if you don’t have an extra rope.
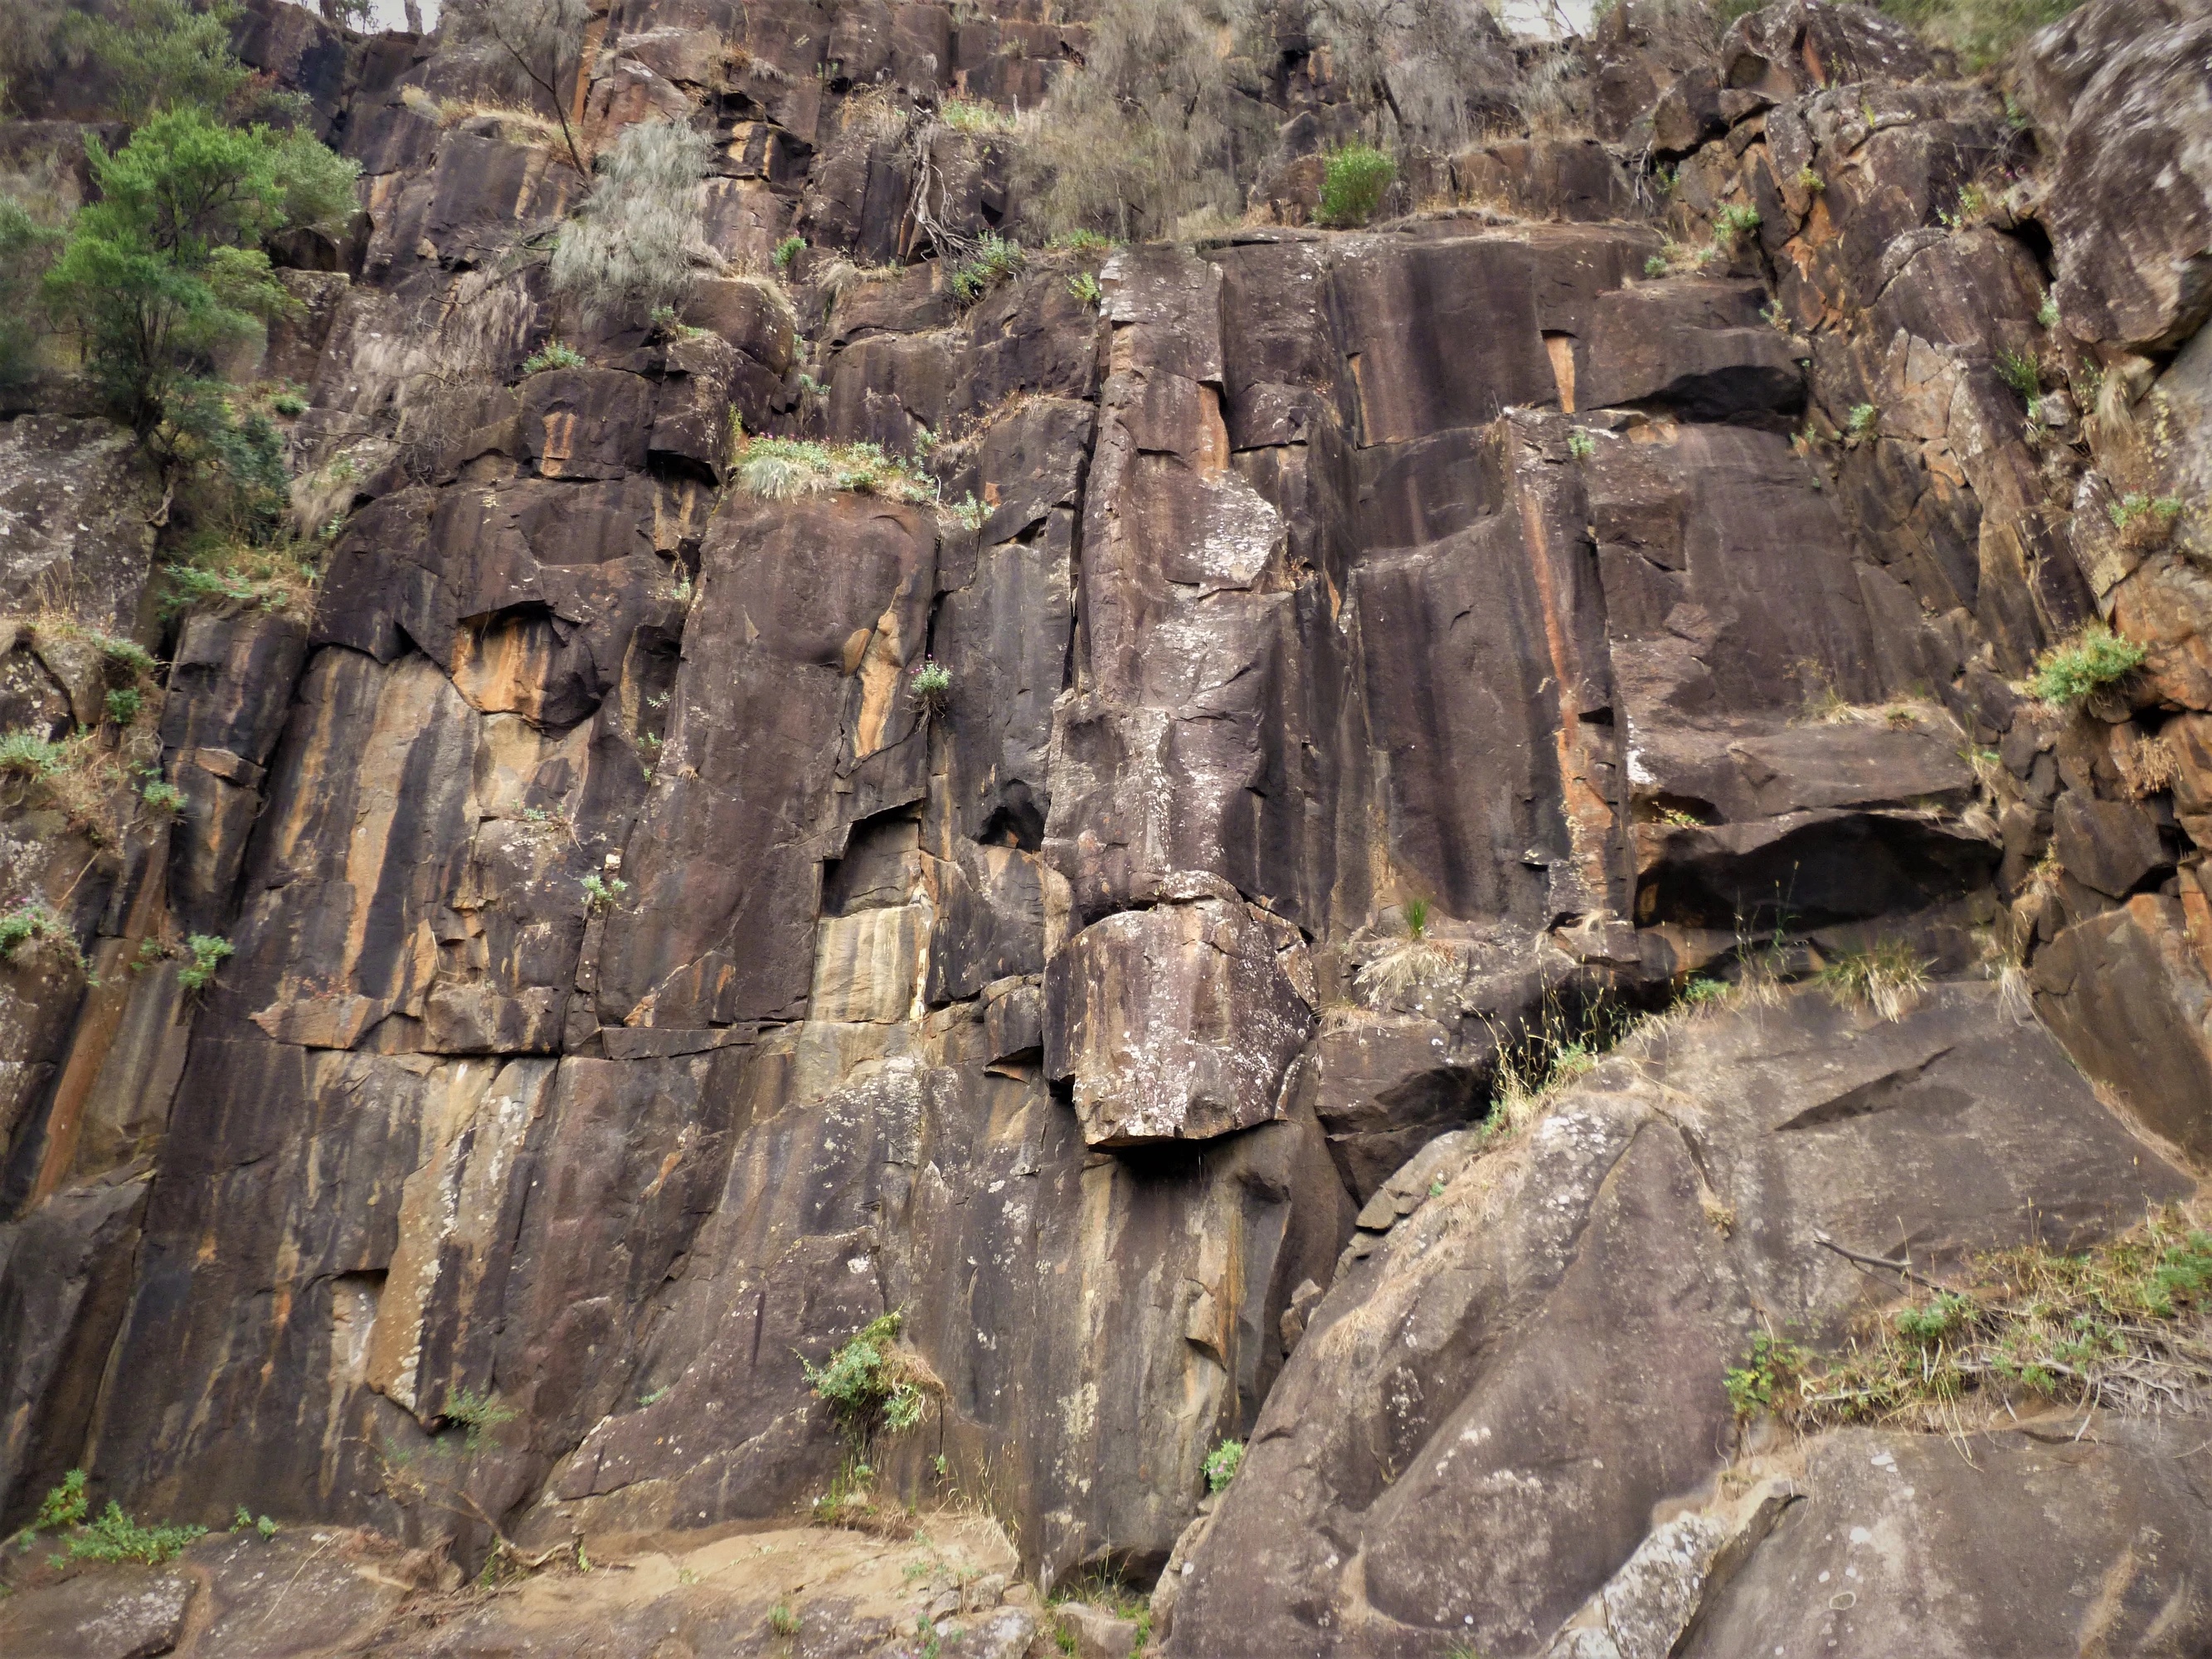
Topo: theCrag contributors, CC BY-NC-SA 3.0, theCrag
Downstream facing corner in the middle of the main face.
J. Fantini & R. McMahon, 1981 · From: theCrag
If you rapped in from the downstream rap station you would have passed directly over this climb. Scramble up slab to broken crack then move left to slab. Up past FH to off-finger crack in the corner and up to DBB. Scramble up right on grassy ledges then climb the crack which leads back to the rap tree.
Hyland, Tristram, 2001.
J. Fantini & I. Thomas
The same start and the same finish as CTTTM. Up slab to broken crack but then blast straight up thin twin cracks to join CTTTM at the off-finger crack.
DeCesare, Fox, 2002.
Once again start up the slab as for Cop that to the Max but continue right to the thin corner with 5 FH.
Fox, DeCesare, Tiz, 2002.
Start 3m to the right of Cop that to the Max. Up downstream facing corner past 2 FH then continue up broken crack system past 5 more FH to DBB.
Fox, DeCesare, Tiz, 2002.
Retirement Village
From the carpark at the top of Denison Grove walk down the path to the Duck Reach track. After about 200m you should see a big cairn on your right. Head across to this and then continue down to the pipeline. Walk along this for 20m and you will be at the top of the Retirement Village.
The obvious off-width with a hidden finger crack on the inside. Luckily no fist jamming is required. Up this to the ledge and then continue up thin crack and face to DBB.
The face 2m right of Dementia. Up past 3 FH and some cams to a DBB.
Fox, DeCesare and Nichols, 2002.
The hand crack to the ledge and DBB
Up steep face then on to slab above. 3 U-bolts to a DBB.