
Great Tier
 15 min
 Morning sun
 Broken dolerite cracks and faces up to 100m
Introduction
Great Tier is the big wall immediately right of Step Tier. The routes here are of good quality and the approach is straight forward. Great Tier has the largest number of grade 14 to 18 trad routes of any of the crags on the Organ Pipes. This crag has three sections; Zoloft Wall, Great Tier main wall and the Lower Tier.
Zoloft Wall is located around the prow at the left hand end of Great Tier main wall. Routes here start mid-way up the cliff and are accessed in most cases by abseiling in from above. The longer Melancholy Mania is accessed from below by traversing around the prow from the left hand end of the Great Tier access ramp.
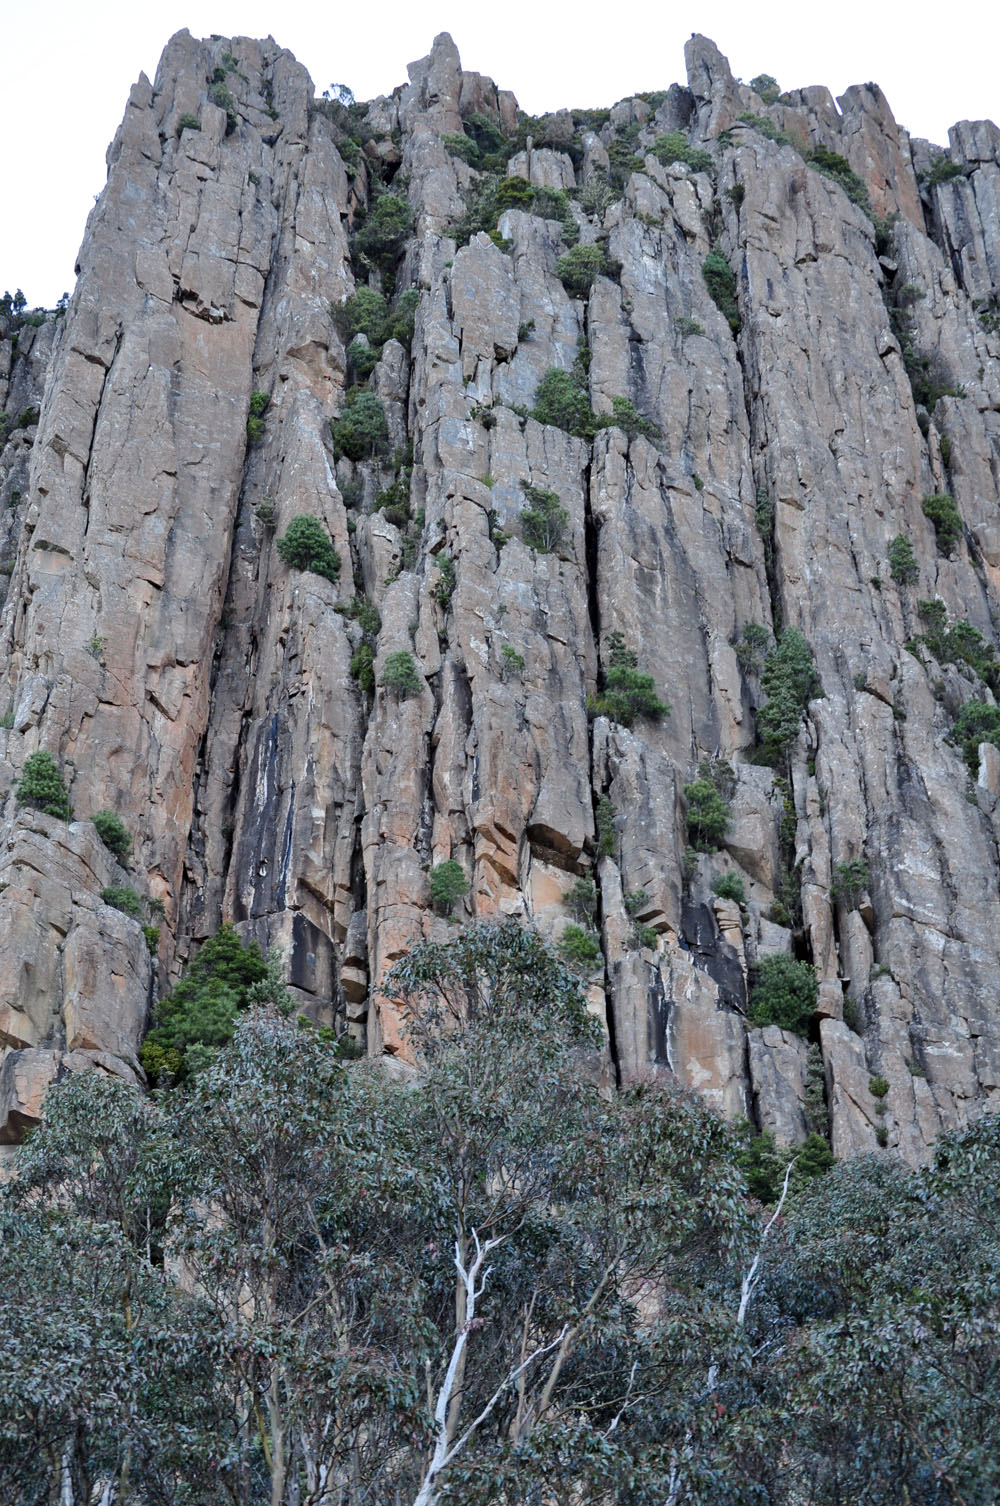
The Great Tier main wall is immediately right of the prow and faces the Organ Pipes Track. The majority of the routes on Great Tier are found here and all start from a rising access ramp accessed from the right hand end. Towards the left hand end is the long chimney-corner of Nefertiti, while in the middle of the wall a group of three major crack lines are located; Slow Combustion, Doldrums and Roaring Forties. Near the right hand end, Blue Meridian ascends a clean face with conspicuous white scabs.
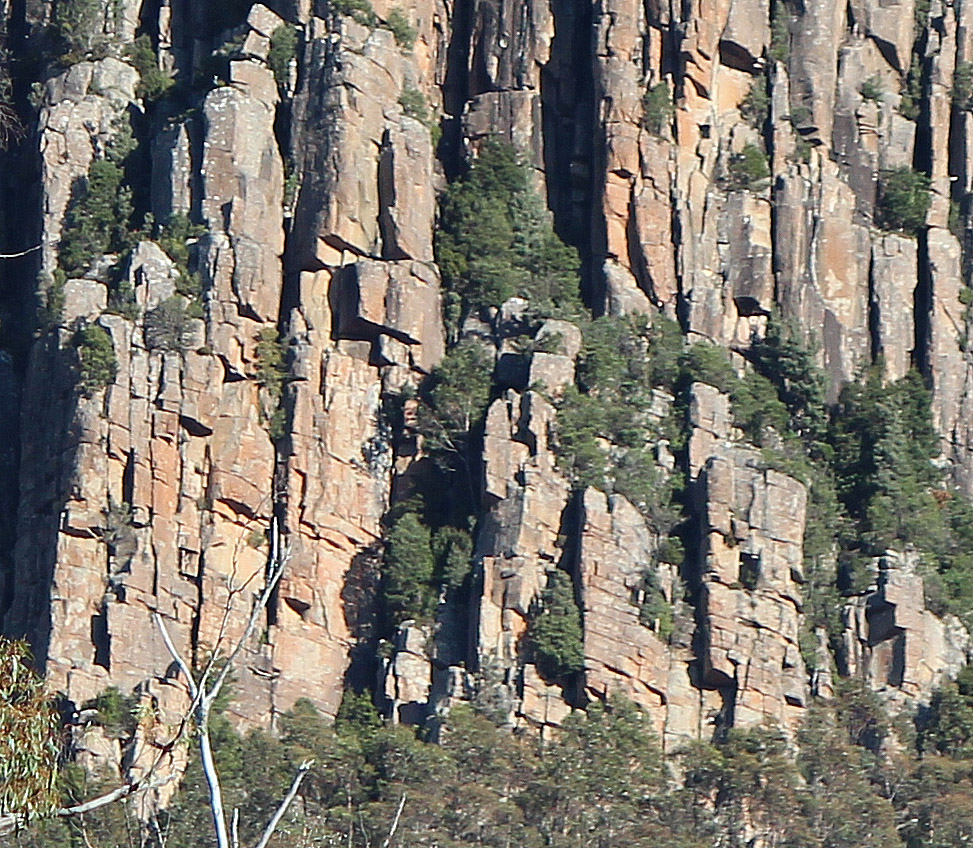
The Lower Tier is a subsidiary cliff directly below the Great Tier main wall. Originally a number of routes on the main wall had an initial pitch leading up to the access ramp, but with a resurgence in vegetation some routes are now impassable. However, the area has seen a renaissance of sorts with the creation of a number of quality new routes. The track that runs left under the base of the cliff towards Step Tier provides access to these routes.
Access
For Zoloft Wall, walk down from the summit to the top of cliffs immediately left of Teardrop Gully to access the climbs by abseil.
For Great Tier main wall and the Lower Tier, walk along the Organ Pipes track to the signposted track to Great Tier. Head directly up this track past the Central Buttress track junction to the cliff base and another track junction. To access routes on Great Tier main wall take the right hand fork to meet a short gully below the right hand end of the access ramp. Scramble up the gully for 3m to access the ramp proper.
To access routes on the Lower Tier take the left hand fork that leads towards Step Tier.
Descent:
There are several rap stations on Great Tier main wall that provide quick and convenient egress.
The Suicide Sadness rap station (1 x 58m) provides descent for routes at the left hand end of Great Tier main wall. Clouds of Obsession has a rap station at the top of the 1st pitch (1 x 30m) and Nefertiti has one at the top of the 1st pitch (1 x 40m). The Slow Combustion rap station (1 x 50m) and the Schizophrenic rap station (1 x 25m; 1 x 40m) provide egress from routes in middle of Great Tier main wall. A rap route near the right hand end descends Blue Meridian (2 x 45m).
On the Lower Tier, rap stations exist at top of Skyfall (1 x 33m to ledge, or 1 x 40m to the ground) and Kabling (1 x 25m).
Zoloft Wall
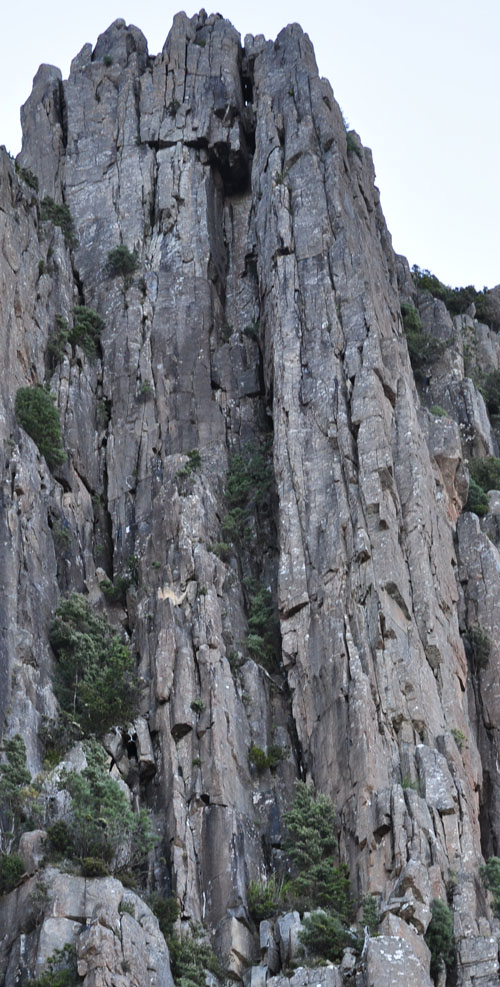
Zoloft Wall is located at the top of the cliffs between the end of Step Tier and the prow of Great Tier and is best approached from kunanyi/Mt Wellington summit. Locating the cliff from the top is tricky. From the summit, head down, then right along the cliffline towards the top of Teardrop Gully near Ano's Sojourn. Descend the ridge below staying left of Teardrop Gully, deviating to avoid tricky downclimbing, to emerge near the top of Sheeza and the nearby routes in Teardrop Gully. Rap in left of here from sling anchors.
Zoloft Wall
Best done on a balmy summer's day. Rap down the line off sling anchors to access the start of the route (50m). Climb the corner 3m right of the Explorer line to a ledge at 8m where Zoloft starts. Up the crack on the left (also used by Zoloft) for 14m to a large sloping ledge. Move left around the corner (Zoloft goes straight up here) and follow the thin line up the face to the top.
P. Robinson, K. Robinson, Apr 2000.
The wide crack system just right of Static Journey. Abseil 25m down to the top ledge on Static Journey/Zoloft. Climb to the top of the crack and move left to the offwidth with chockstones.
P. Robinson, K. Robinson, Dec 2000.
Excellent exposure towards the top. Varied climbing on the face and cracks left of the upper pitches of Melancholy Mania. Access by abseil (40m) to a ledge at the base of line. Climb the finger crack/face off the left of the initial ledge. Up to large sloping ledge below the roof/overlap. Climb the blocky crack on the left of the hanging nose/arête until one can move right into the crack on the nose. Up through the steep section following hand cracks up the middle right of the hanging face.
H. Jackson, M. Jackson, Jan 1999.
Terrific climbing. Abseil 25m to the upper of two ledges in common with Zoloft and Static Journey. From the right hand side of the ledge and right of the hanging arête/nose, climb the steep wall (crux) to the overhang (1m left of Melancholy Mania). Follow the hand crack up the right of the hanging headwall past a flake. Up the wall on the right to the top.
P. Robinson, K. Robinson, Dec 2000.
The next route originally started as for Peacepipe on Step Tier. The overgrown first pitch is now avoided and substituted by climbing the first 8m of Janzoon then traversing left around the prow via ledges to access the climb.
K. Bischoff, J. Barnett, A. Wing, Mar 1981. Variant 2a: C. Allen, D. James, Jan 2012.
Great Tier Main Wall: Suicide Sadness Area
The routes on Great Tier main wall all start from the access ramp. To access these routes, take the final right hand fork of the access track and scramble up the gully for 3m to the ramp proper. Routes in the Suicide Sadness area start at the left hand end of the ramp immediately beyond the big step midway along the ramp. The first route, Tsing Gai is depicted on the Zoloft Wall topo, whilst most of the remaining routes are depicted in the topo below.
K. Bischoff, P. Robinson, Mar 1981. FFA: S. Parsons, P. Bigg, Apr 1981.
Great Tier Main Wall
I. Lewis, B. Kennedy, Jan 1974.
Pete Steane, D. Fife, May 1996.
M. Law, S. Parsons, D. Bowman, 1978.
A difficult variant finish to Suicide Sadness. Instead of climbing through the roof on Suicide Sadness, under-cling out right below the roof and climb the seam above to access the rap station as for Suicide Sadness.
K. Robinson, P. Robinson, Apr 2000.
J. Moore, P. Stranger, Feb 1968.
(1) N. Deka, et al. (2) D. Stephenson, J. Otlowski, Apr 1989.
V. Kennedy, J. Moore, Jan 1968.
J. Nermut, T. McKenny, D. Humphries, Dec 2010.
P. Robinson, B. Rathbone, Nov 1979.
H. Jackson, 1998.
Pitches 1 and 2: T. McKenny, A. Beech, Dec 2011, Pitch 3: I. Snape, T. McKenny, Jan 2012.
J. Moore, M. Tillema, May 1968.
Great Tier Main Wall: Blue Meridian Area
Routes on Great Tier main wall all start from the access ramp. Routes in the Blue Meridian area start right of the big step midway along the ramp.
Jon Nermut, Dave Humphries (alt), Jan 2012.
C. E. Rathbone, P. Robinson, 1977.
Basil Rathbone, P. Robinson, Oct 1981.
On the small wall at the top of Great Tier, above Blue Meridian and Fine Time. Climb the crack system on the wall left of the scrubby corner.
D. Fife, P. Mackenzie, 1983.
G. Cooper, Pete Steane, Jan 1985.
K. Robinson, P. Robinson, April 2016.
D. Stephenson, N. Deka, 1988.
Just to the right of the climb up to the ramp you can see the bolted arete/prow of Shrapnel. This is covered in the South Central Buttress section.
The Lower Tier
To access the Lower Tier, take the signposted track up to Great Tier. Where the track meets the cliff take the left fork that is signposted to Step Tier.
The following four routes (and a project) start 20m along this track from the Skyfall ledge, which can be accessed either by climbing the short bolted wall (7m grade 14, 4Þ, DBB, possibly the easiest and shortest sports route on the Pipes!), starting directly off the track, or by a vegetated scramble / climb up the corner system on the right side of the short wall.
To descend from the Lower Tier climbs, walk off right down the ramp or rap off where rap stations are provided.
The Lower Tier
I. Lewis, B. Kennedy, Jan 1974.
Project
The wall between Janzoon Direct and Thirsty Thirties.
Climb up the the short, thin crack in the middle of the wall for a few metres (crux). Bridge up the easy chimney above to belay on the ledge on the right. Descent as for Skyfall (33m to ledge, or 40m to ground).
D. Stephenson, D. Bruce, Apr 1989.
Right of Thirsty Thirties is a rearing, overhanging wall bristling with rooves. Bold, steep and sustained, this route finishes on the ledge at the start of pitch 2 of Janzoon.
Starting at the DBB 2m right of the Thirsty Thirties crack, climb up and right until it is possible to hand traverse back left under the roofs, avoiding the booming flake on the wall above, to an overhanging layback crack. Layback through the roof, and follow the steep incipient line up with spaced, small protection to a large open corner below a massive roof. Up the left hand arête to an exhilarating hand traverse back right under the roof to a ledge below another open book corner. Thin bridging up the corner to a runner placement and welcome jugs. Finish up and left to the top of the wall and DBB. Rap: 33m to ledge, or 40m to ground, or continue on Janzoon.
T. McKenny, P. Robinson, April 2013.
Excellent steep climbing up the wall and through the roof right of Skyfall. From the DBB, traverse right and climb hidden wall at far right-hand end of Skyfall ledge, then blast up the middle of the face and through the powerful roof passing a DBB to gain a welcome rest ledge.
Ponder your position, then step left over sickening void and onto the thrilling hanging arête. Up to DBB.
If you don't fancy the intimidating step into the final arête, finishing at the DBB above the roof makes a shorter more sustained route (Solace, 20m 22).
O Gervasoni, T McKenny, May 2013.
To the right of the short bolted access wall is a heavily vegetated gully system. This is the location of the now unclimbable direct starts to Nefertiti, Passiona and the lost climb of Geriatric. Right of the next low point, about 10m left from the turn off from the Great Tier track, is a clean grey wall with several excellent short routes, all in close proximity.
A subtle mix of old school and new wave climbing, this route is much more entertaining than it looks. Start at the right facing corner in the cleared space behind the copse of trees, at the left-hand end of the wall. Climb the crack, step left at the top, then straight up the left hand weakness to the top of an orange fin of rock and the indecisions of Procrastination Wall. When you have made your mind up, climb up and slightly right (crux) to the corner above. Finish over the block, topping out on the ramp to belay near some horizontally growing vegetation. Walk off down the ramp.
T. McKenny, O. Gervasoni, A. Beech, Apr. 2013
The wall and arête right of Procrastination and just left of Kabling, gives an enjoyable steep climb. Start midway between the two. Boulder the thin face, then climb the shallow corner and finger cracks directly up to the hakea bush. Climb the overhanging arête, moving right on to the wall near the top to the DBB. Rap or lower off from here (20m).
O. Gervasoni, P. Robinson, Feb 2017.
Well protected with a pulse-raising overhang. Micro cams are useful. Start at the wall beneath the prominent overhang and boulder up past the bolt, trending left to a ledge. Climb the corner to the roof and swing out right and up through the overhang to a welcome rest. Follow the slabby face above to a lower-off (20m).
O. Gervasoni, B. Ikin, Mar 2012.
A fitting companion line to Kabling with potential for learning. Start a metre right of Kabling. Climb up and over to large block and take a direct line up the steep wall past 2 bolts and straight on up through the roof to the small tea tree. Step left and finish up the right-hand edge of the wall to the DBB. Rap or lower off from here (20m).
T. McKenny and B. Bull, Feb 2017.
Unearthed, this now conspicuous crack is found 2m right of Kabling in the same cleared alcove. Climb the classic hand crack to a ledge at 5m. Continue up the hand crack to where it steepens, then up the corner to exit right behind the Zephyr pillar. Chimney up behind the pillar to DBB. Rap off (24m) down the gully or exit via the ramp.
P. Robinson, K. Robinson, Sep 2014.
Like all the other Trump Towers, all the action and grief is at the very top. Follows the arête and tower right of Elementary Jam. Scramble up the blocks at the bottom then follow the arête past bolts straight up to the top and DBB. Rap off bolts on the wall behind the finish (24m).
B. Bull and T. McKenny, B. Maddison, S. Scott, Valentines Day, Feb 2017.
Originally climbed as the first pitch to Doldrums, this pitch is worthy of inclusion in its own right now it has had a clean and tidy up. Start directly above the fork in the track where it first meets the cliff. Climb to the top of the blocks, then up the line in the steep face on small holds. Up between the two rocks, chimney up behind the pillar to DBB. Rap off (24m) down the gully or walk off down the ramp. The lead is unfortunately marred now due to the close proximity of bolts on Trump Tower.
Chris (Basil) Rathbone, P. Robinson, R. Rolls, 1979.
Worthwhile. After a steep start, this route remains close to the arête the whole way. Start 1m right of Zephyr and left of the steep gully. Climb the bulge a metre right of Zephyr to a ledge. Pass the first rooflet on the right and the next rooflet to the left. Move back right, continue up the arête and onto a ledge. Finish directly up the clean arête keeping well away from the gully. At the top, scramble up for 3m to belay from tea trees on the ramp. Descend via the ramp.
P. Robinson, C. (Basil) Rathbone, Jan. 2017.
Where the Great Tier track meets the cliff, take the right hand fork for 5m to the base of a short wall. Climb the wall to a ledge, then up a short face and directly up the steep buttress (crux) on small holds, RPs handy, to a mantle and easier ground. The route tops out directly under the start of Schizophrenic. Walk off via the ramp.
P. Robinson, Chris (Basil) Rathbone, Sep 2013.