
Teardrop Gully
 15 min down from the summit
 Not much sun
 Single pitch dolerite buttresses, quite a few sport routes
Introduction
Teardrop Gully has some good cragging in the shade, on several distinct buttresses. The first bolted routes on the Pipes were done here in the early nineties, and the area has continued to produce some good sport and mixed routes. The cliffs are described roughly L to R, which is from the bottom of the gully to the top.
Access
Teardrop Gully comprises two sections, the gully below Step Tier (Lower Teardrop Gully), and the gully above Step Tier (Upper Teardrop Gully). Access to most of the Lower Teardrop Gully has traditionally been from the bottom, scrambling up to the left of Summertime Buttress. However, this is now heavily vegetated and involves considerable bush bashing, so access is better gained by climbing a bit past the anchors of Sleeping Dogs/Gone Viral on Summertime buttress.
Currently the best way to access climbs in Upper Teardrop Gully is from the summit carpark. From the Lookout Shelter head down and across the screes (see topo in the guide Introduction) heading in the general direction of the northern tip of Bruny Island. After several hundred metres look for the rusty pipe and cairn that mark the top of the gully (GPS MTW180). Alternatively head down the fence line from the television tower, and then head towards Constitution Dock from the bottom of the fence. Either way finding the top of the gully can be difficult if you've never been there. The most common mistake is to find yourself too far south at the top of Avalanche Couloir, which looks similar from above.
Lower Teardrop Gully
This section offers some quality routes on steep buttresses.
Access to the lower gully is by heading straight up the Bulging Buttress track towards Cracked Pepper and branching off right where the path splits, traversing through to the grassy gully below a bit of a waterfall. For Farewell to Arms etc, the best approach is climb one of the routes on Summertime Buttress that lead directly to the base of FTA.
Descent: abseil (tape) off blocks on top of the buttresses. Abseiling back down the waterfall and gully line itself is not recommended nor is down climbing the often wet and slippery rocks.
Summertime Buttress
The very first buttress on the left at the base of the gully, a series of short walls on either side of the small waterfall. A bit cold and dank in winter but comes into its own on a sunny summer’s morning.
The buttress to the far left, past a deep chimney. Steep but fun climbing on good rock up the nose of the buttress, staying left at the top. Rap station (12m).
T. McKenny and B. Bull, B. Maddison, Jan, 2017.
On the square, separate wall to the right of the Bentwood. Start low down on the left and climb the left hand side of the wall with good gear in the horizontals. Move right at the top to the DBB. Rap:12m.
D. Humphries, J. Nermut, Mar 2014.
Good rock, good gear and good moves. Takes the right-hand arête of the wall to DBB. Rap: 11m.
T. McKenny, B. Maddison and B. Bull, Jan 2015.
Bridge up the clean corner to the R of Dave's Wall. A neat little climb with good protection. Rap off from DBB on left (12m).
J. Nermut, Mar, 2014
Steep climbing on good rock straight up the rounded arête, 3m right of Jon's Crack. Rap off from DBB 2m back (14m).
B. Bull and T. McKenny, I. Crossland, Dec. 2016
Neat! The steep line to the right of Sleeping Dogs. Rap :14m.
B. Maddison, B. Bull and T. McKenny, Jan, 2017.
On the right hand side of the gully, opposite Gone Viral. Classy climbing with a sting in the tail.
B. Maddison, T. McKenny, S. Scott and B. Bull, Jan, 2017.
Farewell To Arms Buttress (LH Side)
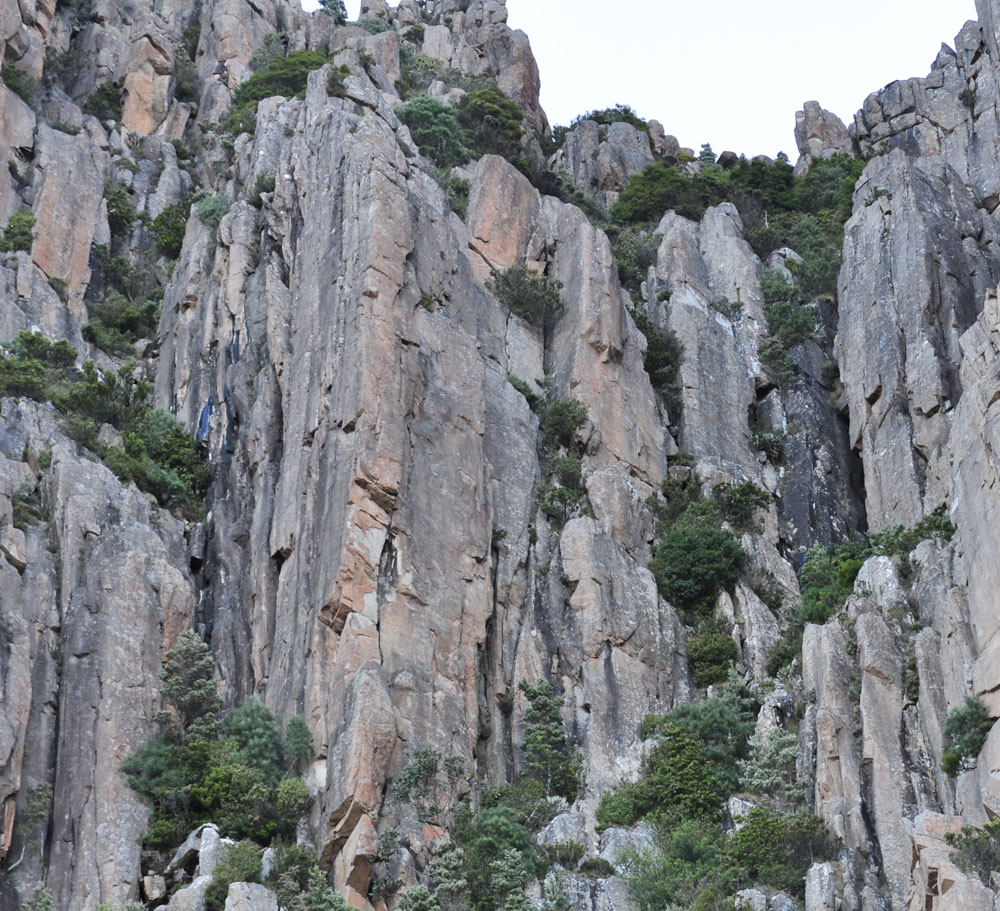
Farewell To Arms Buttress
Two options for access: 1) scramble 60m up the vegetated ledges to left of Summertime Buttress to the first buttress on the left-hand side of Teardrop Gully - a bit of a bash! 2) A better option is to climb Sleeping Dogs and continue past the anchors for 3m to the base of Into The Fire.
Climbs on the left-hand side of the gully are described from bottom to top (left to right).
The chimney to the left of Farewell To Arms. Climb the tight chimney.
S. Brennan, K. Bischoff, Apr 1981.
The obvious crack system on the south face of the first buttress, clearly visible from the track. Start at the base of the buttress, between Out Of The Frying Pan and Into The Fire. Climb the sustained, flared cracks up the face to belay on a ledge just below the top of the buttress. Tape abseil to descend.
D. Stephenson, N. Deka, Feb 1989.
S. Parsons, K. Bischoff, Apr 1981.
The crack right of Into The Fire. Follow the chimney to start with, and the corner at the top.
K. Bischoff, S. Parsons, Apr 1981.
Thought Insertion Buttress (LH Side)
The enjoyable crack on the south face of the second buttress up the gully. The start can be done two ways. The crack on the left is probably the original start and is at least 20, despite the easier line existing closer to the right arête. The right-hand line has a very suspect flake on it at the roof though – beware. Finish up the crack line.
P. Bigg, S. Parsons, D. Fife, Jan 1982.
It is not clear where this is! The original description says to climb the obvious crack around the arête right of Thought Insertion.
I. Montoya, 1988.
Worth a look. The crack around the corner to the right of Thought Insertion.
S. Parsons, P. Bigg, D. Fife, Jan 1982.
A fun route that follows the finger crack 2m right of All Those Madmen. Climb the crack, trending right at half height and through the bulge where the crack straightens (crux).
S. Parsons, M. Briggs, Jan 1982.
Wootang Ledge (RH Side)
The next five routes start from a wide vegetated ledge 50m up the right-hand side of Teardrop Gully and are described left to right.
Rap in to Upper Teardrop Gully; walk down past all the routes there, then to the left of the rock pedestal at the top of Step Tier as though going down to the Step Tier abseil chains; but a couple of metres down, around on the back of the pedestal (facing down Teardrop Gully) is another rap station (2 U-bolts); a 50m abseil from here will reach the ledge at the base of Wootang; a 25m abseil will reach the top of Cornered; also, a short abseil reaches the top anchors of Wootang, and then from there a 35m abseil reaches the ledge at the base (a 70m rope doubled over just makes it down for this option).
It is also possible but not advisable to access from the bottom by scrambling up the right-hand side of the gully (steep and slippery, particularly when wet) Definitely worth roping up for.
Descent: Top out or if you access from the bottom each route has a rap station to get back to the ledge, and a 40m abseil from bolts on the ledge (at the base of Wootang) gets you back down to the ground.
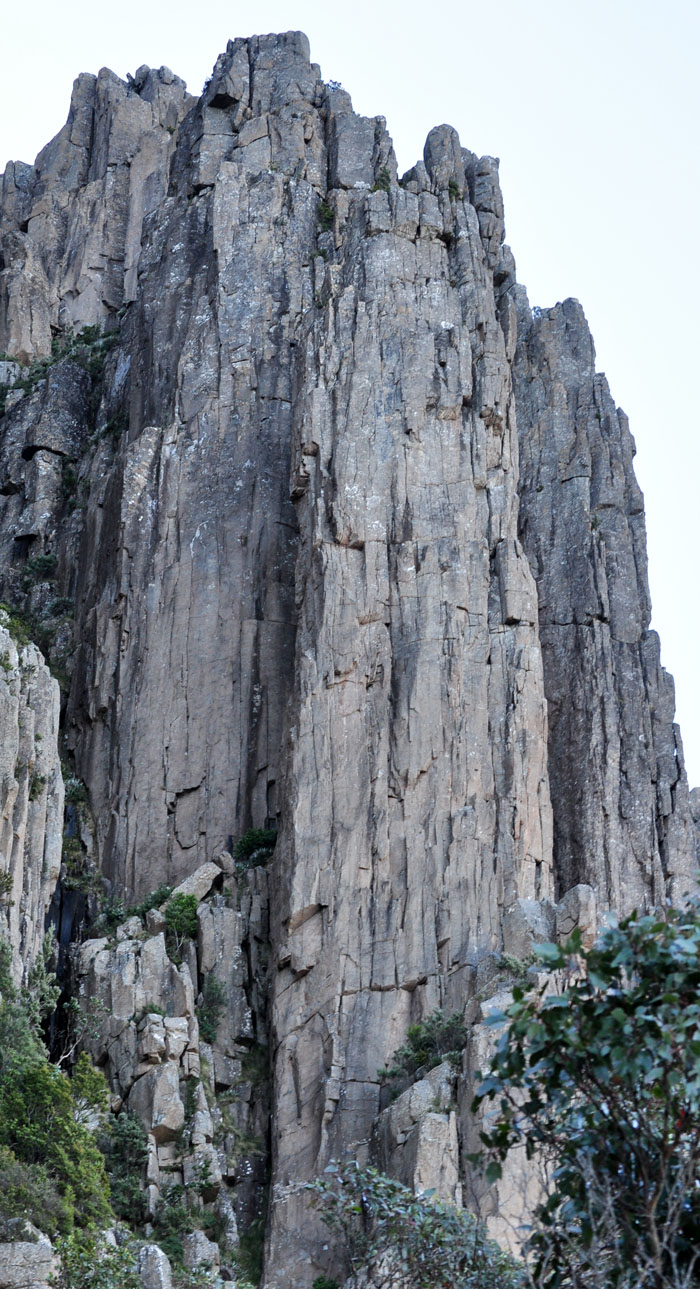
Lower Teardrop RHS
D. McConnell, Jan 2007.
Start approximately 5m left of Wootang. Climb the thin crack line just right of the arête, protected by small to mid-sized cams (some people think these small cams are quite dodgy), then continue up the shallow corner above past 3 FH to a DBB at the ledge.
A. Williams, early 2005.
A dedication to Lois Scarr. Start on the right-hand side of the wide face above the ledge at a DBB. Layaways on the face for the first 10m (crux) lead to a small ledge, continue up the face above to a DBB on the ledge at 35m. A short pitch (18) past one FH provides access to the top DBB if required.
A. Williams, Oct 2002.
The line of bolts to the left of The Colour of Magic. Scramble up the large corner then step right to gain the second bolt. Climb the shallow corner then move right into the thin layaway seam, following this until easier ground leads to the DBB of TCOM.
A. Williams, Jan 2007.
The slightly overhanging arête above the extreme right of the ledge. Climb the initial layaway crack (0.5-3 Camalot), then undercling out right to the first bolt and continue up the arête to DBB.
A. Williams, Nov 2002.
Upper Teardrop Gully
This section is described from top to bottom (left to right). Note: There are still a couple of older routes with glue-in carrots, which usually have large heads and will only take the older RP brackets or sliding wires. These climbs are noted as such in their route description (all other bolted routes have either U-bolts or fixed hangers).
Sunny Side
Start at the thin crack line immediately left of Dag on a Crag. Pleasant climbing just right of the arête.
P. Robinson, A. Beech, S. Cameron, Jan 2010.
Known to have dished out some humiliation in recent times, the grade of this route could be suspect. Be warned. You also need brackets that can fit over carrots with large heads. On left-hand side of gully, at same height as Ano's Sojourn, are a series of broken outcrops. This route ascends highest one, just right of an orange wall. Power up initial section past 2 BRs and move L for a cam placement. Move back right, up ladder, left over bulge and right again, to finish up arête.
M. Perchard, Apr 1992.
Climb the short crack on the northern side of the buttress past a bush to a ledge. Arrange protection high in the corner, but take the face over the diagonal ledge on the left for nicer climbing to the top.
S. Cameron, P. Robinson, A. Beech, Jan 2010.
Dark Side
This area was described in old guides as Teardrop Wall. Access via rap station down and left (facing out) from the top of Ano's Sojourn (15m rap; grade 4 to climb back out - and be wary of loose rock). Avoid the old approach; a short, but tricky down-climb into the head of gully (the scene of a serious accident in 2003).
Descent: Most bolted routes have their own lower-off, otherwise use the rap station just down on the buttress wall to the right of Ano's Sojourn.
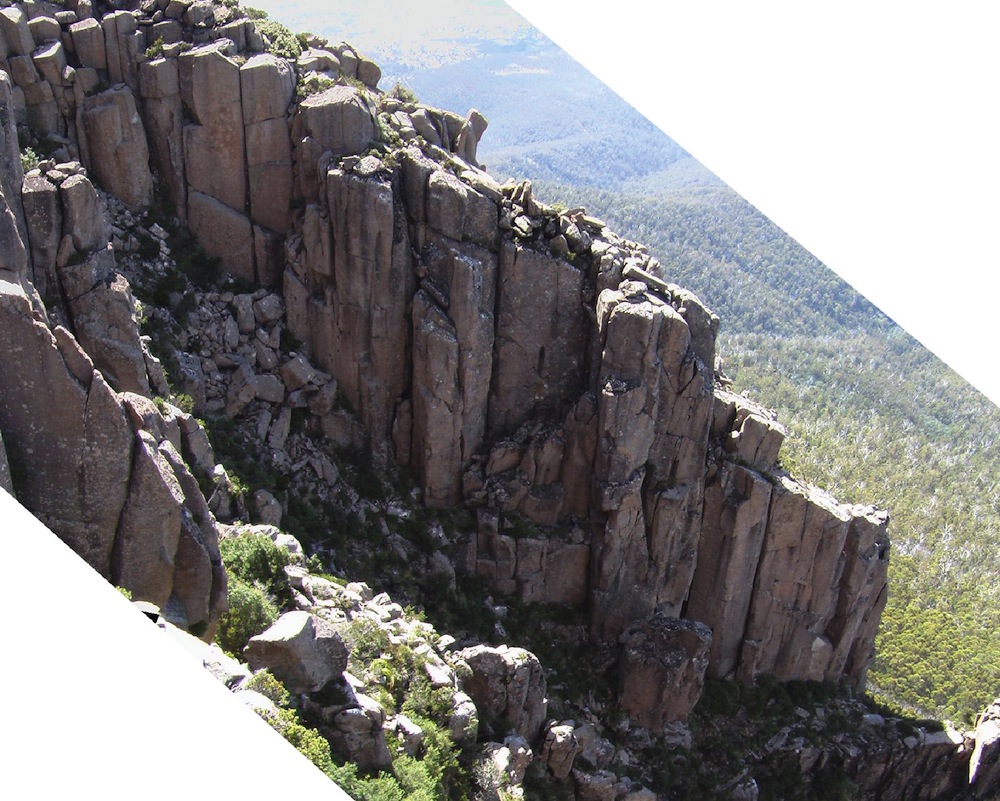
Teardrop Gully
The first climb takes the crack line just up the slope to the left of Ano's Sojourn.
The crack climb to the niche, then awkward and thoughtful climbing to the top.
D. James, D. Rollins, Feb 2010.
An entertaining workout to test your jamming skills. A distinct hand crack on the left-hand side of the gully (looking down) 20m below the top. Jam the straight crack through the overlap to the top.
M. Collie, D. Fife, Apr 1981.
The face 5m left of Turkey Slap, below the abseil bolts.
The project is open to anyone that can finish to the left via the last two bolts.
Dave Humphries
Start about 12m downhill from Ano's Sojourn, 3m left of Turkey Slap. Climb the short off-width on right of pillar, step out right onto wall and climb thin crack to top. Rap off Turkey Slap DBB.
T. McKenny, A. Adams, I. Snape, Feb 2011.
The bolted arête 15m downhill from Ano's Sojourn. Climb face and arête past a low crux to DBB.
D. McConnell, M. McMinn, A. Drenen, Jan 2007.
The crack 2m right from Turkey Slap. Start in the crack, back against a flake, up to the leftwards jag, then to the top of Turkey Slap pinnacle. Extend the DBB from Turkey Slap to belay or easily continue to the top.
C. Lang, M. Roseavear, Nov 2020.
But a big one helps protect the start. Start at short wide crack in a corner left of Sweepings. Up this to a ledge then continue up the steep flake crack. Belay in the back below the blocky chimney. A short and easy pitch leads to the top.
D. Rollins, C. Allen, Dec 2012.
Start 3m to the left and above Suzerain, on a small platform behind Ceci N'est Pas Une Pipe. Up the crack in the wall which becomes a shallow corner, exiting right to finish.
S. Scott, M. Stone, Mar 1981.
Pronounced 'sersi nay parz une peep'. Any the wiser? Pleasant face climbing up the downhill side of the lone chunk of rock in front of Suzerain.
R. Parkyn, Nov 1991.
Start 1m left of Suzerain. Climb the crack to a small roof, undercling and bridge past this, then layback the thin crack above. Step left and finish up the arête.
M. Perchard, Mar 1991.
Sustained and technical, this is the hand crack in the prominent corner towards the right-hand end of the wall. Jam up to and past the overlap on the left wall. Continue up past a recess (crux) to a large ledge. Up the crack on the left to the top.
I. Lewis, L. Closs, Feb 1974.
Don't forget your #4 Camalots. This is the 'classic' fist (10cm) crack that splits the left-hand side of the blank wall, 4m right of Suzerain. Climb it with style and panache to keep your skin intact.
R. Clarke, G. Fisher, Dec 1983.
Another technical and sustained number up the steep wall right of Suzerain. Climb a shallow corner 4m left of SBAPT then move right and up to a balancy mantle on the narrow ledge. Continue thinly up the fridge-like feature (crux), moving left to a flat hold at the last bolt. Finish out right.
M. Perchard, Mar 1992.
Starts and finishes 2m left of Fat Snatcher. Climb the tricky shallow corner/rib to a large sloping ledge. From the left end of this continue to the small ledge above, then up via the face holds to a punchy finish.
O. Prall, Feb 1992.
Better tighten your girth strap. The squeeze chimney 2m left of the Virus.
Unknown. This is possibly the route taken by the final pitch of route Explorer on Step Tier.
More technical dolerite face climbing. Follow the U-bolts up the wall left of Pretty Septic.
R. Parkyn, Nov 1991.
An interesting start. The open book corner that faces down the river, 1m left of Sheeza.
O. Prall, Nov 1991.
A very picturesque route just above Step Tier. Clip the BR (carrot) from the left then follow the arête all the way to the top. Good pro is found in the cracks on the left.
M. Perchard, Nov 1991.