
The Columns
 15 min downhill or 20 min uphill
 Morning sun
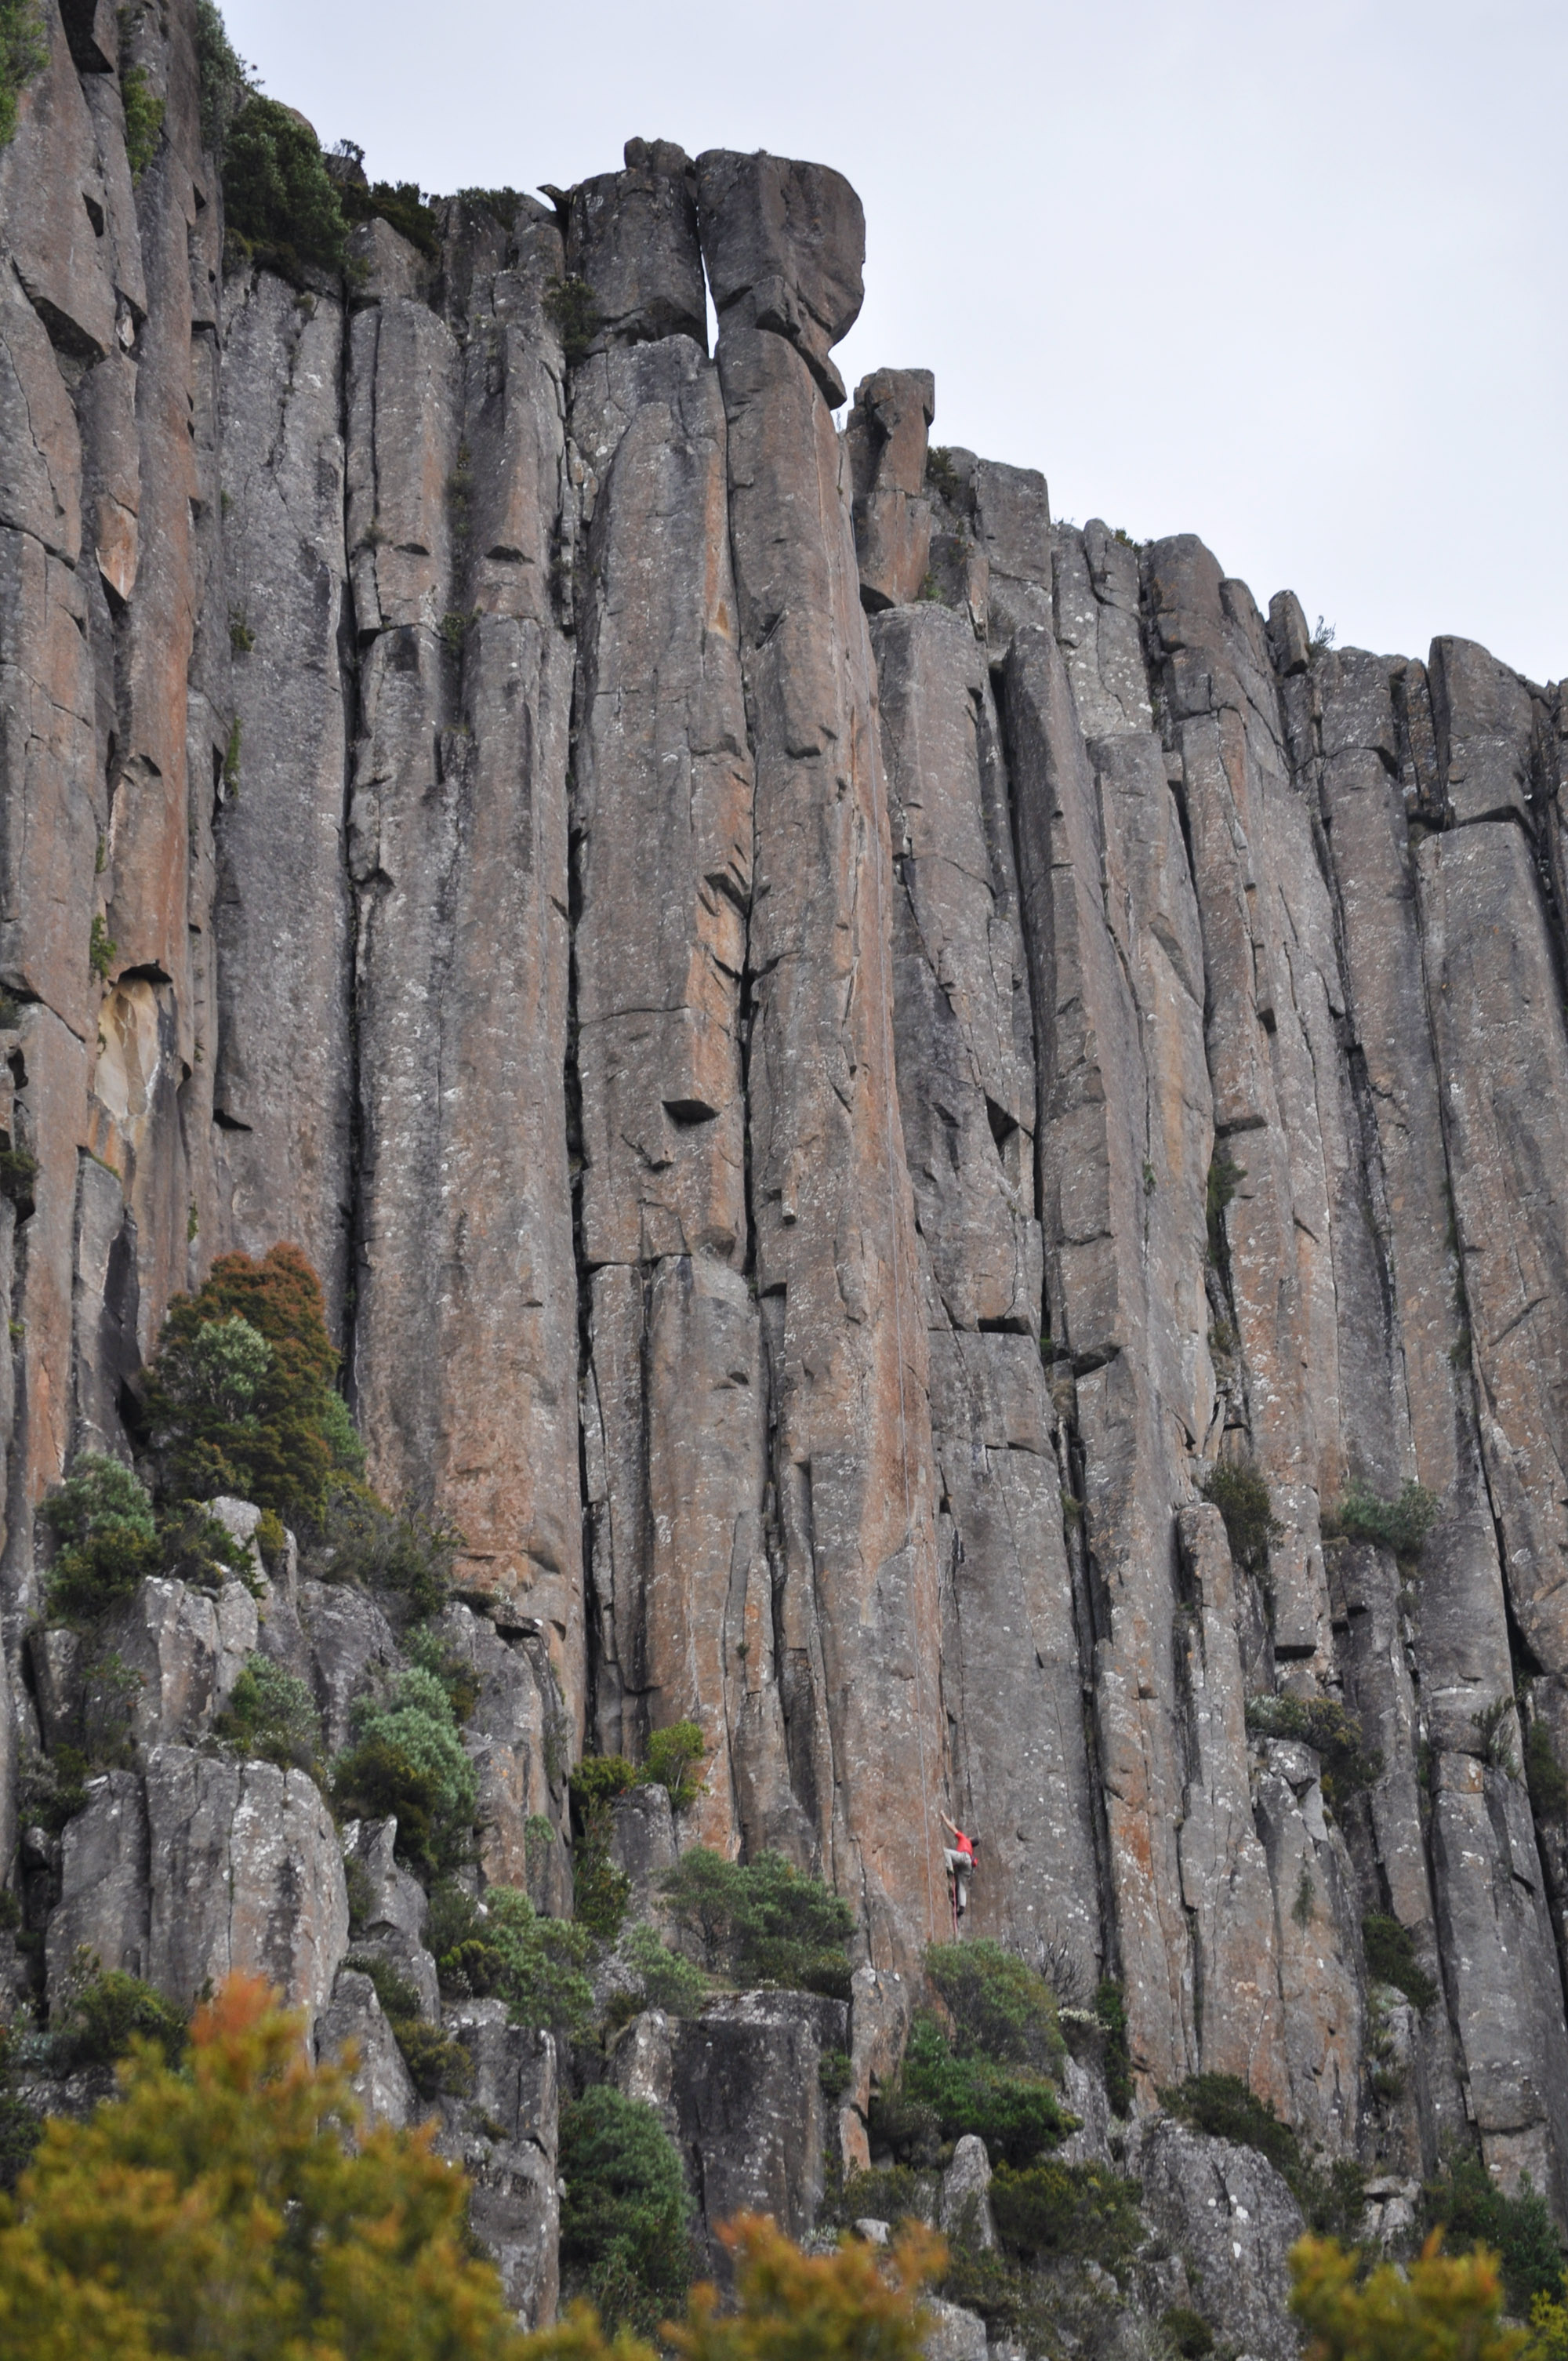
 Spearing dolerite columns, up to 110m high
Introduction
The impressive cirque of columns that starts immediately right of Flange Buttress and ends where it merges with Amphitheatre Ledge. The experience of climbing in the Columns is often character building and sometimes epic! Routes here are steeper, more serious and increasingly 'tradified' than those on nearby Flange Buttress or Northern Buttress. The Shipwreck provides a good vantage point from the base of the cliff for learning the topography of the Columns. Five distinct columns in left to right order aid route finding.
At the left hand end, the deep chimney of Brown Madonna marks the end of Flange Buttress and the start of the Columns. Cairn Column is the first column right of this demarcation zone. The trio of Battlements Column, Split Column and Double Column sit closely together in the centre of the Columns, whilst Cossack Column occupies the head of the cirque at the right hand end.
Access
The Columns can be accessed by either a top-down or a bottom-up approach.
The means of access for routes on Battlements, Split and Cossack Columns is predominantly a top-down approach. To access the top of the Columns drive to the summit. Right of the summit lookout (GPS MTW100), head down to pick up a track with orange markers that descends to the top of the Columns amongst a patch of snow gums (GPS MTW110). For detailed notes on access to individual columns from this waypoint, consult the body of the text.
The means of access for routes on Cairn Column and Double Column, is predominantly a bottom-up approach. To access the base of the Columns drive to the climbers' carpark and follow the track uphill to the Organ Pipes track junction, then continue up either the Northern Buttress track or left and up the Flange Buttress track. For detailed notes on access to individual columns from this point, consult the specific sub-section for each Column in the text below.
The Columns Overview
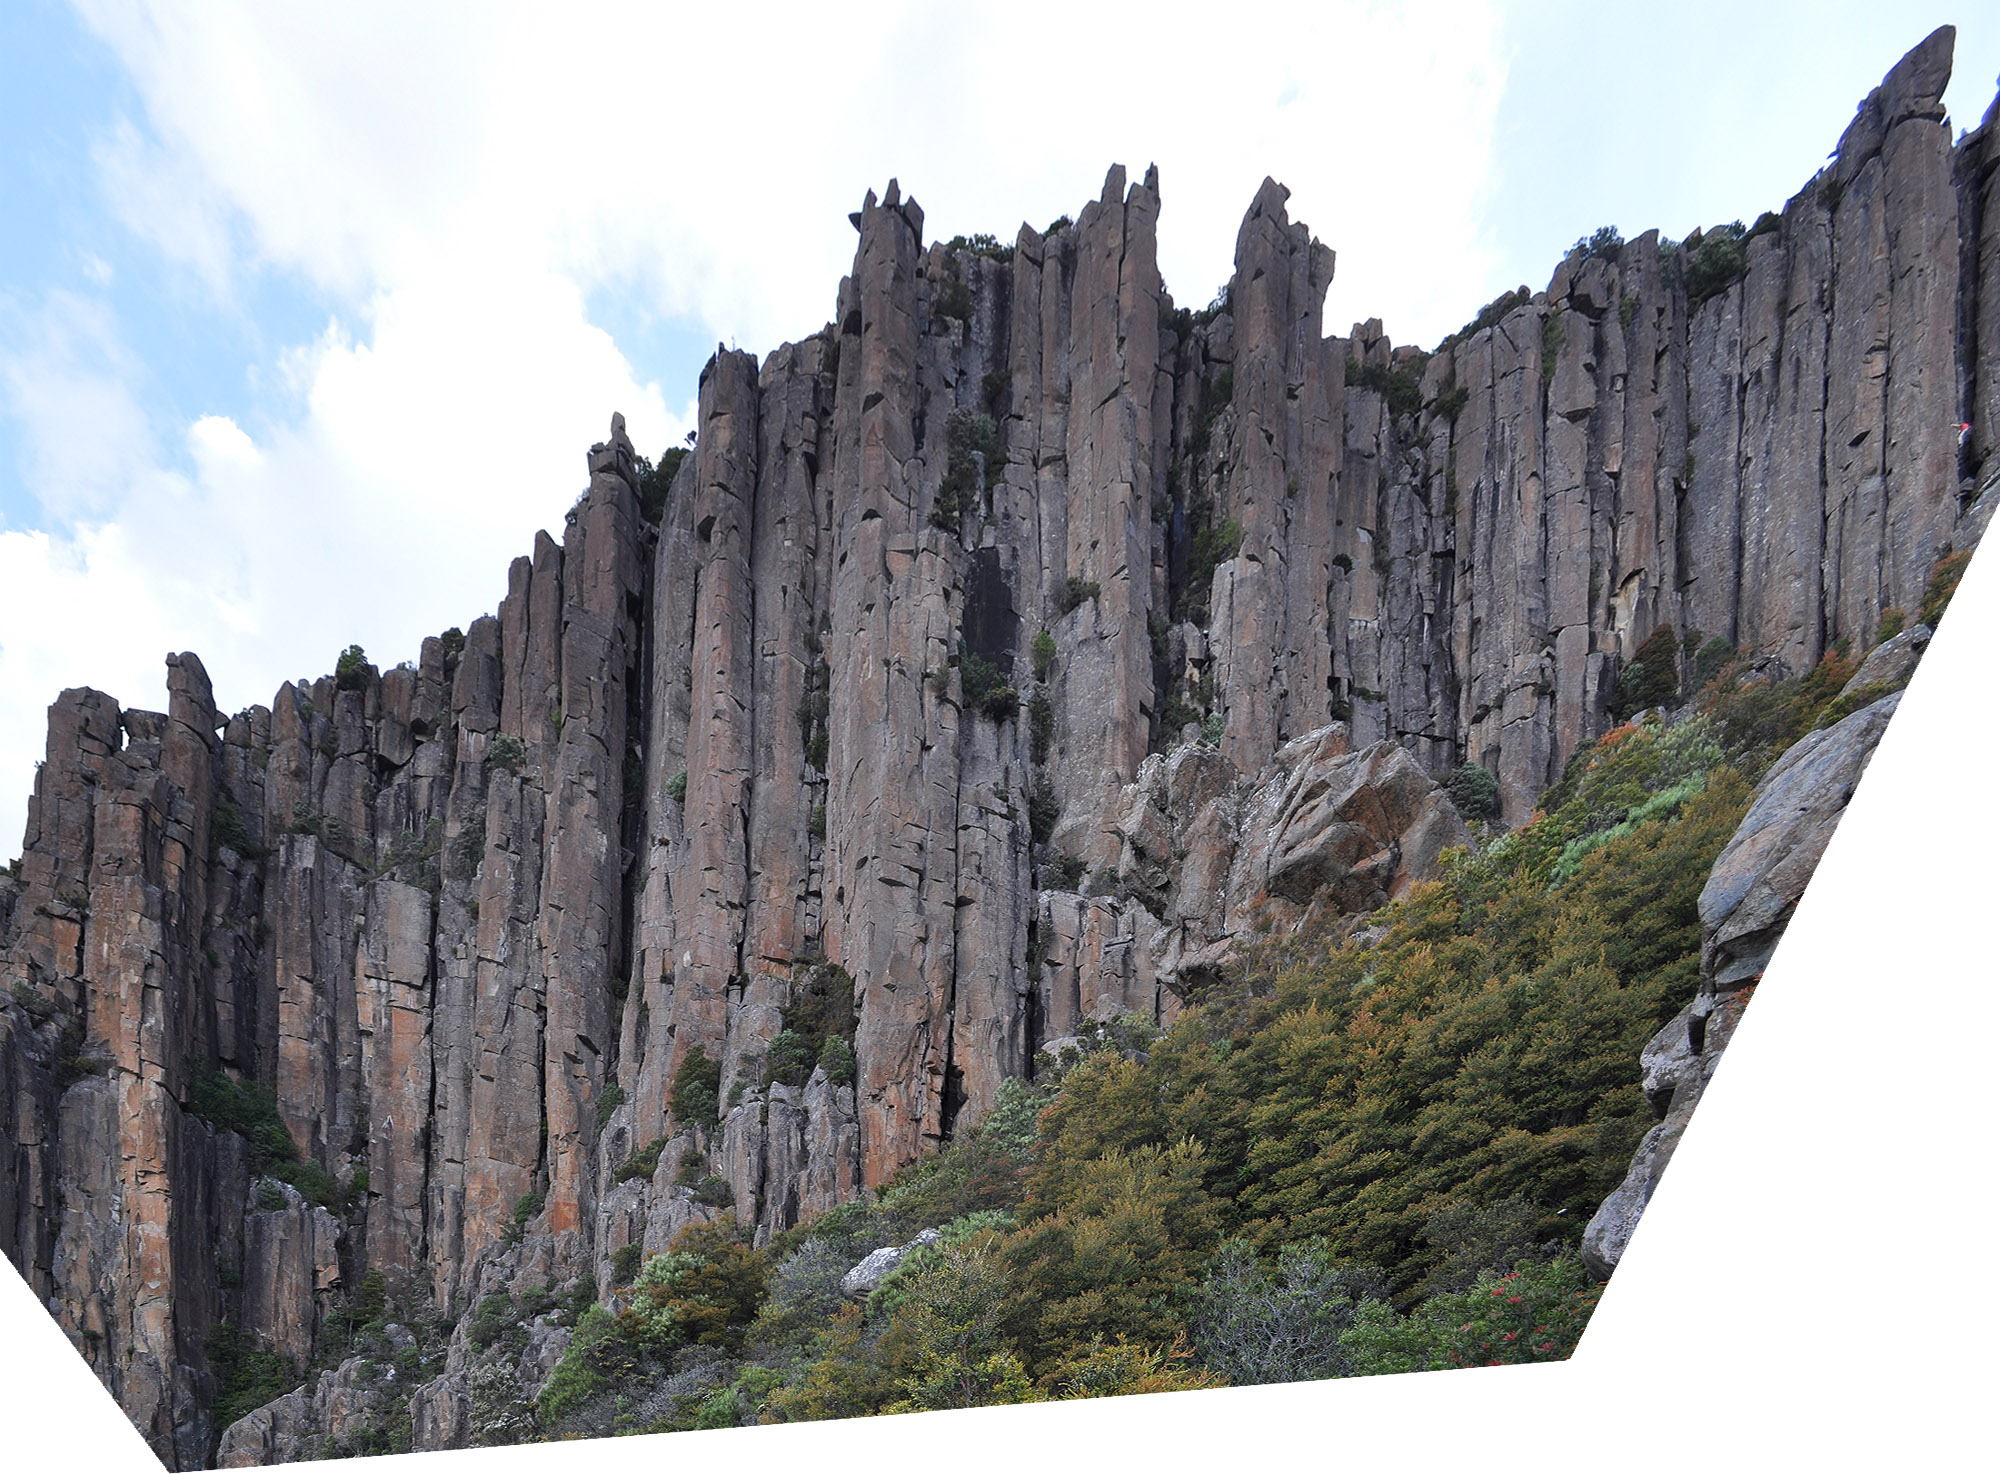
(Image straightened to correct for lense distortion)
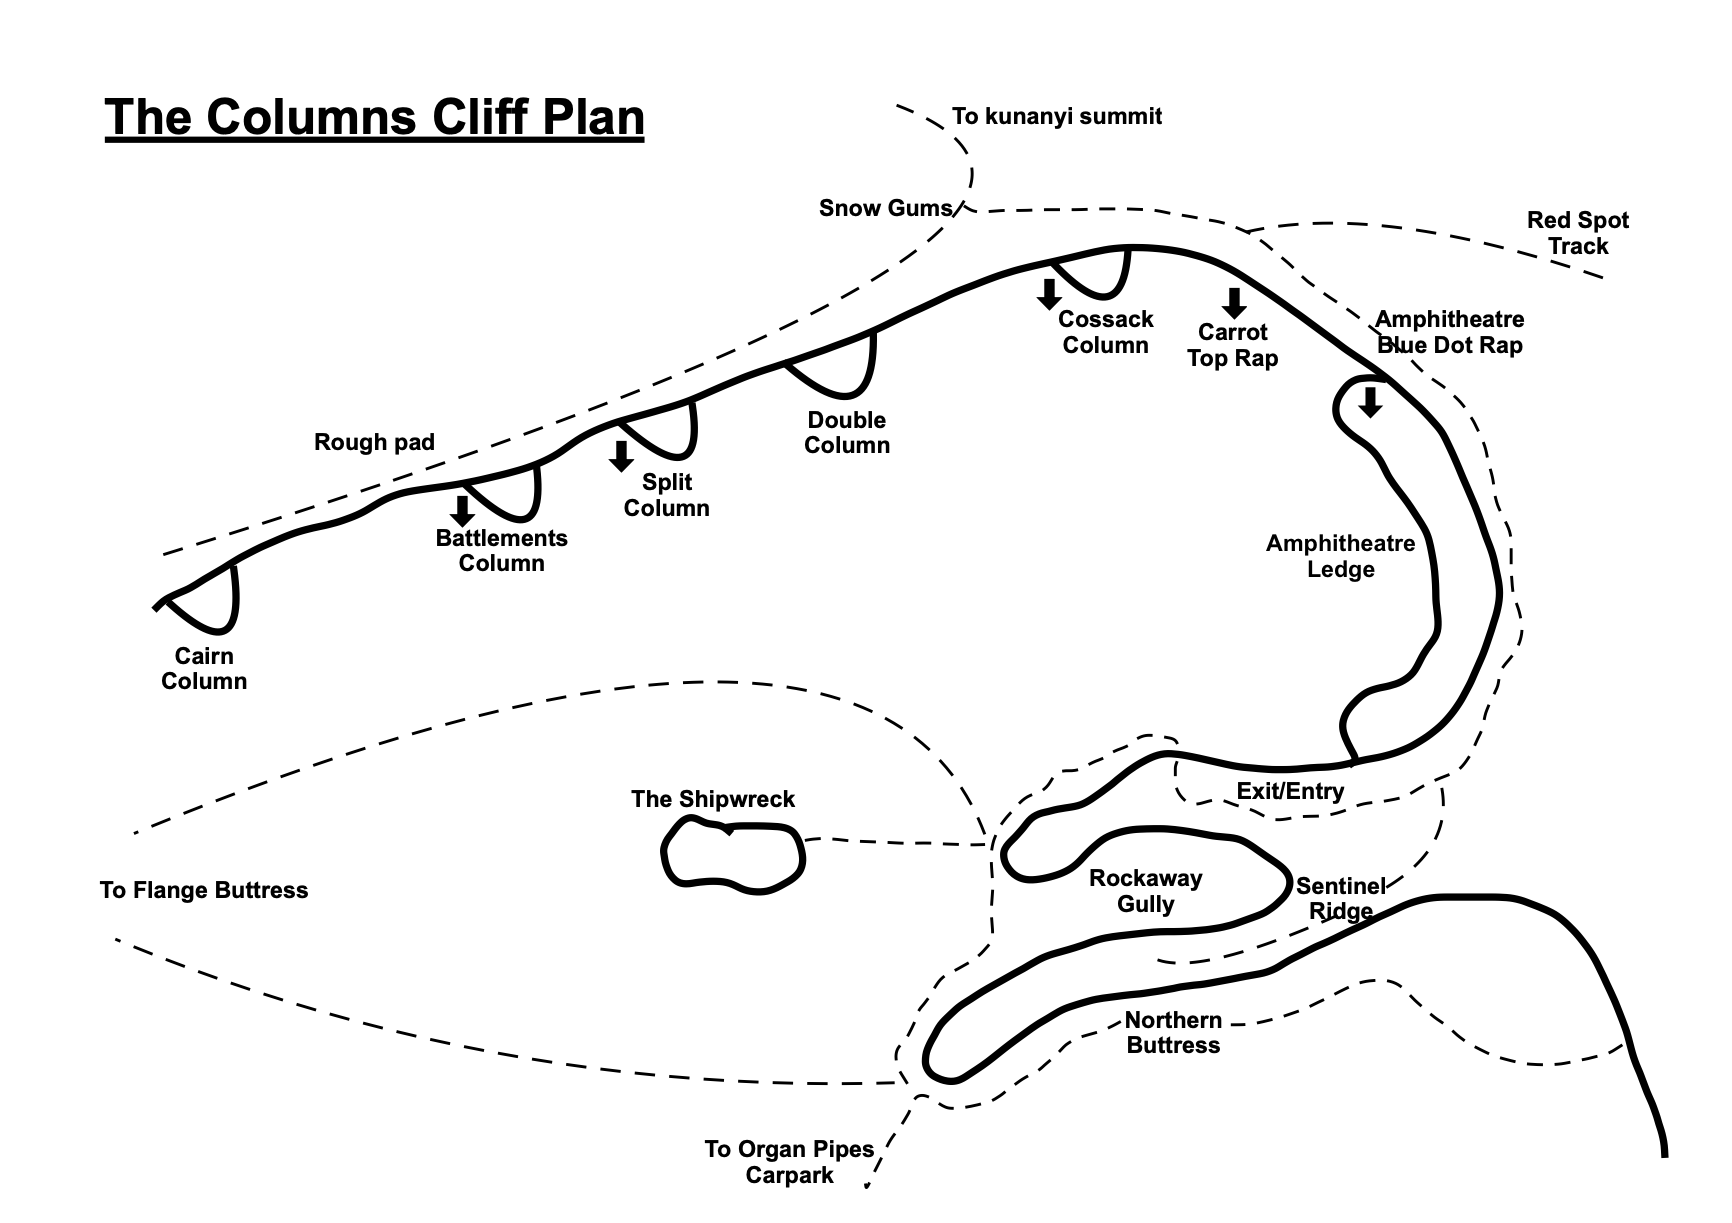
Cairn Column
Cairn Column stands prominently at the left hand end of the Columns on a ramp of broken rock forming the base of the southern columns. A pile of rocks on its summit resembles a cairn. Routes on Cairn Column are predominantly accessed using a bottom-up approach.
Bottom-Up Access
For access to routes on Cairn Column walk left along the Organ Pipes Track for approximately 150m, arriving at a climbers' track junction (GPS MTW030) that heads right to Flange Buttress. The track heads up initially through bush, then follows a prominent boulder lead to reenter the bush close to the base of the cliff near Bert's Fear, an obvious body-width chimney on Flange Buttress. Take the right fork and follow the base of the cliff uphill to the reach Brown Madonna, a right facing corner and chimney that marks the end of Flange Buttress. Routes in the Cairn Column area start immediately right of here. Rap stations exist at the top of Brown Madonna (1 x 50m), Tower of Power (1 x 60m), the Best Route in the Gorge (1 x 15m), Serendipidy (1 x 40m) and the Brush Tail Extension (1 x 30m; 1 x 50m). For other routes use the Bert's Fear rap route (GPS MTW170), (1 x 15m; 1 x 35m; 1 x 50m).
Top-Down Access
For access to routes on Cairn Column requiring a top-down approach, walk right from the patch of snow gums (GPS MTW110) as viewed looking towards Hobart. Walk along the cliffline past Double Column, then past Split Column with its distinctive twin 'ears' of rock, then past Battlements Column with its large sloping capping rock, to reach Cairn Column a short distance further on. It is distinguished by a pile of rocks on top that resemble a cairn.
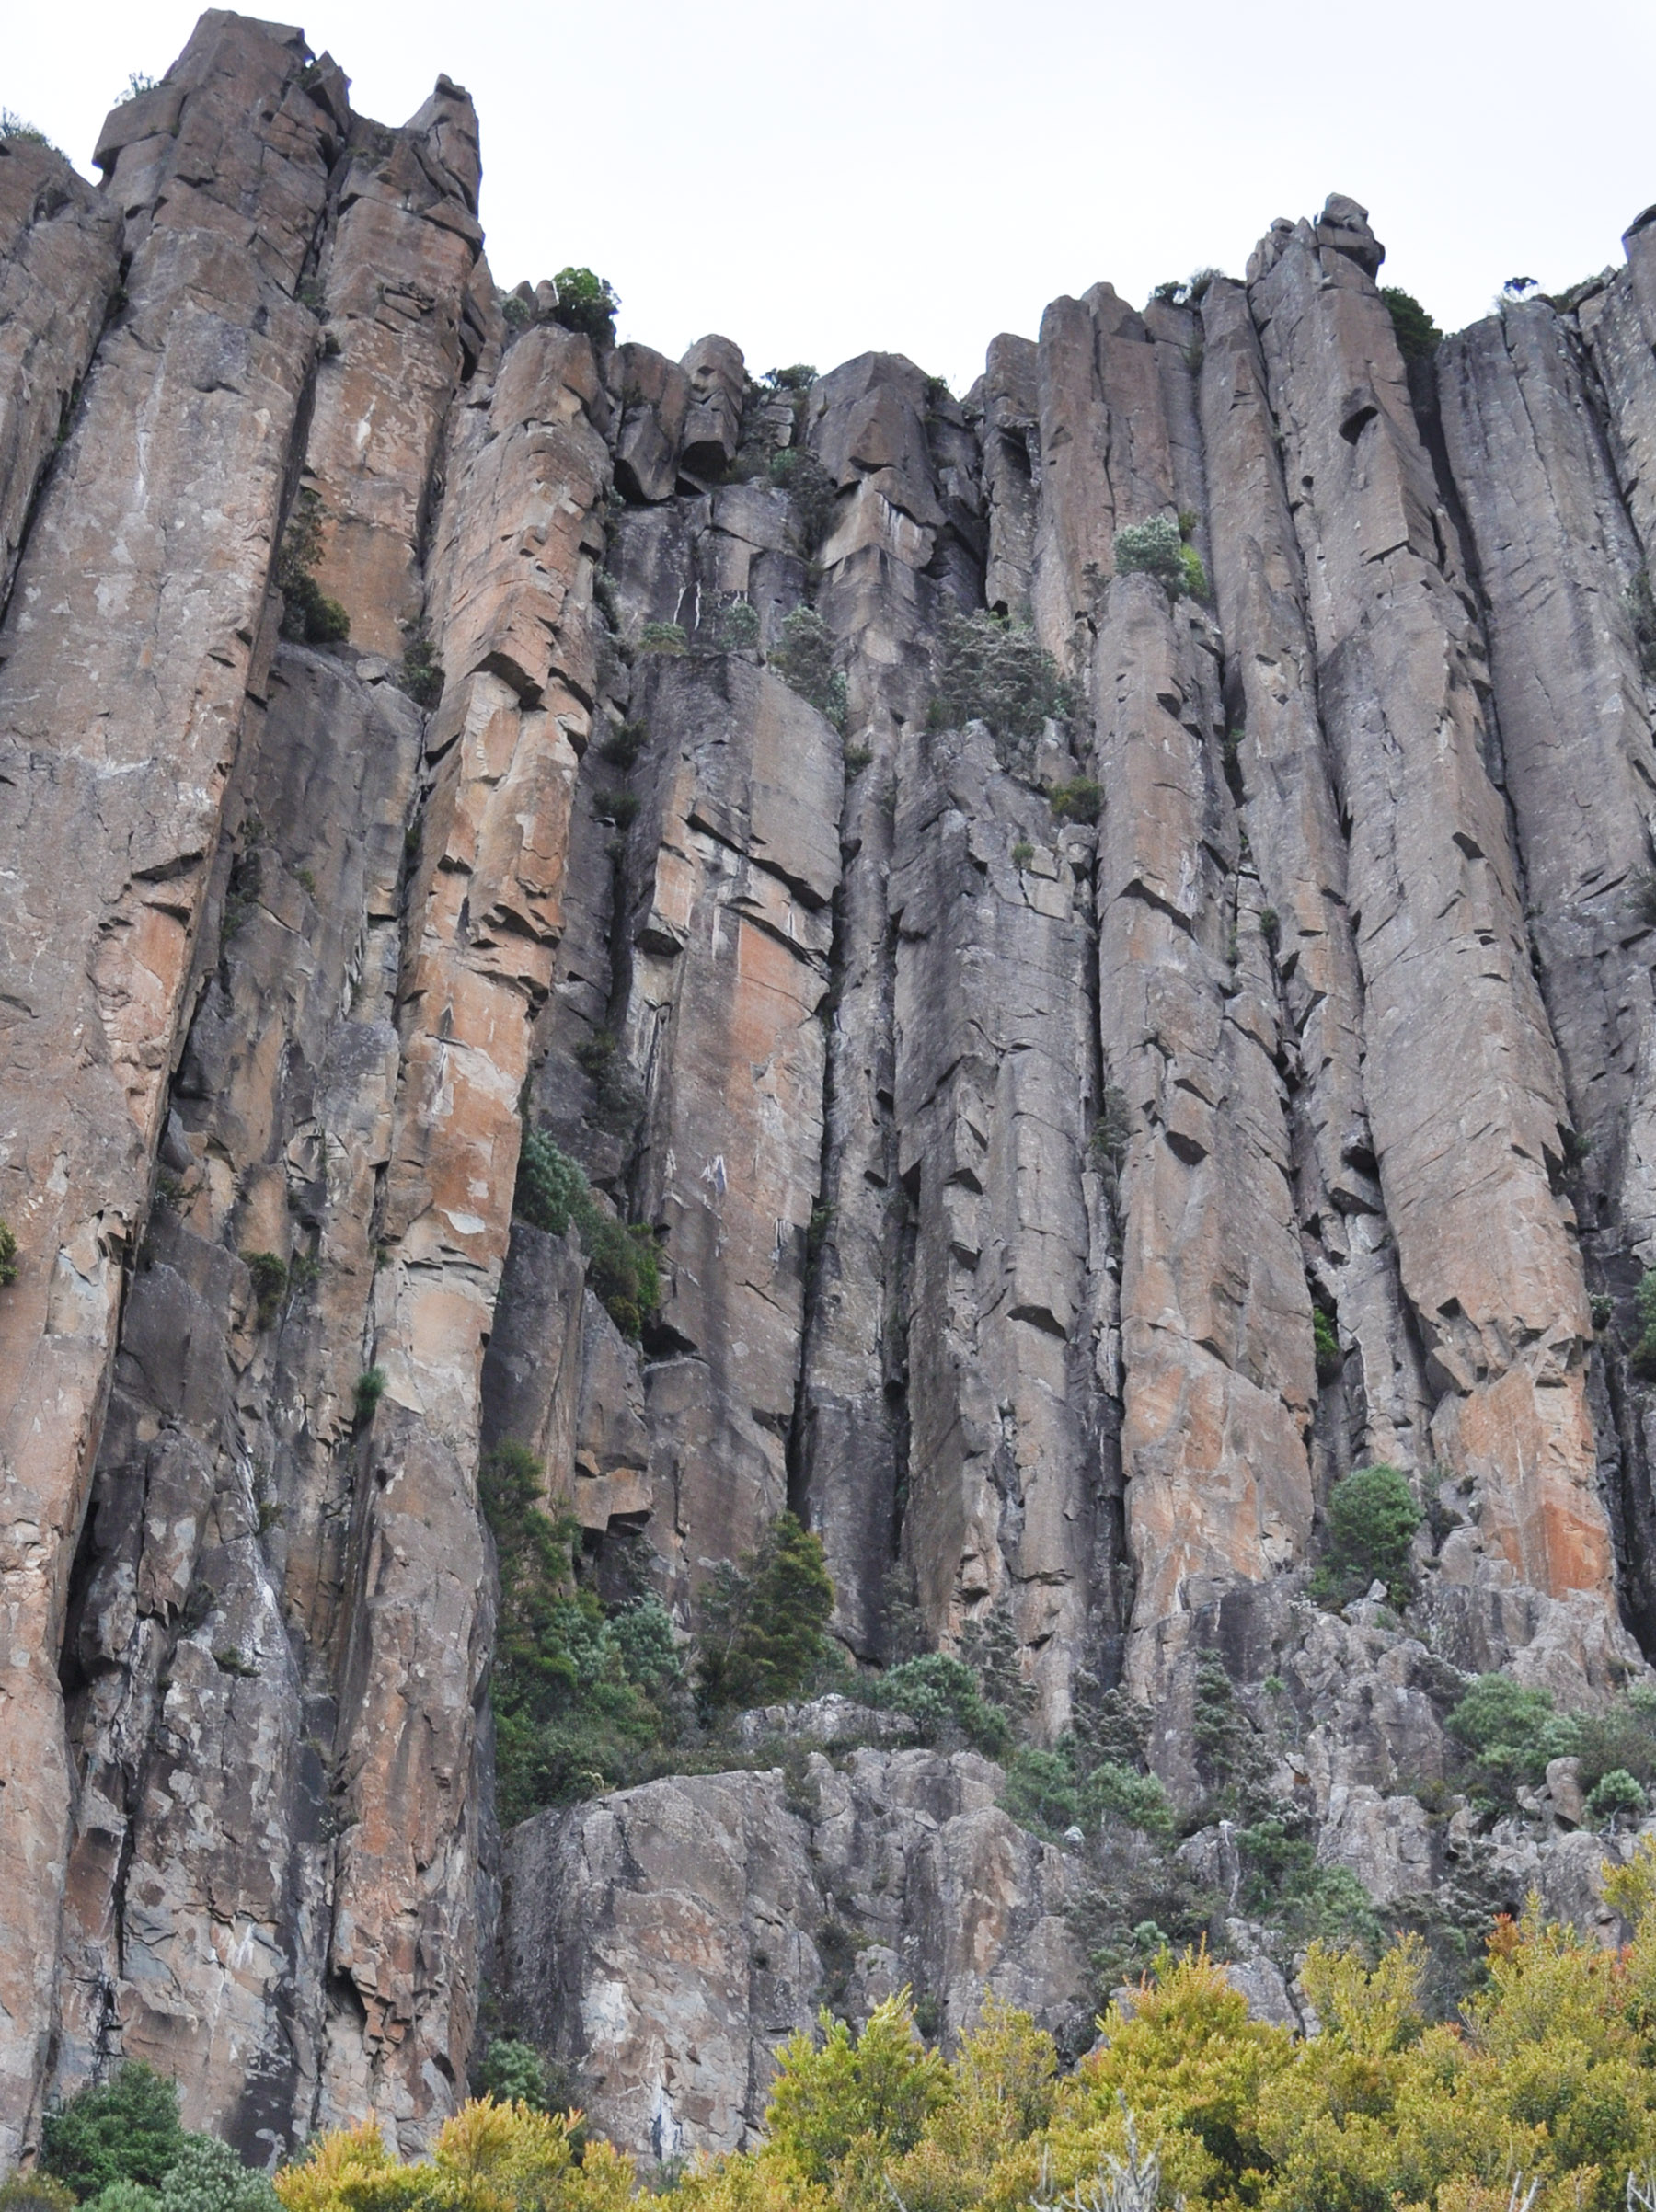
Cairn Column
M. McHugh, L. Closs, R. McMahon, Nov 1971.
L. Closs, I. Lewis, Dec 1973.
M. Jackson, H. Jackson, Apr 1998.
"I can stand about an hour on the Tower of Power; as long as I gets a little golden shower" (Frank Zappa, 1979). The massive arête 7m right of the Great Bitch. Climb face and arête with the crux at one-third height. A #1 Camalot or #2 Friend may be useful about 3/4 the way up to avoid a run out section. Trend left near the end to finish at rap station on top of the tower (1 x 60m).
N. Hancock, D. McConnell, Dec 2003.
Aren't you in the wrong place my friend? Scramble up scrubby ledges right of Tower of Power to a sloping stance with a DBB. Climb the thin face and blunt arête. Rap station with 2 fixed hangers.
D. McConnell, Nov 2003.
An exception to the bottom-up approach. Accessed by abseiling 45m from the top of the Columns to a large bushy tree. Climb the hand and fist crack in a shallow orange corner to the left of the final pitches of Piccolo.
D. Fife, Phil Steane, 1982.
The descent for routes between Piccolo and F-Sharp is via the rap station above Bert's Fear (GPS MTW170) unless otherwise stated: (1) 15m from boulder to ledge; (2) 35m to Brown Madonna terrace; (3) 50m via Brown Madonna rap station to the deck.
T. Christie, A. Keller, Jan 1966.
A clean corner line found halfway up the cliff. Access from bottom via a scramble and climb up to the base of Piccolo Wall, left of Firebird, and climb the 15m wall to the base of twin corner cracks. It is possible to access from above but this requires leaving a fixed rope and jugging out upon completion. The climb follows the corner with a thin crack on the left to the ledge 20m from the top of the Pipes. One third of the way up where the crack thins, there are two alternatives:
(a) Go straight up.
(b) Traverse left onto the arête, up 3m then back right into the corner. Continue up the left hand side of the corner past a small tree and up a layback crack. Move right onto the slab and scramble left to the DBB bolts. Rap off and scramble back down. The line above has been climbed (grade 20) but is deemed suitable only for masochists.
P. Robinson, C. Hewer, K. Robinson, Dec 2005.
J. Ewbank, V. Kennedy, Mar 1968.
J. Ewbank, V. Kennedy, Mar 1968.
Nauseatingly thin gear with a few loose blocks at the start lead to fantastic bolt protected climbing! Climbs the dihedral and face to the right of Pooh corner. The final rooflette and slab are equipped with 3 bolts. Even with the bolts this route should not be taken lightly, especially if climbed ground up. Ball nuts are very useful and micro cams are essential. Rap anchors (32m).
S. Bischoff, G. Soler, Jan 2014.
N. Deka, T. McKenny, Feb 1990.
R. Parkyn, H. Hancock, April 2013.
Climb Anomia to the fourth bolt and then wander easily a few metres right to below the shallow groove. The fun begins! Sustained and interesting climbing to DBB (which is about 5m below the belay for Anomia 1 - it is possible to scramble up to that belay if needed).
R. Parkyn, D. Rollins, May 2013.
D. McKelvey, T. Terry, Jan 1966. Deep Chimney: M. Douglas, J. Morley, Jan 1966.
It was once fashionable to climb these named variants as alternatives to the final pitch of Cymbal. Contemporary trends in access now utilise a top-down approach to reach their starts. Immediately right of the top of Cairn Column as viewed looking towards Hobart, set up anchors and abseil 30m to the large belay ledge at the end of Cymbal pitch 2.
* Dick the Despot. 20. The obvious off-width crack directly above the ledge. A couple of #4 camalots make the crux at 7m much more palatable! Continue up the widening crack and exit right onto the face where necessary.
Jungle Jim. 18. Needs a clean! The twin cracks 3m right of Dick the Despot. Stem and chimney up past the vegetation until near the top. Revert to jamming the right hand line up and over the summit bush.
** The Vice. 16. A great pitch that has been neglected for many years. The corner with twin cracks 5m right of Jungle Jim.
Dick the Despot, A. Adams, N. Deka, May 1991. Jungle Jim, N. Deka, A. Adams, May 1991. The Vice, J. Ewbank, V. Kennedy, Mar 1968.
A crazy line starting at a seam halfway up the south side Cairn Column. Rap 40m from the top of Cairn Column to an airy hanging belay at the base of a thin crack on the south side of the column. Probably safer for the belayer to stay attached to the abseil line. Pleasant climbing up the face and thin finger crack to a ledge. Follow the fist size crack until it widens to a crux 3-4m from the top. DBB at a platform on ‘The Brush Tail Extension’. Exit by prussik or climb the last pitch of Brush Tail (28).
P.Robinson, K.Robinson, April 2013.
C. Hewer (p1&2), Jan-Feb 2012.
K. Robinson (p3&4), Jan-Feb 2012.
Pitches 1 & 2, and 3 to within 10m of the top: J. Moore, P. Jackson, R. Williams, Mar 1967. Pitch 3 done with aid by C. Dewhirst, J. Moore, Feb 1968. FFA: M. Steane, J. Burgess, Apr 1976.
J. Ewbank, V. Kennedy, Mar 1968. FFA: D. Bowman, L. Wood, Dec 1977.
Battlements Column
Battlements Column is a forward-standing column capped by three turret-like rocks that is situated in the centre of the Columns. When viewed in profile, a large slab of rock caps the detached summit tower, connecting it with the main cliff. Routes on Battlements Column are predominantly accessed using a top-down approach.
Top-Down Access
For access to routes on Battlements Column walk R of the patch of snow gums (GPS MTW110) as viewed looking towards Hobart. Walk along the cliffline past Double Column, then past Split Column with its distinctive twin 'ears' of rock, to reach Battlements Column with its large sloping capping rock. A rap station next to the capping rock provides access to the start of Freedom (1 x 30m). In the gully to the R of the capping rock and down 15m is the Daedalus rap station (1 x 55m – GPS MTW150). which accesses routes that start from the ledge alongside Icarus.
Bottom-Up Access
For access to routes on Battlements Column, follow the Northern Buttress track uphill to the base of Northern Buttress (GPS MTW010). Take the LH fork and follow the track up to the Shipwreck (a large rock that some folks think resembles a shipwreck). To approach Battlements Column from here walk straight across across the gully to the base of the column. Descent from routes requires a short walk around the cliff line to Cossack Column Rap station (1 x 6m; 1 x 50m) or a scramble down Exit/Entry
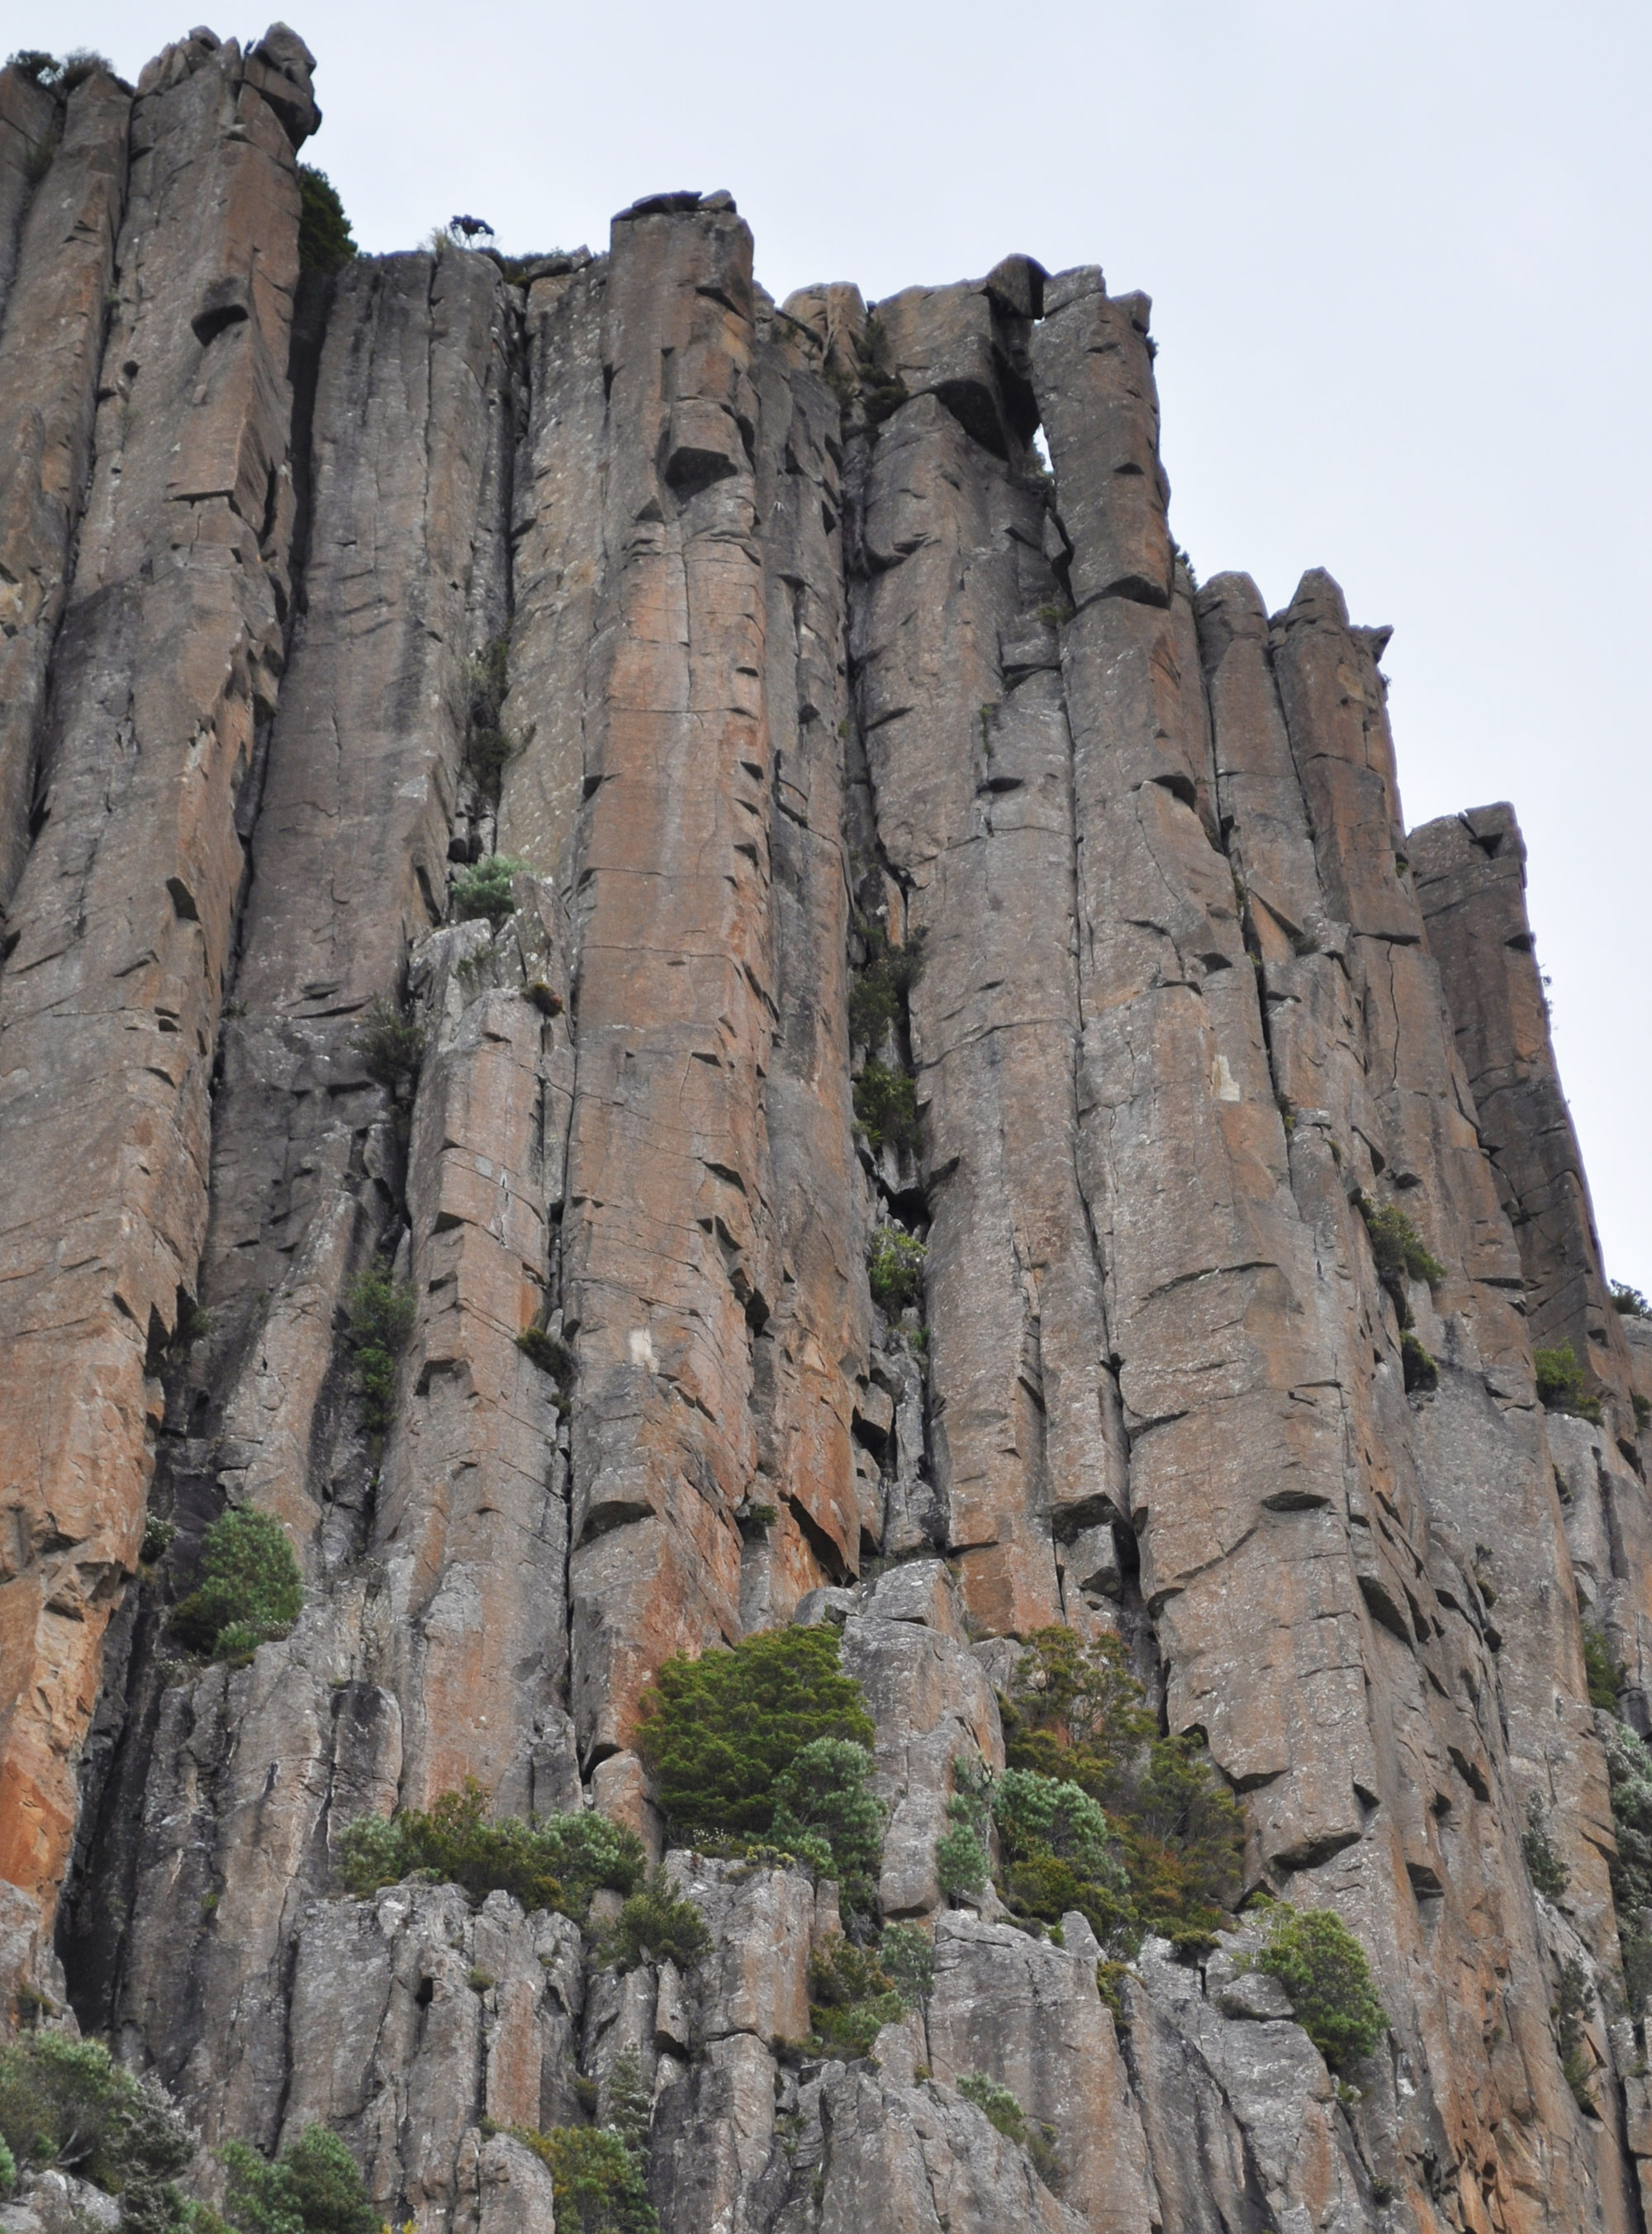
Battlements - Icarus
Accessed via top-down approach. Fix abseil rope to the Daedalus rap bolts, then walk south 4m to abseil 35m down the steep dihedral L of Once in a Lifetime, passing a small ledge 6m down. Belay on a pillar with a big tree as an anchor. Follow finger crack/seams back to the top, moving L onto face for a few metres at half height to avoid fused section. Well protected (take lots of tips/fingers size gear), with a bouldery crux at the top.
A. Lewis, S. Young, Jan 2011.
Hancock’s better half doubted his ability to send this baby after three years of repeated spankings! A sustained long pitch in a great position. Rap in from the Daedalus bolts and swing L across face to a small ledge with DBB (60m abseil). Climb the arête L of Daedalus in one monster pitch. Technical moves with good rests.
N. Hancock, Jan 2008.
H. Barber, L. Wood, Apr 1975.
Access from above using the U-bolts at the top of Daedalus to abseil down to another pair 25m down the wall. Follow the finger crack back up to the top. Good natural pro all the way in a range of sizes.
R. Parkyn, Feb 1998.
D. Groom, A. Keller, J. Moore, Dec 1967. (3b): T. McKenny, J. McKenny, Mar 2002.
C. Dewhirst, J. Ewbank, Feb 1968 (3 bongs were used on the first ascent on pitch 2 for a rest, and 3 pegs to protect pitch 3). FFA: H. Barber, L. Wood, Apr 1975.
One of the hardest route on the Pipes and a magnificent line, taking the arête and wall to the R of pitch 3 of Icarus. Access via a 30m abseil from rap station above the slab that caps Battlements Column, to the Middle Battlement (top of pitch 2 of Battlements). A technical boulder problem at half-height offers some amazing moves in an outrageous position and should be enjoyed by all. A finger-sized cam can be handy to protect the post crux section.
J. Bresnehan, Feb 2010.
The next seven climbs start on the lower section of Battlements Column and so are best accessed from below, using the track passing Northern Buttress and the Shipwreck.
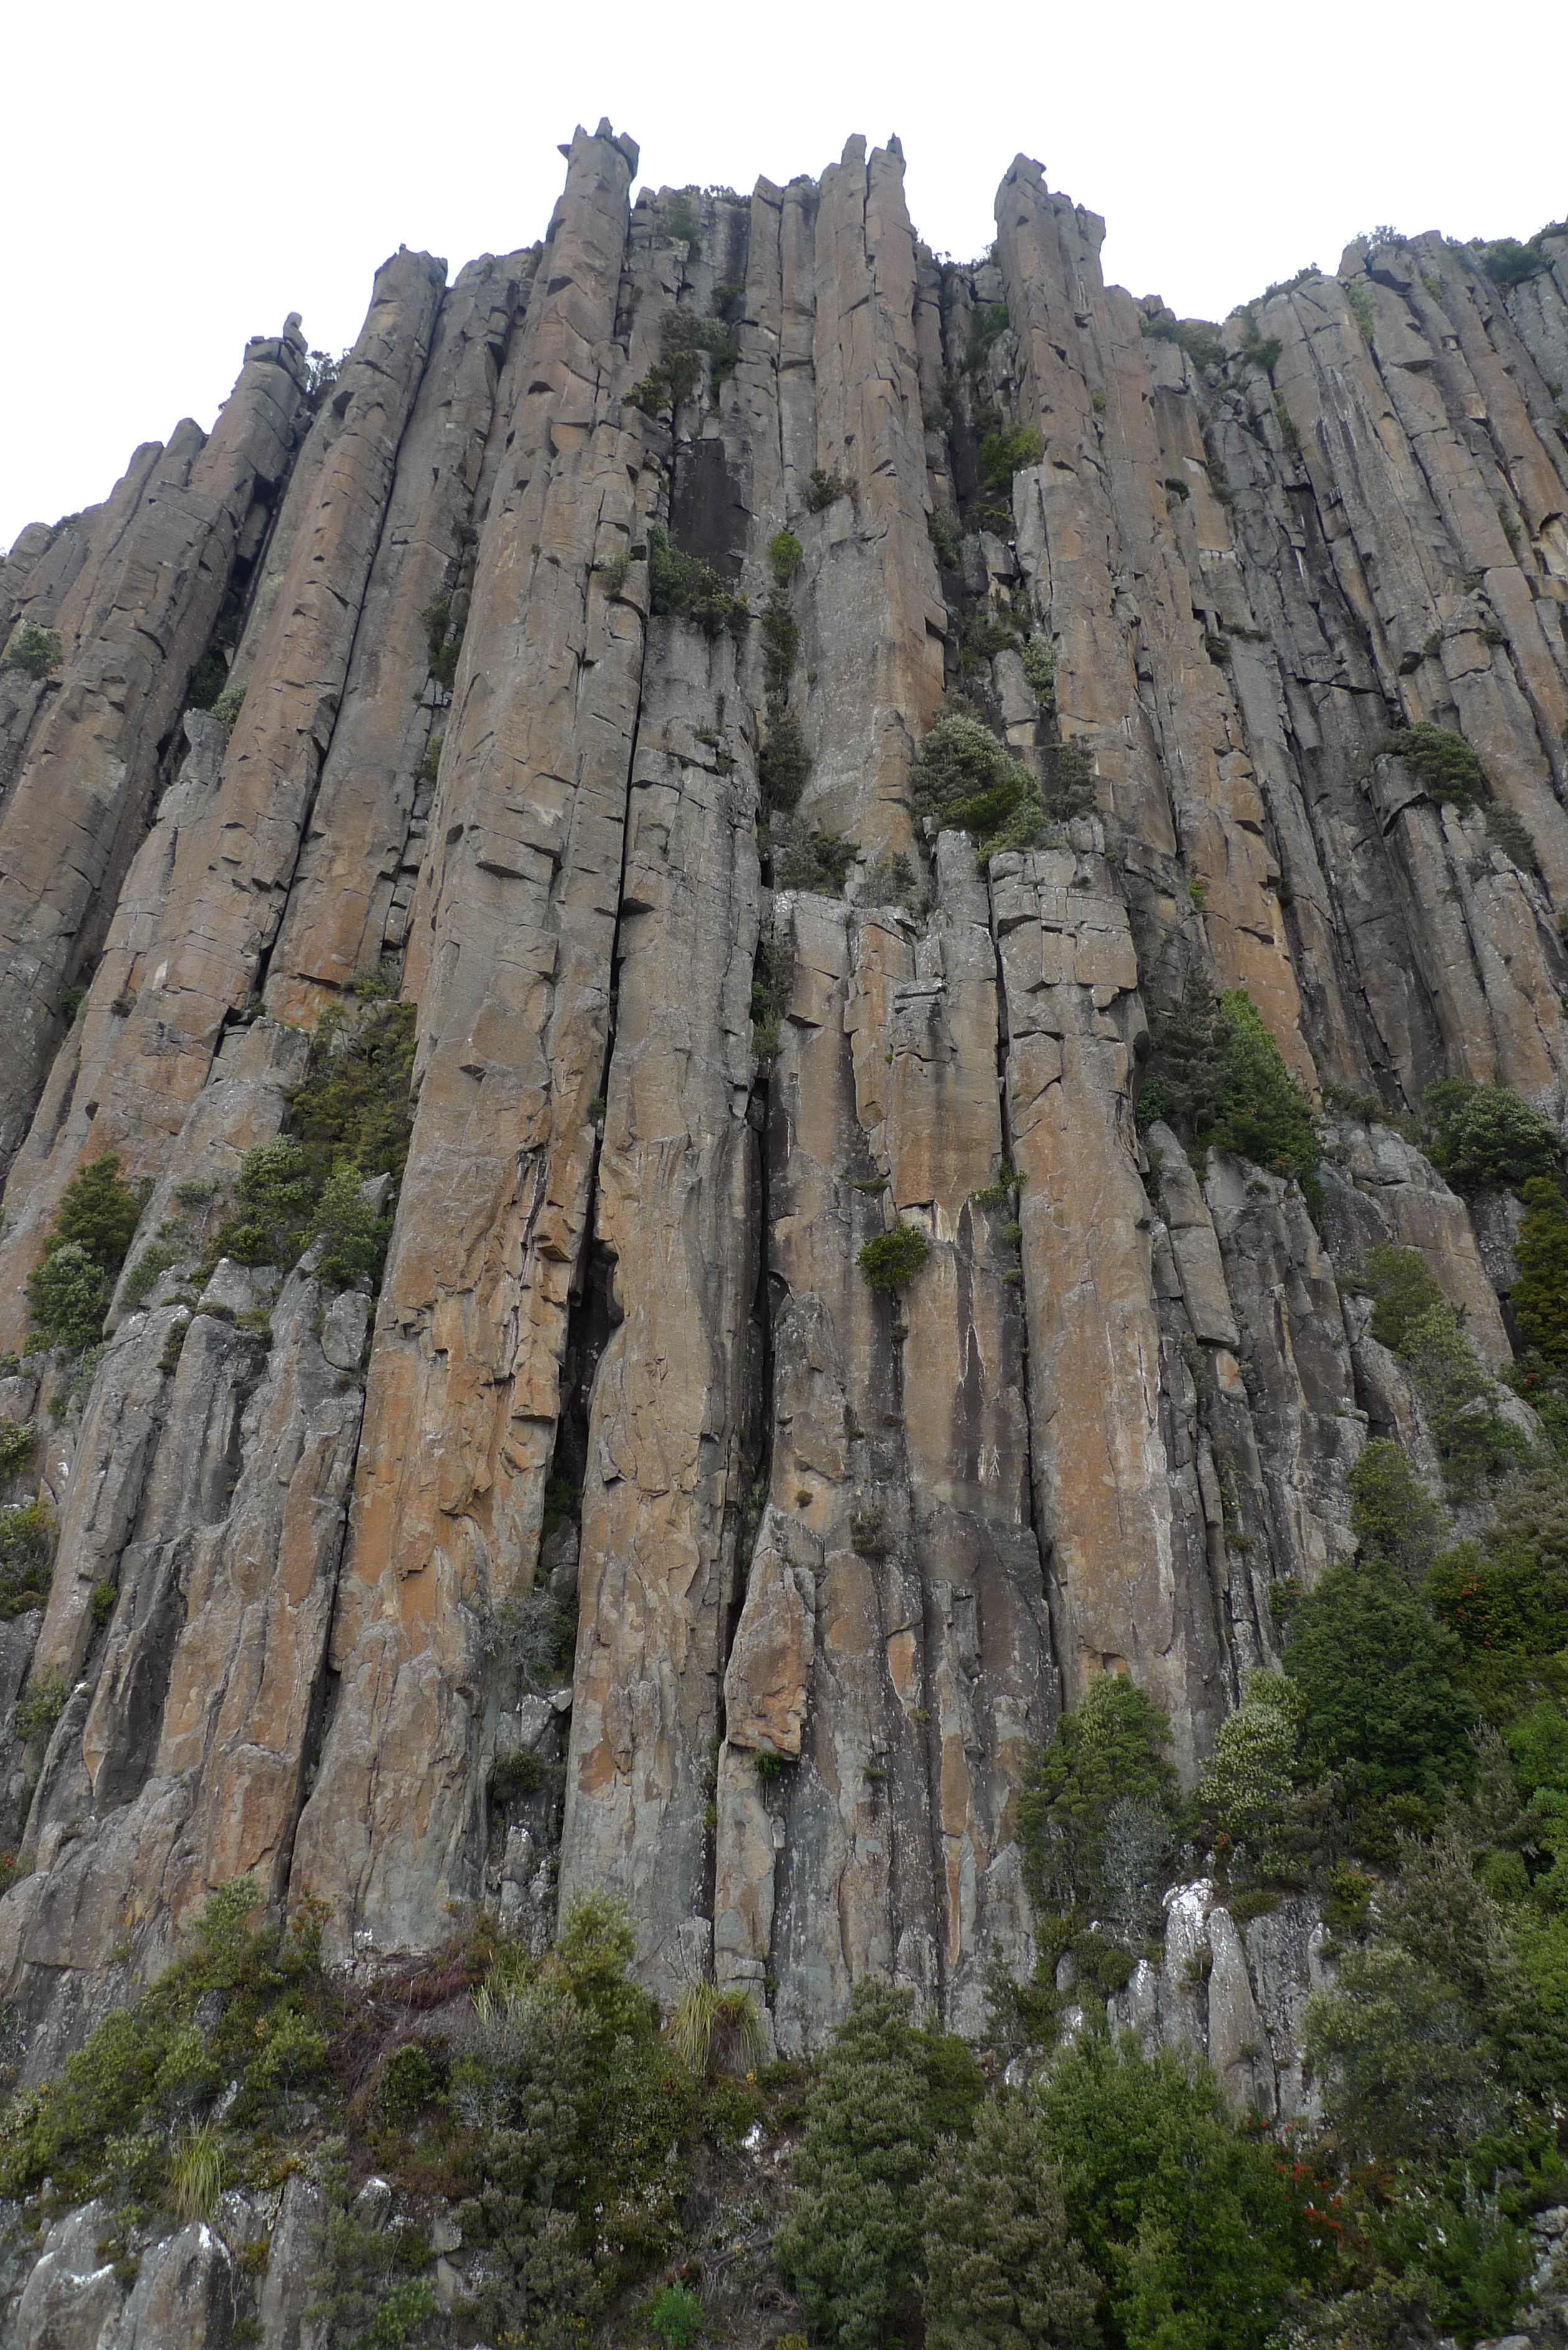
Battlements Lower
Roger Parkyn, Nick Hancock (alt leads), Heather Hancock, Feb 2016.
D. Groom, J. Moore, Jan 1968. FFA: (2 and 3) K. Lindorff, K. Rosebery, Feb 1977. (1) K. Carrigan, P. Bigg, 1982.
(1) K. Lindorff, K. Rosebery, Feb 1977. (2) P. Bigg, S. Parsons, D. Fife, 1979.
A long and pleasant ramble. Climb past the first two U's on Dark Nebula then branch left (past another 3 U's) to cracks (trad gear) for the middle third of the climb. There are three U's on the upper section, which is about 2 m left of Dark Nebula. Take a double set of cams (#0.3 to #1 camalot) and a set of wires.
Roger Parkyn, Owen Gervasoni. Jan 2017.
Up the buttress right of Incision (which is the big dark cleft). The last U before the top DBB is doubled up, with the intention that this provides a rap-option with a 60 m rope: it does, but only just, on stretch, and only if you're not a lightweight, so take extreme care [or, better, use two ropes, or a longer rope].
Note: This route can be climbed entirely on trad protection. Take a double rack of cams between .2 and .75 with triples of .4 and .5 and single 1, and 2. Small and medium wires protect the middle section of the route - these placements are bomber, but require care to get right.
Roger Parkyn; Owen Gervasoni. Nov 2016.
The deep chimney crack line to the right of Dark Nebula was originally climbed as an alternative direct start to the old climb Battlements, or as the first pitch of Sandy Bay Road. The first pitch of Split Column apparently started 2m right again, up a short corner, leading to a flared hand and finger crack, possibly just left of the next climb, Ford Prefect.
Climb up the black wall.
Roger Parkyn, Owen Gervasoni. Jan 2017.
Unusual climbing on the sculpted rock left of the big corner.
Owen Gervasoni, Roger Parkyn. Jan 2017.
Good value and worthy of inclusion separately. Start at the base of the cliff and climb the corner crack on the right of Datsun Sunny, directly below Split Column, to the Lower Battlements platform. Abseil off or finish up Battlements.
Unknown
On the orange buttress right of Battlements Direct and about 15 m right of Dark Nebula. Join the dots.
Roger Parkyn; Owen Gervasoni. Nov 2016.
M. Douglas, J. Fairhall, Apr 1962.
Split Column
Split Column is immediately right of Battlements Column. The top 25m of Split Column looks as if it has been split with an axe and at the very top are two ear-shaped rocks. If you look carefully from below, you can see a sinuous hand-crack snaking its way up the nose of the column into an ever-widening crack below the top. This is the line taken by pitch three of Split Column. Routes on Split Column are predominantly accessed using a top-down approach.
Top-Down Access
For access to routes on Split Column walk R of the patch of snow gums (GPS MTW110) as for Battlements Columns. Walk along the cliffline past Double Column, and across to the top of Split Column with its distinctive twin 'ears' of rock. Located on the RH ear in a vee groove is the Ultrahard rap station (1 x 35m – GPS MTW140), which accesses routes from the ledge at the start of pitch three of Split Column.
Bottom-Up Access
For access to routes on Split Column, follow the Northern Buttress track uphill to the base of Northern Buttress (GPS MTW010). Take the LH fork and follow the track up to the Shipwreck (a large rock that some folks think resembles a shipwreck). Access to the base of Split Column is further to the right and up the gully from Battlements Column. Descent from routes requires a short walk around the cliff line to Cossack Column Rap station (1 x 6m; 1 x 50m) or a scramble down Exit/Entry.
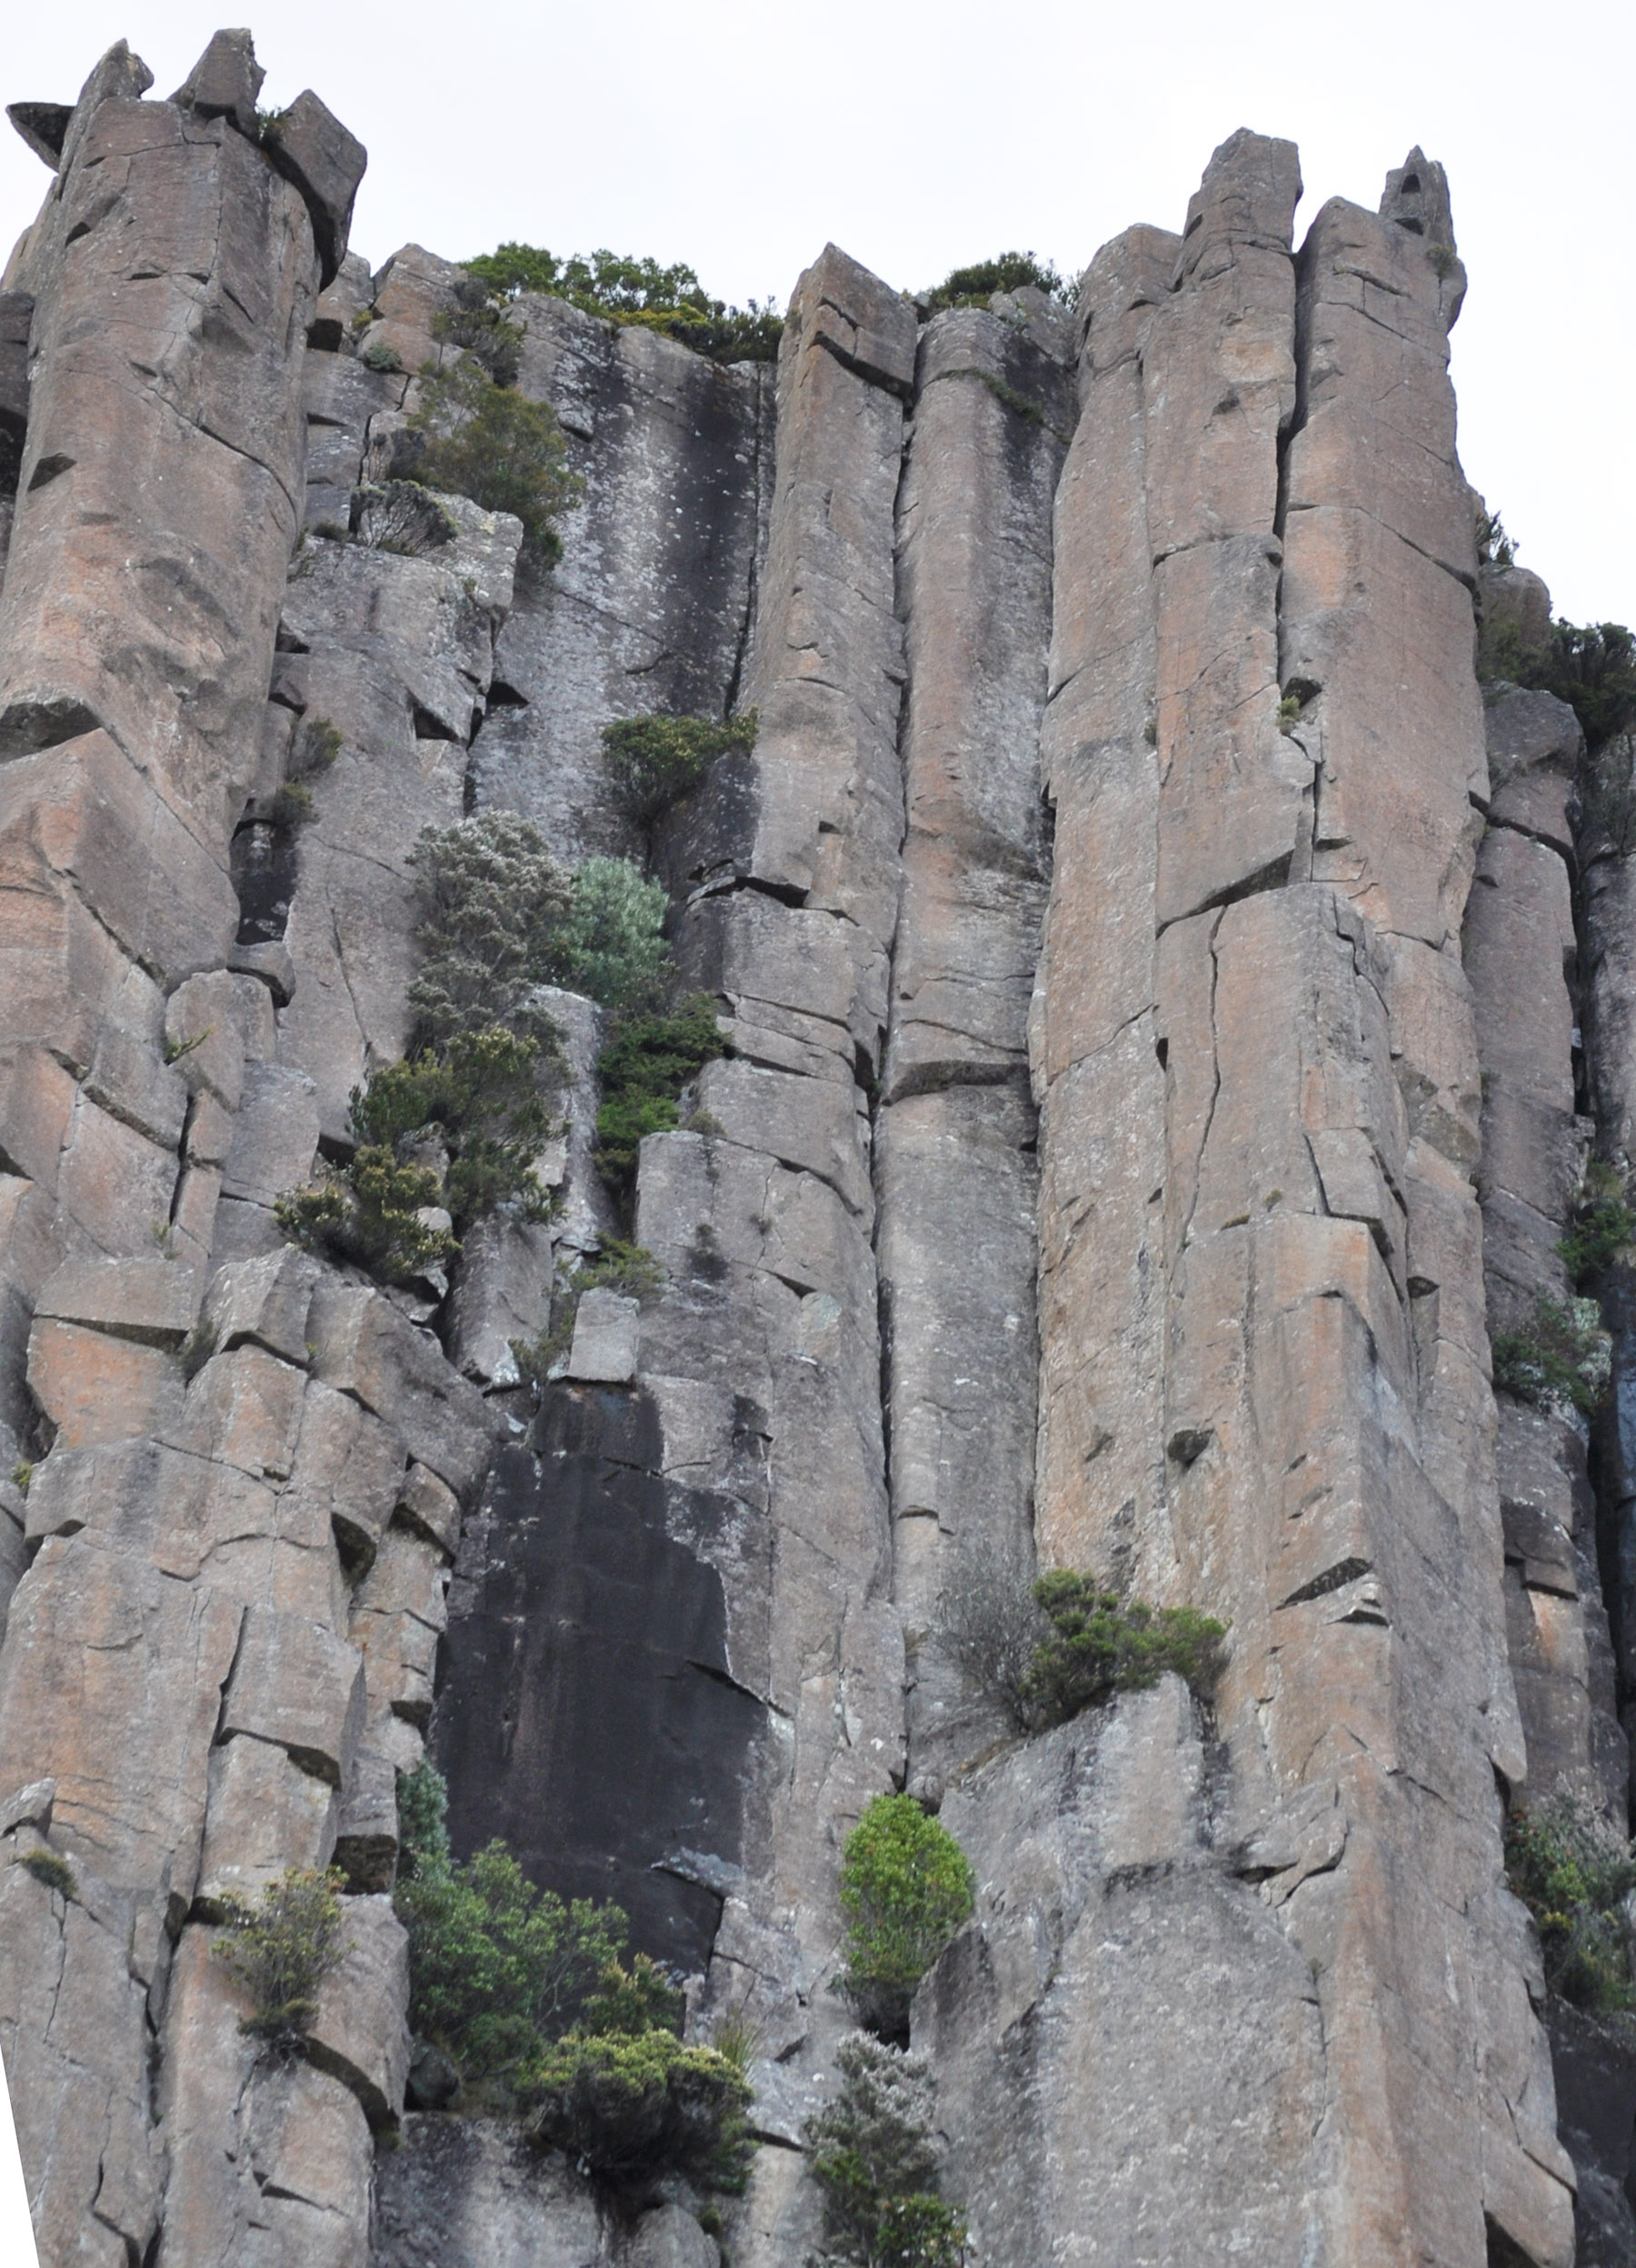
Split Column
Uncompromisingly traditional. The prominent fist-sized crack left of Holiday in Cambodia has left those not accustomed to the style confused and bleeding. Originally climbed from the ground up via what is now Battlements Direct. Instead rap-in to do the final excellent pitch as for Ultrahard.
Climb the obvious fist crack on the wall just left of Holiday in Cambodia. The crack takes #4 Camalots for most of the route, and there is also a variety of smaller gear in horizontals along the way.
L. Wood, M. Tillema, A. Bush, Dec 1976.
Sustained, energetic and some say hard for the grade. Straight up the flared tight hand crack in the corner past two small roofs (crux), then try not to fall-off from exhaustion on the good hand jams to the top. Take plenty of medium - hand sized cams.
P. Bigg, S. Parsons, 1982.
Thin and thought provoking. The line found just R of Holiday in Cambodia.
Climb Holiday in Cambodia for 10m (until just below the first rooflet), hand traverse right into the next crack and follow this to the top. Lots of very small - medium cams and wires are the go.
S. Parsons, D. Fife, 1982. Originally climbed by starting from the niche halfway up Split Column and traversing in, but the described route is much better and less inconvenient.
G. Child, K. Carrigan, Feb 1978.
The self-explanatory direct start to Ultrasound. Rap in to the ledge. Climb up Holiday in Cambodia for 2m then reach R and clip the first bolt. From here move R into the line and up past 4 bolts, before finishing up Ultrasound where a trad rack including small to medium cams and wires is required.
The obvious direct start involving a hard, crimpy boulder problem has been done at around grade 29 (Ultra-ultraHard, j Clemens and H Jackson 2025).
S. Parsons, Nov 2006.
Position, position, position. High quality climbing up the exposed line below and R of the last pitch of Split Column. Abseil down the NW side of Split Column to belay in a R-facing corner, not far above the large bushy ledge 50m from the top. Step L onto the face and climb through balancy moves with spaced gear to the thin crack. Follow the crack (crux) and then the easier arête to the ledge of Split Column. Finish up this.
H. & M Jackson, Mar 1998.
For the next two routes, rap down the wall to the L of the LH ear (facing out) on top of Split Column.
A hidden gem. Belay in the chimney on the RH side of the wall at a grassy ledge next to a horizontal break about half way down (wires and hand-sized cams for belay). Traverse left out to the rattly fingers / tight-hands splitter in the middle of the face. Up this, then negotiate a short wide section (#5 handy) to a respite, before finishing over the final bulge.
P. Bigg, S. Parsons, D. Fife, 1982.
Belay on the grassy ledge at the base of the wall. Start up thin crack, traverse L to the next crack and continue up line to the hand traverse on Face What You Fear. Reverse this, then climb the thin line above to rejoin FWYF at the wide section and finish as for that route.
D. Rollins, Z. Sonstegaard, Jan 2020.
M. Tillema, D. Klees, 1972. (2b): P. Treby, T. Brooks, Jan 1974.
Double Column
Double Column is the double column immediately right of Split Column and separated from it by a shallow gully. Double Column is forward standing, approximately 100m high and split by a conspicuous crack/chimney line. This is the line taken by Double Column Central. Routes on Double Column are predominantly accessed using a bottom-up approach.
Bottom-Up Access
For access to routes on Double Column, follow the Northern Buttress track uphill to the base of Northern Buttress (GPS MTW010). Take the LH fork and follow the track up to the Shipwreck (a large rock that with some imagination resembles a shipwreck). To approach Double Column from here walk across and up the gully to the base of the column. Access to routes on Hiawatha Ledge is further to the right via a chimney and a scramble up steep grass. Descent from routes requires a short walk around the cliff line to Cossack Column Rap station (1 x 6m; 1 x 50m) or a scramble down Exit/Entry
Top-Down Access
If approaching from the summit Double Column is the first column R of the patch of snow gums (GPS MTW110) as viewed looking towards Hobart. The top of this bulky column is separated from the main cliff by an 8m deep moat, making abseil access difficult. To access the base of the routes via abseil it is best to walk L from the patch of snow gums and use the Cossack Column rap station (1 x 6m; 1 x 50m) to reach the base of the Columns. From here walk down the gully and across to the base of Double Column. Another option is to down-climb Exit/Entry.
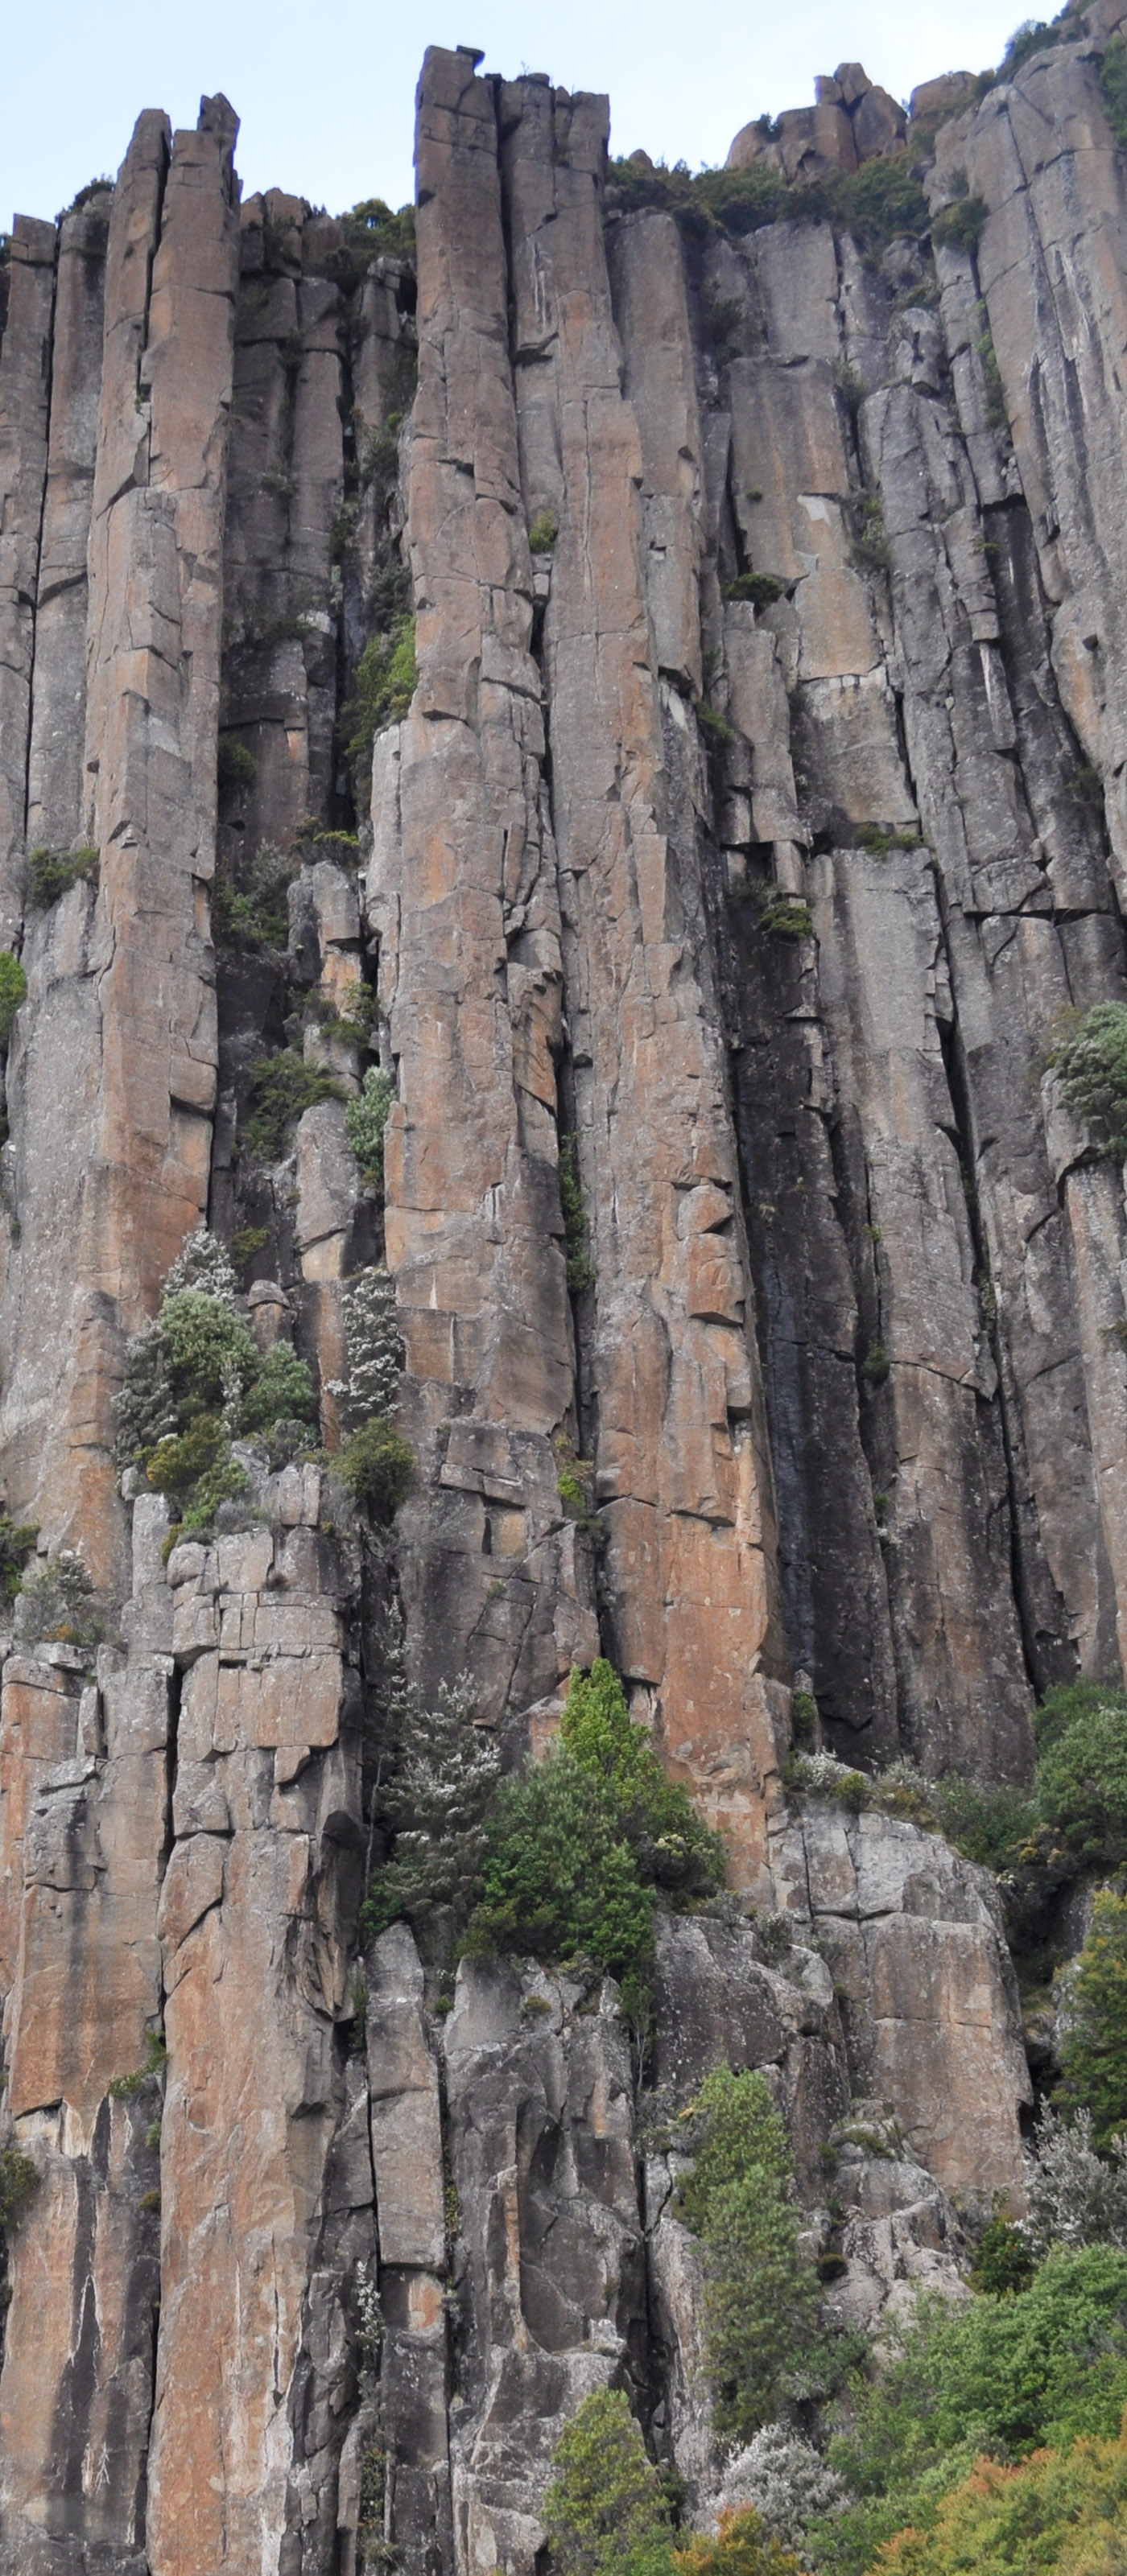
Double Column
J. Moore, V. Kennedy, Nov 1967. FFA: Phil Steane, N. Ward, Apr 1983.
No beginning and no end but a worthwhile climb on superb rock.
Access: Walk from Mt Wellington summit down, and then scramble (or roped up) to the top of the pillar. Setup a gear belay (#2 & #3 Camalot; there are also two glue-ins that look like they were placed by high-liners) and rap 55m to DBB at a good ledge. Check that you have at least 20 draws before you rap!
The Climb: Ascend the arete left of Double Column Central to a move right at the fourth bolt, then back left and continue up the arete past a mantle-shelf move to where it steepens and becomes blanker. Climb directly up the arete and then move right to a finger crack which leads to a DBB (15m from the top of the column).
Decent: Either jug the fixed line to get out (15m jugging then 15m scrambling) or climb right into Double Column Central and climb out that.
Nick & Heather Hancock. Jan 2017.
M. Douglas, T. Terry, Apr 1967. FFA: B. Kennedy, L. Closs, Oct 1970.
The next routes start in a recess immediately R of Double Column Central, where a substantial ledge extends across the recess beneath the start of these routes. This is Hiawatha Ledge and it is approached from the gully below via a 15m chimney and a scramble up steep grass.
J. Bresnehan, Feb 2009.
N. Deka, G. Cooper, Jan 1989.
J. Moore, P. Stranger, Feb 1967.
G. Cooper, Pete Steane, Feb 1984.
J. Ewbank, D. Groom, 1969.
G. Cooper, A. Adams, Jan 1991.
Cossack Column
Cossack Column occupies the head of the cirque at the right hand end of the Columns. Right of Double Column is a wide curving stretch of wall that ends at a closely joined twin column that is 65m high. Two large wedge shaped blocks cap the summit. Routes on Cossack Column are predominantly accessed using a top-down approach.
Top-Down Access
Cossack Column is located about 40m left of the patch of snow gums (GPS MTW110) as viewed looking towards Hobart. The Cossack Column rap station (GPS MTW120) is located here (1 x 6m; 1 x 50m) and is used to access routes in the vicinity of Sky Rocket. Carrot Top rap station is located by following the curve of the cliff line further around to the left. The hangerless carrot bolts provide access to Carrot Top and The Early Bird (1 x 20 m). Amphitheatre rap station (GPS MTW130) is further to the left again (1 x 50m) and is marked by a blue dot, and used for access to routes in the amphitheatre. Further left of Amphitheatre rap station and downhill is the top of Exit/Entry a grade 7 scramble to the base of the cliff that requires care to descend.
Bottom-Up Access
For access to routes on Cossack Column, follow the Northern Buttress track uphill to the base of Northern Buttress (GPS MTW010). Take the LH fork and follow the track up to the Shipwreck (a large rock that that some folk think resembles a shipwreck). To approach Cossack Column from here walk up the grassy gully towards the bottom of Exit/Entry then across to the base of the column.
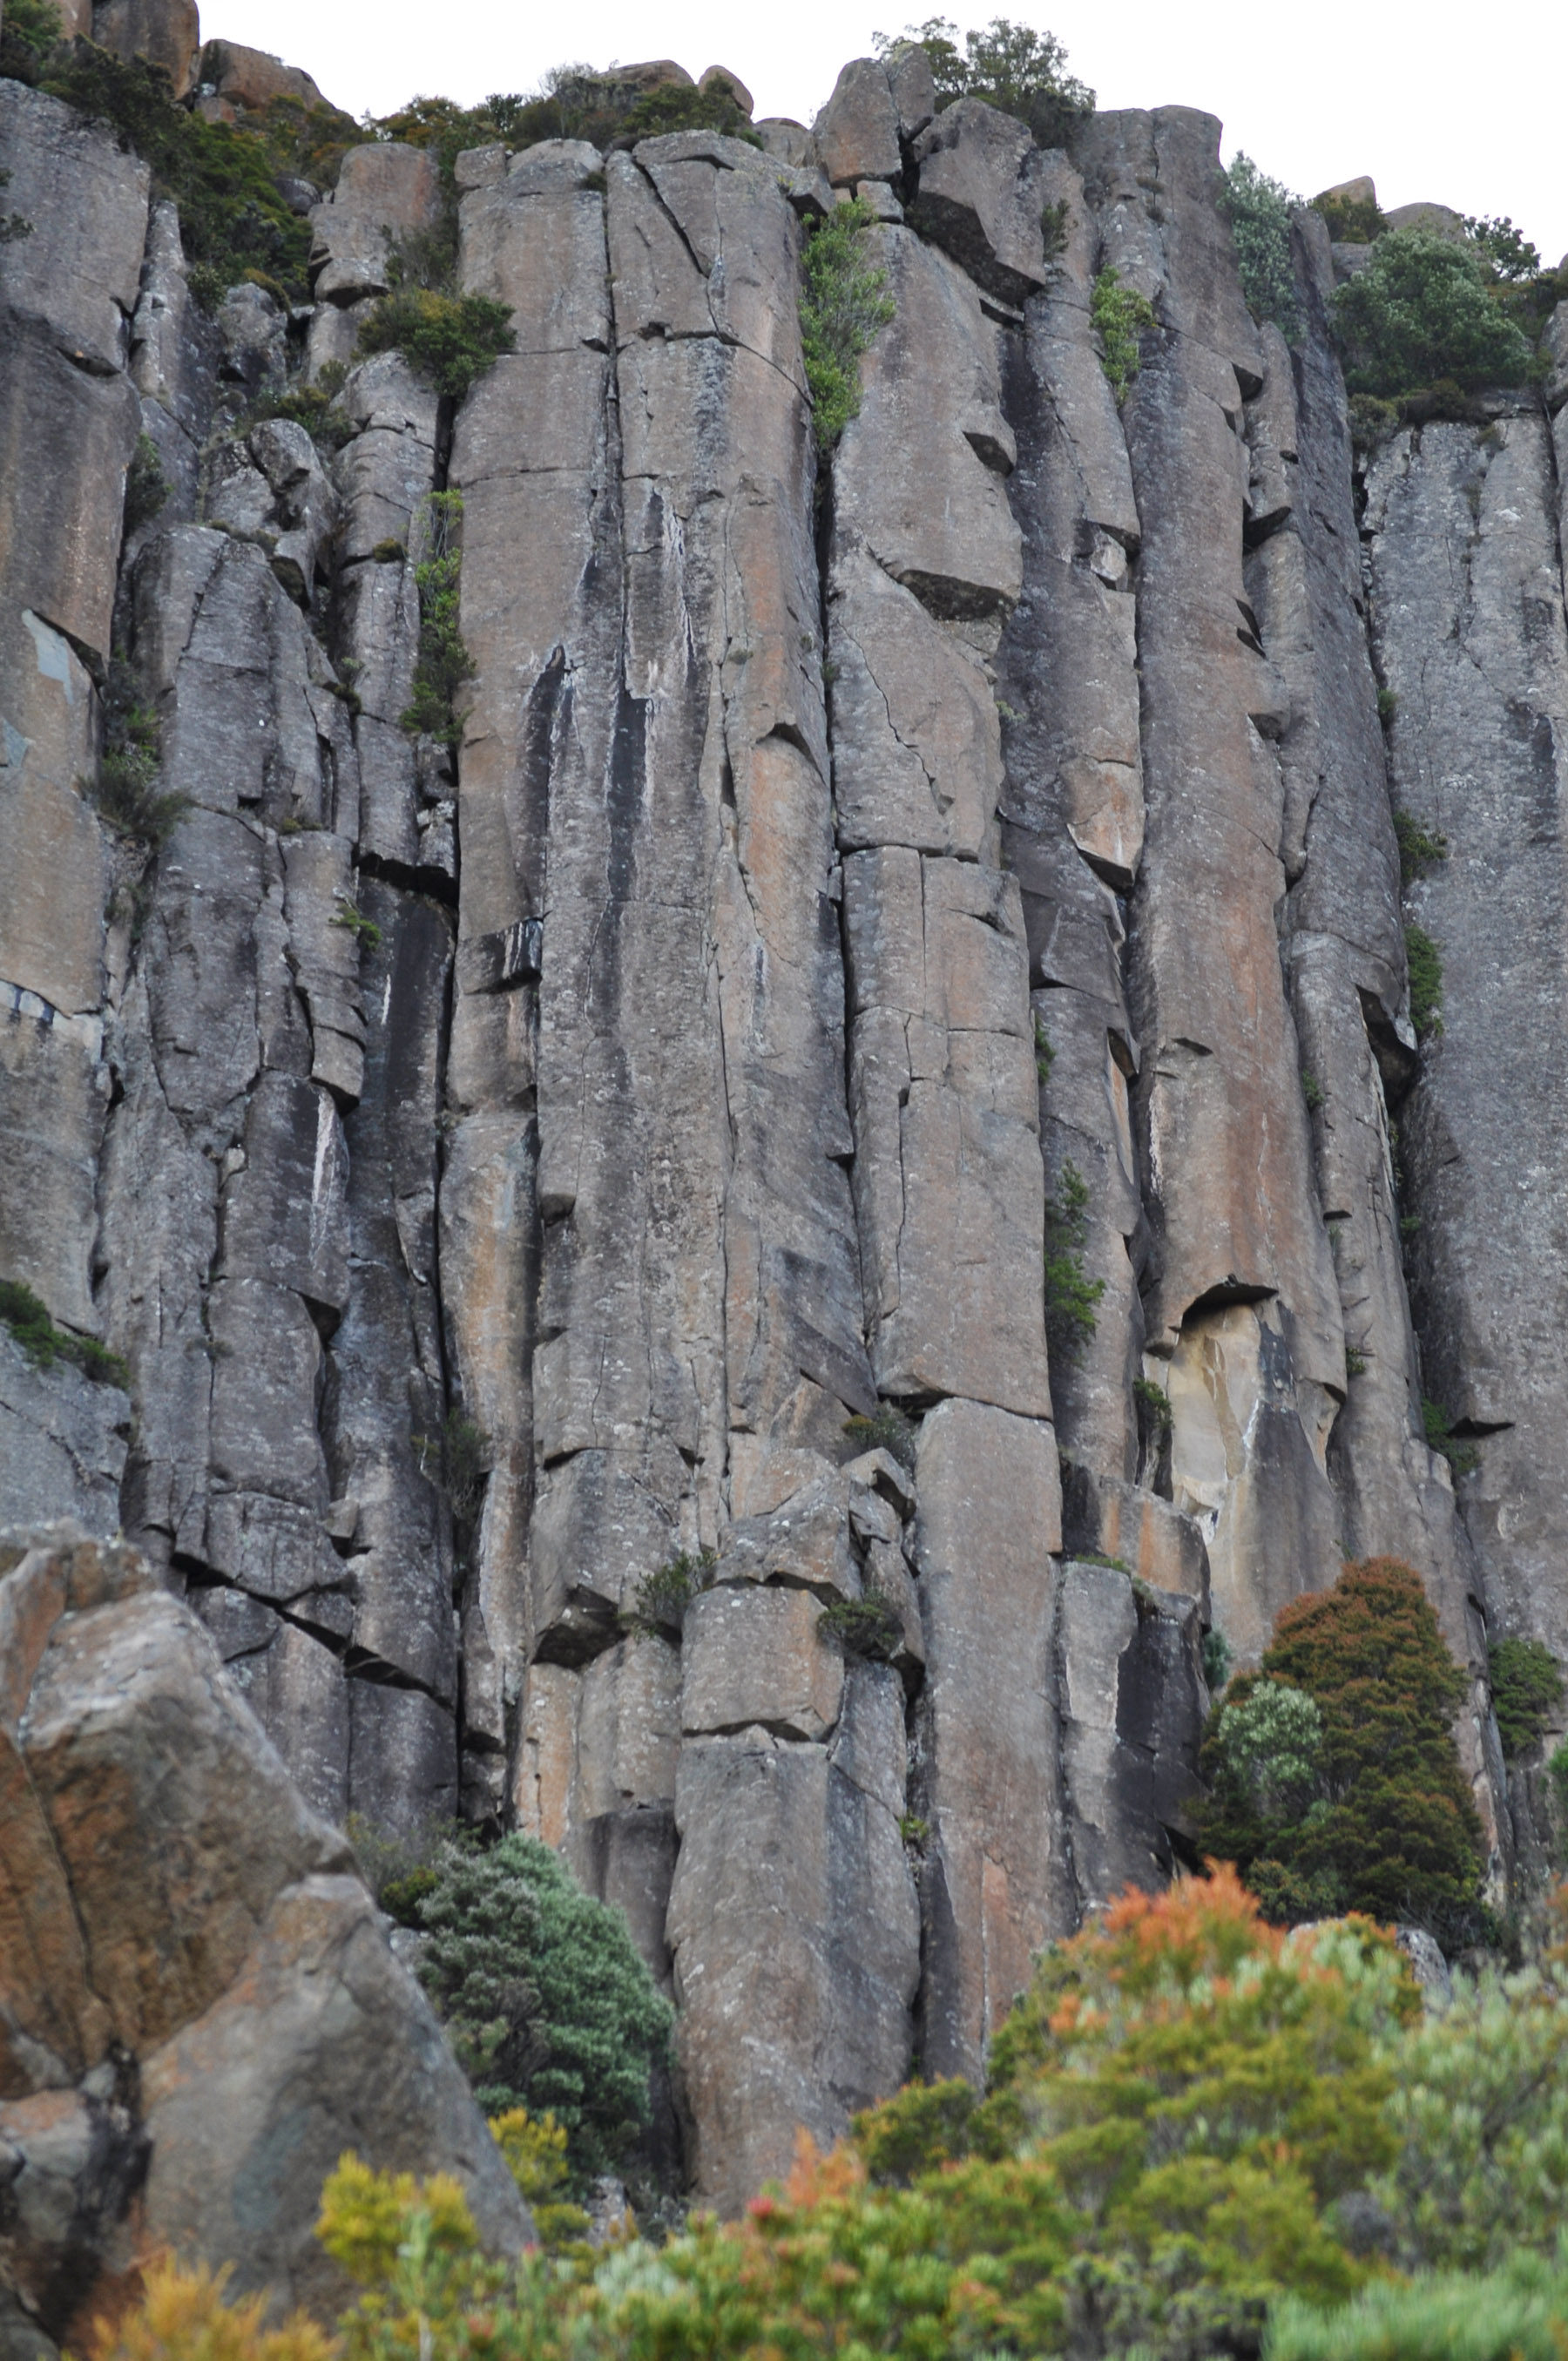
Hakea Area
The line just left of Killer Canary. Up corner crack via stems and laybacks to a flared crack on the face. Awesome but runout climbing past fiddly gear leads to a short flared crack before joining Killer Canary at the end of the traverse. Small offset cams are pretty much essential to protect it adequately. You can start from the grassy ledge at wide 16ish but it's not that great, a small ledge about 12m up is comfy and avoids it.
Alex Hartshorne, Feb 2019.
S. Parsons, P. Bigg, D. Fife, 1982.
I Lewis, K. Carrigan, Jan 1974.
Access for the next few routes is possible by abseiling in from above. Although this may be easier, abseiling down one’s ascent line does take a lot out of the ascent allowing pre-inspection. And one has an unclean finish for Hakea.
A. Adams, G. Cooper, 1986.
The line immediately R of Bad Attitude, following a steep hand and fist crack. A small sassafras bush high up provides a welcome rest.
P. Robinson, K. Robinson, Mar 2002.
A steep, sustained, test-piece crack that varies from a small seam to hand width. Climb the wall and thin seam (good micro-cams and wires) to a small roof, passing this on finger jams (crux). Continue up the very sustained crack passing a number of v-grooves, chimneys and bulges. Pull around a huge overhanging flake to a stance at the Hakea tree near the top.
As on the 1st ascent, abseil-off the tree back to the ledge where you can again abseil from bushes or down climb (grade 14) back to the base of Cossack column. Alternatively for an ordinary and bushy finish, ascend a fixed rope for ~8m or worse, climb awkwardly past the hakea tree to the top.
P. Robinson, K. Robinson, Feb 2002.
This steep corner L of The Word Was Made Flesh has been top roped. Festooned with one or two drapes of tea tree and choked with tussock grass in places, it is not recommended unless one is a true green climber. The overhang is interesting.
Top Roped: P. Robinson, Mar 2002.
N. Duhig, M. Edwards, 1988.
P. Robinson, B. Terry, May 2002.
Cossack Column - Sky Rocket
- ★61.Sassanach19
- ★★62.Hakea22
- 63.Days of Future Past20
- 64.The Word Was Made Flesh20
- ★65.A Step Back19
- ★★★66.Tartarus21
- ★★★67.Sky Rocket20
- ★★★68.In Flagrante Delicto24
- ★★69.Potem Tole19
- ★★★72.Max Rockatansky26
- 73.Lost Arrow17
- ★74.Nucleon21
- ★75.Shield Variant24
- ★★76.The Shield20
- 77.The Sword14
- ★78.The Nightingale (s)25
- ★80.Carrot TopA3
- 81.The Early Bird24
- 82.Lunatic Eclipse21
Access for the next routes is easiest by abseiling-in from Cossack Column Rap Station.
I. Lewis, K. Carrigan, Jan 1974.
S. Parsons et al, 1982. Direct start: M. Colyvan, R. Clarke, 1984. Direct finish: P. Robbins, 1990.
An amazing line of sustained quality and difficulty up the right hand arête of Cossack Column. Originally done in two pitches, but best done as one. Although no trad gear is needed, wires can be placed on the first pitch and near the top of the second pitch. Either scramble up to the base or abseil in from the top via the Cossack Column rap station. Follow the line of U-bolts up the arête between Sky Rocket and Potem Tole; 8 bolts to DBB, then 8 bolts to the rap station.
R. Parkyn, Dec 1993.
The steep corner at the top is unique for the Pipes. The line follows the corner just right of Cossack Column, and is best accessed by abseil via the Cossack Column rap station.
From the vegetated ledge in the recess, start up the left hand crack/groove line for 10m (as for Voluntary Vomit), stepping left into the parallel line on the face when you encounter the fern forest. Continue up the crack system to a grassy ledge at the base of a steep corner. Negotiate an awkward move in the corner and jam/layback through the corner above to a welcome rest. Continue up the short hand crack on the arete as for Skyrocket to finish at the rap station.
K. Carrigan, I. Lewis, Jan 1974. FFA: S. Parsons, D. Fife, 1982.
I. Lewis, A. Hogarth, Feb 1974.
M. Tillema, G. Batten, Mar 1971.
H Jackson (pitch 2) and J. Clemens (pitch 1) October 2025 - with thanks J. Spencer
J. Ewbank, V. Kennedy, Mar 1968.
D. Gray, D. Rosen, Feb 1992.
S. Parsons, J. Kennedy, Dec 1985.
J. Ewbank, A. Keller, Mar 1968.
J. Ewbank, A. Keller, Mar 1968.
Access: abseil down fixed line to EB anchors/ledge. Great quality hard trad climbing, escapable on upper sections.
Climb twin crack pod for 9m, then traverse left (crux) and then up (spicy) to crack on arete. Up this to ledge. Finish up bolted arete above.
Gear: std rack with triple cams from 0.2 to 1, +/- double ropes.
Alt:
"Nightingale the second". Up twins cracks all the way to the blank face then move left (crux) around arete to crack. (H Jackson 2026).
H Jackson, J Clemens and J Spencer 2025
Jem Clemens (& H Jackson) Closed Project
Twin cracks left of early bird (the right of which is ascended by Carrot top), then straight up middle of face (2 BR) to ledge (instead of going up loose flake of carrot top), then blunt arete/face above (3 BR).
The route description sounds delightful! The thin aid line left of The Early Bird, that uses a top down access by abseiling from fixed line (thre double carrot bolts rusted and have been removed) down to the same DBB as The Early Bird. Aid directly out of the belay via the middle crack (knife blades and small cams) then a loose flake leads to a carrot. Bat hook to a rubbly ledge and then aid right through a crack.
G. Phillips, S. Harper, Apr 1997.
Currently dirty / vegetated. Reputably classic when clean, but not many have tried it due to Al's alleged fondness for sandbagging and lots of cleaning would be required ..... Rap in from the Carrot Top rap station to reach a narrow ledge equipped with a DBB (fixed hangers), right of the Sword. Climb the shallow left-facing corner to the right of the belay. Well protected by small to medium cams and wires.
A. Williams, Oct 2004.
The strenuous crack left of Richard Scraper, reached by abseiling to a ledge. The result of a mammoth cleaning effort, but unfortunately the lower crack has regrowth (dwarf woody Coprosma, if you are a botanist!).
G. Aimer, Mar 1991.