
Adamsfield
 1 - 15 min
 Mixed sun and shade
 Short, steep, pocketed conglomerate. Tends to be sharp.
Acknowledgement
Edited by Sam Edwards & Roger Parkyn (after previous work by Rob Williams), originally published in Craglets.
Introduction
The rock at Adamsfield makes for a complete change from climbing on dolerite; being short, pocketed and very steep. There is more steep rock here than any other developed climbing area in the state. It's all bolt protected too, so you can leave your rack at home. The spectacular surroundings add to the charm of the place (although the area's high rainfall does tend to make it a summer crag). The rock is conglomerate and a little loose at times, but after cleaning, some excellent routes emerge. People considering putting up new routes at this crag should respect its established ethics and tradition. Do not use either "natural" equipment or bolts that require key-hole hangers as nobody will be bringing them here. Adamsfield has little to offer in the way of good easy routes, and as such could hardly be recomended as a good beginner crag. To get the most out of this place you will want to be climbing 23 and up, although there are probably enough easy routes for a couple of trips. The rock is really sharp here too and takes some getting used to.
Access
Clear Hill Road was closed for repairs in 2019, and re opened January 2021. There is a gate at the Gordon River Road Turnoff to Clear Hill Road, but this is normally left open (open March 2022).
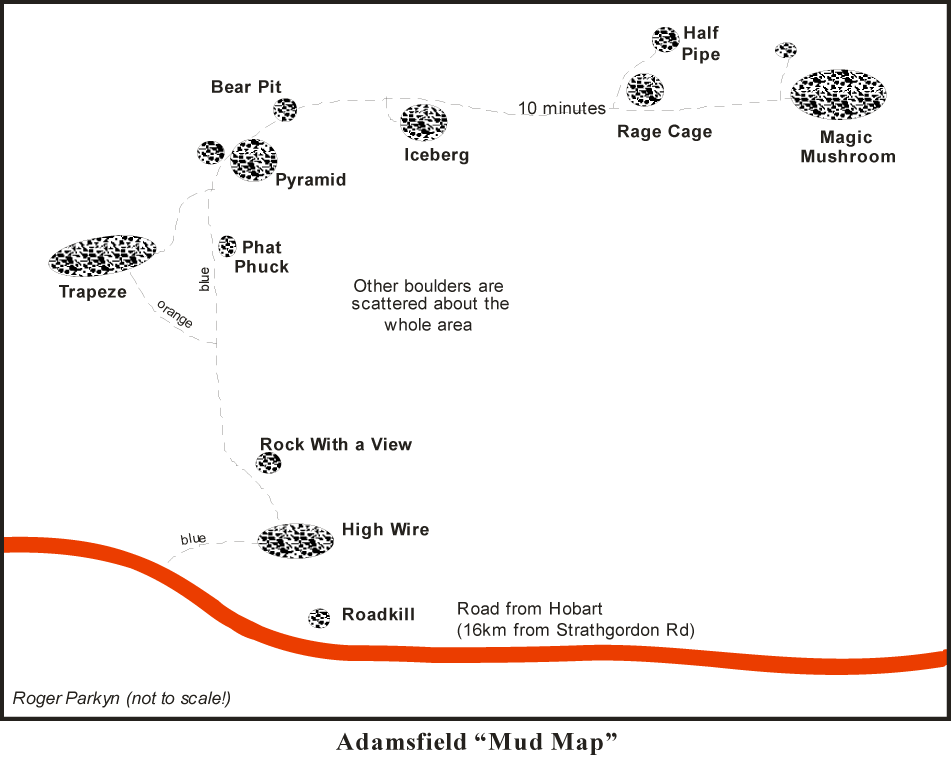
The Adamsfield cliffs are situated at Grid Reference 715430 on the Wedge 1:100 000 map at the northern end of the Ragged Range, about 35 km past Maydena. Once you have driven past Maydena, continue into the National Park along the Gordon River road, driving past the Scotts peak dam turn off (Frodshams Pass). About 5 km on from here, the road will be heading downhill. After passing several minor offshoots, a sign indicates "Clear Hill Road", follow this. Turn right down the road and drive for 16 km (from the Gordon Road) until a large boulder sticks out on the right, nearly overhanging the road (this is the climb Roadkill!). If you haven't been here before look out for this boulder as it is easy to miss and is the best way to locate the area. A top-rope problem also exists on this boulder and is about grade 17. Only 50 metres on from this it is possible to park on the left, opposite a slimy looking bank. Walk up this bank with a little difficulty, then head up to the right through bracken and bushes for about 100 metres to the large boulder. This boulder is known as The High Wire. Also of note is the great swimming hole about 3 km past the High Wire. It lies about 50m downhill of the bridge. There is a good flat camping area at the base of the hill about 2km past the car park.
N.B. The gate on Clear Hill Road isn't always open - it depends on forestry operations, bushfires and burn offs. Check with Forestry before driving all the way out there - it could save a lot of angst. Alternatively, drop by Forestry Tasmania at 79 Melville St, Hobart, during business hours, and ask to borrow the key to Clear Hill Road (they'll know what you are talking about). They'll get you to fill out a form and leave a $100 deposit.
Crag Steward
Rock climbers please contact the Cliff Steward (southwest@climbersclubtas.org.au) if you have any queries or concerns regarding social or environmental impacts of rock climbing at this crag. Do not email regarding general travel, seasonal advice, or lost property - this is not the Steward’s role. If you have important safety information to communicate (e.g. risks due to recent and large rock falls) please also consider updates on thesarvo forum, facebook group and/or online guidebooks as appropriate. Please copy in cct@climbersclubtas.org.au if you feel you have a high level concern which may imminently impact the crag or climbing community.
Non-climbers, other users, land managers: please also contact cct@climbersclubtas.org.au if you have important climbing related queries at this location.
GPS
Roadkill Boulder
You can't get easier access than this. The arête that overhangs the road.
Sam Edwards, Dec 1995.
The High Wire
The lower side of the High Wire, which is up to 17m high, overhangs at up to 45 degrees like a colossal wave.
The first route you come to, incredibly thin.
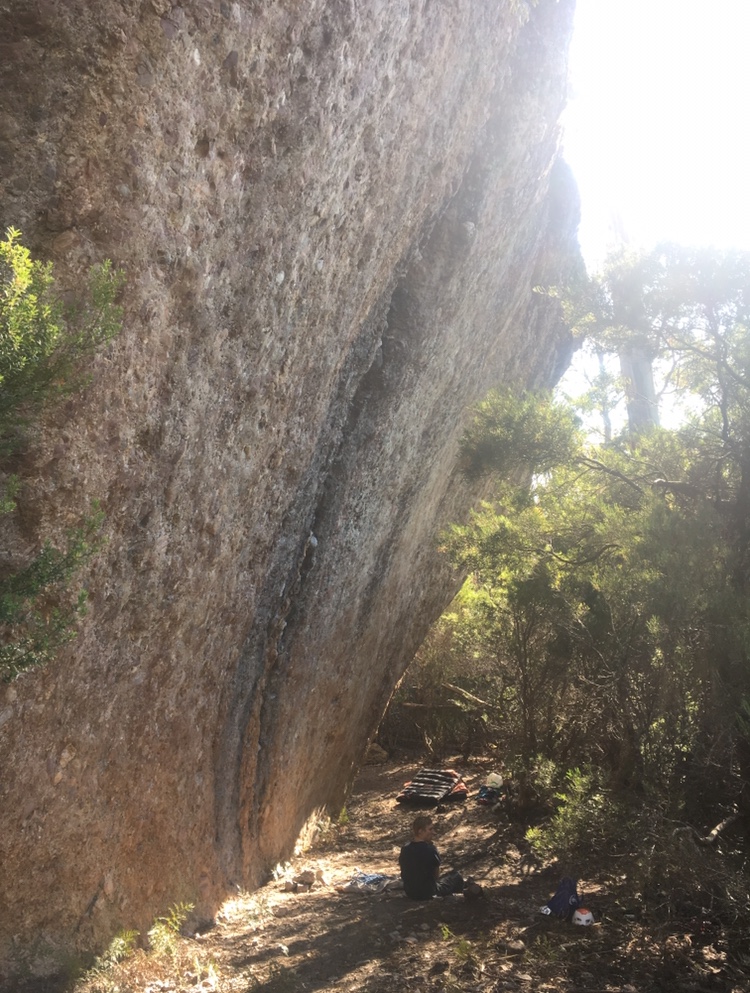
The awesomely steep black crack on the lower side of the High Wire. Direct finish, with three extra bolts puts the grade up to 26.
Evan Peacock, Nov 1994.
The very overhanging wall.
Sam Edwards, Feb 1998.
Adds an additional 5m of perfect climbing to the start of MP, start as for the sub zero boulder problem and continue into MP.
Ryan Sklenica, 2018
This climb starts off the large pile of wuss stones to reach large jugs. Continue diagonally right and up past 3 U anchors. Lower off the top bolt. An enjoyable climb.
Evan Peacock, Feb 1994.
Starts about 3m left of Materialisation of a Psychotics Dream. Another stick clip start. Climb the initial tricky moves and then crank to the top. Either top out (lichenous with a ground fall potential) or lower off the top bolt. Needs rebolting.
Evan Peacock, Mar 1994.
A few metres right of this is another line of U anchors. Start at the base of this steepening slab, face climbing up the left hand side of the U anchors. Tend right at the top to reach the rap anchors above Bitter Twisted Soul.
Rob Williams, Feb 1994.
Starting about three metres right of Materialisation, climb up the very thin slab and face. Rap anchor exists at the top of this climb.
Rob Williams, Feb 1994.
Climbs the slab to the right of Bitter Twisted Soul past 3 U anchors. Move left to finish at the shared rap station.
Simon Ozolins, Jan 1994.
Climbs the slab 2 metres to the right of Elvira. No protection.
Hamish Jackson, Feb 1994.
Very close to the right of Mr Kite is another solo climb of lesser quality.
Hamish Jackson, Feb 1994.
Start 15m right of Elvira on the North face of the High Wire. Climb past two U-anchors after stick clipping the first. Use double ropes to avoid an embarrassing crater. No rap anchors.
Evan Peacock, Mar 1994.
Rock With a View
This boulder is 30 m uphill from The High Wire. Keep walking! These climbs define the word poxy. TR bolts on top. Easy acess to top, up arete above van sized boulder.
Climb the overhanging arête. Climb to the right of the bolts (I clipped some of the ones on Tight Rope too, Ed.).
Garry Phillips, Apr 1996.
Start 1m right of Drill past three bolts to finish as for Drill. Hardly an independent "line" as only about one body length of different climbing.
Grant Rowbottom solo Sep 1996.
Climbs through the initially steep ground past one bolt then to the top.
Garry Phillips, Mar 1994.
This climb is to the right of Lady Of The Lake and also has a steep beginning (one bolt) followed by an easier, unprotected slab.
Sam Edwards, Mar 1994.
Start just to the left of the smaller boulder that rests against the Rock With A View. Climb up the face with natural protection.
Jon Tiller, Mar 1994.
Left of Cool Chicks. Top-roped but not yet bolted.
Jon Tiller, Phil Schwan, Oct 1996.
On the opposite end of the boulder to Drill to Thrill is a vertical wall; start at its righthand end. Three bolts to chain.
Jon Tiller, Phil Schwan, Oct 1996.
Five metres right, around the corner, and under a fallen tree, from Cool Chicks. Climb right of the bolt two thirds up the curving face.
Richard Cockerill, 1997.
Pyramid Rock
Pyramid Rock is the largest boulder at the top of the hill about 10 minutes directly uphill from The High Wire.. Follow the blue taped track until hill flattens out and the following two climbs are reached. The other routes are on the other side of the boulder.
Tackles the pocketed overhanging wall on the left side of the boulder (as viewed when standing on the lake side of the boulder). Two bolts and lower off biner.
Sam Edwards, Dec 1995.
The wall 2m right of Steel and Stone, to the same rap anchors.
Sam Edwards, Feb 1996.
Project
Start up Soft then go left and up.
Grant Rowbottom Mar 1997.
Starts up Soft but climbs directly through the headwall.
G. Rowbottom, Mar 1997.
Starts about 10m left of Attack. Go up then rightwards through the overlap.
Roger Parkyn, Jan 1997.
Climb Alcoholic Acrobat to roof, traverse left and finish up Juggling Junkie.
Grant Rowbottom, Dec 1995.
Tackles an overhang, joining Attack higher up.
Grant Rowbottom, Dec 1995.
An enjoyable climb up the overhanging arête on the opposite side of the boulder to Steel And Stone. Four bolts and a rap station.
Sam Edwards, Dec 1995.
The next few routes are on a boulder opposite Attack of the Deranged Mutant Killer Monster (about ten metres away) which has a large eucalypt in front of it.
Takes the left hand side of the line of bolts (two brackets with U rap anchors) in front of the tree. Stick clip the first bolt.
Evan Peacock, May 1996.
The right hand side of the She's Lump bolts.
Evan Peacock, May 1996.
Starts on the right hand side of the wall and traverses leftwards to finish up She's Lump/Millions.
Steve Ford, May 1996.
The Bear Pit
The Bear Pit is the 130 degree wall situated about 20m past Pyramid Rock (follow blue tapes past pyramid rock).
Steep juggy climbing at the left end of the wall.
Evan Peacock Jan 1997.
The line of Metolius hangers up the centre of the wall.
Sam Edwards, Jan 1997.
Up to chain.
Grant Rowbottom, 98
Follow the huge buckets and Petzl hangers up the right arete.
Sam Edwards, Jan 1997.
The nearly vertical (ie less overhanging) wall right of the main pit. Three anchors.
Evan Peacock Jan 1997.
Also of mention are linkups. Start Temper Tantrum to finish Morjabia. Start Morjabia to finish Temper Tantrum
Phatphuck Rock
Phatphuck Rock (named after a Thai desert) is a square looking boulder about 50m below Pyramid Rock. It has an orange and white overhanging lower face which can be seen when coming up the track (the route are on the opposite side of the boulder to this).
Follow the line of bolts and rap off the top of the boulder. Consistently steep.
Jon Tiller, Sep 1996.
Lies on an arête on the uphill side of the boulder. Clip the bolt and pull over the bulge to the top.
Phil Schwan, Sep 1996.
The Trapeze
The Trapeze offers some of the best roof climbing in the state. To get to the boulder walk about half way up the hill from the High Wire (as for the Pyramid) and then head left for about 400m following the zig zagging yellow tape.
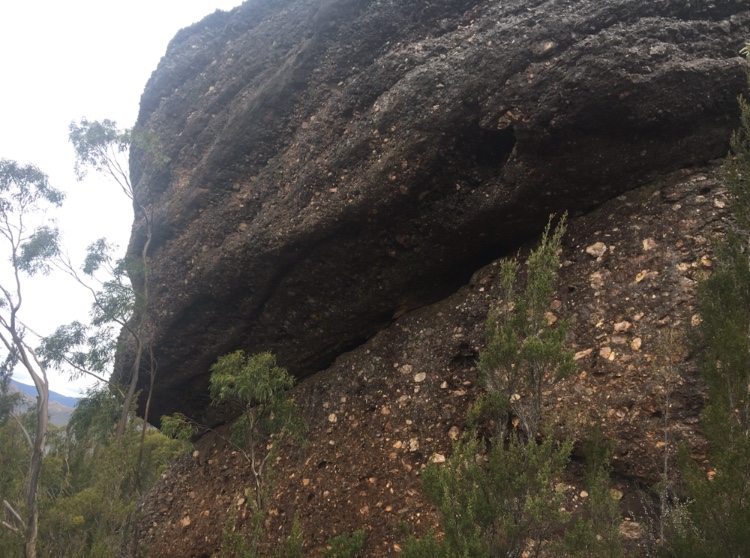
Start on extreme left. Cross through roof perpendicular to other routes to finish up Redback Fever.
Sam Edwards 1998
Tackles the pocketed roof 5m left of Redback Fever.
Sam Edwards, Jan 1997.
Roof climbing in a similar vein to its companions to the left and right.
Sam Edwards, 1997.
An amazing climb. Follow the pockets through the biggest part of the roof.
Sam Edwards, Feb 1996.
Follows the broken weakness up to the roof and then follows a flake rightwards before heading up again (if you're a bit soft, like me, it is recommended to put draws on the top bolts; they're hard to see and clip when you're pumped silly, Ed.).
Evan Peacock, Nov 1994.
A fun climb up the steep face 2m right of Circus Oz. Five bolts and a rap station.
Steve Cameron, Jan 1997.
Iceberg
Starts off the rock stack with obvious left hand undercling and right hand mini pinch.
Ryan Sklenica, 2026
The Rage Cage
Sam Edwards.
The Magic Mushroom
The Magic Mushroom is about 10 minutes walk from the Bear Pit. Follow vague track down through scruby slope then up left along ridgeline. Not very clearly marked.
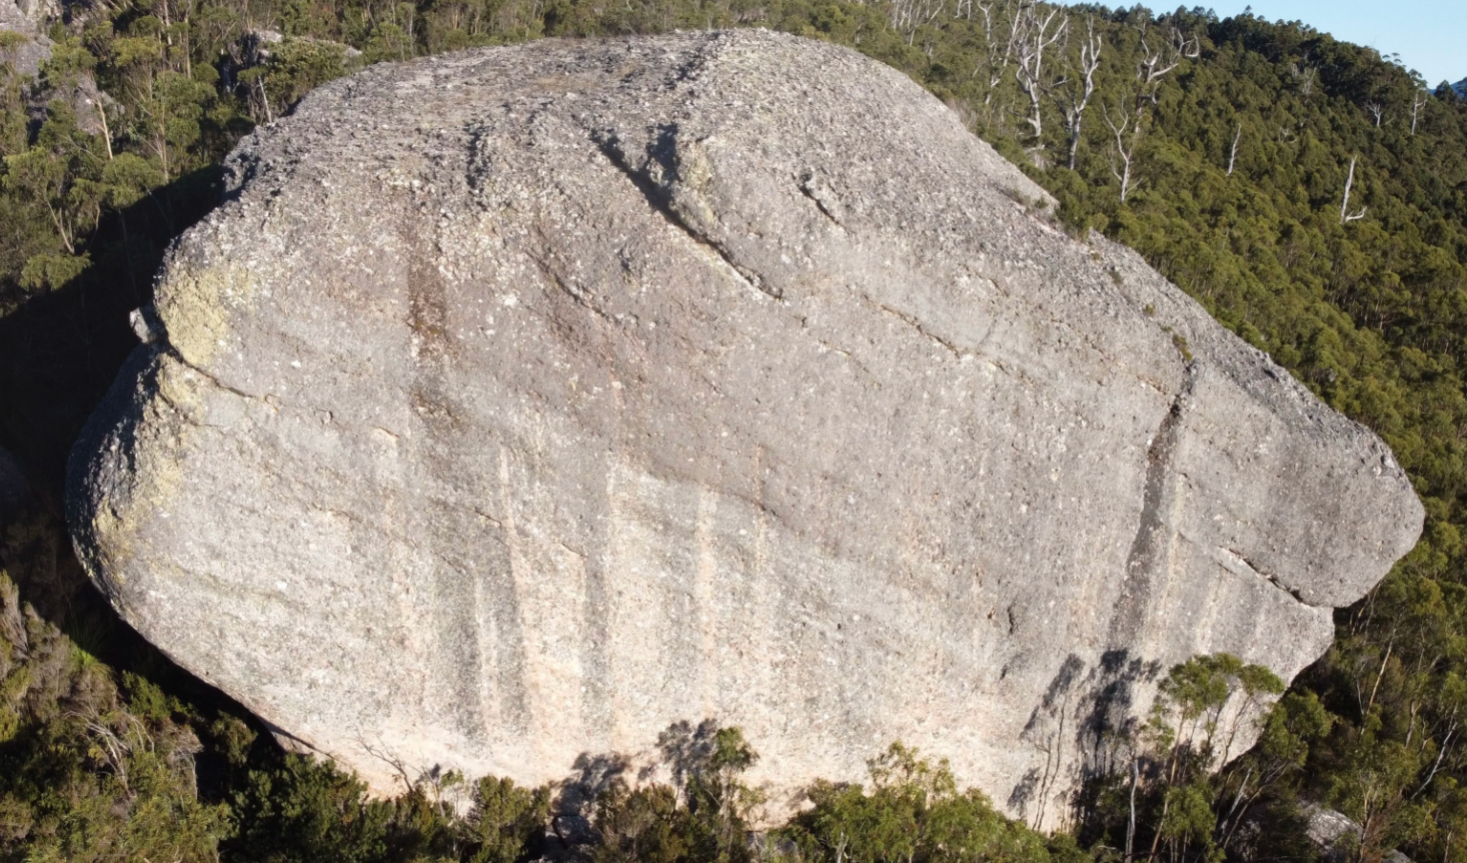
This climb starts the same as Meltdown but at the first bolt veer left and up past another 5 bolt runners. One of the bolts down low is hard to clip.
Grant Rowbottom, Apr 1997.
Thin face moves followed by a juggy finish. Start 5m left of Electric Snake and climb past 4 bolts to the chains.
Garry Phillips, Apr 1997.
First line to the left of the black streak, at the 4th bolt traverse slightly right before heading straight up to the chains.
Grant Rowbottom, Mar 1997.
Climb directly up the black streak past 6 bolt runners to a rap station. A classic.
Grant Rowbottom, Apr 1997.
Climb past three bolt runners to the break, then finish up Snake Charmer.
Sam Edwards, Jan 1998.
Past 2 bolt runners to the break then another 2 more before the chains. Chains are hard to clip.
Garry Phillips , Mar 1997.
Up the right hand arête to the break. Traverse left along the break until it ends then continue up to the rap rings.
Garry Phillips, Mar 1997.
Starts up Snake Charrner to the break. Moves slightly left then heads straight up to the rap station.
Garry Phillips, Mar 1997.
Up the right hand arête to the 3rd bolt runner, then head straight up to the chains over the top.